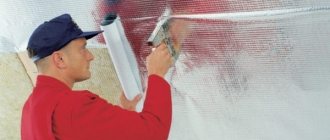
Subtleties of vapor barrier installation
The main question that arises when installing a vapor barrier for a roof is which side to lay the material on, and in which part of the roofing pie. The location depends on the type of roofing structure being constructed:
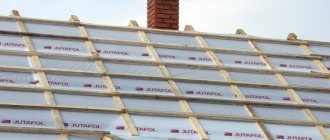
Insulated attic and mansard roof
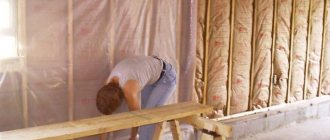
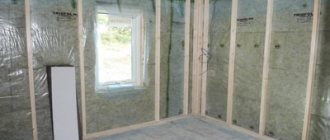
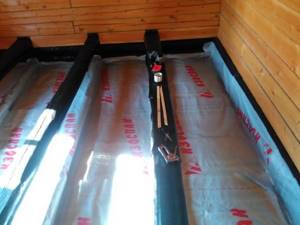
In this case, it is important to protect the thermal insulation layer from fumes penetrating from the lower rooms. Therefore, the film is spread under the insulation (from the inside), on the rafter structure or rough sheathing
Panels of rolled material are laid horizontally and overlapping, secured with nails or staples.
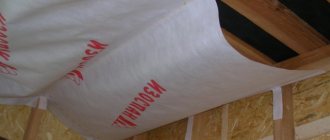
Ceiling vapor barrierSource pedkolledj.ru
Any certified vapor barrier material is supplied with instructions for use. It provides all the necessary information on installing a vapor barrier on the roof; Which side of this or that material is located depends on the layer responsible for blocking water vapor. The general rule can be formulated as follows:
Double-sided (superdiffusion) membranes, regular and reinforced polyethylene films have the same properties on both surfaces. Such materials can be laid on the thermal insulation layer on either side.
Purpose and distinctive characteristics
The main purpose of the vapor barrier layer is to protect building structures from the penetration of moisture in a vaporous state onto their surface and the subsequent formation of condensation, which negatively affects the performance characteristics of these structures (materials). As a rule, vapor barrier is installed from the inside of buildings (structures), which is explained by the fact that the air humidity in the internal space is higher than outside. The distinctive characteristics of vapor barrier from waterproofing are:
- location in the “pie” of the building structure (ceiling, roof, walls, etc.);
- purpose - waterproofing protects against the penetration of water from the outside, and vapor barrier - against the penetration of water vapor from the inside;
- vapor barrier does not allow moisture (steam) to pass through, which is retained on its surface both from the inside and outside, while waterproofing does not allow moisture (steam) to pass through in one direction and retains it in the opposite direction.
Video description
About diffuse vapor and waterproofing in the following video:
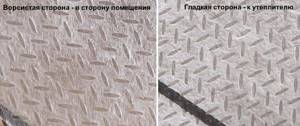
- A two-layer anti-condensation film is spread with the smooth side facing the insulation, and the rough side facing the source of warm, humid air, the living quarters.
- The foil film is laid with a metal layer to the living spaces - this way it can return some of the heat inside, increasing the thermal efficiency of the building.
- Diffusion double-sided membranes provide the roofing pie with the ability to “breathe”. If both surfaces of the membrane are identical, it is laid on either side. If you have chosen a one-sided membrane, it is better to check the data on the front and back surfaces with the manufacturer (in most cases, the membrane is adjacent to the thermal insulation with a rough surface).
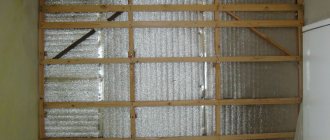
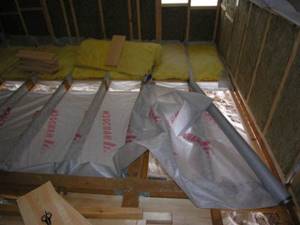
Laying a vapor barrier in a roof with steep slopesSource bostonglobe.com
Types of vapor barriers: A, B, C and D
To understand where the vapor barrier should be laid on which side and why, for example, both sides suddenly turned out to be smooth, you must first determine its type. After all, not every species has two different sides!
Type A insulation: for one-way steam exhaust only
Type A cannot be used as a vapor barrier, because eventually all the vapors will end up in the insulation. This film is suitable for waterproofing, since its main task is to ensure the unhindered escape of steam, but not allow rainwater to pass through from the reverse side.
Stages of installation of a vapor barrier layer
The installation instructions specified by the manufacturer must be followed; Moreover, the rules allow for the installation of film materials both before and after the installation of the roofing pie. The progress of work on laying vapor barrier is as follows:
- Before installation, you must read the instructions from the manufacturer and determine the side of the material whose function includes contact with steam.
- The spreading method is selected, horizontal or vertical. Most manufacturers accept both arrangements; In the instructions you can find out about acceptable options and layout details. The direction of the layout is affected by the slope of the slopes. On a flat roof, the roll is rolled out horizontally, perpendicular to the rafters. On a steep roof, the film is laid along the rafters.
- With any installation method, the material is laid with an overlap, the amount of which is often indicated along the edge of the film. The instructions also indicate other values (which depend on the steepness of the structure).
How to check if the vapor barrier is working
There is a very simple way to check the effectiveness of a vapor barrier. You need a small piece of material and two glasses of the same diameter. Pour boiling water into one glass, cover it with a piece of the material being tested, and place the second glass upside down on top. If the material works as it should, the second glass remains dry.
If drops form on the walls, “fog” appears, the material conducts steam. Perhaps you have a vapor barrier with one-way conductivity, then you need to turn it over and repeat the tests. The situation has not changed? This is a vapor-permeable material with two-way vapor conductivity.
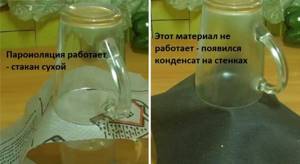
Checking the operation of the vapor barrier
Video description
About the membrane installation technology in the following video:
The main condition for installation is that the film is fixed without tension, with a sag of approximately 2 cm. The reserve is created due to the ability of the wooden frame to change its dimensions with the change of seasons (with changes in humidity); otherwise there is a risk of the film tearing.
For horizontal installation, installation is carried out from above (from the ridge)
The strips are laid with a reverse overlap (the lower strip overlaps the upper), for additional protection of the insulation; they are connected with tape and secured to the structure with galvanized nails or a stapler. If the thermal insulation layer is not dense, the rolled sheet is fixed using slats, which must be antiseptic. Particular attention is paid to junction points (attics, windows, hatches, pipes, ventilation ducts); they are isolated especially carefully.
Fixing the filmSource pro-uteplenie.ru
Basic Steps
Answering the question about how to lay a vapor barrier on the floor, I would highlight the installation of a special lathing as the main way to lay any vapor barrier. Some models of superdiffusion films (membrane vapor barrier) are laid directly on the insulation, but not all. To create a vapor barrier, we create a special wooden frame on the surface of the waterproofed floor. All fastenings are made using waterproofed self-tapping screws with special caps.

The sheathing is laid under thermal insulation. I already wrote how to do it in my previous articles. For example, you can read an article on how to make your own floor insulation . It is best to calculate the lathing in advance so that a layer of vapor barrier can be laid on it, and there will be a gap of 2-3 cm between it and the insulation.
If this is not possible, we simply put long slats, 3 cm thick, on top of the sheathing and nail them with small nails (I recommend using furniture nails). After that, we run a vapor barrier along the slats. Also read about how to make a vapor barrier for walls with your own hands.
Video description
This video explains in detail which side to lay the film on. General tips for installing it are also given:
As mentioned above, the overlap should in any case be at least 15 cm. Sealants and glue should never be used: diffusion film, as well as alternative materials, contains acrylic components. They are destroyed when using glue.
However, tape is acceptable for use. It not only glues parts of the film, but also eliminates defects that appeared during its installation.
There has long been a debate among repairmen about whether it is worth installing a vapor barrier. Some argue that this should never be done - if it does not sag, the degree of steam evaporation will drop many times. For others, on the contrary, it seems that tensioning the vapor barrier is a necessity. As they say, sagging film deteriorates very quickly.
General advice on how to properly install a vapor barrier ends here. During operation, some other nuances may arise, but their number is small.
As well as their degree of importance
Installation features
It is important not only to install the vapor barrier correctly, but also to ensure a ventilation gap between the vapor-proof layer and the cladding of the structure for finishing, for which purpose counter-battens are placed along the sheathing
. Moisture settling on the rough side of the laid vapor barrier sheets will evaporate naturally without damaging the finish.
Scheme of an insulated roof with a ventilation gap
If the vapor barrier is installed correctly, the insulation is reliably protected from moisture. Almost half of the problems associated with freezing and damage to structures are associated with defects in the installation of the vapor barrier
.
Video description
This video explains why a vapor barrier is needed and how to determine the external and internal sides. General installation tips are provided:
How to distinguish the vapor barrier side
When working with vapor barrier materials, it is necessary to find out which side the product should be laid in relation to the insulation. The location of the vapor barrier will determine the degree of moisture absorption by the insulation and its service life. The instructions for the product indicate how to install it correctly. But what if there are no instructions? In this case, the installation method is determined independently, taking into account the following points:
- if there are sides of different colors on the vapor barrier material, the lighter one is placed next to the insulation;
- the outer side of the product has a rough surface;
- If in doubt, take a glass of hot water and place it on the vapor barrier area. Condensation forms on the waterproof side.
The polyethylene film is laid with either side facing the insulation, while the diffusion film has one smooth surface, which should lie towards the insulation. By preventing the insulating layer from getting wet, it allows moisture to pass through the smooth side without hindrance.
Roof vapor barrier fasteners
Roof installation deserves special mention. Steam protection is especially important for a roof, and it is when installing insulation on it that the most problems arise. If the film is installed incorrectly in winter, the material can suffer greatly: steam can turn into frost.
To understand how to properly install a vapor barrier for a roof, you first need to study the physics of steam. Being lighter than air, it always rises and never falls. Therefore, thin wooden slats need to be attached on top of the film every 0.5 meters. Then there will be a small gap between the vapor barrier and the interior finishing of the roof.
The following are the main mistakes made when insulating a roof from steam:
The seams are sealed with tape that is too thin. Its width must be at least 50 mm; The film is wrapped around the rafter beams. This is unacceptable, and insulation should only go on top of them; Do not leave a reserve of film during installation. This is vitally important - with changes in temperature and humidity, the material can become deformed; Do not seal the junction of the film to the ceiling
This is vitally important to do, otherwise sooner or later the material will simply peel off.
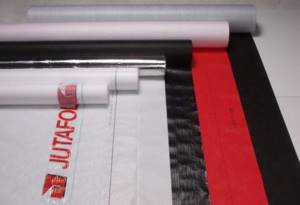
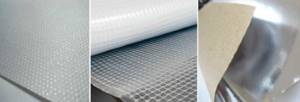
Types of vapor barriers
In modern construction, vapor barrier is successfully used to protect organic and inorganic thermal insulation materials. It comes in the following types:
- Film.
- Diffusion membrane.
- Energy saving membrane.
- Roll vapor barrier.
The film is a blind vapor barrier material that retains moisture and does not let it pass through. Due to its low cost and excellent waterproof characteristics, the film is used not only in the construction industry, but also for domestic needs. Films vary in thickness, number of layers, and surface quality. It can be smooth on the outside and rough on the inside. Water always remains on the surface of the film.
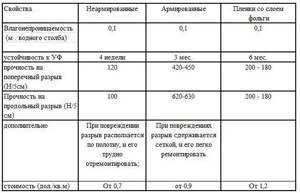
Summary table of vapor barrier film properties
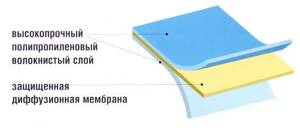
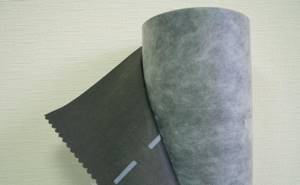
Diffusion membrane . This type of vapor barrier material consists of a polymer film and polypropylene and has limited vapor permeability. Water vapor contained in the insulation immediately evaporates.
The energy-saving membrane is resistant to elevated ambient temperatures due to its metallized outer layer. Vapor barrier should be installed in rooms with high humidity and temperature. The material is capable of reflecting infrared radiation.
Rolled vapor barrier allows moisture to pass in two directions. Convenient to use when insulating large surface areas.
The thermal insulation and vapor barrier characteristics of a structure depend on the choice of material. A careful approach to the selection of the necessary products will ensure the comfort and coziness of the premises and will help extend the service life of the entire structure.
Briefly about the main thing
A residential building located in a cold climate is isolated not only from water in its liquid state, but also from steam. If this is not done, then over time the frame of the living space itself may begin to collapse due to the constant ingress of moisture from the inside.
To understand which side to lay the vapor barrier on, you first need to look at its color and tactile sensations when running your hand over it. After the required side has been determined, the work is carried out carefully and slowly. The technology for carrying out the work varies depending on where the film is installed - on the ceiling, floor or facade.
When working, it is important to avoid the most common mistakes. Otherwise, the quality of the material may quickly deteriorate due to the appearance of frost and even ice on it.
Material grades
Nowadays you can find a huge number of brands of polarizing flooring in stores. They differ in cost, quality and other characteristics:
- Tyvek has proven itself to be an excellent material for vapor barrier insulation of floors. Its country of origin is Denmark. The cost of flooring is 6,000 rubles. for 50 square meters.
- The Izospan company produces materials that protect homes from wind, water and steam. Country of origin: Russia, cost: 13 rubles. per square meter.
- The Domizol brand is Russian-made flooring. Perfectly protects from humidity, steam and wind. The cost of the material starts from 15 rubles. per square meter.
Types of vapor barrier materials
The vapor barrier device involves the use of various modern materials and coatings.
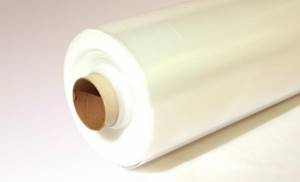
Polyethylene films are characterized by low price and availability
Thus, for wooden buildings the following materials are used for floor vapor barrier:
- polyethylene film;
- polypropylene film;
- diffuse membrane;
- liquid rubber.
Polyethylene film is available in several types. The most popular are films with a perforated or non-perforated side and a reflective coating on one side.
Reinforced film is a fairly good choice for creating the first layer of vapor barrier
Perforated film is mainly used for waterproofing work, the other two types are used to create a vapor barrier. The main advantage of film is its availability and low cost.
Polypropylene film is a more modern and durable type of material. The coating contains viscose-cellulose fibers that prevent the penetration of steam and the formation of condensation.
Polypropylene material quickly responds to changes in humidity, evaporating trapped moisture. Among the advantages of the material are its cost, ease of installation and high service life.
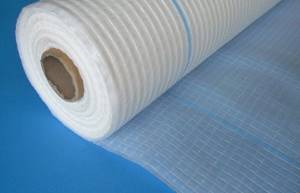
Diffuse membranes are the most optimal materials for vapor barrier of floors in wooden houses. The membrane is made of artificial materials and is a woven covering that can allow air to pass through.
Although diffusion membranes have a relatively high cost, they have good performance characteristics
The membranes have a high coefficient of vapor permeability and the ability to regulate the microclimate in the room based on air temperature. For vapor barrier, one- and two-sided types of material can be used.
Liquid rubber is mainly used for hydro- and vapor barrier of concrete pavements. It is made on the basis of bitumen-polymer compounds and has high thermal and waterproofing characteristics.
Applying liquid rubber does not cause any particular difficulties - a layer of liquid material is applied to the surface to be treated. Processing is carried out both using manual means and using automatic sprayers.
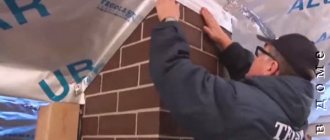
How to attach a vapor barrier in the form of a membrane?
The sheets need to be fastened to each other using a construction stapler, after which the vapor barrier is secured with antiseptic slats 4x5 cm.
It is possible to use vapor barrier membranes attached to the walls of frame houses. This will largely eliminate the dampening of thermal insulation materials on the walls of the frame house. Some heat insulators that are used in walls are capable of changing their own structure due to their getting wet. As a result, the material no longer adheres so tightly to the wall, forming voids and cracks. The house no longer retains heat, since the thermal insulation properties of the material are lost due to getting wet.
Due to the composition of the frame wall, which after finishing will consist of almost 80% of the heat insulator, be sure to pay attention to the methods of vapor barrier, having carefully studied them. First, it is necessary to understand that the wall of a frame house cannot be fully insulated from water penetration when using a vapor barrier membrane. The membrane itself has a porous structure, and the multilayer structure with its use does not prevent the passage of water vapor through it. It is capable of reducing the speed of steam that penetrates the walls, although this process cannot be excluded by this material.
Wall vapor barrier installation diagram.
The vapor barrier membrane has a smooth surface on one side and a slightly rough surface on the other, which causes moisture to settle on the membrane, accumulating and then evaporating. You can attach a vapor barrier from a membrane by laying its smooth side towards the heat insulator, and the rough side should face the inside of the room.
If water gets inside the wall, the thermal insulation qualities of the frame may deteriorate. It is possible to ensure a normal indoor climate only if there is high-quality air circulation. At the same time, the walls of the house are also structural elements that allow air and steam to pass through, like windows, doors, ventilation, etc.
Among the properties of concrete there is also such an indicator as its vapor permeability. From this, an appropriate conclusion should be drawn regarding the selection of the necessary materials for vapor barrier. It is better not to buy ordinary polyethylene film, but to use a vapor barrier membrane, which has a multi-layer structure. If the vapor barrier is not carried out properly, it cannot be effective.
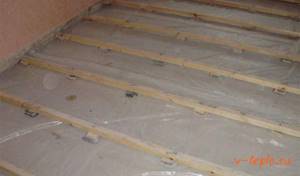
Step-by-step instructions for floor vapor barrier
Where does floor vapor barrier begin? Of course, from the dismantling of the old floor covering, careful preparation of the covering or repair work associated with it, if the need arises. After completing all this work, you can proceed directly to installing the vapor barrier material. The process consists of several stages, let's look at each of them.
The scheme by which vapor barrier is usually performed
Stage one. Carrying out dismantling work
First, you must remove all layers of the flooring, down to the sheathing boards or concrete base. If there is concrete underneath, then thoroughly clean it, for which you can use a vacuum cleaner or a regular broom. Next, inspect the surface for visible defects (this may include through cracks, potholes, various types of irregularities, etc.). If they are present in significant quantities, a number of repair measures will be required. First, you will have to straighten the screed in order to prevent direct penetration of moisture (and it may well penetrate from the ground if there are through cracks in the base).
Stage two. Install waterproofing material
This moment is necessary in order to additionally protect the material from moisture.
If you use roll-type waterproofing, then lay it exclusively with an overlap. Glue all joints of the material with mounting tape or ordinary adhesive tape.

Stage three. Install the logs in the position specified by the project
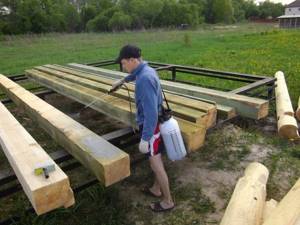
Before starting this stage, carefully check the level of each of the lags so that the surface is perfectly horizontal. Treat all elements made of wood that will be used with a special antiseptic composition. Thanks to this, the tree will be reliably protected from the formation of mold and mildew, as well as from damage by various types of insects.
Stage four. Install a thermal insulator
Place the thermal insulation material in the space between the joists. If you use tile-type insulating material, then additionally get rid of the gaps that appear between it and the guides. This way you will prevent the appearance of so-called “cold bridges”.
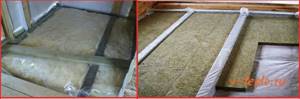
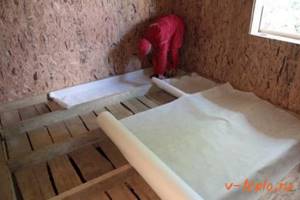
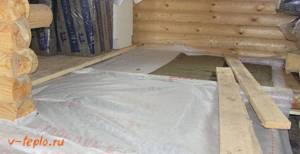
Stage five. Place a vapor barrier on the floor
If you are using a two-layer polypropylene film (in which layer No. 2 is an antioxidant), then lay it with a smooth surface facing the heat insulator and a rough surface facing the room. And if you use a metallized film, then lay it with the metallized surface facing the heat insulator. Lay polypropylene with one-sided lamination with its smooth surface facing the heat insulator, with the wicker facing outward. Finally, if we are talking about a three-layer film that includes a reinforcing mesh coated on both sides with polyethylene, then try to ensure that the material with maximum density adheres to the insulation, but at the same time there are mandatory gaps of 3-5 centimeters.
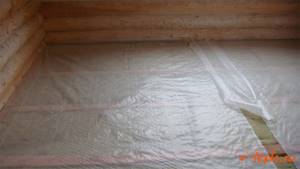
Stage six. Lay the floorboards
When attaching the boards, remember the 2 centimeter gap that should remain between the vapor barrier and the floor.
Note! If the vapor barrier of the floor was carried out taking into account all the requirements, then you will be able to avoid significant heat loss, and the thermal insulation characteristics will be quite high. Thanks to this, the indoor microclimate will be comfortable even in the most severe frosts
If you are planning to insulate a wooden house, then remember that the procedure for installing a vapor barrier in this case is no different from that carried out in other rooms. In this case, you can lay it on a concrete base, on the ground, and even on joists. In all cases, the algorithm for fastening materials will be the same, although minor deviations may still occur.
Here, for example, is an algorithm for laying vapor barrier material along joists.
- The first layer is laid - plank sheathing.
- Insulating material.
- The logs themselves are installed.
- Vapor barrier layer.
- Covering from boards.
How to insulate a floor in a wooden house
We advise you to read our guide to floor insulation in a wooden house, everything
Using a vapor barrier
Inside any room there is a certain microclimate, which is ensured by proper water vapor barrier for the floor. In a residential building, food is prepared, floors are washed, and showers are used. Due to these actions, a large volume of steam is formed in the air, which extends beyond the walls of the room. It intensively affects all elements of the building, and drops of condensation settle on the walls, ceiling and inside the floor.
To protect floors from moisture, it is necessary to use vapor barrier materials
Moisture is absorbed into all materials used to build a home. Condensation ends up inside the wood, penetrates the insulating layer and reduces the performance characteristics of the used fabrics, leading to their destruction. Vapor barrier is needed for rooms located on the ground floor under the basement or above the ground. In such a building, the floors are subject to increased influence of humidity. A vapor barrier is installed to reduce the level of water exposure to the floors. At the same time, the movement of air in the room does not decrease at all, and its jets go outside, allowing the building to “breathe”.
Vapor barrier is important for buildings made of wood. It is also used for concrete structures. Vapor barrier material should be laid as follows:
- vapor barrier is fixed to the floor;
- next the insulation is installed;
- then a second layer of vapor barrier is placed;
- After this, the finishing floor is laid.
The second layer of vapor barrier is important because it creates a barrier to moisture vapor emanating from the structure. The film is installed in such a way that the heat-ventilation gap between the finished floor and the vapor barrier is maintained. The film strips are glued together using tape or assembly tape.
Vapor barrier film for flooring is a product that is installed inside the floor. It is often confused with waterproofing.
In this video, learn more about ceiling vapor barrier:
Waterproofing material is needed to prevent moisture from entering the building from the street. If water gets into the insulation, the thermal flooring stops storing heat. This characteristic will be noticeable in winter when the water inside the floor turns into ice crystals. This makes the floor colder and will make it uncomfortable to live in the building. To prevent this from happening, a layer of vapor-waterproofing film for the floor is installed.
Moisture insulation is placed inside the concrete floor. It is needed to protect the materials that are part of the structure of the diffusion base, and protects the floor filling from rising moisture inside the room (for example, from condensation resulting from cooking and other activities accompanied by the release of moisture and steam) . The main differences between the materials:
- Insulation made from a waterproofing coating does not allow moisture, but can allow evaporation.
- Vapor and moisture insulation helps retain moisture and steam.
- Vapor barrier does not have a membrane structure.
To maintain a comfortable temperature in the house, it is necessary to install a layer of vapor-waterproofing film.
It must be taken into account that not all waterproofing materials are considered vapor-permeable.
Individual installation
The floor cake is made of several layers, including logs, a layer of waterproofing material, a preliminary floor, a layer of insulation, a vapor barrier layer, a layer of soundproofing material and a final coating. Before installing a vapor barrier, it is imperative to prepare the surface. If the structure is being built from scratch, then there will be no problems with installing this layer. Pre-floor boards are simply treated with disinfecting products, leveled, and a vapor barrier material is laid over them. It is also recommended to coat the joists with protective compounds.

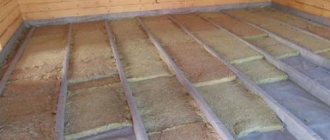
Floor insulation with mineral wool
If the house has already been built and is being seriously renovated, then first of all it is important to remove the old flooring and other previously used materials. Next, it is important to check the strength of the joists and the preliminary foundation - if they bend or rot, they will have to be dismantled and replaced with new ones. All debris is removed before subsequent work, small debris is removed using a vacuum cleaner.
The vapor barrier layer should lie on a level base, without protruding nails. Otherwise, it may be damaged. Before installation, it is important to find out which side the vapor barrier material will be installed on. As for ordinary cellophane film, it is not useful to determine the side. If Izospan is used, then it is important to look at its color on both sides. It is laid with the light side facing the insulation. If the material has pile, then with the given side for us it is installed in the direction of the room - the pile will absorb excess water.
Laying vapor barrier "Izospan"
Installing a vapor barrier does not require any special knowledge. The material is rolled out over the surface of the prepared floor and secured to it using small nails and a construction stapler. But the easiest way is to use special adhesive tape.
It is best to additionally treat areas that are inaccessible or have an unusual shape with a bitumen-based coating agent. The reason for these actions is that in such places it will be quite problematic to lay and correctly fasten the vapor barrier material.
The process of laying "Izospan"
The insulation itself will lie on top of the vapor barrier if the material is used to protect it from water not only from the inside, but also from the outside. Foam plastic, mineral wool or expanded polystyrene can be used as an insulating layer. It should fit very tightly to the wood logs so that cold bridges do not form.
Another layer of vapor barrier is installed on top of the insulation layer. It will no longer allow moisture coming from inside the room to reach the insulation and be absorbed into it.
Basic mistakes when performing work
Despite the simplicity of the process, when performing floor vapor barrier, home craftsmen often make mistakes that lead to loss of functionality of the vapor barrier layer. Condensation accumulates on the film, the insulation and joists begin to rot.
- Insufficient overlap between the sheets of vapor barrier material. If it is less than 15 cm, when the panels are fixed to the joists, they will “spread apart”, forming gaps between themselves. The tightness of the layer will be broken, and the condensate will be given a green light.
- No overlap on walls. When laying the flooring, the narrow gap between the wall and the vapor barrier layer remains unprotected and condensation will accumulate under the baseboards.
Condensation will accumulate under the baseboards if there is no overlap on the wall - The front and back sides of the material are mixed up. The lower part of the diffuse membranes is made up of a special layer that prevents drops of moisture from falling down onto the insulation. If you lay the material with this layer up, its functionality will be lost.
- Poor sealing of joints. Some craftsmen use ordinary stationery tape for sealing. It costs much less than sealing tape, but has significant disadvantages. Firstly, it is difficult to stick it exactly along the entire length of the canvas, and secondly, its adhesive characteristics are an order of magnitude lower.
Vapor barrier work in a wooden room
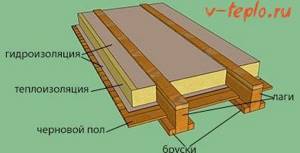
In a wooden private house, vapor barrier of the floor is an important stage of arrangement. The laying scheme of the protective layer must be subject to the peculiarities of creating a floor represented by the following layers:
- subfloor boards;
- logs;
- protective layers of vapor barrier (as well as hydro, - and thermal insulation);
- finished floor boards;
- special linings to provide warmth (not always used);
- various floor coverings (linoleum or carpet).
The floor is installed on supporting structures (brick or concrete). There is often natural ventilation between the subfloor and the ground. It is best to carry out the vapor barrier process at the stage of construction work.
Preparing for vapor barrier
In order for all the necessary work to be carried out with maximum reliability and quality, special training should be carried out.
The stages are as follows:
- wood (rough and base boards, strong supports (beams) and joists) must be treated with a product that prevents the appearance of fungus and mold, and protection against insects;
- install logs and mount the base - unedged rough boards;
- put the selected type of material to protect the structure.
If the process of protection against condensation is carried out during a major renovation, then the first stage will be the removal of the floor covering, the finished floor, then the rough boards. Thermal insulation will also have to be removed.
After this, you will need to check the condition of the joists and supports of the floor structure. Boards that have become unusable need to be replaced. After completing the floor repairs, you can begin laying material to protect against moisture and steam.
Material laying process
The installation process is simple enough that it can be done without the help of specialists. The vapor barrier is laid on the subfloor boards in one layer. All resulting joints should be glued with a special construction tape, then the reliability and quality will be high. To be on the safe side, you can overlap.
To securely fasten the protective material, you should use not only tape, but also nails or a stapler with medium-sized paper clips. The advantage of the tape is the ability to create a complete coating, without cracks, irregularities or protruding joints.
Thus, the process of laying a vapor barrier looks like this:
- preparing the subfloor - treating all elements with an antiseptic;
- laying vapor barrier - the roll is laid on the frame, individual sheets are overlapped;
- The material is secured around the perimeter, joints and cracks are sealed;
- insulation is installed;
- a second layer of vapor barrier is installed;
- The finished floor is being laid.
Material laying process
As soon as all possible joints and cracks of different sizes formed during the work, voids, and places unprotected by the material have been eliminated, the finished floor boards can be laid. The main floor covering, linoleum or carpet, is laid last.
Variety of materials
To protect surfaces and insulation from moisture use:
- reinforced polyethylene film;
- aluminum coated film;
- film made of propylene fibers;
- membrane vapor barrier.
What where When?
The main role of a vapor barrier material is to protect wooden structures and insulating material from moisture, rotting and, as a result, premature destruction.
It is extremely important to use it on lower floors, above basements and basements, and especially above bathrooms and kitchens. It is also necessary to remember that the insulation protection must be double-sided, since wet mineral or glass wool almost completely loses its thermal insulation qualities. That is, the film is placed between the finished floor and the insulation material, as well as between the insulation and the subfloor. However, often the bottom layer is replaced with waterproofing.
Which side should I lay?
You need to know which side to lay the vapor barrier on the floor. An extremely important nuance, since the wrong technology for installing the material will negate all its properties.
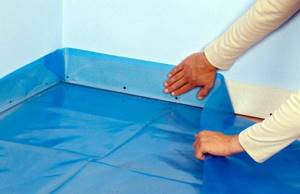
A man lays vapor barrier material on the floor
Here are the instructions:
- The double-sided film is placed with the smooth side facing the insulation and the corrugated side on top. The rough surface acts as a filter for steam and even the smallest drops of water.
- It is customary to lay polypropylene with the wicker side away from the insulation, and the smooth side inside.
- Installation of foil vapor barrier is carried out with the aluminum side facing the room, as it tends to reflect infrared radiation.
- Individual installation technology is possible for individual brands and types of vapor barrier materials.
- Before use, be sure to read which side to place the vapor barrier on the subfloor and insulation.
Laying algorithm
It's not complicated:
- First, the old flooring is dismantled down to the subfloor. Then the base is prepared: debris is removed, cleaned, leveled, treated with antiseptic and primer. Old floor beams or joists that have begun to collapse must be replaced with new ones.
- Hydro and vapor barrier of the subfloor is carried out, preventing moisture from entering the insulation from the ground or lower rooms. The film strips are laid with the correct side (see above) overlapping by 15-20 cm. The edges must be glued with reinforced or double-sided tape. Also, the vapor barrier should extend 10-15 cm onto the walls and joists. It can be attached to beams and joists with metal brackets.
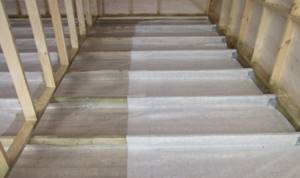
- A layer of insulation is laid on top of the film with the seams staggered and a thickness of at least 20-30 cm.
- A second layer of vapor barrier is laid on top of the insulation, also with an overlap and gluing the joints. If installation is carried out on wooden floor joists, it is necessary to lay the film so that it sag slightly: this way a ventilation gap is created between it and the finished floor. However, it is also recommended to put counter-battens on the logs on top of the vapor barrier, which will prevent the film from coming into contact with the finished floor.
- The finished floor is filled and then finished with the finishing floor covering.
Now you know how to install a vapor barrier on the floor and will not make the mistake of doing your own repairs.
We recommend looking at what happens if the vapor barrier is not installed correctly. Condensation fills the ceiling with water, the insulation gets wet and mold spreads. Don't make these mistakes.
We hope that the material was useful to you. We will be grateful if you share this article on social networks with your friends.
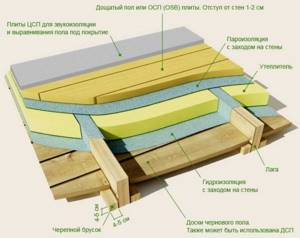
Schemes for installing vapor barriers on the floor in a wooden house
The supporting structure can be different: floors between an unheated attic and a living space, interfloor structures, floors on concrete, soil, joists and much more. In each individual case, it is recommended to use highly specialized materials, as this will allow the formation of a correct and, most importantly, durable structure. Let's consider the options.
Floor built on beams above the earthen floor
Characterized by a significant difference in temperature in the underground and room.
Scheme of floor arrangement along beams in a wooden house.
As you know, condensation forms due to temperature differences. If there is an unheated basement under the rough flooring or there is space between the load-bearing beams and the ground to the height of the foundation, then the master’s task is to form such a “pie” so that condensing moisture does not penetrate inside the structure, but at the same time the wood and insulation can “breathe.” In fact, it is necessary to prevent the thermal insulation and wood from getting wet. Accordingly, the vapor barrier of a wooden floor should be arranged as follows:
- Skull bars are packed onto the beams, boards or OSB treated with protective compounds (fire-retardant, antiseptic, water-repellent) are laid on them.
- A vapor-waterproofing membrane (smooth side to the mineral wool) or waterproofing material is installed onto the walls. Purpose – to prevent the insulation from getting wet. Strips of fabric or film are fixed with staples to wooden elements. Installation is carried out with an overlap of 15-20 cm, the joints are glued with adhesive tape. A vapor-waterproofing membrane is preferable to simple waterproofing, but is much more expensive.
- Slabs of mineral wool or any other insulation with a vapor permeability coefficient above zero (ecowool, thermal wool, isoplat) are laid.
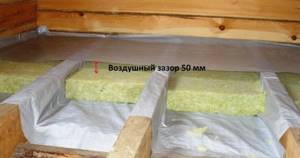
- A vapor barrier membrane (for example, Izospan B or Izospan D, etc.) is laid on top of the heat insulator and secured with brackets to the joists. There should be an air gap of 3-5 centimeters between the mats and the vapor barrier.
- A floor board or any sheet material for a prefabricated screed (chipboard, OSB, gypsum fiber board, etc.) is mounted on the prepared insulated base.
The floor of an unheated attic or attic is arranged in almost the same way, with minor modifications. The task is to make a thermal cutoff of the cold air of the under-roof space and the heat of the living space. Instead of waterproofing, a vapor barrier material or a vapor barrier with an anti-condensation surface is laid on the ceiling lining. Installation is also carried out with an overlap of 15-20 cm; joints and junctions with fences are fixed with adhesive tape.
Interfloor flooring
In this case, rooms with the same operating temperature are overlapped. The basic task of a vapor barrier installed between floors is to prevent the penetration of heat insulating fibers into the living space, as well as maintaining a normal level of wood moisture. According to the recommendations of the manufacturers, the layout of the floor “pie” should be as follows:
Scheme of interfloor slabs in a wooden house.
- Floor;
- Steam-waterproofing;
- Thermal insulator;
- Counter rails;
- Beams;
- Rough base - ceiling lining made of plywood sheets, OSB, chipboard;
- Vapor barrier;
- Interior decoration.
Installation is carried out with the smooth side facing the insulation; the formation of an overlap and a ventilation gap is mandatory. If the room belongs to the wet category, then a steam-hydrobarrier with an increased anti-condensation surface is selected. In addition, when laying, the joints of the membranes and the junctions with the walls must be sealed with adhesive tape.
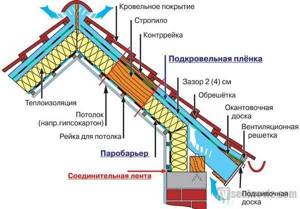
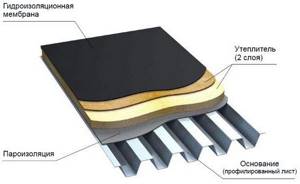
Vapor barrier for pitched roofs
Vapor barrier of a pitched roof is carried out when insulating the attic. The film is attached to the beams from the inside of the attic or along the internal sheathing - all wooden elements of the roof structure, as well as the insulation, should not get wet from exposure to warm air vapor from the room. If the attic is cold, then the ceiling is insulated, and the vapor barrier is attached to the false ceiling .
Attics
As the simplest vapor-tight material for the attic, you can use polyethylene film with a thickness of at least 200 microns. In cases where it is necessary to reduce the risk of moisture in the interior of the attic, two- and three-layer vapor-tight materials with an anti-condensation surface are used.
To increase the efficiency of the heating system, it is recommended to use heat-reflecting vapor-waterproofing materials. They all have a metallized (foil) surface, but the base can be different:
- kraft paper metallized with lavsan (Izospan FB) - able to withstand high temperatures, including the “dry steam” of saunas;
- polypropylene fabric with metallized propylene film (Izospan FD - woven fabric, Izospan FS - non-woven fabric);
- foamed polyethylene with metallized lavsan film (Izospan FX) - has its own thermal insulation properties.
For cold attics
Vapor barrier of cold attics with concrete insulated floors is carried out using the same materials as flat roofs with a similar base.
The protection of the insulation, laid between wooden beams on a hemmed base of boards, is carried out along the surface of the rough ceiling. The range of vapor barrier materials in this case is the same as for insulated pitched roofs.
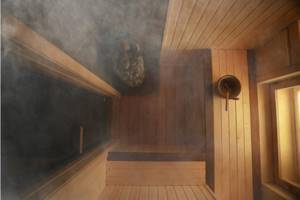
The choice of a specific type depends on the temperature and humidity conditions of the room. For example, for baths it is preferable to choose a film with a reflective layer.
For roof repair
When an attic roof is repaired without removing the internal cladding, it is impossible to attach a new vapor barrier to the rafters in the traditional way. In these cases, a membrane with variable vapor permeability is used - for example, DELTA-Sd-FLEXX.
After the old roof and insulation are dismantled, it is attached to the rafters from the roof side in a continuous layer. Then the insulation is laid and a new roof is installed.
In a dry state, such a membrane has low vapor permeability. When wet (from contact with moistened rafters or wooden sheathing of the internal cladding), the pores of the membrane “open” - excess moisture begins to evaporate into the insulation, and from it through the superdiffusion waterproofing into the under-roof ventilated space. After drying, the pores of the membrane “close” and it becomes vapor-tight again.
What is the difference between hydro- and vapor barrier
A vapor barrier is a narrow film that is installed inside the floor pie. But quite often it is confused with waterproofing, but these are completely different materials. So, the waterproofing layer is designed to prevent moisture from entering the room from the outside. If water does reach the insulation, its properties will deteriorate significantly - it will not retain heat. This will be especially noticeable in winter, when the water inside the insulating layer turns into ice crystals. The floor will become colder, and in general it will no longer be so comfortable to be in the room. To prevent this from happening, you need to lay a layer of waterproofing. In general, it does not allow precipitation or groundwater to pass through itself and is laid outside the floor pie.
Waterproofing the floor on the ground
The vapor barrier is installed inside the floor pie. And it will protect the materials included in the structure of the base, no longer from water from outside, but from water coming from inside the room - condensation formed due to breathing, cooking and other actions accompanied by the release of steam and water.
Scheme of floor arrangement by supports
The main difference between these two types of materials is their structure. Waterproofing coatings do not allow water to pass through, but are fully capable of allowing evaporation to pass through. But vapor barriers trap both water and steam, thereby protecting the insulation. Thus, vapor barrier does not have such a membrane structure.
Vapor barrier laid on the floor
What type of vapor barrier is there?
As you already understood, if insulation is installed in the floor structure, which absorbs water and changes its properties when wet (mineral wool in any form, for example), it is necessary to take measures to ensure that moisture in no form penetrates into the insulation. This is why vapor barrier materials are used.
A vapor barrier is a material that does not conduct water vapor. There are two types:
- with one-way conductivity;
- vapor-tight.
With one-way conductivity - these are membranes. They are more like non-woven fabric. In any case, on one side they have non-woven fabric. They do not allow steam to pass in one direction, but they do so in the other. This type of material appeared not so long ago, and if it “works” as it should, it’s a very good thing. But while there is little experience in using it, they are trying to avoid it.
Types of vapor barrier: membrane, film, with heat reflection. Which side to lay the vapor barrier is important for membranes and materials with a shiny coating
Materials that do not conduct steam at all, in any direction, are made on the basis of film. Most often this is polyvinyl chloride film (PVC), but other polymers can be used. The most durable polystyrene, but it is also the most expensive. Vapor-proof films can be reinforced - three-layer or without reinforcement.
There are also vapor barrier materials with a heat-reflecting effect. They can be distinguished by a shiny surface on one side (there are materials on both sides that reflect heat). A shiny surface can be:
- thin foil glued to the surface;
- metallized lavsan;
- metallized polypropylene.
What is metallized film used for? It reflects thermal radiation into the room. This way you can save on heating costs. Here's just one thing: reflection works when there is an air gap. That is, in a floor pie it makes sense to use such a film in floors along joists. It can be used to cover mineral wool, spreading a reflective shiny layer into the room.
Surface preparation technology for vapor barrier installation
If the house is just being built, then vapor barrier of the floor can be carried out without any problems. First, you need to treat all the boards on the floor with a special solution (antiseptic), which will protect them from rotting, insects and pests.
In this case, it is very important to pay attention to the subfloor and joists, because they are located near the ground. Install the joists and install the subfloor. In the future, it will be necessary to lay a vapor barrier material on it.
In the future, it will be necessary to lay a vapor barrier material on it.
If the house has already been built, then the vapor barrier technology will be completely different.
When creating a new vapor barrier or overhauling an old one, you first need to remove the floor covering, remove the subfloor, and dismantle the old vapor and thermal insulation. The screed must be cleaned using a vacuum cleaner or broom.
Next, you need to inspect it for various defects: potholes, through and small cracks, as well as large irregularities. If they are present in sufficient quantities, then it is necessary to repair them. You need to start by straightening the screed so that there is no direct entry of moisture from the soil through the cracks. For additional protection against water ingress, you can install waterproofing: if you use waterproofing material that comes in rolls, then it must be overlapped; to seal the joints, you must use special tape or regular adhesive tape.
After this, you need to install the logs back. Measure the level of each joist so that the horizontal level is perfectly level. After the surface has been treated and cleared of debris, you can begin laying the vapor barrier layer.
Why do you need a vapor barrier?
Each house has a certain microclimate. Comfortable living means having a bathroom or shower, a kitchen and other rooms with different humidity levels. During the cleaning process, the floors are washed.
Vapors and moisture generated indoors every day settle on the surface of walls and floors. Condensation causes the deterioration of flooring, subfloors, and other decking materials. The floor on the first floors in private sector houses is additionally exposed to moisture coming from below (from the ground).
A vapor barrier film (membrane) is used to create a protective barrier against steam and moisture. With its help, it is possible to neutralize negative factors affecting the microclimate of the home. At the same time, the floor will remain breathable.
Wooden buildings especially need vapor barrier. In houses made of concrete, a protective layer is also appropriate. This will reduce the humidity level in the room.
How and with what to fasten
If a vapor barrier is used in a floor pie along joists, there are options for its installation.
- If the material is laid before installing the lag, it is simply rolled out, leaving it in the corners of the fold, connecting the sheets as indicated above. There will be logs on top that will hold the material. It does not require additional fixation. You just need to start it and fix it on the walls.
- If the logs are already installed, we wrap each of them with material, leaving a small fold so as not to tear. We attach it to the wood using staples and a construction stapler. Staples are needed with a leg of 8-10 mm. We place the fasteners along the joists (from above) in increments of 50 cm. But the staples make holes. Although they are small, they are there and break the seal. They are closed using wooden planks, which are mounted on self-tapping screws. Self-tapping screws are placed so that they do not fall into the brackets.
- If the film has to be attached from below, the situation is similar to that described above, only there is no need to wrap the logs. We stretch the film and fix it with staples. When all the canvases are secured and glued, we nail the strips covering the brackets along the joists.
To be sure that no steam will pass through the holes near the brackets, foamed polyethylene or polypropylene can be laid between the film and the fixing bar. These materials are often used as a backing for laminate flooring. The material also does not allow steam to pass through, and due to its “foaming” it has considerable elasticity. It will definitely block the steam access.
How and with what to attach vapor barrier to walls? Any more or less serious manufacturer of vapor barrier films has specialized connecting tapes. They are available for different wall materials, so choosing is easy. These tapes themselves have double-sided adhesive. The gluing procedure is as follows:
- We glue the tape to the walls around the perimeter at the required level. In this case, we remove only one layer of the protective film. On the side that we will glue to the wall.
- We roll out and fix the films on the floor, so that the edges overlap the walls and there is room for folding.
- When everything has already been laid, the joints have been taped, secured, we begin to glue the vapor barrier of the floor to the walls. We lay a fold at the base of the wall, remove the protective film from the adhesive tape pasted, and glue the canvas.
It's that simple. Once glued, the excess can be cut off. And finally, you know not only which side to lay the vapor barrier on, how to lay it correctly, but also how and with what to fasten it.
Why do you need a vapor barrier and how to install it?
When building and renovating a home, you have to deal with many unfamiliar concepts. One of these is vapor barrier. From the name it seems clear that this material should cut off steam, but why and where. After all, there was no vapor barrier before? Did not have. But the toilet and bathtub were on the street, they didn’t do laundry at home, and they used glassine and roofing felt. These are also vapor barrier materials. Well, then let’s figure out how vapor barrier differs from waterproofing and what types it comes in. You will also need to find out which side to lay the vapor barrier on, how to install it and what to fasten it with.
How to make a vapor barrier for a floor under a screed
It is made only from special membrane materials that have waterproofing properties and are not afraid of the harmful effects of water and cement. In most cases, such materials are sold separately from the rest and are designed specifically for laying under a concrete screed. Since in this case there is no gap between the vapor barrier and the screed, you need to select a film with high mechanical strength. It is very important that the film can be laid directly on the insulation, that is, use superdiffusion films.
There is no need to use ordinary polyethylene, as it does not withstand the effects of cement and water very well. It is destroyed by prolonged exposure and allows water to pass through. Vapor barrier of the floor under the screed is carried out immediately after laying the insulation and serves to protect it not only from condensed steam, but also from water formed during concrete laying.
In a hardware store, you will need to contact a consultant and select a special vapor barrier for concrete. It will be more expensive than usual, but the result will be really good.