Features of the correct use of foil for baking foods. Points of view and arguments.
Man has come up with a lot of devices and technologies to make his life easier, comfort and pleasure.
The topic of nutrition, food, cooking is one of the most reverent, subtle and pleasant. That’s why there are as many developments, innovations and experiments here as there are chefs.
Food foil is a convenient and practical thing. With her invention, baking food in ovens turned into a separate branch of culinary art.
It seems complicated - I wrapped the chicken/meat/potatoes and sent them to cook. But no, the question arises about the correctness of covering the foil and the contact of products with one or another side of it.
Let's look at this point in more detail.
What are the differences between the sides of food-grade aluminum foil?
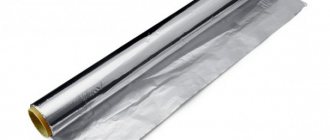
photo of a wound roll of food foil before use
Aluminum foil is made not only from the mineral of the same name, but also with the addition of other alloys. The thickness of the sheet is equal to the diameter of a human hair.
To give strength to such a thin product, it is made by gluing 2 parts, between which a layer of liquid is applied.
Industrial rollers, located like a wringer on Soviet-style washing machines, press the aluminum sheet to the required thickness.
As a result of contact with the surface of the shaft, one side of the foil acquires a glossy sheen, while the other side remains matte.
These sides differ slightly in their reflective properties:
- shiny - about 90%
- matte - 80%
Names of modern materials
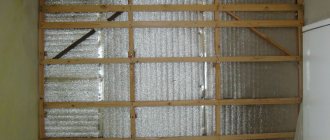
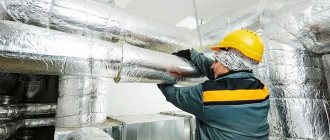
Basalt base is mainly used in manufacturing plants and local heating systems. This is a unique fireproof material with increased resistance to temperature changes. Often used in modern construction aviation.
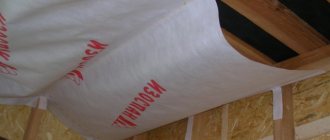
New generation insulating material - durable multifoil . Such material performs the functions of main and auxiliary. The first layer of foil is coated with a layer of oxygen bubbles, polypropylene. The material also contains a protective layer. Multifoil serves as excellent waterproofing, but is rarely used for construction, insulation and installation of insulating structures.
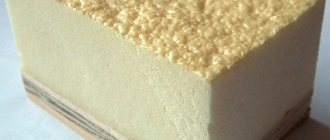
Another modern foil-based component is the universal foilisolon . A practical innovative material with wide application in various construction areas and areas. Folgoizolon is used not only when laying heated floors. It is used in the construction of steam rooms and bath complexes. The material behaves well in such temperature environments. Folgoizolon is moisture resistant, has high strength and durability, good sound insulation and resistance to temperature changes. It is considered the most environmentally friendly insulating material today. Ideal for insulating apartment buildings, cottages, schools, kindergartens and other residential buildings. One of the obvious and big disadvantages is that this innovative material is the most expensive on the building materials market due to its complex production technology.
Why do you need baking foil and how to use baking foil in the oven?
food is wrapped in foil pouches before baking in the oven
Food foil was originally intended for baking foods in the oven and storing them for short-term storage.
Thanks to the good conductivity of infrared rays and the accumulation of heat inside, it helps housewives create delicious masterpieces in the kitchen.
Important - ensure the tightness of the product you plan to cook in foil. That is, wrap food with it so that the juice is collected and stored inside.
Properties and features of the material
Regular foil is made from different metals - tin, steel, gold or silver. They are rolled through large shafts, the gap on which gradually decreases. In this way, layers of metal “paper” of the required size are obtained, which are then rolled into rolls.
Foil, suitable for preparing or storing food (food), is made of aluminum . It can most often be found in the store. This material is considered the safest; it can come into contact with food.
In addition, it has the following properties:
- Doesn't melt;
- Does not cause allergies;
- Able to retain heat.
Which side should you put the foil on the baking tray and which side should you cover?
raw meat with spices on foil before wrapping and putting in the oven
This issue causes controversy on online forums and in conversations.
Some people take the position that:
- Before baking, place the foil on a baking sheet with the matte side down to place the product on the shiny side. This side provides better heat conductivity, while the glossy side reflects it perfectly. This means it keeps the food at a higher temperature under the foil.
- To preserve the aromas of the cooking food, cover it on top with the shiny side of the foil so that the matte side “looks” at you.
Baked chicken recipe
This dish is good to prepare before guests arrive, as it does not require time or effort, and in the end you get a lot of delicious hot food for the table:
- Rinse the chicken carcass with warm water and dry;
- Rub top and inside with salt (2 teaspoons) and spices (2 teaspoons);
- Wrap tightly with foil. If you notice that it is torn, you can wrap it in a second layer;
- The oven must be preheated to 180 degrees;
- Prepared chicken can only be placed in a hot oven;
- It takes approximately 45 minutes to bake a bird weighing 1 kg;
- 20 minutes before the end, unwrap the bird and leave it in this form to “reach”. You will see accumulated juice on the baking sheet, pour it over the carcass and it will be juicier.
Where should the shiny and matte sides of the food foil be placed, inside or outside?
Having examined the features of both sides of food foil in the sections above, we recommend acting in 2 ways:
- rational
- simple
In the first case, to speed up and maintain high temperatures of products cooking under foil, make sure that the shiny side always “looks” inward and the matte side remains on the outside.
In the second option, cook your dishes without reference to how you cover the foil. They will still turn out tasty and aromatic.
Do I need to pierce the foil when baking?
Better give up such an idea. Then your product:
- it will turn out juicy and not dry out
- the aroma and its own juice will be preserved
- cooks without adding oil
On the other hand, you no longer need to wash the baking sheet and oven from grease and leaked liquid.
If you like a crispy crust, it is better to open the edges of the foil over the product and reduce the temperature in the oven. Leave the dish in these conditions for 10-15 minutes and enjoy lunch/dinner.
So, we have considered different points of view regarding the rationality of using food foil for baking food in the oven. Their logic and persuasiveness were revealed.
What to listen to and which one to follow is your choice. But the common point for everyone is this: cook with love and inspiration. Then any of your dishes will be to the taste and will delight your family and friends.
Using special sun protection film
A film specially designed for sun protection is a slightly more expensive option, but more reliable. It relieves the apartment owner from all the above-mentioned disadvantages of using ordinary food foil.
Advantages of solar control film:
- strength - the film is dense and elastic, and not fragile like foil;
- a dimensional grid suitable for use on windows (length – 3 m, width – 0.6-1 m);
- affordable price - on average, a roll of film costs 100 rubles;
- good appearance if installed carefully;
- transparency - sunlight will sufficiently illuminate the room without heating it.
By applying solar control film to the window, you will get slightly tinted glass, which will reflect excess radiation from the outside.
Please note: during the day, glass coated with film perfectly protects windows from the eyes of passers-by, as they create a mirror reflection. However, at night when the light is on, the room will be visible very well, so do not forget about using curtains.
There are two types of such window film - glass-adhesive and curtain film. Let's look at the features of using both materials to understand which one is better suited in a particular case.
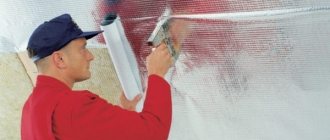
Adhesive film for sun protection
This version of the film is glued directly to the glass. With its help, the effect of tinting the surface is created. The advantage of this method is that the material is durable and can be used for several seasons in a row (remember that UV rays enter the room not only in summer).
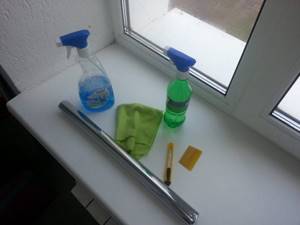
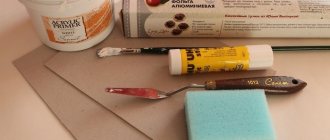
Instructions for gluing this film:
- It is necessary to thoroughly wash the window from dirt, remove dust and small debris from it. If this is not done, any particle will be very noticeable from under the film;
- Then the area of the glass is measured, a part of the material is cut off according to the measurements with a margin of 5 mm on each side;
- Using a spray bottle with soapy water, generously wet the surface of the glass. The more moisture, the easier it will be to adjust the position of the cut on the window;
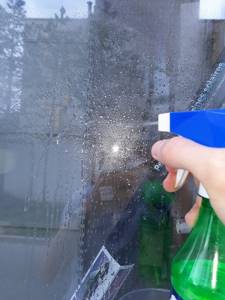
- The protective layer is removed from the material, then its reflective side is also sprayed with a solution;
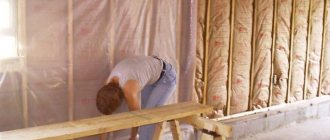
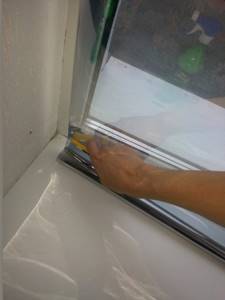
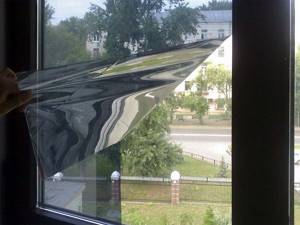
- The film is applied to the surface with gentle movements (it is better to do this with an assistant, using four hands), smoothed and leveled. Important – the film is glued with the reflective side facing out!
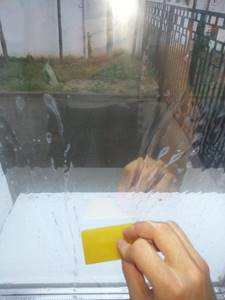
- Next, you need to remove moisture from under the material. This works best with a rubber spatula, but if you don’t have one at hand, any similar object with a soft cloth draped over it will do. At this stage, it is important not to damage the film with sharp objects (that is, it is not recommended to expel water with a regular metal spatula, flat spatula or similar objects);
- The last step is to cut off the excess film along the edges, left to compensate for possible gaps and distortions, using a cutter or a sharp stationery knife.
If the work is done correctly and carefully, there should be no folds, air bubbles, or scratches on the surface of the film.
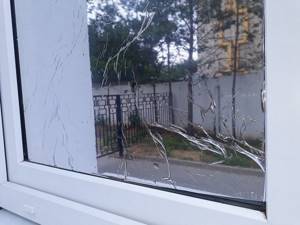
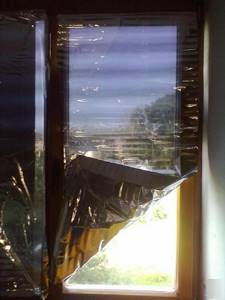
Poor-quality window film installation option
In order to remove such film from the window, you will need to act no less carefully. If the material was originally of high quality, it will come off easily after preheating (for example, with a regular hairdryer). The edge of the film is carefully lifted with a spatula or a metal ruler, then pulled back and gradually removed from the glass.
There are also self-adhesive film options. Often they are made not just in the form of tinting, but with beautiful drawings or patterns (like stained glass or in a certain theme). It is better to remove any remaining adhesive after removing such material after it has cooled using mild detergents.
Window curtain film
The curtain film is not attached to the glass itself, but to the top of the frame. This allows you not only to protect yourself from the sun, but also to freely open and close the shutters for ventilation, adjust the level of illumination in the room - the lower part of such a curtain can be easily moved aside. The material is attached using a self-adhesive strip at the top of the product.
The installation process consists of:
- When washing the window frame, its upper part should also be free of specks and dirt;
- Removing the protective layer from the self-adhesive strip;
- Carefully and evenly glue the curtain to the top of the frame.
Using ordinary garters, you can roll up and unfold the curtain film according to the principle of roller blinds.
This method of protection from daylight will not only help maintain a comfortable temperature in the room, eliminate the possibility of furniture and decoration fading, but also eliminate the hassle of wiping the material off the glass. In addition, such a curtain can only be lowered at the time of day when the sun shines directly through the window.