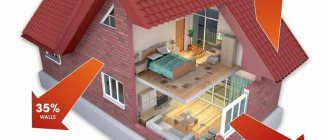
For a comfortable stay in the house and maintaining an optimal microclimate inside, it is necessary to insulate the facade of a residential building. There are several options for insulation used to provide thermal insulation for the external walls of a home. The most common of them is insulating the exterior of the house facade with mineral wool under the siding. Let's talk in more detail about the types of heat insulators, installation features depending on the type of walls of the house, and examine the technology of work step by step.
Types of insulation
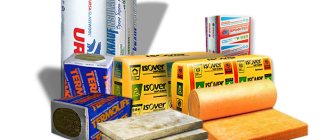
The most popular types of insulation today are:
- penoplex;
- mineral wool;
- Styrofoam.
They all have common advantages: they are safe for human health, easy to install, and low cost.
Application of penoplex
This material is valued in the field of construction due to its positive properties. It consists of foamed polystyrene and has a porous structure. Special advantages include:
- high thermal insulation;
- hygroscopicity;
- environmental friendliness;
- resistance to aggressive environments;
- long service life;
- ease of installation.
Penoplex can be used in any field of construction. It is often used as insulation for the facades of private houses. If construction technology is followed, extruded polystyrene foam can maintain its thermal insulation properties for several decades. To reduce heat loss in a brick house, it is enough to use polystyrene foam boards 50 mm thick. Concrete buildings and frame houses are insulated from the outside with penoplex foam 60-70 mm thick.
Features of using mineral wool
Mineral wool is widely used for insulating building facades. This insulation is especially relevant when arranging thermal insulation for frame and wooden houses. The special structure of the wool fibers ensures air circulation and good steam transmission. The insulation production process is based on the use of environmentally friendly materials, so mineral wool is harmless to human health.
Features of installing mineral insulation are:
- ease of operation;
- a light weight;
- long service life;
- air circulation.
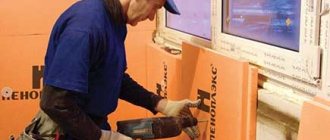
The disadvantages of the material include: the possibility of getting wet and deforming. During work it is necessary to use protective equipment.
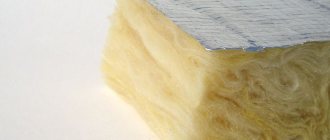
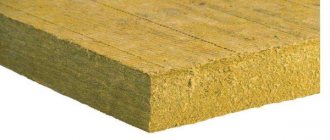
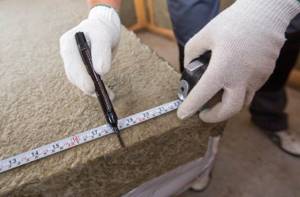
The thermal insulation properties of mineral wool depend on its thickness; the thicker it is, the lower the thermal conductivity. Insulation is available in two forms: slab and mat. When installing insulation on the outside of a building, material in the form of slabs is used for ease of installation. The most popular is stone wool.
Foam insulation
The quality of foam insulation depends on its density. High density ensures structural strength, low thermal conductivity, and durability. The lightweight material is easy to use; even an inexperienced craftsman can handle the installation work.
But finishing a house with foam plastic under the siding loses its physical properties after 10-15 years. Arranging the façade of a house with this material removes the possibility of natural air exchange, excluding normal vapor barrier. Therefore, the house will have to resort to mechanical ventilation, which increases heat loss inside the room.
All these nuances indicate that it is not recommended to insulate a wooden house with siding with foam plastic.
Stone wool Green Guard Universal
There is a large selection of various thermal insulation on the market, including stone wool in a wide range, so why should you choose Green Guard Universal?
These non-flammable basalt fiber slabs combine minimal thermal conductivity with a high sound insulation coefficient, which is achieved by a special arrangement of fibers and a density of 35-40 kg/m³. Low density in this case means lightness, a large amount of air inside and water resistance. The insulation is designed for use in non-load-bearing structures, which includes ventilated facades, and is capable of maintaining its performance properties for a hundred years. The latter is proven by the results of tests carried out according to the GOST method.
Another important indicator is the environmental friendliness of the boards; they are produced using a biopolymer binder and meet all domestic and European environmental standards.
That is, when using this universal thermal insulation, the house will be protected from both heat loss and extraneous noise, which is often no less important. Both during installation and during operation, the material does not emit harmful substances into the air. And thanks to the light weight, there is no need for additional fixation - it is enough to maintain the correct step between the lags to install the slabs sideways.
Specifications
- Thermal conductivity coefficient is 0.035-0.037 W/(m·C).
- Compressibility (based on volume) – no more than 30%.
- Vapor permeability – not less than 0.3 mg (m·h·Pa).
- Density – 35-40 kg/m³
- The content of organic substances (by weight) is no more than 2.5%.
- Flammability – non-flammable (NG).
- Service life – up to 100 years.
Features of use on different walls
Poor installation of insulation or incorrect selection of material can lead to serious consequences. The problem of fixing the sheathing and insulation lies in ignorance of the installation technology or the negligence of the craftsmen. Troubles can arise when insulating the facades of wooden, concrete, panel, and brick houses. Structures made of cinder block and foam block pose a threat of further destruction. To avoid such phenomena, you need to use insulation correctly, taking into account the material of the walls.
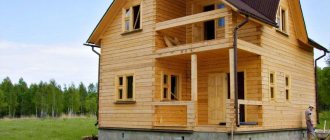
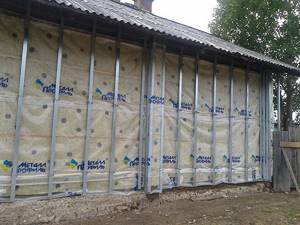
Insulation of a timber house
The insulation of a log house with mineral wool slabs for siding is carried out according to the ventilated facade scheme. This technology eliminates moisture retention under the insulation, ensuring a long service life of the material. High-quality ventilation is necessary for the unimpeded escape of steam and moisture, which polystyrene foam and penoplex cannot provide.
Fire resistance is necessary for arranging the insulation of a timber house. Mineral heat insulator belongs to the class of non-combustible materials, so it is installed outside without fear of unpleasant consequences.

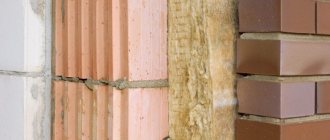
Insulation of a house made of aerated concrete
Walls made of aerated concrete have high vapor permeability. The wrong choice of heat insulator will lead to the appearance of mold, mildew, and rotting. The insulation should not interfere with gas exchange between the walls of the house and the external environment. In combination with aerated concrete, mineral wool retains high vapor permeability, providing an optimal indoor microclimate.
The fragility of aerated concrete requires strict adherence to technologies for installing insulation and cladding. Siding is a durable finish, allowing you to hide all the imperfections of the structure. Insulation of an aerated concrete house before finishing it with siding takes place in several stages, which we will discuss below.
Video description
We will dwell in more detail on insulating a house with polystyrene foam. Find out how safe polystyrene foam is in our video:
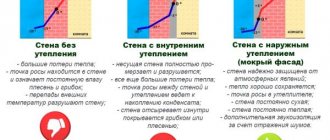
The wrong choice of insulation or protective membranes in the design of a curtain wall disrupts both processes. But if the loss of “breathing” properties is compensated by a supply and exhaust ventilation device, then with moisture transfer everything is much more complicated. In winter, when the partial pressure of water vapor inside the house is greater than outside, it enters the walls of the house.
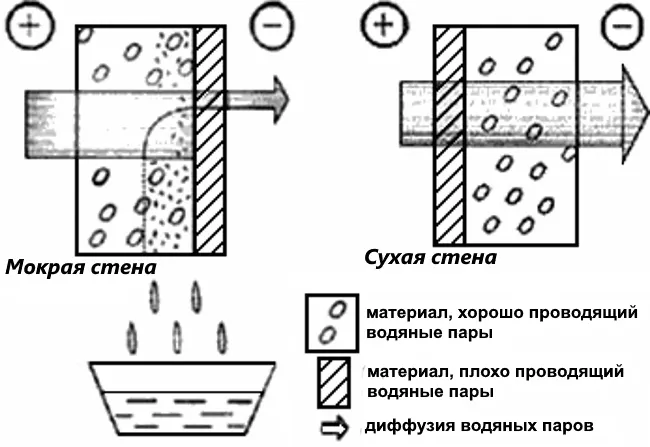
The wrong choice of technology and materials leads to the appearance of excess moisture in the thickness of the wall, which is poorly evaporated Source stroim-dom.radiomoon.ru
Of course, some of the excess moisture from the air will go into the ventilation system, but the rest will penetrate into the capillary structure of wooden structures. And if they are not dried, the tree is literally saturated with water. In addition, where there is dampness, favorable conditions are created for the growth of fungus and mold.
For reference! Moisture transfer is the movement of moisture in capillary-porous bodies from a saturated zone to an unsaturated one.
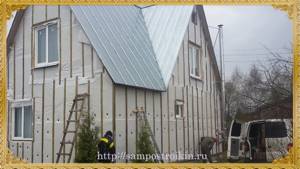
Installation stages
Compliance with installation technology will prevent the appearance of a dew point in the structure itself, which will ensure uniform temperature distribution. To properly insulate the facade of a house, it is recommended to follow the installation instructions below. Insulating a house from the outside with mineral wool consists of six main stages.
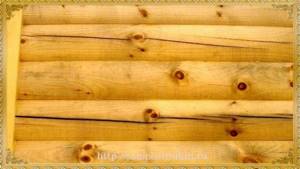
Preparatory work
Before starting work on façade insulation, the walls of the house are prepared. The aerated concrete base is cleaned of dust, dirt, and primed if necessary. The wooden walls of the house are treated with an antiseptic and dried. Decorative elements are removed from the walls. If the walls get wet before work, allow the box to dry completely.
Before installing the sheathing, markings are applied along which the frame elements will be attached.
The distance between the spacers is 5 cm less than the width of the mineral wool. This is necessary in order to install the insulation tightly.
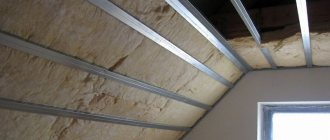
Sheathing device
The basis of the sheathing is usually made of wooden beams. The width of the lumber is selected depending on the thickness of the insulation. The wooden frame is treated with an antiseptic and a non-flammable mixture. Fix the sheathing elements using dowels and nails. Vertical and horizontal placement of lumber on the wall is allowed. The location of the beams depends on the subsequent installation of the siding.
Irregularities on the wall surface are eliminated using additional wooden spacers. The classic option for placing timber is a vertical frame. After attaching the racks to the wall, proceed to installing the horizontal guides. Marking is carried out using a level and marker. The pitch between the beams depends on the size of the siding. When installing the guides, take into account a gap of up to 5 cm to ensure free ventilation.
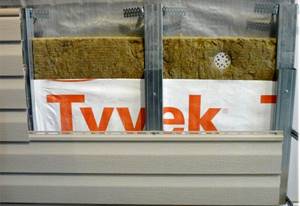
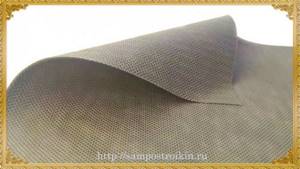
Installation of vapor barrier
After installing the sheathing, it is recommended to install a vapor barrier. Usually it is a vapor barrier film or special mastics. Film is considered more reliable protection. It is attached using a construction stapler; the joints are connected with special tape.
A special material is used for vapor barrier; ordinary polyethylene film will not work.
After arranging the sheathing and securing the vapor barrier material, they begin laying mineral wool.
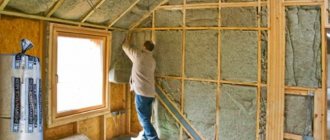
Laying mineral wool
For facade insulation of a house, mineral wool in the form of slabs is used under the siding. Rolled insulation can slide down over time, compromising its thermal insulation properties. Plates of thermal insulation material are installed against each other, aligning the seams to avoid cold bridges. The mats begin to be laid out from below. If necessary, mineral wool is cut into strips of the required size. Installation is carried out using an adhesive base and studs.
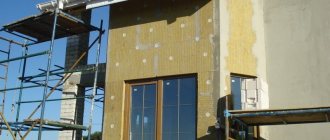
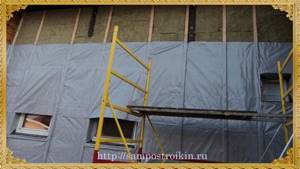
Installation of waterproofing
After installing the insulation, a wind-hydroprotective diffuse membrane is attached to protect it from atmospheric influences and unhindered removal of moisture. The protective layer is rolled out horizontally, starting from the bottom. The membrane layers are overlapped. Its parts are connected with special tape, and the base is secured using a construction stapler.
Ventilation gap
An air space of 35-50 mm is left between the membrane and the siding for free ventilation. The final stage will be the installation of the cladding.
To make it easier to provide clearance, you can use additional slats. This design will ensure free drainage of the resulting moisture.
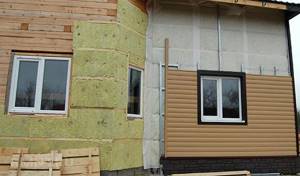
Siding installation
To secure the siding, a counter-lattice is installed. To do this, profiles are mounted on top of the membrane waterproofing using self-tapping screws. The counter-lattice elements are installed at the required increments. Typically it is 400 mm. Fastening the siding begins with ebbs, if they are provided for in the design. The parts begin to be secured from the bottom of the building façade. The cladding parts are secured using self-tapping screws in the provided holes.
After completing the installation of all the main siding elements, begin attaching the corner profile using a building level. Finish frames are installed around frames and doorways.
Selection of materials
Selection of stone wool
Companies that insulate low-rise buildings usually work with a specific brand of stone wool, but the customer has the right to change the insulation used for the construction of the facility.
Now many “experts” suggest choosing insulation based on density, limiting yourself only to this parameter. In particular, to insulate the outside of a house with stone wool under siding using curtain-wall facade technology, it is proposed to use semi-rigid mats with a density ranging from 45 kg/m3 to 125 kg/m3. Insulation in this range is not elastic and will be poorly mounted into the frame, and often simply break during installation. Therefore, when choosing stone wool, you need to pay attention to the following parameters:
- Thermal conductivity . The lower this figure, the better, since the insulation conducts less heat, and the home owner will pay less for the operation of the house (not only in winter but also in summer, when the house needs to be cooled)
- Thickness _ It is selected based on the thickness of the original wall and the climatic conditions of the region in which the house is located.
- Elasticity . The insulation will be installed in the spacer between the studs of the wall frame. Therefore, only elastic insulation can be installed efficiently, without using additional fasteners and eliminating air / non-insulated “pockets”.
Prices for materials and insulation work
Insulating and finishing the exterior of the house with mineral wool and siding is considered the most budget option. Work on arranging the external walls of a residential building can be done with your own hands, or you can turn to professionals. The cost of installing insulation and cladding depends on several factors:
- type and cost of materials;
- wall surface area;
- number of floors in the house;
- distance of the object from the city;
- condition of the walls.
The price of work is calculated per 1 sq.m. area. In addition to the basic materials, the cost of the work includes a complex of all preparatory measures: from the installation of scaffolding to finishing.
The cost of mineral wool depends on the type, manufacturer, density, thickness and quantity per package. The average price varies from 450 rubles to 5000 rubles per package. The price may also vary depending on the region of the country.
Insulating the walls outside with mineral wool under siding is an economical and affordable option for saving energy in a private home. A residential building will be reliably protected from cold and damp if insulation work is properly organized using mineral wool.
Which mineral wool to choose?
When choosing a suitable material, you should definitely pay attention to some points. In mineral wool, an important indicator is the number of fibers that are present in the structure of the material
It is very important to understand that the weight of the fibers and the weight of the cotton wool itself are not the same thing. The best mineral wool is the one with higher quality fiber, this allows you to most effectively resist high temperatures
The density indicator describes the following characteristics:
- static shape even during long-term use;
- good resistance to mechanical stress.
The density of mineral wool ranges from 32 to 167 kg/m3.
The density indicator from 43 to 110 kg/m3 makes it possible to use cotton wool for finishing a ventilated facade. If the density of mineral wool is higher than 110 kg/m3 (140-160 kg/m3), this indicates that the wool can be used for processing with decorative plaster “Bark Beetle”, “Lamb”, “Mosaic”.
Most often, mineral wool of a lower density (from 30 to 50 kg/m3) is used for insulation. This material is used only indoors and is covered with plasterboard or clapboard. Also, such wool can be used for roof insulation and sound insulation.
To choose the right wool for facade insulation, it is recommended to remember the quality of the material. Domestic mineral wool is heavier, its density is about 150 kg/m3 (Thermolife, Danova). European companies offer lighter material with a density of 110-115 kg/m3 and even lower. The thermal conductivity coefficient of this type of wool is better. Heavy wool has more binding components; Western manufacturers reduce the presence of resin and pay more attention to the quality of the fiber.
As a result, such products have better characteristics, while the weight of the material is noticeably lower (by 20-30 percent). To be fair, it should be mentioned that the cost of such insulation is noticeably more expensive than domestic ones.
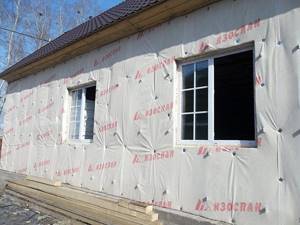
Windproof membrane
When the main work of laying the mats is completed, they should be sheathed with a membrane, the sheets of which are glued together using specialized tape. Regardless of the point at which you connect them, the canvases must be laid with an overlap, the width of which should be at least 10 cm.
Additionally, the heat-insulating structure is stitched with “fungi” - these are special fasteners made of plastic and having a wide cap.
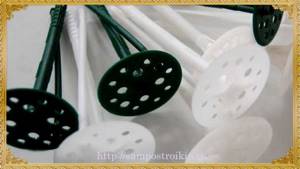
To install them, you will need to drill holes through all layers of insulation and into the wall. Next, the “fungus” is installed in the hole and driven in like dowels, opening up inside the wall. “Fungi” promote better adhesion of mineral wool to the wall surface and hold it. When the work is completed, your home should look like a quilted mattress.
Before you begin cladding the facade, you should install a counter batten on the frame, with the help of which a ventilation gap will be formed; it is on these beams that the façade trim, in our case, will be attached - this will be siding.
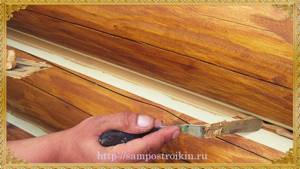
Treatment of a wooden structure before insulation
First of all, explore all the walls.
Clean all crevices and existing cracks from accumulated dust.
Treat the damaged areas with an antiseptic primer solution, if necessary, in 2 layers. Wait until it dries completely.
Seal all cracks and crevices. This work should be carried out carefully, since the presence of flaws allows cold air to penetrate into the living space, creating discomfort. It is better to carry out the work with a latex-based sealant intended for external types of wooden work. The paste helps maintain temperature balance and does not allow wind currents to penetrate into the living space through the walls.
A properly selected sealant can easily be applied to a thoroughly cleaned and pre-primed surface. Due to its elasticity, the seal will be able to deform, adapting to changes in the size of existing gaps. If there are large cracks, it is additionally recommended to use an acrylic type of tourniquet, which is placed into the crack as tightly as possible and only then covered with a layer of sealant.
Know! Repairing a wooden structure can be carried out using materials used as inter-crown insulation such as tow, felt and moss.
Proper insulation of external walls
An important role in insulation is played by the correctly selected type of diffuse and windproof membrane.
ATTENTION! It is not recommended to use a vapor barrier film; its functions are not suitable for buildings intended for year-round use.
The membrane for wooden houses is attached to the front part of the insulation used. Diffuse windproof material has hydrophobic properties. When liquid hits its surface, it cannot be absorbed; it simply rolls off the surface. In other words, if moisture gets through the wall sheathing, the insulation and load-bearing walls will always remain dry.
Despite the impermeability of moisture, the membrane does not interfere with the “breathing” functions of the skin. Water vapor from the walls and the insulator used freely escapes into the atmosphere, and the moisture balance is automatically equalized.
The membrane has windproof functions, does not allow cold air to penetrate into the structure of the insulation and prevents the weathering of its fibers. The presence of a ventilation gap, left between the membrane and the insulating layer, allows air to circulate. As a result, the released drops of condensate will dry out on their own.