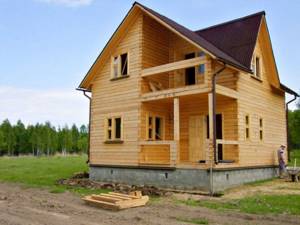
The thermal insulation characteristics of timber with a cross section of 150x150 are not sufficient to ensure comfortable living in a house during the cold winter period. In this regard, the owners of such a building inevitably ask the question: how and with what to insulate the house? According to the rules of heating engineering, external insulation is much more effective than internal insulation. Therefore, first of all, you need to worry about choosing the optimal thermal insulation material for specific conditions, suitable for use outside the house, and find out all the nuances of installation.
Insulation of a house made of timber from the outside
Preparing the walls of the house
At the stage of preparation for external insulation of a wooden building, it is necessary to resolve several issues:
- which insulation is better;
- how to lay it correctly;
- how to prepare the walls of a house.
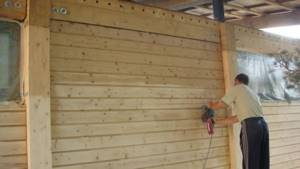
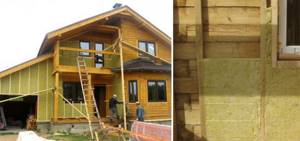
Regardless of which thermal insulation material is chosen, walls made of 150x150 timber need to be prepared. First of all, it is necessary to conduct a visual inspection and make sure that there are no signs of wood rotting, insects harmful to wood, or the need for additional fastening of timber and finishing elements of window and door openings.
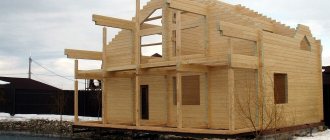
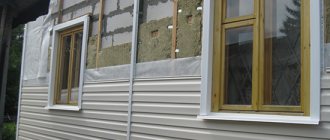
The photo shows a house made of timber before insulation.
At the same time they decide whether the walls need caulking. If empty cracks are noticed, then they need to be filled with appropriate material before laying the insulation. Caulking walls is a simple, but labor-intensive process. Knowing the rules and tricks of this matter will greatly simplify its implementation.
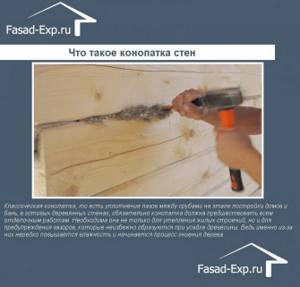
What is wall caulking?
To eliminate gaps between beams, three materials are traditionally used:
- tow;
- jute;
- flax wool, etc.
Overview of materials for caulking
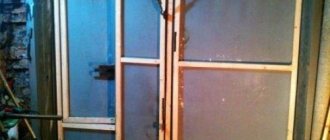
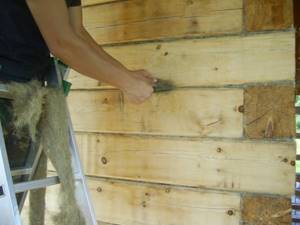
In the process of work, craftsmen use special wooden devices in the form of spatulas with a thin blade. But to perform the task yourself, an ordinary narrow spatula will do.
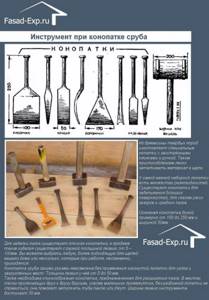
Tool for caulking a log house
Next you need to choose the most suitable caulking method. There are two of them:
- laying stretched insulation;
- laying insulation into the set.
The first is optimal if the gaps are not wide, the second is suitable for deep and long gaps. When caulking, the stretched tow fibers are distributed along the crack in an even thin layer, while driving it into the gap with a spatula. The work must be done slowly and carefully, trying to seal the insulation as efficiently as possible. The tow is driven in layer by layer until the gap is filled.
Laying in a set is done as follows: bunches or balls of tow are formed from the tow, corresponding to the size of the gap, and driven into it using a spatula and a hammer. Regardless of the chosen caulking method, work begins from the bottom of the wall.
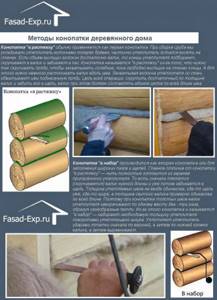
Methods for caulking a wooden house
Video - How to caulk a house made of timber
Video - Caulking a house made of timber
Preparatory stage
You need to start by assessing the condition of the walls and the quality of the previously completed work on insulating the log house. It is necessary to carefully examine all the joints, corners and joints of the beams, and evaluate the compaction of the entire surface of the log house walls. If any defects are detected (for example, thinning of the caulk layer), they must be eliminated in advance.
Caulking walls
Any timber structure is distinguished by a large number of seams. After the building shrinks and the moisture content of the wood equalizes, voids may form in the grooves and seams, which reduce the ability of the entire structure to retain heat. That is why caulking is so important, allowing you to completely isolate the inter-crown joints.
Carrying out such work requires compliance with several rules:
the caulking must be carried out from below and processed one crown from all sides at the same time, otherwise the building may warp; It is important to choose the right tool, because the chisel should not damage the wood; Taking into account the formation of a narrow groove between the timber, it must be processed “stretched”.
This type of caulking is carried out by stretching fibers of tow, moss, jute or their analogues along the seam. Part of the material is left out and after processing the groove, it is rolled into a roller and pushed in, completely covering the space between the rims.
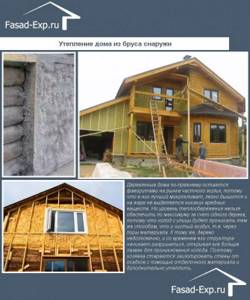
Rules for external insulation of a wooden house
The walls of a wooden house are built from a very hygroscopic material. Wood can absorb moisture and at the same time become deformed. Despite the fact that construction timber has a low moisture content, environmental influences inevitably change this indicator. Therefore, in wooden houses you can observe deformation of the walls. It is insignificant, but inevitably affects the geometric shape of window and door openings.
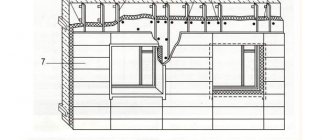
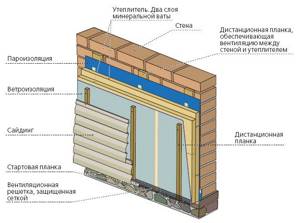
When externally insulating a house made of 150x150 timber, it is necessary to take into account that a ventilation gap is required through which moisture will escape from the wood. Thus, no harm will be caused to the walls. It is necessary to build a facing layer over the insulation laid on the outside of the building. Therefore, the best technology for insulating a house made of timber is the installation of a ventilated facade.
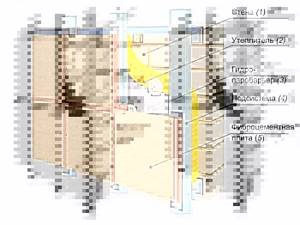
Its schematic diagram includes the installation of several layers of materials (direction from the wall to the street):
- wall;
- lathing (frame);
- heat insulator;
- vapor barrier membrane;
- ventilation gap;
- facing material.
Approximate diagram of a ventilation façade
Ventilated facade

Ventilated facade for a log or timber house
Regardless of what kind of insulation is used, it is necessary to follow the order of laying the materials and do not forget that there must be a gap of at least 1 cm wide between the heat insulator and the cladding.
Video description
What happens to the wall if the insulation is not properly insulated from the inside - in the video:
Insulation of walls from the outside: advantages and disadvantages of the method
Most often they resort to it, keeping in mind the obvious advantages compared to internal insulation:
- The usable area of the internal space is preserved;
- External work does not change the family's daily routine.
- The facade of the house is reliably protected from sudden temperature changes, which extends the life of the building.
- The correct selection of materials does not disturb the microclimate of the rooms (the house “breathes”).
- You can decorate the facade to your liking or improve the appearance if the wood has darkened over time.
- If the technology is followed, the wood will be additionally protected from damage.
- Ease of monitoring the work of the construction team.
The main disadvantage of external insulation is the need to carry it out in good weather; in cold and damp weather there is no point in doing this.
See also: Catalog of companies that specialize in insulating country houses.
Installation of a ventilated facade, installation of lathing and insulation
We make a ventilation façade with our own hands
Step 1: installation of spacers
To install spacer strips, use bars with a cross section of 20/20 mm or an edged board with a thickness of 20-25 mm. To fasten wood, nails or wood screws are used. The optimal step is 60-80 cm.
Scheme of an insulated facade
Step 2: installation of vapor barrier membrane
Vapor barrier film is sold in rolls. Laying the canvases begins from the bottom of the wall and gradually moves upward. The vapor barrier is secured with a construction stapler with an overlap of 10-15 cm.
Tools and materials for thermal insulation of buildings
To insulate a house without being distracted by searching for tools and materials, builders need to prepare the following:
- bubble or laser building level, you can also use a plumb line;
- tape measure, square or metal ruler;
- hammer, construction knife or hacksaw, screwdriver;
- facade dowels, tape, chalk, polyurethane foam, antiseptic;
- dry slats, insulation;
- vapor and waterproofing film;
- material for final cladding.
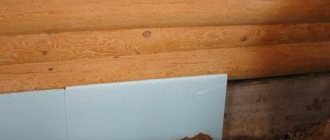
- sprayer for treating wood with protective compounds
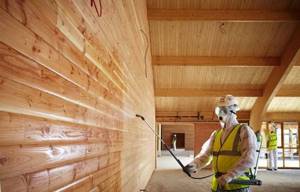
Treating a wooden wall with an antiseptic Source mybesedka.ru
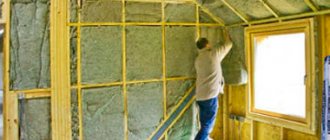
Hotrock mineral wool
So how to insulate a timber house from the outside. Hotrock mineral wool is European class basalt thermal insulation. The range includes slabs of different densities, designed for insulation of a wide variety of structures, including ventilated facades. Depending on the characteristics of a particular object, you can choose slabs with a density from 35 to 90 kg/m 3. The thermal conductivity of all slabs in a dry state ranges from 0.035 to 0.038 W/m K. A 50 mm thick slab has thermal resistance equivalent to a 150 mm thick pine beam.
Basalt wool is completely non-flammable, does not retain moisture, is not damaged by rodents and insects, and fungi and mold do not develop in it. Based on the sum of its qualities, it is recognized as the best material for wall insulation.
Source: hotrock.ru
Schemes: how to insulate a building with your own hands?
Let's consider the order of implementation of each technology.
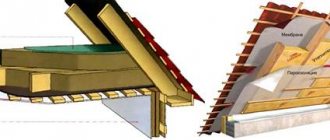
Ventilated facade
Photo of the scheme:
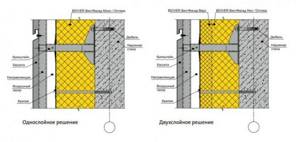
In order for the structure to be reliable and durable, certain rules must be followed when installing it.
The thickness of the air gap is taken based on the architectural features of the structure and the insulating material. The gap is usually 4 - 8 cm.
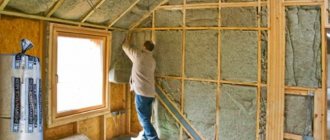
Insulation is carried out with mineral wool, t = 10 cm. A profile box is first installed on the retaining walls of the building and a frame for the finishing material. Mineral wool insulation is then placed in its niches.
To protect the timber from wind and moisture, a membrane layer is installed behind the coating and thermal insulation layer. The insulation is sealed from the outside.
The final stage is wall cladding. For finishing, you can use wood materials, for example, block house. The choice of finishing type is influenced by financial opportunity, the desired appearance of the material and characteristics.
The lining is secured mechanically (with screws, clamps or other means), taking into account the thickness of the ventilation gap.
Wet method
Photo of the scheme:
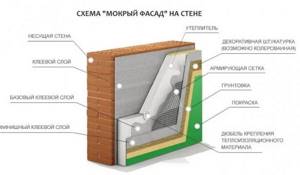
Order of work and finishing:
- Wall cleaning, leveling, primer treatment.
- Installation of vapor barrier.
- Installation of thermal insulation boards with glue.
- Additional fastening with plastic pins.
- Applying glue to insulation.
- Reinforcement of holes.
- Primer and surface coating.
Laying under cladding
Instructions:
- Cleaning surfaces and leveling the surface.
- Installation of vapor barrier material.
- Installation of a wooden or metal frame.
- The next step is to coat the insulating material with glue. Next, a boot profile is executed that will support the first line. After the glue has dried, the facade insulation is additionally attached to plastic pins.
- Waterproofing must be installed on top of the insulation. For these purposes, it is recommended to choose a membrane with a water chamber and vapor diffusion. A film or membrane is attached. The joints are made with a coating of at least 10 cm and sealed with tape.
- After all steps have been completed, installation of the cladding begins. Carry out the work according to the instructions.
Spraying polyurethane foam
When using polyurethane foam as a thermal insulation layer with a thickness of 3.5 cm, an effect similar to using a mineral wool panel t = 12.5 cm is achieved.
Instructions:
- Polyurethane foam is applied to wooden formwork. Can be made of metal.
- Treat wood with an antiseptic, metal with an anti-corrosion compound.
- Cover the hardened foam with a vapor barrier film and cover the top with plasterboard.
Attention. Do not apply finishing materials directly to hardened polyurethane foam.
Heat engineering issues
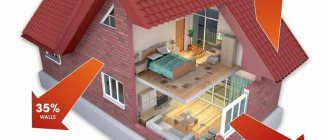
In order for the house to be warm, its walls and other enclosing structures must have a certain resistance to heat transfer. In accordance with SNiP 23-02-2003, the heat transfer resistance of external walls of residential premises is determined depending on the terrain.
For example, in the Moscow region, according to new standards, this indicator should not be less than 3.13 K m 2 /W. A wall 150 mm thick, made of pine timber, has a thermal resistance of about 1.25. With a thickness of 200 mm - approximately 1.6 K m 2 / W. In any case, the thermal insulation properties of timber walls do not meet modern requirements, although they are fully within the standards in force for buildings built before 2000.
From this we can conclude that in order for a log house to comply with modern ideas about minimum energy efficiency, it is necessary to insulate it, and for this there are various materials.