Box using decoupage technique using foil
Today I suggest you make a box using decoupage technique and using foil.
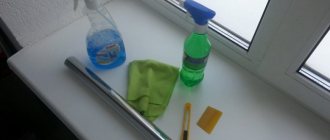
We will need the following:
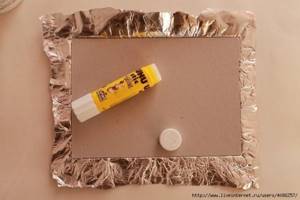
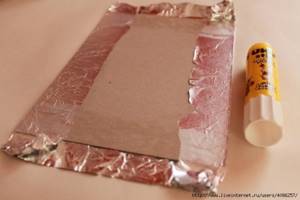
Materials: • MDF box blank • Sonnet texture paste or putty • Primer or white acrylic paint • Foil • Glue pencil • Liquid bitumen • Decoupage napkin for light surfaces Chip Art white • Acrylic paints • Chameleon paints • Varnish • glassy varnish • Glue felt • Outlines • 3D gel Tools • Stencil • Palette knife • Sandpaper • Rolling pin
1. Sand the entire box.
2. Using a palette knife, apply texture paste to the stencil placed on the side of the box.
3. Remove the stencil, carefully, without waiting for the structural paste to dry.
We do this on each side. Let the resulting relief dry completely. After complete drying, we sand it and make the relief smoother.
4. Prime the top of the box lid with primer or white paint. Let it dry naturally.
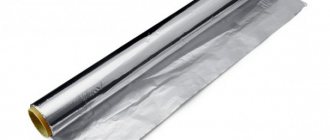
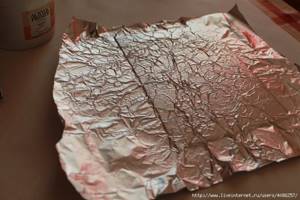
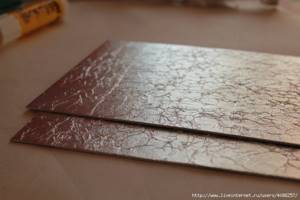
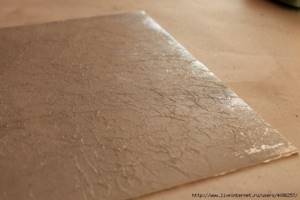
5. Take baking foil, crumple it and smooth it with a rolling pin.
6. We make blanks from foil for the entire surface of the box except the lid.
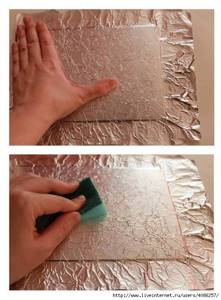
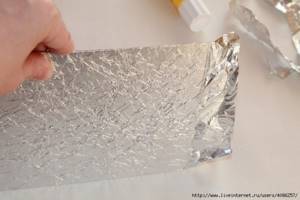
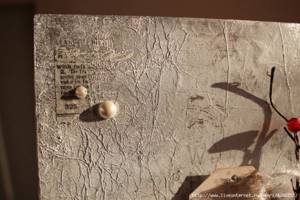
7. Glue all the foil blanks to the box using a glue stick. Press the foil firmly against the box. We make the relief noticeable by pressing very firmly along the entire contour.
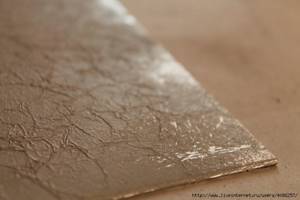
Let it dry completely. 8. Cover the entire surface of the foil with liquid butum. Wipe off any excess immediately. Let it dry.
9. Prepare the picture for the lid. We print on a Napkin for decoupage on transparent glass and dark surfaces Chip Art. Printed only on laser printers.
10. Like a decal, we transfer it to the lid of the box. After drying, we fix it with several layers of varnish.
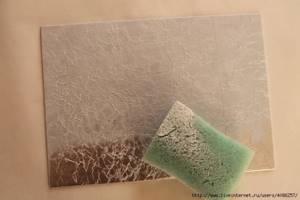
11. Mix blue, turquoise, white paint and glazing medium.
Cover the surface of the box where the foil is.
12. Without waiting for it to dry, wipe it with a paper towel or napkin. In the corners of the relief, do not wipe off excess paint too much.
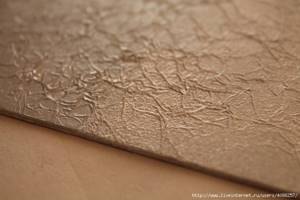
13. Take just a little black acrylic paint on a shield brush and use an almost dry brush to tint (touching the very top) the relief, sides, and corners of the box.
14. When the paint dries, take a fine piece of sandpaper and lightly sand it, this will reveal the shine of the foil. Just don't overdo it. And we coat it with varnish (In my case, Tikurilla Yasya is semi-gloss).
15. Now let's work on the lid of the box. We take the silver outline and trace the drawing and make curls along the edge of the box. After the curls around the edge of the box have dried, we tint them with black paint, just as we tinted the relief.
16. Then, using chameleon paints, we draw the picture where we intended it to be. After the paint has dried, we apply the 3D gel where we intended it to be. Let it dry.
17. After drying, coat with glassy varnish.
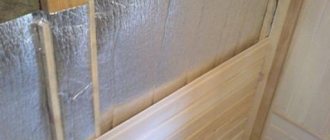
18. Screw the hinges onto the box. And glue the adhesive felt. Measuring each piece separately after gluing the previous piece. The adhesive felt is very difficult to tear off once glued. To glue the part well, you need to remove the protective paper only from the edge and glue it to the edge of the part, then gradually remove the paper and glue the felt. This way you get a good design for the inside of the box.
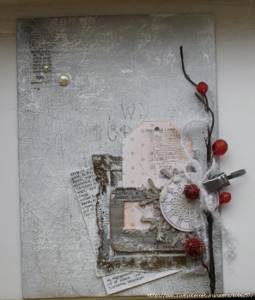
Well, now let’s admire the result of our work.
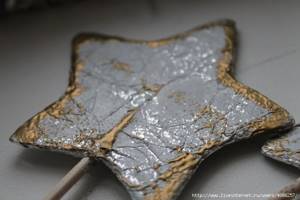
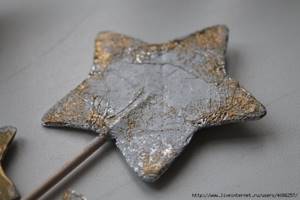
This box was made in a similar way.
I hope you find my master class useful.
Cleaning silver with baking soda and water
6. Silver polishing
Over time, silver darkens due to a chemical reaction that occurs when the silver comes into contact with sulfur from the air. Foil can reverse this process by turning silver sulfide into silver. For this you will also need baking soda and hot water.
Line the bottom of the pan with foil and place any silver item you want to clean on top of it. Pour hot (boiling) water with soda (1 glass of soda per 3.5-4 liters of water) into a frying pan. Cover the silver with water and wait until the tarnish disappears.
If the item is too large for the pan, you can use a larger bowl or pan.
LiveInternetLiveInternet
Quote from Rudenka's message
Read in full In your quotation book or community!
Foil background. Master Class
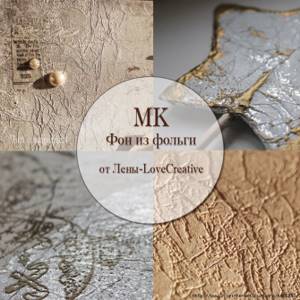
Effective work can be done even from ordinary food foil - the same one in which we bake various dishes.
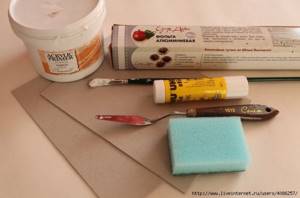
For this we need
foil, acrylic primer, glue and a regular dishwashing sponge.
I’ll make a reservation right away: it’s more convenient for me to use a glue stick; perhaps some of you prefer to glue on acrylic primer. In this case, a palette knife will help you...
First of all, coat the cardboard cover blanks with glue so thoroughly that there are no uncovered areas left. This is especially important if you plan to then use embossing (foil that is poorly glued to the base may cause bubbles to appear when exposed to a hair dryer).

Then we place the crumpled foil (we take a piece larger than the format of our cover) on a cardboard base and...
we begin to crush it. The main thing is not to overdo it, so as not to turn the future cover into a perfectly smooth mirror. Our goal is to make beautiful creases. First, I lightly crush the foil with my hand, then I go over it with a dish sponge - not with smoothing, sliding movements, but as if pressing the foil into the cardboard.
After we have processed the front side of the cover in this way, we turn the foil over to the back side. Don’t forget about the “edge”: so that the contours of the cover look clear and the foil does not “walk” along the edge, “we roll our cover edge-wise across the table on each side.
Turn the cover over and glue the foil to the cardboard base. Since the endpaper will subsequently be glued to this side, there is no need for creases here - we need as smooth a surface as possible, so we glue it with diligence, smoothing movements.
This is what the finished covers look like
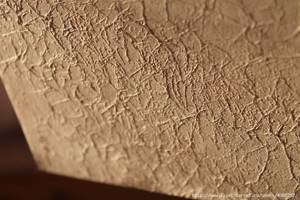
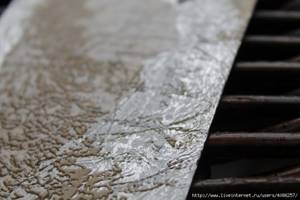
However, they are only half ready. Then the fun begins. We put acrylic primer on a sponge and rub it over the cover. Why do I rub it first... Because I prefer not a uniform dense white background, but with transitions from gray to white - this gives the background a more complex and interesting aged look. So, first we rub the soil over the surface with wide movements.
... and then we take the soil again and begin to treat individual areas of the surface with it using the “chpok-chpok” technique to make them lighter. If there is a lot of soil, you can get this interesting texture (see enlarged view)
If we need abrasions for greater effect, we turn the dish sponge over with the hard side and begin to scrape and scratch the surface
Then I use white embossing. From some angles the result looks like this:
This is ATSki - the “Old New Year” series. Here we used dark gold embossing powder to achieve the effect of old Soviet pictures:
And this is part of the decor that was made for New Year's photo projects. The same foil, primer, scuffs with a dish sponge and embossing with gold powder.
source
Rudenka
Scrapbooking Post Series:
Part 1 - Awesome Lantern - Paper Candle Holder!!! MasterClass Part 2 - Again the Original Lantern - Candlestick (from cardboard) + 5 Mk ... Part 12 - Delicate Beautiful Volumetric Postcards - Butterflies. Mk Part 13 - How to quickly and easily make “real wood” (imitation wood). Mk Part 14 - Background from Foils. Master Class Part 15 - New Year's Texture Tags. Interesting Fact. Mk
Which foil glue to choose and how to use
To make a brilliant Hollywood manicure, you need to choose a decorative material and glue for it. Special compositions have a strong hold, so they firmly hold the foil on the nails.
Global Fashion
Hypoallergenic gel adhesive for transfer-type foil. Global Fashion dries quickly and sets well. The glue is sold in 15 g tubes with a narrow or wide brush. Place foil on the dried product, press down, and then tear it off with a sharp movement. The design is imprinted onto the glue on the nail plates. Use topcoat to secure.
Rio Profi
The transparent product leaves a glossy finish on the surface. The special features of Pro glue for transfer foil are fast drying time, uniform distribution, and water-repellent properties. Complete polymerization of the composition occurs within 3 minutes. How to glue foil with glue: apply, wait a couple of minutes, attach the transfer fragment, align, sharply tear off from the plate, fix with topcoat.
Jina
Jina glue dries quickly and evenly and secures complex decorative elements well. You can dry the material without using a lamp. The product is sold in a compact jar with a brush and is inexpensive. Foil glue is used after applying colored varnish or shellac.
Kodi Professional
The standard volume of a glue bottle is 10 ml. The composition is hypoallergenic, after drying it forms a transparent coating on the nails. The design can be transferred to the entire nail or part of it. Before gluing, you need to wait 3 minutes for the product to exhibit adhesive properties.
Naomi Foil Glue
Manicure glue is convenient to use for casting techniques. Sufficient stickiness ensures reliable fixation of tear-off and transfer foil. You can treat your nails completely or partially. Naomi Foil Glue is sold in a 12 ml tube with a nylon brush.
Hongyi
The glue holds decorative decorations well, including rhinestones and applied tips. Suitable for mirror manicure with a transfer pattern. The product is released in a 16 ml tube with a thin brush. After application to the nails, the layer is dried without a UV lamp, the material is applied, the excess fragments are trimmed after 5 minutes, and the nails are covered with transparent varnish.
Star Gel Glue E.Co Nails
E.Co Nails adhesive gel with a sticky layer is available in a compact 10 ml bottle with a built-in brush. First, apply a gel polish base and dry it under a lamp. Then cover the nails with glue and polymerize for 60 seconds under LED lighting. The foil is torn off, the ends of the plates are sanded with a soft buffer, and a top coat is applied.
Jess Nail
Jess Nail transfer foil adhesive is also suitable for gluing tips, rhinestones, sparkles, and can be used to restore nail plates. To obtain the desired effect, it is recommended to use a base that matches the foil under the gel polish. Before applying the glue, you need to remove the sticky layer, let the composition dry for a minute, and print the design.
Art Star Glue
With glue from the manufacturer KaSi, you can create nail designs from transfer foil. Art Star Glue is sold in 16 ml bottles with a built-in brush. The design is transferred to the nails after applying the glue and the substance becomes transparent.
When decorating nails with foil, you need glue, gel polish or regular polish, a base and top coat, an orange stick or a pusher. The excess part of the material is cut off with nail scissors, filed down, and the edge of each plate is sealed.
Before applying the foil, you need to let the glue dry for 1-3 minutes. When the product becomes transparent, you can glue the decor.