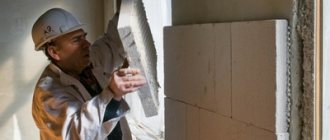
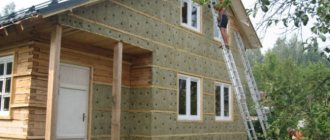
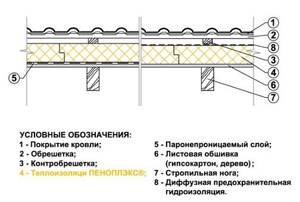
Penoplex ceiling insulation technology
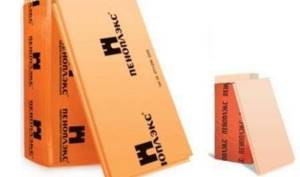
Penoplex has properties similar to polystyrene foam, but has a denser structure. This thermal insulation material is easy to install, has a relatively low cost and good insulating properties. We suggest you learn how to properly insulate a ceiling with penoplex. Knowing the technology for installing this material, you can carry out all the work yourself.
Advantages of penoplex for ceiling insulation
In comparison with foam plastic and other (similar in properties) insulating materials for ceilings, penoplex has its advantages. Penoplex does not collapse in a humid environment. The material is not susceptible to the spread of fungi, mold and harmful bacteria. Indoors, the slabs can be easily glued to the ceiling without preliminary finishing of the surface.
Penoplex allows you to create additional sound insulation in the room and easily tolerate temperature changes. It can be mounted on fragile foundations, as it is light weight and small thickness. The small thickness allows for minimal reduction in ceiling height. The slabs are fixed with simple tile adhesive. Penoplex, in addition to its advantages, also has its disadvantages. When burned, it melts and releases toxic substances. The material is quite fragile and breaks when pressure is applied to it.
Penoplex ceiling insulation technology
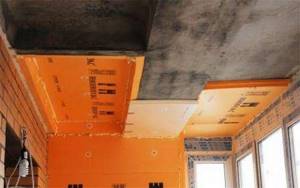
This insulation material has 2 installation methods. In the first case, penoplex is installed outside the room, and in the second option, the material is installed from the inside. When fastening externally, it is laid on the outside of the ceiling. Since the slabs have grooves and notches, they fit together quite tightly and easily. For better insulation, all joints and seams are filled with construction foam.
For internal insulation, the material is glued to the ceiling. The seams are foamed or sealed with sealant. When attaching penoplex from the outside, the material is laid on the ceiling. If such a surface is used frequently, logs are installed on top and the finishing flooring is installed. Penoplex is placed in the spaces between the joists. Gaps are sealed with sealant and foam. The flooring is laid on top of the logs.
When internally insulating the ceiling, one must not forget about high-quality ventilation. When installing external insulation, a small gap must be left under the flooring. In the internal version, insulation occurs in a similar way. The slabs are fixed to the surface and covered with finishing on top.
Watch the video: Do-it-yourself ceiling insulation
Penoplex can be immediately glued to concrete. Glue is applied to the slab in a continuous strip along the perimeter, with several glue blots placed in the middle. If it is impossible to use glue, you can use special mushroom dowels. In this case, holes are drilled in the insulation, and the dowel is screwed into the concrete, while the cap secures the slab.
If it is necessary to apply plaster, a special reinforcing mesh is glued onto the slabs. In addition to plaster, plasterboard or any types of panels can be attached to the surface of the slabs.
Penoplex is an almost universal material in its properties. For this reason, this material is increasingly gaining popularity when insulating houses. Knowing how to properly insulate a ceiling with penplex, you can significantly save on heating and keep your house or apartment warm. Use modern materials to carry out repairs yourself and make sure they are effective and inexpensive.
How to insulate a house is a pressing task for most homeowners. Most often, when carrying out this work, they try to place the largest amount of insulation on the floor and walls. However, judging by the results of repeated studies, about 20-25% of heat loss occurs through an uninsulated ceiling.
To minimize heat loss, it is enough to insulate the ceiling with penoplex. In addition, insulation helps reduce sound conductivity and improve vapor barrier.
Materials for attaching penoplex to the wall
In addition to insulation, adhesives and dowels, to install the slabs you will need polyurethane foam to fill the joints, a reinforcing mesh that is laid to cover the insulation, as well as foil tape to insulate the seams.
The tools you will need are a glue gun, a puncher for punching holes when installing on dowels, a knife, a drill, containers for preparing the solution, a spatula, and to control the perpendicularity of the seams you need a building level and a plumb line.
The list of fastening materials includes commonly used adhesives and hardware.
Mineral-based dry mixes
The main binder is Portland cement. To improve the qualities of the future glue, plasticizers and polymers are added to the sand-cement mixture. The advantage of the solutions is that they can be used on uneven surfaces.
Sequence of installation work:
- add water to the powder poured into the container and knead the solution using a drill attachment, avoiding the formation of air bubbles;
- wait 2 hours for the liquid to be completely absorbed by the mixture, repeat stirring;
- Apply the prepared solution onto the slab with a notched trowel, retreating 2 cm from the edges;
- install the insulation in its intended place and hold for 1-2 minutes.
Polyurethane-based adhesives
They are used for fastening insulation outside and inside the building; the compositions are used at temperatures ranging from -6...+30ºС. They set in light frosts and in conditions of high humidity in a time not exceeding 30 seconds, and completely harden in 15-30 minutes. Polyurethane adhesives are available in the form of a viscous liquid, ready for use.
- adhesive foam is applied with a mounting gun in straight or wavy lines along the perimeter of the slab and along the long side in the middle of the penoplex;
- the insulation is pressed against the concrete base for 30-40 seconds;
- The installation work continues after the slab is laid, after 2 hours: this is installing dowels and painting or plastering the front side of the structure.
Polyurethane glue is used by professional builders to carry out large volumes of building insulation. The price of the compounds is quite high. The need to use a mounting gun is another disadvantage. In addition, you need to remember that foam is toxic and burns well.
Liquid Nails
The adhesive is used for a smooth surface of a concrete wall. Its advantage is that there is no need to cover the entire area of the slab.
Available in tubes, applied using a gun in the following order:
- point portions are squeezed out along the perimeter of the penoplex and in the center;
- the plate is applied to the wall, then torn off and left for 10 minutes until the glue dries;
- The insulation is finally fixed to the wall by pressing and holding for 40-60 seconds.
Bitumen mastic
The traditional use of bitumen in construction is waterproofing the underground part of foundations. On its basis, mastics are made for gluing penoplex to concrete walls, which have water-repellent properties.
Installation of penoplex sheets is carried out after preparing the concrete surface:
- the cleaned wall is primed;
- the mastic is applied in a thin layer to the insulation boards with a spatula, another option for the foundation is to thickly coat the wall with a brush;
- penoplex is pressed against the concrete surface for up to 1 minute.
The disadvantage of bitumen glue is flammability at high temperatures and toxicity. If the insulation is installed indoors, air exchange must be ensured and measures must be taken to comply with fire safety rules. Mastic is sold in buckets ready for use. Foundations and plinths of buildings are objects for insulation and waterproofing using bitumen.
Disc dowels
In order to increase the strength of the adhesive connection of the slabs to the concrete, the insulation is additionally secured with dowels with a wide cap - mushrooms or umbrellas. Hardware has a number of advantages: the use of a washer allows you to increase the radius of coverage of the surface from 30 to 50 mm, the anchor structure of the polyamide rod can withstand a pull-out load of 100-150 kg, and is not susceptible to corrosion and rotting.
The procedure for strengthening the fastening of the insulating layer on the facade of the building:
- Points for drilling holes are marked. The diameter of the drill for a concrete wall is 10 mm. The depth is taken from the calculation: length of the dowel sleeve + 1-1.5 cm. For adjacent sheets, one hole drilled in the connecting seam is sufficient.
- Use a hammer drill or impact drill to make holes for umbrellas through the foam plastic in accordance with the markings. Drill cuttings are blown out with compressed air. The anchor must fit freely into the hole.
- Dowels are installed: the cap is pressed into the slab with a hammer so that it does not protrude beyond the plane of the insulation. A rod is inserted into the umbrella and hammered.
The penetration of the hole into concrete is ≥45 mm. The length of the dowel with an insulation thickness of 5 cm will be 95 mm. Before installation, the glued slabs must stand for at least 3 days. After completing the installation work, the wall surface is prepared for finishing: dents and voids are filled with adhesive using a spatula.
How can you insulate the ceiling?
When insulating the ceiling surface, various materials are used, the most common of which are:
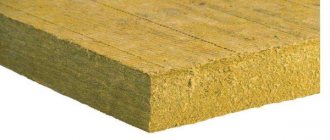
- various types of mineral wool are inorganic fibers, harmless and extremely cheap. The disadvantage of this material is its hygroscopicity - at high humidity, the benefit of insulation becomes minimal;
- polystyrene foam is far from a cheap material. Its disadvantages are flammability and price; also, some sources claim that foam insulation can harm the health of the residents of the house. The advantages of the material are that it does not require additional vapor and waterproofing.
Despite the disadvantages, polystyrene foam is still in great demand and is used many times more often than mineral wool. If you doubt whether it is possible to insulate the ceiling with foam plastic, then the answer is absolutely clear: of course, it is possible.
Properties and differences between polystyrene foam and penoplex
Penoplex and foam plastic are made from polystyrene, but using different technologies.
Polystyrene foam is essentially foamed polystyrene, that is, slabs with sintered, gas-filled granules. They have micropores and voids between them. The more compressed the granules are, the lower the material’s moisture absorption and vapor permeability, and the higher the quality.
Penoplex is produced by extrusion using high pressure and temperature technologies. The result is a dense material with closed pores and a uniform structure.
How to calculate the required amount of material
Before you start insulating the ceiling with polystyrene foam, you need to calculate the amount of material. The calculation is made using the simplest formula for calculating the area - the length of the ceiling is multiplied by the width, and the result is the required quantity. There are many types of penoplex of various thicknesses on sale - from 2 to 10 cm. For insulation, it is advisable to choose one with a thickness of at least 5 cm.
For installation you will need cement-based adhesive or special adhesive for foam plastic. The amount of glue is calculated based on the proportions indicated by the manufacturer on the packaging.
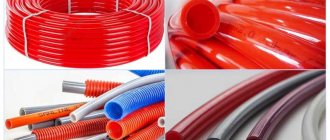
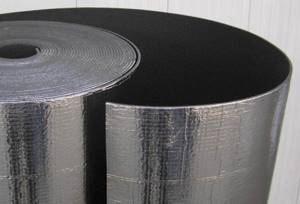
Floor insulation with penofol
Penofol looks like a layer cake. Foamed polyethylene is covered with pure aluminum foil. Available for sale in large rolls. The penofol sheet has a thickness of three to ten millimeters. It retains heat perfectly, provides high-quality sound insulation, and is safe for the environment of the home.
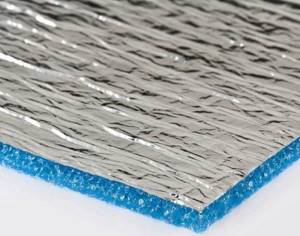
Foil penofol is an easy-to-work material
The effectiveness of penofol is based on the reflection of thermal radiation. This is how heat is retained indoors. This is due to high quality aluminum foil. Here its properties are close to those of precious metals.
I distinguish between penofol with two and with one layer of foil. In addition, there is self-adhesive penofol.
Penofol is susceptible to moisture. However, it is not capable of absorbing moisture on its own.
Penofol does not support combustion
The disadvantages of the material include low rigidity, which can create additional difficulties when working with it.
Attaching penofol may also require additional effort. Punch-out fasteners cannot be used, because this will lead to deterioration of properties. All that remains is special glue, which will also have to be purchased.
To work with vertical and inclined surfaces, it is advisable to use self-adhesive penofol.
Recommended for use as additional insulation. Serves no more than 5 years.
How to install insulation on the ceiling
To insulate the ceiling with foam plastic, you will need some tools:
- wooden slats or aluminum profile;
- polystyrene foam (or penoplex);
- dowels;
- knife and hacksaw;
- polyurethane foam;
- glassine (or similar waterproofing material);
- metal screws;
- hammer;
- drywall;
- glue.
Ceiling insulation is carried out in two ways:
- frame ceiling insulation with foam plastic;
- adhesive ceiling insulation with polystyrene foam.
Frame insulation involves creating a frame from slats or a profile. A frame made of aluminum profiles is preferable because it gives the ceiling additional rigidity. This allows you to lay the power supply system inside the frame and place lighting fixtures without difficulty.
Installation is carried out exclusively on a prepared surface. All irregularities must be leveled, puttied, and the surface of the ceiling covering must be treated with a primer. The frame is created by the transverse and longitudinal arrangement of profiles, which are attached to each other and to the ceiling with screws or nails.
Foam plastic is placed in the resulting cells. It must be cut strictly according to the cell size; it does not shrink and does not deform over time. This property allows you to insulate any ceiling surfaces. Penoplex is either glued with specialized glue or attached with screws. Then, which is the most important condition for obtaining the best effect of sound insulation and insulation, all the gaps between the frame and layers of material are tightly filled with polyurethane foam.
The final stage of ceiling insulation is covering the frame with plasterboard. Afterwards all that remains is to complete the finishing work on the ceiling.
Foam ceiling insulation technology
If you are somewhat strapped for funds or simply do not want to bother with creating a frame, then use the method of insulating the ceiling with foam plastic by simply gluing the material. The proprietary adhesive mixture is quite expensive, but it can be successfully replaced with ordinary putty or tile adhesive.
Before proceeding with gluing, it is necessary to prepare the surface, as in the case of frame insulation. At the same time, if the ceiling canvas is covered with whitewash, which is almost impossible to completely remove, you can simply coat it with an adhesive mixture and wait until it dries. In this case, the foam will stick perfectly.
Pasting is carried out in the following order:
- the ceiling canvas is being prepared;
- An adhesive mixture is applied to the insulation sheets;
- the foam is pressed against the ceiling;
- hold for several minutes for best adhesion;
- The gaps between the sheets are properly coated with the adhesive mixture.
There is also a little trick: for better adhesion, you can use dowels with a large head, with which the penoplex is screwed to the surface.
After the surface has dried, it is worth reinforcing it with a special solution in which a fiberglass mesh is embedded. The second layer of solution is applied only to the completely dried first one.
Insulating the ceiling with foam plastic will not only help keep the room warm, but will also significantly reduce the level of incoming noise. In addition, it will be possible to perform various finishing works that were impossible on a whitewashed ceiling surface.
https://youtube.com/watch?v=_fga-mBSyUo
A person wants to live comfortably both in the city and in the countryside. A material with unique properties – penoplex – will help him with this.
It is perfect for insulating the ceilings of city balconies and loggias, and in private houses - verandas and living rooms.
Penoplex is made from extruded polystyrene foam. This material has remarkable chemical and physical properties that allow it to outperform other construction insulation materials in terms of quality, reliability and efficiency.
How to glue penoplex to the ceiling
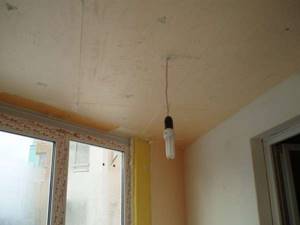
In a private house, high-quality ceiling insulation helps to significantly save on energy, both in winter during heating and in summer when air-conditioning residential premises . The peculiarity of a private building is that the ceilings are in direct contact with the attic space, where the temperature differs only slightly from that in the external environment. Therefore, the lion's share of heat loss occurs through an uninsulated ceiling (up to 20-25%), which is not able to isolate living rooms from the space above them.
We recommend that you read: How to glue penofol to penoplex?
Typically, thermal insulation materials have the ability to be a barrier to sound waves, therefore, while improving the heat-saving properties of ceilings, their noise-insulating characteristics are simultaneously enhanced. Therefore, by choosing the right insulation, you can not only ensure a comfortable temperature in the house, but also protect your living space from street noise.
Among the heat-insulating materials used in construction, foamed (extruded) polystyrene foam, often called penoplex among consumers, is in increasing demand. This material is used, among other things, for thermal insulation of ceilings in private residential buildings. Therefore, it is worth considering the properties of extruded polystyrene foam, as well as existing methods of insulating ceilings with it.
Performance characteristics of penoplex
Foamed polystyrene has recently become widely used as a means of thermal insulation in construction. At first, it was mainly used where there was a heavy load on the insulated surface or exposure to moisture, namely for insulating floors and plinths. And all because penoplex is the most durable of the widely used materials for thermal insulation and, moreover, is not at all afraid of moisture.
Now extruded polystyrene foam (EPS) is increasingly being used to insulate other surfaces: walls, ceilings, roofs. This is due to the fact that penoplex, being an effective insulation material, is very convenient to use, which attracts both professional craftsmen and those who repair and insulate their homes on their own. In addition, EPS has some other positive qualities, thanks to which many people prefer to make thermal insulation using this material, namely:
- foamed polystyrene is not a flammable substance, so it is preferable in terms of fire safety to some other polymer thermal insulation products;
- EPS does not emit toxic products, which allows it to be used not only for external, but also for internal insulation of residential premises;
- the material is hydrophobic, so getting wet does not affect its ability to retain heat;
- extruded polystyrene foam demonstrates good soundproofing qualities.
The resistance to moisture of penoplex allows you to avoid making moisture-protective barriers from film, which, firstly, facilitates the process of arranging a thermal insulation layer, and secondly, it somewhat reduces the cost of thermal insulation. The rigidity of the material makes it possible to level the surface for subsequent finishing layers using the “wet” method of thermal insulation.
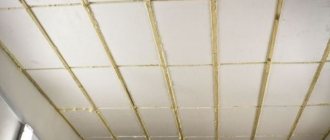
When insulating ceilings, EPS can be used both from the attic and from the inside of the house. Moreover, when using extruded polystyrene foam for internal insulation of ceilings, it is placed under the lathing, followed by sheathing with plasterboard, or attached for further plastering. Next, we will consider all three methods of thermal insulation of the ceiling using foam polystyrene in a private house.
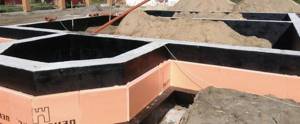
Insulation of the ceiling surface with extruded polystyrene foam from the attic side
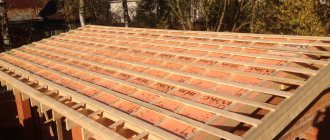
The advantage of this method is that the internal volume of the living space is not used and, moreover, a hard flooring is formed in the attic on which you can walk.
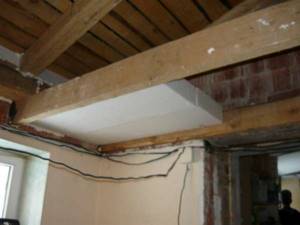
Penoplex in this case is laid in the gaps between the load-bearing beams of the ceiling (if it is made of wood). It is advisable to use sheets with a thickness of 100 mm, which will not only provide excellent thermal insulation and protection from external noise, but will also create a level platform for walking in the attic, since the height of the beams is usually of this size.
Foamed polystyrene sheets usually have edges on the long part of the rectangle, which overlap during installation, thereby avoiding the formation of gaps. The gaps between the insulation and the floor beams are filled with polyurethane foam for sealing. The result is a continuous thermal insulation layer without cold bridges.
If a reinforced concrete slab is installed as a ceiling, EPS is laid solidly, with the sheets in each row offset to avoid long longitudinal seams. The gaps after laying the insulation sheets must also be filled with construction polyurethane foam.
Installation of penoplex on the ceiling from the inside under plaster
This method of installing insulation is best used when the ceiling is made of a reinforced concrete slab with small differences in the horizontal level. In this case, the following operating steps are performed.
- The surface is cleaned of possible dirt and dust and treated with a primer, which must be allowed to dry.
- A special adhesive is being prepared for the installation of extruded polystyrene foam; the proportions of water and dry mixture are indicated by the manufacturer on the packaging. For mixing, use a low-speed drill with a mixer attachment.
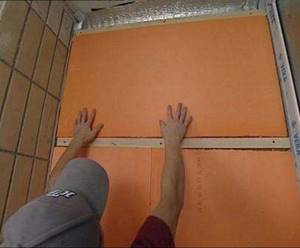
- Penoplex sheets are glued to the ceiling under horizontal control.
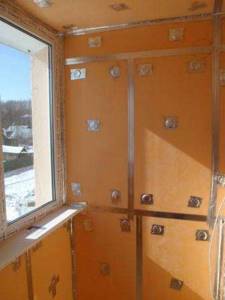
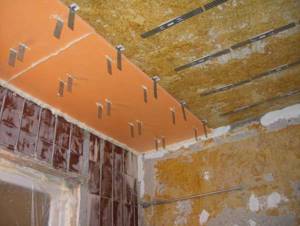
- After crystallization of the glue, which takes about a day on average, the extruded polystyrene foam slabs must be pulled to the reinforced concrete floor slab using special dowels (umbrellas) with a plastic nail.
- The surface is leveled with plaster mortar using reinforcing fiberglass mesh. Next, another thin layer of plaster is laid, after which the finishing is done.
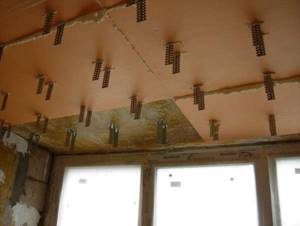
How to attach penoplex under plasterboard sheathing
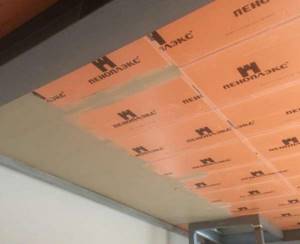
EPS sheets are attached to the ceiling at the intermediate stage of assembling the frame from profiles. This is best done after fixing the U-shaped hangers. Sheets of heat-insulating boards are attached using umbrella-shaped dowels; in this case there is no need to use glue. In order for the perforated suspension plates to pass through the thickness of the insulating board, a slot must be made in the appropriate place. All cracks and inconsistencies must be filled with mounting foam, after which has dried, you can continue assembling the frame for the subsequent installation of plasterboard sheets.
If the ceiling is made of wooden boards, dowels are not suitable for fixing the insulation. In this case, you can cut off the cap from them with a construction knife, put it on a wood screw and use it to attach foam boards.
What are the benefits of penoplex?
Penoplex is used for thermal insulation not only of roofs, but also of floors, walls, and foundations of houses. It will protect your home from overly noisy neighbors; good sound insulation is also one of the important qualities of this irreplaceable building material.
The beneficial properties of penoplex also include:
- Its environmental friendliness. Does not contain hazardous resins and fibers that are released from some building materials during operation. Does not harm the health of household members, made from quality ingredients.
- Penoplex does not allow steam to pass through and does not absorb water. Accordingly, condensation does not form on its plates.
- Does not enter into a chemical reaction with the environment. Mold, rot, and stains do not appear on the material.
- Withstands heavy loads due to its high density.
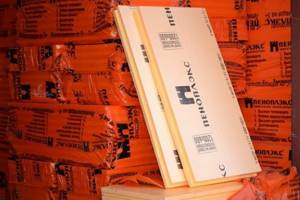
- Easy to install. Even a non-professional builder can cope with it. You can install penoplex very quickly, thanks to the presence of a special protrusion on its slabs.
- Easily adheres to finishing materials. This quality of insulation is provided by a rough surface.
- Does not weigh down the overall structure. Has a low specific gravity.
- Durable. Retains thermal insulation properties for almost 50 years.
- Does not require special weather conditions for installation. Neither rain, nor slush, nor heat, nor cold will affect the quality of laying penoplex. This property will be appreciated by any owner: a city dweller - when insulating a loggia, a villager - when thermally insulating a house.
You can read more about the types of penoplex and its technical characteristics in this article.
Good windows and doors that do not let in the wind from the street will increase the protection of your home from cold, frost, and temperature changes.
Features of the material
Penoplex is an extruded polystyrene foam - insulation produced using a special technology, thanks to which the output is a material with improved strength properties. You can read about the characteristics and advantages of EPS in the article “Step-by-step instructions for thermal insulation of a log house with polystyrene foam.”
Insulation characteristics
- Water absorption. The material shows minimum values for the volume of absorbed liquid. In this case, water, if it penetrates, then only into the upper layers, inside the structure consisting of closed cells, the access of liquid is completely closed;
- thermal conductivity. The performance of penoplex is very low - 0.03 W/m-K, and the values remain unchanged, regardless of operating conditions. Therefore, the material can be used for thermal insulation of the roof, foundation, basement, as well as floors and basements;
- environmental friendliness. The insulation meets environmental standards, which is confirmed by relevant certificates;
- vapor permeability. This indicator also has low values. The material does not allow steam to pass through itself, which on the one hand can be called a positive property, since condensation does not accumulate in the insulation, which, at critical values, transfers to wooden walls and causes rotting. But on the other hand, the material does not allow the wood to breathe, which contributes to the creation of a greenhouse effect in the room;
- strength. As a result of using the extrusion method, a homogeneous material consisting of tiny cells is obtained. This structure provides high compressive strength;
- chemical resistance. The insulation interacts well with a large number of substances used in construction: alcohol- and water-based paints, acids, alkalis, oils, concrete mixtures, etc.;
- life time. The material retains its properties for 50 years;
- fire safety. Penoplex has a flammability class of G4, which indicates a fairly high degree of flammability. Therefore, when using the material, it is necessary to use fire retardants;
- operating temperatures: from -50 to + 75 degrees.
Types of Penoplex
The manufacturer produces several types of penoplex, which have different densities and differ in some technical characteristics. The following types are intended for insulation of houses made of timber and logs:
- Thermal insulation boards for insulation of external and internal vertical structures: walls and partitions. The insulation has a milled surface, which improves adhesion to adhesive and plaster solutions. Density 22 kg/m3.
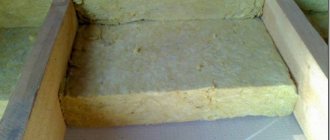
- Universal insulation of the “Comfort” series. Suitable for finishing floors, including on the ground, plinth, foundation, roof, walls. The material can withstand high humidity well, so it can be used for thermal insulation of bathrooms, bathhouses and saunas. Density from 22 kg/m3.
- Thermal insulator for pitched roofs. The material has a U-shaped edge on all sides, thanks to which the plates fit comfortably and easily. As a result, a flat surface is created, due to which the thickness of the thermal insulation is significantly reduced. Density 26-34 kg/m3;
- Foundation cladding slabs. The material is characterized by increased strength and wear resistance and can withstand increased loads. Used to insulate foundations, floors, and basements. Excellent for finishing garden paths. Density 27-35 kg/m3.
What is required for installation
Installation of penoplex is carried out in four stages:
- The instrument is being prepared.
- Consumables are purchased.
- The surface is cleaned.
- The slabs are glued to the ceiling or to the floor.
In order to cover the ceiling of a loggia or balcony with penoplex in a city apartment, or in a room in a private wooden house, you will need:
Before starting work you need to stock up on:
- special fastening tools - fungi;
- foam for installation;
- primer with antifungal properties;
- dry glue.
Now you can proceed to installing the penoplex on the ceiling.
You can also use Penoplex Osnova insulation to insulate the ceiling; read more here.
Use of foam plastic in work
How to apply liquid wallpaper with your own hands in the interior? 93 photos, tips and application ideas
Insulating the ceiling in a private house from the inside with polystyrene foam is used quite often. But it has disadvantages:
- Formaldehydes are released into the air;
- Rodents may appear;
- The upper part of the room will not breathe;
- Lights up when a fire occurs.
Installation stages
- There are two installation methods: glue and frame.
- Measurements are taken of the width and length of the ceiling.
- Thermal insulation material is purchased.
- The old covering is removed from the ceiling.
- The surface must be treated with an antiseptic.
- Afterwards it is primed.
- Now either the slabs are glued to the ceiling, or a frame is made and the blocks are placed in the cells.
- With the adhesive method, the slabs are additionally secured with dowels.
- All cracks are filled with polyurethane foam.
- Reinforcement of the surface is done.
- The entire upper surface of the room is sewn up.
Penoplex installation
After the base for the penoplex is ready, we proceed to its installation. First of all, you need to decide on the method of thermal insulation.
You will have to choose from two options: install from the attic side, or make thermal insulation from the inside of the room.
Installation from the attic is carried out as follows:
- The attic floor is thoroughly and carefully cleaned of dirt and debris and, if necessary, leveled.
- Dry glue is applied to the foam boards, after which they are laid on the attic floor in dense rows to each other.
- After the glue has dried and the slabs are attached to the attic floor, the gaps between the laid material are sealed with polyurethane foam. It takes a day for the resulting structure to dry thoroughly.
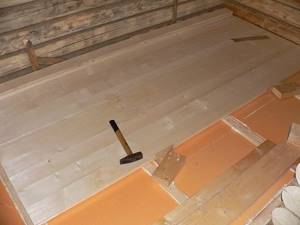
- Excess foam is carefully cut off. A floor made of boards is laid on top of the foam boards.
Installation from the side of the room (loggia, balcony) is done as follows:
- The ceiling, cleared of dirt and debris (leveled, with cracks and potholes sealed), is treated with a primer.
- Dry glue is applied to the foam boards, then they are attached to the ceiling.
- Use a hammer drill (very carefully!) to drill holes for the fungi.
- Fungi are driven into the holes made by the puncher. They are necessary to ensure that the structure rests securely on the ceiling.
- At the joints and in the gaps, foam boards are filled with polyurethane foam. When it dries, the excess is carefully trimmed off.
- Now the reinforcing mesh is attached. For this, a rough adhesive mixture is used.
- The surface of the ceiling is cleaned and treated with a primer.
- A fine finish is applied.
- The final touch is a decorative coating or paint.
Ceiling insulation is complete.
Advantages of thermal insulation from the attic:
- the usable area of the room is preserved;
- ceilings will not become lower after installing penoplex;
- additional work in the attic is carried out, as when laying a floor.
How to insulate a balcony with your own hands (Photo)
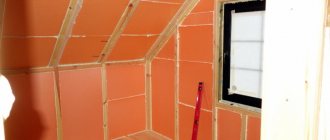
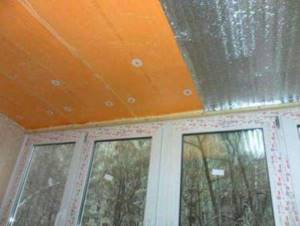
Look at step-by-step photos of each stage of balcony insulation. This is what the finished sheathing looks like. Notice that at a height of 1.2 meters from the floor, there are two bars. The bottom one is for attaching the first sheet of drywall, the next one is for the second sheet of plasterboard. Try to fit the foam sheets tightly to the cells of the sheathing, avoiding large gaps. If there are still gaps, you should foam them with polyurethane foam, and cut off the excess with a paper cutter. Don’t forget about the places under the window sill. All cracks must be filled to avoid cold bridges. We lay penofol and fasten it to the sheathing with a stapler. We glue the joints of two sheets of penofol with tape
Important! Penofol is attached with the foil side to you! The final stage is the installation of drywall sheets
As you can see, the technology for insulating a balcony from the inside is quite simple, the implementation of which you can easily cope with. Following all the recommendations in this article will allow you to properly insulate your balcony and make it more comfortable and functional.
Penoplex - a modern solution for room insulation
Penoplex is a convenient, practical material that retains its valuable properties for several decades. Plates made from it are easy to install. Even an owner inexperienced in construction will be able to cope with this task.
The results of penoplex insulation are excellent, especially if the thermal insulation is carried out simultaneously with the insulation of floors, walls, and the replacement of windows and doors.
Try penoplex, and you will see for yourself!
How to insulate the ceiling from the attic side, watch the video:
Modern home improvement systems allow you to make it warmer and more economical for heating in several ways.
One of the effective ways to achieve this is to insulate the ceiling with penoplex to insulate the room from external temperatures along the entire perimeter, and not just the floor, windows, doors and walls.
This is a universal material, so you can simultaneously insulate the entire room with its help.
You have two options: order the work from a professional repair and construction team, or cope with the process alone.
The simplicity and lightness of the material allows installation by just one person.
The advantage of insulating the ceiling is that heat does not escape through it, and in hot weather, this layer acts as thermal insulation, preventing the room from heating up too much.
That’s why penoplex is also used to insulate the attic, namely the inside of the roof. The advantage is the fairly low cost of the material.
This allows you to not spend too much on insulating the room, and subsequently save significantly on heating bills.
Penoplex insulation: how to glue, cut, fasten, paint penoplex
The current cost of heating forces home owners to look for various ways to save money. One of the best ways is to insulate the room using penoplex. The installation technology is quite simple; for this you need to have minimal construction skills. Penoplex insulation is an excellent solution.
Product
general description
This material is otherwise called extruded polystyrene foam. The way to obtain an insulating product is by foaming polystyrene foam, and then pressing it through an extruder. Gradually, the gas displaces air (95%).
In the finished mass there are many small voids that are evenly distributed. At the end of production, a material is produced that is lightweight and durable.
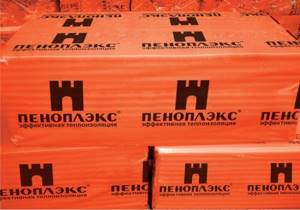
The package includes 8 pieces, and the total weight is 15 kilograms.
There are several types of this heat insulator. The name of each variety characterizes the area of application. For example, in order to thermally insulate walls made of concrete or brick, a material called “Penoplex Wall” is used.
The heat capacity of this thermal insulator, which has a thickness of 100 millimeters, is equal to the heat capacity of a one-and-a-half brick. The insulation material has a high level of resistance to alkalis and acids. This suggests that it can be plastered.
Painting can be carried out using water-based solutions.
Advantages:
- Small mass of slabs.
- High level of strength.
- It is allowed to use and install the product where the humidity level is high.
- The heat insulator is environmentally friendly and contains no chemical elements. You can without a doubt insulate a children's room.
- Insulation together with penoplex is carried out from the inside and outside. Also areas of application are floors, ceilings and much more. The surface of the blind area is also insulated with penoplex.
- Wide range of material thickness depending on needs (20-100 millimeters).
The downside is the cost.
Carrying out preparatory procedures
At the very beginning, you need to get rid of the old layer of paint, wallpaper and putty. If the old layer has excellent adhesion to the surface, then it does not need to be eliminated.
Next, level the surface; this can be done using putty. Cover all bumps and depressions. This must be done, because if you install penoplex, they will break over time.
The maximum error is one and a half centimeters per linear meter.
It is necessary to prime the unplastered surface. Metal structures that will be covered with a heat insulator need to be painted. You can coat it with an anti-corrosion mixture.
Before starting the procedures, you need to hammer in the brackets for mounting drains, air conditioners, distribution boxes, and so on.
Plates of insulation material are rolled using a needle roller.
What should I use to glue penoplex?
When choosing a particular adhesive for fastening, it is necessary to take into account the composition and chemical properties of the heat-insulating product.
The most effective adhesives are:
- Atlas Stopter K-20. This material has a high level of quality, so it is very often used for gluing slabs. The adhesive composition is used to restore facades. The product is also used for reinforcement. Has a high level of resistance to low temperatures and humidity. Significantly saves money.
Atlas Stopter K-20
Main article: how and with what to paint polystyrene foam?
- Atlas Plus. It is a universal adhesive. The main distinctive features of this product are elasticity, as well as excellent adhesion (adhesion to the surface). You can use glue on a wet surface.
- Mineral glue. You can find quite a lot of similar compositions on the construction market; among others, “Sarmat” stands out, which has a reasonable price.
- Polyurethane adhesive composition "Titan". The mixture does an excellent job of installing polystyrene foam boards. The composition has a fairly high price on the market.
Titanium
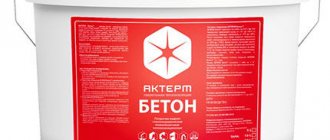
- Compositions intended for waterproofing. A popular product is one that is widely used among builders and installation workers. One such material is bitumen mastic.
- Glue "Moment". This is a composite composition. Also often used for working with foam boards.
When choosing an adhesive, it is necessary to take into account that it should not contain some components in its composition. Such components include benzene, formaldehyde, formaldehyde, diesel fuel, and solvents.
When purchasing an adhesive composition, you need to take into account the stock. The base is not always smooth, so the consumption of the product becomes significantly greater. Choose a high-quality product to ensure excellent fastening of the plates to each other.
What is the best way to cut penoplex?
During various procedures, the insulating product must be divided into certain parts that have certain dimensions. If the material simply breaks, you will get uneven edges, and it is not possible to achieve the exact size.
Based on the above, we can conclude that the best solution is cutting. You can use various tools:
- Using a utility knife. The advantages of using this tool: accessibility, no noise, speed of the process. The sharper the tool, the higher the cutting quality.
Source: https://ZnatokTepla.ru/utepliteli/uteplenie-penopleksom.html
What kind of material is this?
Today there are many materials used for insulation. It is not natural ones that are considered less expensive, but those that are produced artificially by chemical means.
The most popular of the latter on the market right now is polymer. This material is obtained by foaming extruded polystyrene, a very versatile material that is used throughout various branches of human activity.
The output is sheets of material that are ideal for insulation and thermal insulation purposes.
Its properties are somewhat similar to those of polystyrene foam, but penoplex is very different due to its higher density.
With its help, you can create practical and very durable thermal insulation, in addition to which heat will not only be retained, but also accumulate.
What is penoplex?
The market for polymer materials that are used for insulating rooms is overflowing with a wide variety of options. The assortment can confuse not only beginners, but also professionals. Experienced experts recommend giving preference to penoplex over other insulation. The reason for this is the excellent physical and chemical properties that are made from extruded polystyrene foam (EPS), it is one of the most versatile materials used in a variety of industries. But penoplex has found its widest use in insulating buildings, from the foundation to the roof.
When insulating EPS, you can obtain a number of properties that are not available when using other types of insulation. Among them are:
- Environmentally friendly material;
- Due to the presence of small pores, penoplex acquires low water absorption and at the same time vapor permeability remains at a normal acceptable level;
Agree, not every finishing polymer material can boast such excellent properties. At the same time, penoplex does not weigh down the structure due to its low specific gravity. Thanks to the small pore sizes, excellent thermal and sound insulation performance can be achieved with a small thickness. When insulating the loggia ceiling with penoplex, you can pay attention to a number of positive qualities. They are:
- ease of installation;
- you can do everything yourself without much difficulty;
- due to the lack of influence of weather conditions on the characteristics of this type of polystyrene, its installation is carried out under any circumstances.
Advantages of penoplex as insulation
Unique properties of penoplex, which are absent in the complex of other insulation materials:
- It is an environmentally friendly product: its production does not use hazardous substances and does not emit harmful waste, because its ingredients are not dangerous;
- It has very small pores, so it does not absorb moisture well. This is an important criterion for insulation: if it constantly absorbs and accumulates moisture, dampness will form, mold will form, and the surface may collapse. At the same time, pores of this size allow steam to pass through well - a mandatory safety criterion;
- This material is very resistant to the formation of mold in it and on its surface, the development of fungus and rot - this is due to poor interaction with the environment;
- It has such a high density that under normal conditions it can withstand heavy loads. This makes it universal; you can also insulate walls and floors with it at once;
- Each slab has special gaps for interconnection: this greatly simplifies the task of working under the ceiling in an awkward position and makes it resistant to collapse;
- The surface is very rough - this means that the adhesion of the plaster will be excellent, and this is very important for working on the ceiling.
Let's watch the video:
How to insulate a wooden floor with penoplex - step-by-step instructions
Penoplex is the latest generation material. This is a foamed polymer produced by extrusion. It has low thermal conductivity due to its durable structure with a large number of cells.
Penoplex is produced in slabs, the thickness of the slab is from two to 10 centimeters. Outwardly, it strongly resembles polystyrene foam. Does not increase the weight of the structure.
Does not absorb moisture. Foamed polystyrene is not affected by fungi and rotting processes.
It should be noted that the thermal conductivity of penoplex is 25 times lower than the thermal conductivity of expanded clay concrete. This factor significantly increases the insulating characteristics.
Penoplex density is 22 t/m
Therefore, the material is mechanically strong and does not require a frame to work with it.
If necessary, this thermal insulation material can be used to install “warm floors” (electric and water type). Penoplex is fire resistant.
The cost of penoplex is slightly higher than the cost of other insulation materials, but it easily pays for itself in the cold season.
Let's figure out how to act correctly when carrying out insulation work.
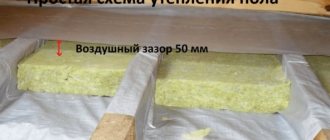
The most convenient way to place expanded polystyrene foam is to alternate with logs and lay the floor covering on top of them.
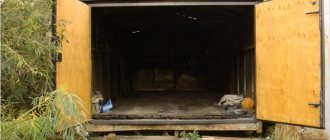
Where is it usually used?
There are two options for working with penoplex and ceilings: internal use for rooms (residential and non-residential premises) and use as a material for insulating the attic ceiling in a private house.
For both types of work, this is an ideal option due to the characteristics listed above.
In addition, it can be used in combination to insulate the entire room as a whole - both walls and floors.

A complex order of one type of material often allows you to save on the total cost of the order. delivery and work.
In addition, if you install such insulation as the main one in the room yourself, it will be easier and faster for you to complete the entire scale of work once you understand the technology.
Carrying out work
At the moment, there are two options for thermal insulation of the ceiling with polymer:
- thermal insulation from the attic;
- thermal insulation on the inside.
Isolation using the first method is significantly better than the second. The fact is that there is no need to “steal” the useful volume of the room, and the time and effort required is significantly less. Additionally, all work is carried out as if it were a floor in the room.
Execution of work
As a rule, it is possible to insulate the ceiling with penoplex without involving a professional team. You need to start from one edge and move gradually towards the exit.
Each slab can be easily mounted close to another using a special L-shaped joint. However, in order for the installation to be successful and not take longer than required, it is necessary to prepare special additional materials and tools in advance.
Prepare yourself with this list:
- Penoplex sheets calculated for the ceiling area with a small margin;
- Level - electronic or mechanical;
- Hammer and drill set;
- A sharp knife, it is better to take a construction or office knife with replaceable blades;
- Not too heavy a hammer;
- Stirrups. stand or ladder to work under the ceiling at a comfortable height.
Preparatory work
In order for a ceiling insulated with penoplex to hold normally and not fall off, it is necessary to carefully prepare the surface for installation.
Especially when you glue it to a special construction mixture.
It is necessary to clean the surface from dust and debris. Then, apply one or two coats of primer. After that, you can start working.
You need to stock up on the following additional materials:
- The mixture with which you will install the layers;
- Dry glue;
- The mixture that will be used to pass through the already installed ceiling;
- Polyurethane foam, which must be used to seal all remaining cracks and seams;
- Fastening tools.
Mounting on polyurethane foam
To work with this composition, it is advisable to use a special gun and do not forget to use a rinse after use. Each container must be shaken well before inserting into the gun. The foam is applied in a thick strip along the entire perimeter of the slab, as well as diagonally. After this, press the slab towards the ceiling and wait until it sets. In order to fix it evenly to the concrete ceiling, use a level, with which you can save yourself the hassle of finishing the surface.