Insulating a house, especially an old one, is always a hot topic. This is especially important in our time, when energy resources are rising in price every day. When carrying out thermal insulation, you need to take into account that this is a complex undertaking. The maximum effect can be achieved only by thermally insulating the floor, walls and ceiling. And not only heat insulation, but also sound insulation depends on quality work. Experts unanimously say that insulating the ceiling with penoplex can significantly increase the comfort of living. But, unfortunately, most people do not attach much importance to this, which ultimately leads to disappointment after the procedures. Today we will talk about the thermal insulation procedure using this material. But first, let’s figure out what it is and why it is advisable to choose it when carrying out this procedure.
What is penoplex?
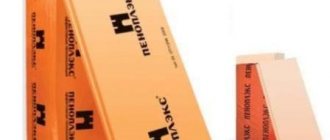
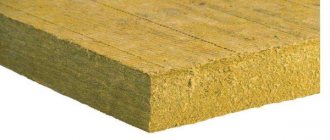
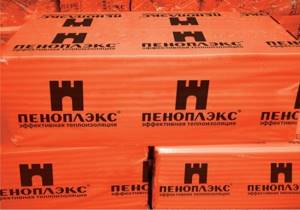
The market for polymer materials that are used for insulating rooms is overflowing with a wide variety of options. The assortment can confuse not only beginners, but also professionals. Experienced experts recommend giving preference to penoplex over other insulation. The reason for this is the excellent physical and chemical properties that are made from extruded polystyrene foam (EPS), it is one of the most versatile materials used in a variety of industries. But penoplex has found its widest use in insulating buildings, from the foundation to the roof.
When insulating EPS, you can obtain a number of properties that are not available when using other types of insulation. Among them are:
- Environmentally friendly material;
- Due to the presence of small pores, penoplex acquires low water absorption and at the same time vapor permeability remains at a normal acceptable level;
Agree, not every finishing polymer material can boast such excellent properties. At the same time, penoplex does not weigh down the structure due to its low specific gravity. Thanks to the small pore sizes, excellent thermal and sound insulation performance can be achieved with a small thickness. When insulating the loggia ceiling with penoplex, you can pay attention to a number of positive qualities. They are:
- ease of installation;
- you can do everything yourself without much difficulty;
- due to the lack of influence of weather conditions on the characteristics of this type of polystyrene, its installation is carried out under any circumstances.
Reviews of sound insulation made of polystyrene foam
Buyers who have tried Penoplex in action note the light weight but large volume of the panels. The mats take up a lot of space in the room, but are easy to cut and, if desired, quickly transported to the next room. If soundproofing is installed correctly, your home can be finished in one day. The work does not require special tools or special skills; all steps can be easily completed with your own hands.
According to reviews of Penoplex sound insulation, the material does an excellent job of thermal insulation of floors. It is a good layer between other layers, together with them forming an impeccable coating that completely retains heat in the house. Carpets, runners, and other coverings are no longer needed, since the floors are warm and your feet do not freeze when in contact with them.
Preparation for installation
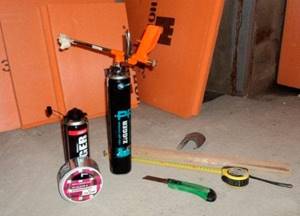
To successfully install EPS on the ceiling, you must prepare tools, consumables and the surface. This will make it possible to carry out thermal insulation in one go, without stopping. So, for this you will need:
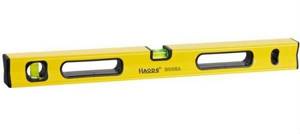
- level;
- perforator;
- stationery or construction knife;
- hammer;
- ladder.
As for preparing the base, it must initially be cleaned of all debris and dirt. In this case, it is advisable to level the ceiling so that the slabs lie without curvature or gaps. This work can be done using plaster. All holes, cracks and potholes are sealed with putty.
To perform the installation yourself, you will need the following materials:
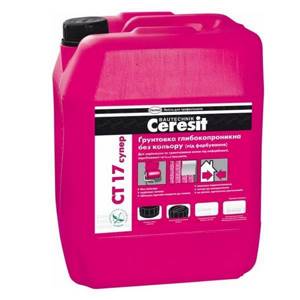
- antifungal primer;
- dry glue for working with tiles;
- polyurethane foam;
- fastening tools (fungi).
When preparing the surface, it is initially cleaned of dust and debris. If leveling was carried out, then it is very important to also remove all the excess. Next, the ceiling is primed and treated with a special antifungal mixture. When the surface is dry, work can begin.
How to properly attach penoplex to concrete?
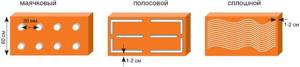
How to glue penoplex to a surface such as concrete? There are several options:
- Liquid nails are used to fasten the heat-insulating product. There is no need to apply the product to the entire surface.
- Use of specially designed foam. This product is best used when working on the floor, because this substance has average adhesion to the surface.
These tools will help you attach penoplex to the concrete surface. There is no need to use any additional fastening components. Before starting the procedure, it is necessary to clean, plaster and treat the surface with a primer.
Carrying out work
At the moment, there are two options for thermal insulation of the ceiling with polymer:
- thermal insulation from the attic;
- thermal insulation on the inside.
Isolation using the first method is significantly better than the second. The fact is that there is no need to “steal” the useful volume of the room, and the time and effort required is significantly less. Additionally, all work is carried out as if it were a floor in the room.
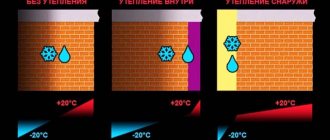
Why does condensation appear?
Condensation on the ceiling is a common occurrence in rooms where there is poor or no insulation from the outside or inside. Before you begin eliminating condensation, it is necessary to identify the true cause of moisture accumulation.
Common factors that cause condensation to form include:
How to avoid condensation
To prevent this unpleasant phenomenon, you need to:
Remedies
Measures to eliminate condensation include:
Polystyrene foam as insulation is not only cheap, but also easy to use. It is not difficult to make thermal insulation with slabs with your own hands, the main thing is to follow consistency in the work. The result will be an excellent result: the temperature in the insulated room will become higher, and it will be more comfortable to be in it.
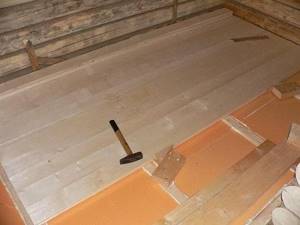
Installation from the attic
The technology for installing EPS using this method consists of the following steps:
- First, the surface is thoroughly cleaned of debris, dust and other pollutants;
- An adhesive mixture is applied to the surface of the slabs, and the elements are laid on the attic floor;
- the procedure must be performed with minimal gaps;
- after the glue hardens between the plates, where there are gaps, sealing is done using polyurethane foam;
- After a day, the remaining foam is cut off, and if you plan to use the attic in the future, then boards or wood boards are laid on top.
As a result of this work, excellent thermal and noise insulation performance can be obtained. It is worth considering the advantages of this method in the form of the absence of insulation elements from the inside of the room.
Materials and tools
To insulate the ceiling you will need:
- polystyrene foam - the grade and thickness depend on the location of the work and the method of finishing the ceiling;
- roll-type waterproofing material for insulating the ceiling in the garage from the outside;
- vapor barrier membrane (type A or AM) and film (type B or C);
Attention: the rules for working with vapor barrier materials are described in detail in the work “Installing a vapor barrier with your own hands.”
- timber for sheathing 40x50 mm;
- rail 30 x 50 mm for installing a counter-lattice;
- reinforcing fiberglass mesh;
- deep penetration primer;
- fasteners for sheathing (metal corners, self-tapping dowels, wood screws);
- glue. For large areas, it is best to buy Ceresit ST 85, and for the ceiling it is financially justified to use synthetic adhesives based on polyurethane resins. But it should be remembered that the reinforcement of the insulation surface is carried out only with a cement-based adhesive solution. In this case, for financial reasons, it is better to buy dry types of glue;
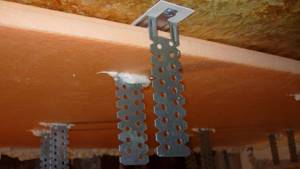
- special fasteners for foam plastic - umbrella dowels or dowels with a rondole washer;
- polyurethane foam (be sure to check for interaction with the foam so that it does not melt) or polyurethane adhesive foam for sealing cracks;
- stepladder or strong table;
- hammer drill or electric drill;
- drill bits for drilling holes for dowels through polystyrene foam;
- mixing attachment if the glue is cement-based;
- container for glue;
- screwdriver;
- putty knife;
- paint brush (roller) for priming the ceiling;
- jigsaw or hand saw for wood;
- roulette;
- construction knife - needed for working with hydro- and vapor barrier materials;
- a hacksaw with a fine tooth for cutting insulation;
- pencil.
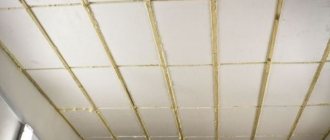
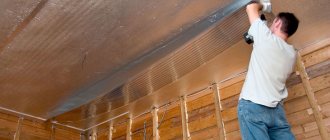
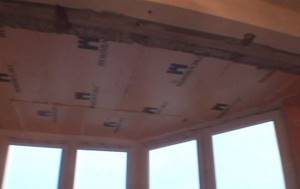
Installation from the room side
It often happens that work from the attic side is impossible. The reason may be the presence of neighbors above, or simply the absence of such a part of the building. In this case, it is necessary to carry out insulation from the side of the room, which complicates the procedure a little.
So, the instructions for carrying out the work are as follows:
- First, the surface is cleared of debris and all cracks, holes and gaps are sealed;
- then the surface is treated with a primer and antifungal mixture;
- An adhesive mixture is applied to the insulation boards and they are attached to the surface;
- Using a hammer drill, holes are drilled for the fungi. It is worth considering that this procedure is carried out with a ceiling to which penoplex is already partially fixed;
- after making holes, fungi clog in them, which makes it possible to hold the slabs more securely;
- then all joints and gaps are treated with polyurethane foam;
- after the foam has hardened, its remains are cut off and the reinforcing mesh begins to be attached using a rough adhesive mixture;
- after this, the surface is cleaned, primed and another layer of finishing is applied to it;
- Thermal insulation work is completed with final surface finishing (painting or applying a decorative coating).
Do-it-yourself penoplex installation
To carry out proper installation of polystyrene foam boards on the ceiling surface, you will need to prepare a certain list of consumables and tools. In addition, the insulated surface must also be prepared. This will allow you to install the thermal insulation layer quickly, without downtime.

You will need:
- building level;
- construction or stationery knife;
- hammer;
- perforator;
- ladder or stepladder.
It is worth dwelling on the process of preparing the foundation. It includes the thorough removal of all kinds of debris, dirt and dust. In addition, the surface of the ceiling should be as smooth as possible. Irregularities and gaps must be eliminated by applying a layer of plaster. Minor defects can be eliminated using putty.
List of materials required for DIY installation:
- deep penetration primer with an antifungal component;
- dry adhesive composition compatible with polystyrene foam;
- foam for installation;
- fastening tools (so-called mushrooms).

Remove any debris and dust from the surface. If it has been leveled, you will need to remove all excess solution. After this, the ceiling is primed. After the surface has dried, you can begin the main work.
Insulation of the ceiling base from the attic side
This method consists of the following sequence of actions:
- Cleaning the surface to be insulated from residues of various types of contaminants.
- Applying an adhesive mixture to the surface and laying insulation elements on the attic flooring.
- During the procedure, care must be taken to ensure that no serious gaps are formed;
- When the glue has completely set, it is necessary to seal the existing gaps between the insulator plates. This is done using polyurethane foam.
- After 24 hours, you need to trim off all excess foam for installation. If the attic space will be used for residential purposes, planks or other floor coverings are laid.
After carrying out the above work, a stable temperature will be maintained in the room, and the level of noise coming from the street will also be reduced. An additional advantage of this installation method is the absence of insulation elements in the living room itself.
Insulation of the ceiling on the residential side
There are often objective circumstances according to which it is not possible to install insulation from the attic area. This happens in apartment buildings where upstairs neighbors live, or in buildings where there is no attic at all. In this case, all insulation work will be carried out from the side of the home, and the procedure will become somewhat more complicated.
The work algorithm looks like this:
- All debris must be removed from the surface to be insulated and visible gaps and cracks must be filled with putty;
- then apply a primer and a mixture that prevents the development of fungus;
- insulation boards are treated with an adhesive solution and then fixed to the surface;
- using a hammer drill, holes for the “fungi” are drilled on the surface of the glued slabs;
- the dowels must be driven into the holes made for them, so the plates will be securely fastened;
- places where joints do not fit tightly and all gaps are carefully foamed;
- after the polyurethane foam has hardened, remove its excess with a knife and begin to secure the reinforced mesh, which will be held in place by the adhesive solution;
- the surface treated with glue and reinforced with mesh must be cleaned and primed, after which a fine finish can be applied;
- The final stage of work consists of decorating the insulated area (you can use paint or any decorative coating).
It is not difficult to conclude that carrying out work inside to insulate a room is a much more labor-intensive and costly process. Because of this, the popularity of this procedure is low, and it is used only in situations where it is impossible to insulate the home from the outside.

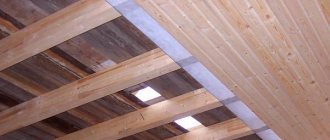
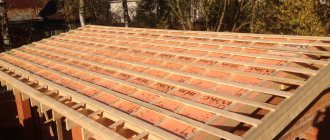
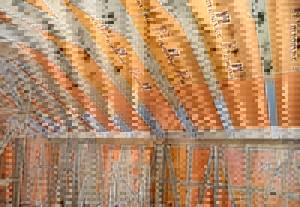
In private homes, there is a practice of using the attic space as a place to live. Then an attic is built from a wooden frame. Such a room is in dire need of high-quality thermal insulation, since the under-roof areas experience increased wind loads. It would not be amiss to organize high-quality sound protection from the inside here.
Insulation of the attic ceiling
If the attic space is used as a residential attic, the question of insulating it using penoplex will be relevant. Its high qualities of thermal insulation and absorption of extraneous sounds will make staying in the attic more comfortable and suitable for living. But it is worth considering that the material will have to be secured differently in this area.
Independent work will consist of the following stages:
- Prepare the surface for attaching fragments of insulating material to it. The procedure is standard and described above.
- Assembling the sheathing frame and securing the polystyrene foam boards to it.
- Treat all joints with installation foam that has a minimum expansion rate.
- OSB, chipboard or plank flooring is fixed on top of the thermal insulator.
The further procedure for finishing the attic is similar to this procedure in any residential premises. Professional builders note that it is possible to install expanded polystyrene even in the attic spaces of old buildings.
Insulating the attic ceiling
If the attic can be used as an attic, then it is also important to insulate the ceiling using penoplex. Thanks to its high thermal insulation and sound absorption rates, it can be used to make the attic space as comfortable and habitable as possible. But the procedure for attaching the slabs is slightly different here.
To do the work yourself you will need to take the following steps:
- from the very beginning you need to prepare the area for fastening. This procedure is no different from the above insulation options;
- Next, you need to assemble the sheathing and attach the insulation boards to it;
- after this, all joints are sealed with polyurethane foam with a minimum expansion coefficient;
- after this, boards or chipboards are attached, which close the gap with the heat insulator.
Next, everything is done in exactly the same way as when decorating a regular room.
Experts have noted that installation of this insulation can be carried out even in the attics of old houses.
Is it possible and how to putty penoplex?
It is necessary to use fiberglass mesh. It needs to be glued to the insulating material. For this purpose, ordinary cement adhesives are used. Once the surface is dry, sand and level the final putty.
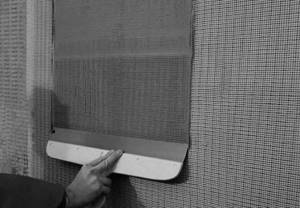
Reinforcement process
Required materials for putty:
- Glue for this heat insulator. There is no need to save your money, so it is better to purchase a product from a well-known brand.
- The next product is a primer designed to provide a high level of adhesion (adhesion to the surface).
- Reinforcement mesh.
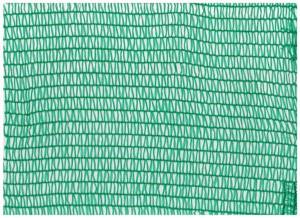
(Net)
- Final putty. Used for interior decoration.
- Perforated corners.
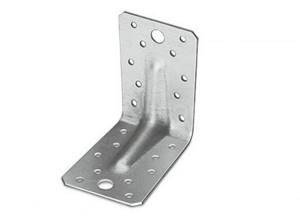
Perforated corner
Remember that when purchasing all these materials necessary for putty, you need to take into account their supply.
Economic effect
The use of this polymer has a positive effect not only on physical characteristics, but also on the budget. So, this material is noted for its rather low cost. This allows it to be used by people of any income.
Expanded polystyrene also makes it possible to reduce further space heating costs. The reason for this is reduced heat exchange with the external environment. Everyone knows that heated air is lighter than cold air. For this reason, insulating the ceiling with penoplex will limit contact with a cold surface.
Foamed extruded polystyrene has a fairly low weight, which ensures that there is no unnecessary load on the ceiling. This characteristic is very important in houses that were built a long time ago. Over time, they begin to lose their stability and strength. Carrying out a major renovation requires a lot of effort. Conventional insulation with this polymer material will make it possible to radically change the interior appearance of the room and at the same time reduce the heat transfer of surfaces, retaining all the heat inside.
The issue of thermal insulation of a home, especially if it is carried out in an old house, is always relevant. This is also due to the annual increase in tariffs for thermal energy sources, which most often are natural gas and electricity. When arranging thermal insulation, do not forget that this coating must be produced as a complex. Achieving the maximum effect is possible only when the insulation affects the surfaces of the floor, ceiling and walls. If the work is done efficiently, the level of living comfort will increase, for which not only thermal insulation, but also sound insulation is important. Professionals confidently claim that insulating the ceiling with penoplex can significantly increase the level of comfort in the room. Many people do not give such advice the importance it deserves. This only leads to the fact that the work performed is not very energy efficient.
Soundproofing technology
For greater heat retention in an office or living space, a layered floor covering is recommended. It will also completely absorb noise and unwanted sounds. Laying Penoplex as soundproofing for floors is often combined with materials such as:
- ceiling in the form of a concrete slab;
- Penoplex layer;
- waterproofing pad;
- reinforcing mesh;
- concrete screed;
- decorative coating in the form of tile ceramics, laminate, carpet, linoleum.
We recommend: Doing your own balcony soundproofing
Expanded polystyrene Penoplex here acts as a substrate that dampens all kinds of noise and protects the floors from the cold. Sometimes, when constructing this type of floor, frames made of wooden blocks are used. The bars are a kind of stiffening ribs and at the same time cells for inserting polystyrene foam sound insulation.
Extruded polystyrene foam (EPS) or penoplex
The market for building materials produced on the basis of polymer compositions and used for thermal insulation of residential premises is replete with various options. The assortment presented in stores can confuse not only inexperienced builders, but also professionals in their field. Experienced builders recommend opting for penoplex rather than other types of insulation such as “XPS TECHNOPLEX”. The reason for this is the presence of special properties in this material related to its composition and structure. Thanks to them, extruded polystyrene foam is a material with a universal scope of application. Most often, this material is used specifically for thermal insulation in private homes, commercial and industrial buildings. It is mounted both in the area of the foundation and walls, and is used to insulate the roof space.

The use of extruded polystyrene foam allows you to take advantage of a number of its unique properties that other types of materials cannot boast of when insulating a ceiling with a cold roof. These include:
- Environmental safety of insulation.
- The presence of microscopic pores in the structure of penoplex causes a low level of moisture absorption without compromising acceptable vapor permeability values.
- Penoplex is not susceptible to fungal infections and mold, and is not destroyed by environmental factors. It is completely protected from rotting.
- The material is characterized by increased strength, thanks to which its slabs are able to withstand significant mechanical loads. This quality makes it possible to use penoplex for thermal insulation not only of ceilings, but also of walls and floors.
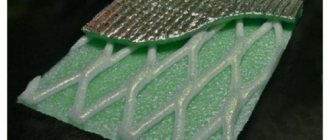
- The edge of the insulation looks like a protrusion in the shape of the letter “L”. This feature greatly facilitates the process of joining the slabs, and also guarantees that all the cracks will be filled with material.
- The surface of the penoplex is rough, which ensures good adhesion characteristics with finishing materials - putty, plaster.
It is difficult to disagree with the fact that not every finishing material made on a polymer basis has a set of such important qualities. In addition, penoplex slabs weigh little, which means they do not create additional load on the structural elements of the building. Since the pores of the material are very small, it can serve as an excellent means of thermal and sound insulation, while its thickness is small. Those who happened to use this material to insulate the ceiling space of the loggia noticed a number of other useful properties.
They are as follows:
- ease of installation;
- the ability to independently carry out work without difficulty;
- work on installing penoplex slabs can be done without regard to weather conditions, since it is not afraid of either frost or moisture.
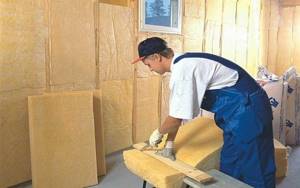
Mineral wool
It is worth noting that stone wool made from basalt rocks is quite often used (its characteristics are described in detail here). But it has a “minus” - it cannot be compressed. Therefore, very precise sizing will be required, and therefore labor costs will increase. The use of glass wool is associated with additional installation difficulties, in particular, with measures to protect the skin and respiratory tract from its dust.
Therefore, it is more advisable to use mineral wool. However, it must be taken into account that working with ecowool requires certain professional training.
For high-quality insulation, the density of mineral wool must be at least 30 kg/m3. It is better (more convenient) to use the material in the form of slabs rather than rolls. Thickness – 50 mm.
- High vapor permeability.
- Practically does not “shrink” during operation.
Technology
The total thickness of the “insulation” is usually from 10 cm. Therefore, installation is carried out in at least two layers, with offset joints between the slabs. They are placed “at odds” between structural elements (racks). The material shrinks slightly, and after laying, increasing in size, it is tightly fixed at the landing site.
Unlike foam plastic, joints are sealed with reinforcing adhesive tape. In this regard, the insulation process is simpler.
- Polystyrene foam is a dense material, so it will not allow the walls to “breathe.” Cotton wool absorbs moisture well. Based on this, the issue of natural ventilation is one of the paramount ones.
- A material such as glassine is excellent for waterproofing. But there must be a gap between it and the insulation (an air gap for ventilation).
- To reduce the amount of work associated with processing the material, you need to decide in advance on the size of the slabs. Based on this, mount the frame with the required distance between the posts (according to the width of the products).
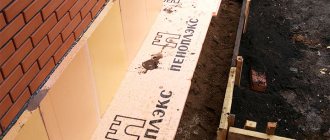
- For high-quality protection of the foundation, it is better to use permanent formwork, which is mounted from slabs of the same extruded polystyrene foam. It simultaneously serves as both a mold for pouring and an insulator (hydro- and heat).
Conclusion
There are different opinions regarding the quality of insulation with this or that material. Some people may praise the same “thermal insulator” too much, but others may not like it. Here you need to understand the following.
Firstly, a lot depends on the correct choice of “product”. In this case, you must first of all focus on the conditions under which it will be used.
Secondly, the quality of thermal insulation largely depends on the conscientiousness and professionalism of the workers. After all, ill-considered actions, violation of technology and irresponsibility can ruin anything.
Before choosing the appropriate material, it is a good idea to consult with people who already live in a frame house, and most importantly, built it with their own hands. Their assessment given to the insulation used will be quite objective. You can read the material on insulating a house from the outside, where similar work is described.
There are also cheaper options - filling the gap between the walls with expanded clay, sawdust, even straw. But here everyone must decide for themselves, taking into account the following aspects:
- the walls will be thicker;
- maintainability is “zero”, since the entire structure will have to be disassembled;
- except expanded clay, all other materials quickly get wet.
We have indicated only the main aspects of insulation work. But the wall of a frame house itself is a “pie”, in which, in addition to insulation, there are other layers (waterproofing, vapor barrier). Therefore, it is necessary to study the features of their arrangement, as well as the criteria for selecting appropriate materials.
Features of polystyrene installation
- The foam sheets must be laid in such a way that they fit as tightly as possible to each other, without creating gaps. This will help ensure the most effective insulation of the surface.
- For the attic, it is important to lay the sheathing in the space between the cells. To obtain maximum effect, the entire surface must be treated with insulation.
- When insulating rooms, after laying penoplex on the ceiling, you must also make a decorative design of the surface - it is puttied, then treated with finishing plaster, and then primed.
- Only after these measures can you begin to paint the ceiling or otherwise decorate it.
Features of thermal insulation of ceilings with polystyrene foam
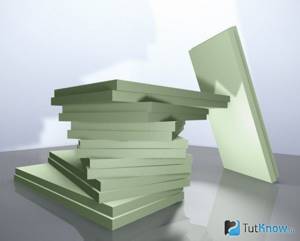
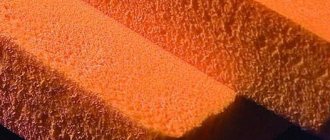
Extruded polystyrene foam is a granular synthetic material made from polystyrene. It differs from other insulation materials in its high heat-insulating and water-repellent properties with a small thickness. The product acquires such characteristics after adding natural or carbon dioxide to its composition.
The substance is obtained after extruding the workpiece under high pressure through a special apparatus - an extruder, which is where its name comes from. The finished samples are porous slabs with very small cells of 0.1-0.2 mm, which are evenly distributed in space.
The product goes on sale under the XPS marking, followed by a digital and letter designation. Each manufacturer has its own. The label contains basic information about the product - thickness, density, color, etc. For example, a Styrofoam product is designated as follows: XPS 1B-AXPS-EN13164-Tl-C5(10/y)250DS(TH)-TR100.
The product is sold in the form of rectangular or square panels with a maximum thickness of 100 mm, in various colors and textures.
You can insulate the ceiling with polystyrene foam in several ways, depending on access to the ceiling:
Advantages and disadvantages of polystyrene foam
The material is a cluster of styrene balls, inside of which there is air . Air and inert gases are the best insulation materials in the world. The more air in the material, the better its thermal insulation properties. The advantages of polystyrene foam (expanded polystyrene) include:
Table with foam characteristics
- Low thermal conductivity. The main characteristic of a heat insulator is its ability to conduct heat. The lower it is, the warmer the room will be. The thermal conductivity of polystyrene foam is approximately the same as that of mineral wool or extruded polystyrene foam.
- Low cost. Carrying out repairs or construction is always a costly undertaking. Polystyrene foam is an effective material that does not require large financial investments.
- Light weight. The mass of expanded polystyrene allows it to be used to insulate ceilings from the inside without any problems. The material adheres well to a horizontal surface. The smaller the mass of the insulation layer, the easier it is to fix it and the less likely it is to fall off during operation. Light weight when holding events in a private home also reduces the cost of delivering the material.
- Easy to install. The characteristics of the heat insulator allow even a non-professional to perform the work. To insulate the ceiling with polystyrene foam you do not need to put in a lot of effort.
- Safety. When installing insulation yourself in a private home, it is important to ensure the safety of the work contractor and residents in the future. The structure of the foam is such that even when destroyed, it crumbles into fairly large balls. They cannot harm humans. This distinguishes polystyrene, for example, from mineral wool, when using which it is necessary to use masks and gloves.
Dimensions of insulation material
The positive qualities of polystyrene foam have allowed it to firmly establish itself in the building materials market. But it has its own characteristics and limitations. Insulation with polystyrene foam has the following disadvantages:
- Styrene beads do not absorb water, so polystyrene foam has a fairly low degree of water absorption. The difficulty is that water can get into the space between the balls. Under normal conditions this does not cause problems, but if the ambient temperature drops, destruction will occur. The bond between styrene beads is not very strong. When water turns into ice, it expands, affecting individual particles of the material. With the simultaneous action of water and cold, the foam simply crumbles.
- Low fire safety. Polystyrene is not resistant to high temperatures. Now manufacturers are introducing special additives into the composition that make polystyrene a low-flammable material, but the problem remains.
- Low strength. This drawback is important when insulating the floor. For installation on the ceiling from inside the room, it is not necessary to use durable materials; weight becomes a more important factor here. Insulation from the attic side with polystyrene foam is also possible, but due to its strength it is laid between the joists or under a strong reinforced cement screed.
- Unnatural origin. This is also more of a feature than a drawback. Insulation materials of natural origin, such as sawdust or expanded clay, have low efficiency. Another type of natural insulation is ecowool. The material is effective and expensive. The last two points are not serious drawbacks when insulating the ceiling in a private house, so we can say that polystyrene foam has proven to be an excellent thermal insulator with a score of 5:2.
Minuses
If you insulate the ceiling with extruded polystyrene foam, you should also be aware of its minor disadvantages. There are only two of them:
- Complete isolation of the room. This means that when sticking polystyrene foam onto the ceiling, the created layer will not allow air to pass through and the room will need good ventilation.
- Release of toxic substances during combustion. The insulation itself will not burn, but in the event of a fire it heats up to a high temperature and begins to release harmful substances. However, if a fire occurs, this nuance will not be the most important.
The remaining disadvantages of such insulation can be considered the same for all types of polystyrene insulation boards.
Insulation methods
You can insulate the ceiling with polystyrene foam yourself from the outside and from the inside. The cold air side option provides greater efficiency and is scientifically correct. When insulating a private house, it is best to insulate the ceiling of the upper floor from the attic side.
This method is difficult if insulation is carried out in an apartment building. In this case, insulation from the inside is practically the only possible option. Insulation in the apartment is carried out not only to protect from the cold, but also from noisy neighbors.
If you insulate the ceiling from the inside with foam plastic, you can significantly reduce the noise level and create favorable conditions for relaxation.
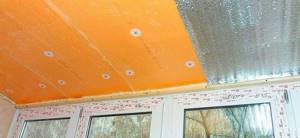
As mentioned earlier, the combination of water and polystyrene foam is undesirable, therefore, when laying, two additional layers are provided: on the cold air side - waterproofing, and from the inside of the room - vapor barrier.
The procedure for carrying out work when insulating from the attic:
- clearing the surface of debris, dust and dirt;
- leveling if necessary;
- vapor barrier;
- laying logs (if they are needed);
- laying foam plastic (it is necessary to provide a small gap between the insulation boards or between the insulation and the joists; the foam expands slightly after laying);
- waterproofing;
- pouring the screed (for the method without logs) with laying wire reinforcement with a diameter of 3-4 mm;
- clean floor.
The last point is an optional step. You can leave a cement screed as a floor covering in the attic.
Thermal insulation of the ceiling in a private house from the inside is carried out in the following order:
- ceiling cleaning;
- installation of a frame (wooden or aluminum profile, this step is not necessary);
- securing foam sheets;
- vapor barrier;
- ceiling trim.
How to insulate ceilings with foam plastic: methods of attaching a heat insulator
Experts advise that it is better if polystyrene foam is laid on the ceiling from the outside. But sometimes this cannot be done. For example, if you need to organize insulation of an apartment in a multi-storey building, when it is impossible to install thermal insulation outside. In addition to the insulation function, the material also has sound insulation.
The slabs are fastened in the following ways:
Additional reliability is provided with the help of dowel umbrellas. The joints are also sealed with polyurethane foam or coated with glue. At the final stage, a reinforcing solution is applied over the heat insulator in several layers. Before applying the next layer to the ceiling, the previous one must dry.
At the end, a lathing is installed from a galvanized profile for plasterboard, to which the gypsum plasterboard sheets are attached with self-tapping screws.
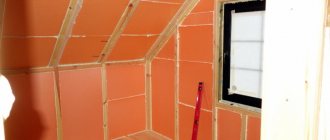
How to do it
In order for insulation of walls from the inside to bring the expected effect, you must adhere to simple rules for installing this heat insulator and do everything in a certain order. In any case, preparation is necessary first. This means cleaning and treating all insulated surfaces with antiseptics. Irregularities, protrusions and depressions should be sealed with putty or plaster mixture. This heat insulator is not flexible and the surfaces must be smooth. Then everything happens in this order:
- The walls are measured and parts of the required sizes are cut out.
- The cut elements are placed in place to check the fit and geometry.
- The adhesive composition is diluted. It must be selected according to the recommendation of the manufacturer of the insulating material.
- The glue is applied to the wall and the slabs, which are pressed tightly against the wall.
- Additionally, all parts are secured with special plastic dowels.
- Joints and cracks are filled with polyurethane foam.
- A vapor barrier membrane is attached over the installed insulation.
- The final decorative finishing of the surface is carried out. The best option is drywall followed by decoration. It will be an additional barrier to water vapor penetrating inside the structure.
If you follow this technology, the risk of condensation on the cold surface of the walls will be minimal. A layer of drywall and, in this case, a mandatory vapor barrier, will help with this. Exterior decor is selected to your taste in accordance with the rest of the interior design.
How to mount
Installing such slabs on the ceiling will not cause any difficulties for anyone. Even if you have never done this kind of work, you can still do it. The operating procedure will be as follows:
- First, the surface of the ceiling is cleaned from dirt, dust and other similar things. Old peeling coatings also need to be removed.
- All necessary work is carried out on laying the wiring and sealing the grooves in which it is laid.
- Next, the surface is primed. It is needed to improve the adhesion properties of the surface and to prevent the formation of mold or mildew under the insulation layer. Most primers contain special components for this.
- The next stage is gluing the plates. They are cut to the required dimensions as necessary and glued, if possible, in a checkerboard pattern so that the joints of the plates do not form one line.
The final work is to “foam” the joints between the parts with polyurethane foam, the excess of which is cut off after drying.
Penoplex was created as a highly effective thermal insulation material of increased strength
| Characteristics | Units | Indicators |
| Compressive strength at 10% linear deformation, not less | MPa | 0.18 |
| Water absorption in 24 hours, no more | % by volume | 0.4 |
| Water absorption in 28 days | % by volume | 0.5 |
| Fire resistance category | group | G4 |
| Thermal conductivity coefficient at (25±5) °C | W/(m×°K) | 0.03 |
| Sound insulation of partition (GKL-PENOPLEX 50 mm-GKL), Rw | dB | 41 |
| Structural noise insulation improvement index when using a 50 mm slab in a floor structure | dB | 23 |
| Standard sizes | ||
| - width | mm | 600 |
| - length | mm | 1200 |
| – thickness | mm | 20; 30; 40; 50; 60; 80; 100; 120; 150 |
| Operating temperature range | °C | from – 100 to +75 |
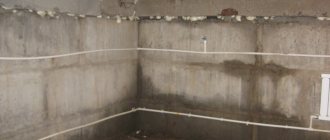
Penoplex is an excellent material for insulating foundations!
Even such massive and seemingly invulnerable structures as the foundation and plinth require thermal insulation. How to insulate a foundation with penoplex
– in a special publication on our portal.
But exactly how soundproofing material was not intended by its developers. And if such qualities are inherent to some extent, then only with a strictly defined method of installation.
Let's figure it out.
- Will penoplex help protect a room from airborne noise? No, it won't bring much benefit. Although the material is porous and light, it has excellent rigidity and elasticity. A slab of extruded polystyrene foam will rather act as a membrane, which is quite easy to “swing”, and it will become an additional “speaker”.
Laboratory studies show that the characteristic structure of the material, on the contrary, can cause frequency resonance in the range of approximately 200 to 500 Hz - which is exactly the middle of the speech range! Thus, in this frequency range, even “soundproofing failures” cannot be excluded, that is, an increase in airborne noise by a fairly serious amount, about 12 - 15 dB.
But what about the data provided by the manufacturer - that the sound insulation (Rw) of a partition using penoplex is up to 40 dB? Well, firstly, our question concerns not the partitions, but the ceiling - the ceiling. It is simply incorrect to take into account the Rw indicator in this design - this is the airborne noise insulation index, which is used specifically for partitions (walls). Secondly, the Rw index is a very average value that takes into account the entire width of the frequency range of normal residential noise, that is, in the range from 100 to 3000 Hz. Thirdly, the table specifically states that we are talking about a specific design - two sheets of drywall with a penoplex gasket laid between them. But what is acceptable on walls is completely impossible to achieve on a solid ceiling slab.
By the way, experts have noticed that increasing the thickness of the penoplex layer is not at all beneficial. And if you use a two-layer structure, with a rigid “core” and penoplex on both sides, you can generally achieve the effect of a catastrophic reduction in sound insulation - the room turns into a resonator!