Many people think about how to make a ceiling in a private house. Taking into account the huge range of materials and finishing methods, this question sounds quite relevant. You need to choose taking into account both technical characteristics and appearance. The ceiling is the most noticeable place in the room, and therefore, first of all, a person’s gaze is drawn to it.

Material selection criteria
The choice of materials for the manufacture and arrangement of the ceiling should be based on taking into account the main influencing factors, as well as ensuring adequate comfort and ease of maintenance. All air currents from the inside, supplemented by human waste products, rush towards it.
He can also feel the impact from above when the roof cannot cope with heavy rainfall or something spills in the attic. The following main criteria for choosing materials for ceilings can be distinguished:
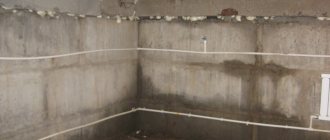
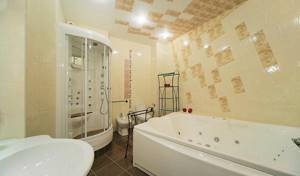
- Moisture resistance . This requirement is important for all premises, in particular for the possibility of wet cleaning or when water leaks from above. It is especially acute in relation to ceiling materials for bathrooms, bathrooms and kitchens.
- Sanitary and hygienic requirements. The material must be absolutely harmless to humans even at elevated temperatures. It should not contribute to the development of mold, fungi, or the proliferation of pathogenic microorganisms.
- Easy to care for. The ceiling should not strongly attract dust and accumulate dirt. It’s good when cleaning can be done using conventional means.
- Durability. During operation, the color should not change (yellowness, blackening, etc.). The material must not be subject to chemical or biological degradation. It is unacceptable for peeling finish to fall from the ceiling.
- Aesthetics. Appearance sometimes plays a decisive role in the choice of material. Originality and the possibility of various design solutions are valued.
Increased demands are placed on ceilings in the kitchen and bathroom . In the first case, when cooking, steam with fatty components rises, which settle on the surface of the ceiling.
In addition, when gas burns, there are combustion products that are also capable of aggressive effects. In the bathroom, high humidity is added to high temperatures, temperature changes and splashing water. All of these factors must be taken into account when choosing ceiling materials.
[custom_ads_shortcode1]
Painting the ceiling with your own hands: taking into account all the little things
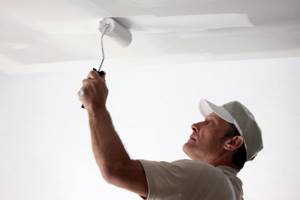
Since we have already plastered the ceiling, we can take a closer look at painting it. As mentioned above, painting the ceiling is well suited for rooms with high humidity - the kitchen and bathroom.
It is important to remember: painting the ceiling should be done before you start on the walls and floor, as it is quite a labor-intensive and messy task. Or try to isolate the surfaces as much as possible from paint using plastic film.
So, to work you will need the following:
- primer;
- putty;
- gypsum mortar;
- sealant;
- water-dispersion or water-based paint;
- cement;
- antiseptic;
- brush;
- sandpaper;
- putty knife.
The surface is already prepared for further work. The only thing you can add: if you paint the ceiling with your own hands in the bathroom or kitchen, be sure to treat it with an antiseptic before priming.

When puttingtying the ceiling, attach gauze to the undried layer. It will serve as a reinforcing mesh that will prevent cracks. After drying, apply a primer and fine-grained putty, this will eliminate minor unevenness.
And the last stage of work is to apply paint to the ceiling using a brush or spray. Painting work has been completed.
Main types of ceiling coverings
Based on design features, the following main types of ceilings can be distinguished:
- Basic (plaster) construction - a ceiling surface without additional load-bearing elements, finished by applying a finishing coating (pasting, painting, whitewashing). The ceiling is first plastered.
- Tension systems . The front side of such a ceiling is formed from stretched fabric. In this case, usually no surface finishing is used.
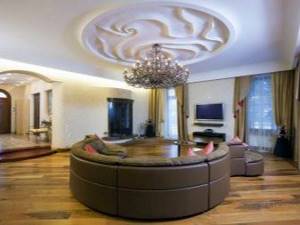
- Suspended design. It provides a supporting frame, which is fixed to the ceiling. On it another solid surface is formed from sheets, slabs, panels, boards or slats. Such systems may have one or several levels.
Each type of ceiling has its pros and cons. In particular, the basic type requires careful leveling of the surface. The other two options can be used in the presence of large irregularities, i.e.
are able to disguise them. At the same time, they “eat up” the height of the room.
[custom_ads_shortcode2]
Ceiling cleaning
Before carrying out repair work, the surface should be thoroughly cleaned of any remaining building materials and any coating already applied.
Note!

Do-it-yourself vegetable garden: new interesting garden crafts for the street at your summer cottage (photo/video review)
DIY ceiling installation: step-by-step description of how to make a ceiling. Review of modern structures and ideas for their design (105 photos)
Do-it-yourself garage doors - a detailed description of the construction of various types of garage doors (120 photos)
Basic work
Most often, ceiling finishing is achieved by carefully leveling the surface and then applying a finishing coating that provides an attractive appearance and a certain design style. The most common methods are:
- Whitewash for plaster ceilings. First, the surface is leveled by puttying, priming and plastering. The process itself involves applying chalk or lime mortar. You can use a white background or tint with various pigments. The main advantages are the possibility of finishing it yourself, the low cost of the method and environmental friendliness. The ceiling is breathable. Lime whitewash has bactericidal properties. The disadvantages of whitewashing are the need to perfectly level the ceiling, fragility (the need to update the whitewash after 3-4 years), low moisture resistance, rapid contamination and problems with cleaning.
- Painting. This is the second most common method of finishing the ceiling. The most commonly used is water-based paint. It has all the main advantages of whitewashing, and at the same time has a certain moisture resistance. The painted ceiling can be wet cleaned using detergents. Other disadvantages of whitewashing are transferred to painting. In addition, the ceiling loses its “breathing effect”.
- Decorative plaster. The most popular is considered to be textured type plaster (it can be called structural, plaster, etc.). It contains a special filler with grains of various fractions. Using a textured solution, relief patterns are created. This finishing increases the decorative value of the ceiling and makes it possible to imitate stucco in a classic style. Disadvantages - increased cost and the impossibility of applying it yourself without special skills.
- Wallpaper. Pasting the ceiling is no different from covering the walls, except for the inconvenience of the location. Using wallpaper, you can provide its original colors (for example, imitation of natural materials). Wallpaper can mask small cracks, but in general it requires careful leveling of the surface. Washable materials can be easily cleaned with normal cleaning products.
- Tile. The ceiling can be covered with lightweight polystyrene foam tiles. Their main advantage is the provision of additional thermal insulation. The main disadvantage is flammability, with the release of harmful substances during fire. A rather expensive method, but without this drawback, is gluing glass or mirror tiles.
- Cork coverings. This applies to modern ways of arranging a room. This covering is made from sheets made from natural cork. It has a special attractiveness, increased water resistance and thermal insulation properties, but has a high cost.
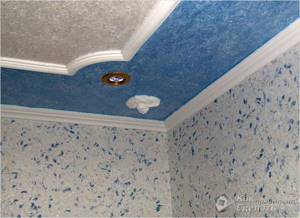
- Liquid wallpaper. Essentially, this is a coating that combines the properties of wallpaper and plaster. It is made from a mixture based on cellulose fibers. The material is applied similarly to decorative plaster, and after hardening it takes the form of wallpaper. Liquid wallpaper creates a beautiful design, but is expensive.
- Stucco molding. It is most often made of plaster. Foam plastic figures are often used as imitation, which after painting are difficult to distinguish from real stucco.
In general, finishing ceilings without additional load-bearing elements is most popular, provided there is a sufficiently flat ceiling surface. Its important advantage is its small impact on the height of the room.
[custom_ads_shortcode1]
Finishing options
If the surface of the ceiling, after appropriate preparation, has become perfectly smooth, then you can begin finishing to give it an attractive appearance. Most often it is provided in the following ways:
- Painting. This is the most common method of improving the ceiling in all rooms, incl. with high humidity. The best option is water-based paint. It is applied to the ceiling with a paint roller in strips with an overlap of 10-15 cm. It is recommended to paint in 2 layers. The first layer is applied in stripes parallel to the window, and the second layer along the light flow. Painting begins from the corner farthest from the door. A brush is used at the junction of walls and ceiling and in corners. Most often, the ceiling is painted white, but by adding the desired pigment, any other shade can be achieved.
- Whitewash. It can be produced with chalk or lime mortar with the addition of an adhesive composition. The highest quality whitewashing is achieved with a spray gun. You can use a vacuum cleaner that has a compression function and appropriate hose attachments.
- Pasting with wallpaper or fabric. The process of gluing the ceiling is similar to finishing the walls, only the complexity increases due to the need to hold the wallpaper. Wallpaper glue is applied with a roller to the ceiling surface and wallpaper. The strips should be applied towards the window so that the joints are less noticeable. The roller smoothes the wallpaper and removes air. It is important to match the drawing precisely, because... any discrepancy will be obvious.
- Application of ceiling tiles. When installing it, it is important to make the markings correctly. First, the center of the ceiling is marked, and lines for the placement of elements are drawn from it. Begin gluing the tiles from the center of the ceiling. The glue is applied in the middle of the tile, in the corners and in dots along its edge. The seams between the elements are filled with polyurethane foam.
We recommend: How to properly glue ceiling tiles? Types and choice of material
The considered adhesive and coating methods are the simplest for do-it-yourself ceiling repairs. They provide an attractive appearance and harmonize well with various design solutions.
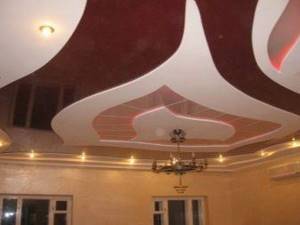
Suspension systems
Suspended or frame ceilings are needed to mask large irregularities and create original multi-level structures with a special lighting system. The following arrangement options stand out:
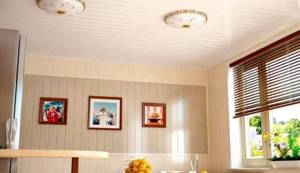
- Panel ceilings. They are made of plastic panels that are mounted on an aluminum profile frame. The variety of textures makes it possible to design the ceiling in different styles. The panels are absolutely moisture resistant and have a reasonable cost.
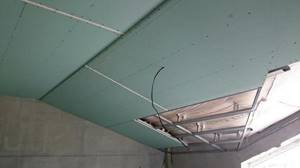
- Sheet material. A ceiling with an almost perfectly flat surface can be equipped using sheet materials. The most commonly used is plasterboard (gypsum plasterboard). It is attached to a metal or wooden sheathing, and the seams are sealed with polyurethane foam or putty. After priming the surface, such a ceiling is ready for the finishing coat.
- Cassette ceilings. This is a special system in which rectangular cells for cassettes are formed using profiles and hangers. The most common sizes of such elements are 60x60 and 60x120 cm. They can be metal, polymer, glass, wood, mirror, or mineral materials. The main advantage is the absence of rigid fastening. The cassettes are easily removed, which makes it possible to wash or replace them.
- Slatted ceilings. They look quite beautiful and have practical value, especially for rooms with high humidity. Aluminum slatted plates are used. A silver or golden hue and chrome plating add a special decorative effect.
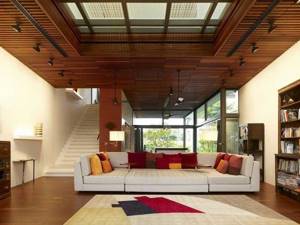
- Wooden coverings. Wood has always been popular in the design of private homes. The fashion has not passed even today. Such methods of finishing ceilings with wooden elements are noted.
- Lining. These wooden slatted panels have long gained wide popularity. They create a natural style and a special unity with nature indoors. To protect against moisture, it is recommended to impregnate the lining with an antiseptic and varnish it.
- Continuous covering - made of boards.
Suspended ceilings often become a necessary measure to hide construction defects. They require the installation of a supporting frame, which reduces the height of the room, however, decorative possibilities make it possible to compensate for this disadvantage.
[custom_ads_shortcode2]
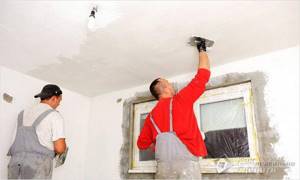
How is the ceiling leveled?
If it is necessary to ensure a perfectly flat ceiling surface for finishing, leveling is carried out in several stages:
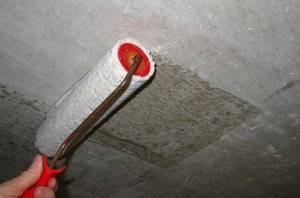
- Sealing and elimination of defects. All convex irregularities (sagging) are removed with a spatula, chisel, chisel or emery cloth. The cracks are first widened slightly with a spatula and then filled with putty. Particular attention is paid to the joint of floor slabs. Here, if there is a noticeable gap, you should use a mounting mesh or sickle tape.
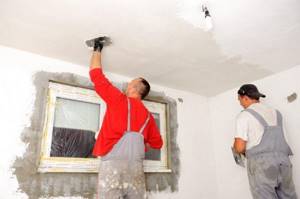
- Primer. It provides primary leveling and improves the adhesion of coating materials to concrete. Typically a ready-made deep penetration primer is used. The solution is applied in an even, thin layer to the entire surface of the ceiling using a paint roller, brush or wide spatula. One of the best materials is considered to be the Betonokontakt primer.
- Putty. If the ceiling has a slight degree of unevenness, and a layer 2-3 cm thick is enough to level the surface, then a putty mixture is usually used. It is recommended to use purchased compounds in the form of ready-to-use putty or dry mixture. Such materials as coarse putty Izogypsum and finishing mixture Satengips have proven themselves well. The solution is applied to the ceiling surface with a spatula 10-15 cm wide. Narrow spatulas (25 and 50 mm) are used in corners and at the junction with walls. With a layer thickness of up to 1 cm, one layer can be applied. Thicker putty is provided in 2 passes, with a coarse type compound applied first, and then a finishing putty.
- Plaster. It is most often carried out when it is necessary to apply a leveling layer 3-5 cm thick. It is recommended to use ready-made, dry gypsum-based mixtures, for example, Rotband. Plastering is carried out with the installation of beacons, which form a flat surface. They are leveled using a building level. The solution is applied to the ceiling between the beacons and leveled using the rule. After the work is completed, the beacons are removed, and the rusts are sealed with the same plaster mortar.
- Leveling and grinding the surface. After the plaster or putty has dried, the surface is treated with a sanding mesh or a sander. It is necessary to eliminate all strokes and other irregularities. You can ensure leveling with fine-grain sandpaper.
- Finishing primer. It is not a mandatory element of ceiling finishing, but will significantly improve the adhesion of paint to the ceiling. Apply the primer in a thin layer using a paint roller.
We recommend: 3 main reasons to use PVC stretch ceilings
After carrying out all of the above measures, it is necessary to give time for the coating to completely harden. After 2-3 days you can begin finishing the ceiling.
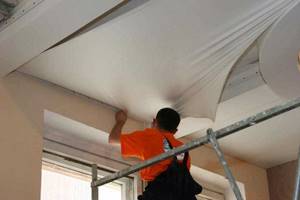
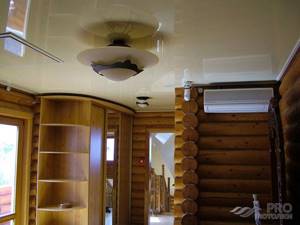
Tensile structures
Stretch ceilings are designed to perform the functions of suspension systems in terms of masking irregularities, without creating additional loads on the ceiling. Their design includes a frame mounted on the wall and a canvas stretched under the ceiling at a distance of 10-12 cm from it.
There are 2 main types of them - fabric and film ceilings. In the first case, a textile fabric woven from polyester fibers is used. In the second case, PVC film is used. The canvas is fixed at its ends in the frame and stretched tightly, forming a flat surface. When stretching the PVC film, it is heated using a heat gun.
[custom_ads_shortcode3]
Ceiling height in a private house
The height of ceilings in a private house is set based on practical considerations. However, certain rules should be followed. The minimum height is 240 cm. Below it, obvious discomfort will be felt in the house no matter the height of the inhabitants.
Determining the optimal height involves several factors. It is impossible not to take into account the distribution of heat flows. If the ceilings are too high, all the heat will go up, which will force the heating to work in increased mode. Taking convection heating into account, the optimal height is considered to be about 2.7-2.8 m.
The ceiling in the house has a special status - it is visible from any point and is under the influence of rising currents and evaporation. In order for it to always have an attractive appearance and sufficient durability, it is necessary to approach the choice of materials and design with skill. From the many possible options, you need to choose the optimal arrangement method.
What kind of ceilings are best to make in a private house? How to decorate it yourself Link to main publication
Separately, it is necessary to decide on the materials that will be used during the work – the technology and sequence of repair processes largely depend on them.
This question is especially relevant for ceiling decoration - a large number of different options makes it difficult to answer the question of which ceilings are best for a private home. Let's try to figure it out? There are several options for finishing the ceiling:
- Tension fabric
- Plasterboard blocks
- Ceiling using wooden blocks or beams
- Plaster
- Cassette ceilings
- Wallpapering
Let's take a closer look at the pros and cons of each option.
[custom_ads_shortcode1]
Tension fabric
The use of suspended ceilings in the construction of a private house is one of the most common options. No wonder. The tension fabric is very easy to install and is relatively inexpensive.
However, designers love them for another quality: huge variability. You can design a stretch ceiling of any color and with any number of levels. This allows you to apply the most daring design solutions and use a variety of room design options.
In addition, the tension fabric is completely sealed, which eliminates leakage. This is especially true in that part of a private house where the ceilings are adjacent to the roof - even if the roof leaks, the interior of the room will not be damaged. They also differ in increased noise insulation due to their tightness. In addition, their care is not particularly complicated: just choose a non-abrasive product and occasionally wipe the surface with it.
Another advantage is their versatility - they can be used in any room, except, perhaps, baths and saunas. And most importantly. Using a stretch ceiling allows you to reliably hide communications and pipes - this is especially important in a private house.
As for the shortcomings, there were some too. Such ceilings are not very durable, so some care must be taken in their operation. However, the ceiling is not the floor, which means there should not be frequent physical contact with it.
Another problem is the joints. No matter how carefully it is laid, there is a possibility that they will be noticeable. You can disguise the joints using design elements or make them look like that themselves - for example, by using tension fabrics of a contrasting color.
In addition, without the appropriate skills, installing a suspended ceiling with your own hands will be quite difficult. In general, suspended ceilings are the best option for use in the construction of a private house: hygienic, easy to install and relatively inexpensive.
[custom_ads_shortcode2]
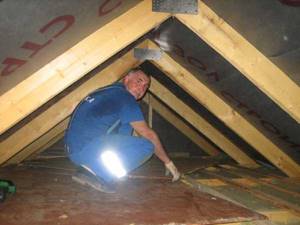
Cold attic
Well, how to make a ceiling in a private house in the case of a one-story building, if there is only a roof on top?
Filing the rough ceiling
And in this case, the construction of the ceiling begins with the filing of a shield made of boards. The material is the same tongue-and-groove or regular edged board with a thickness of 25 millimeters or more. The boards are fastened with long nails into spacers with minimal gaps.
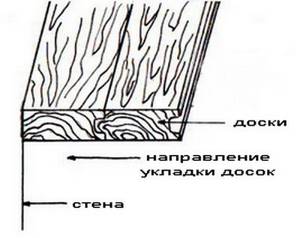
In this case, the tongue and groove board is hemmed with a groove from the wall, from which the installation of the ceiling begins.
It is possible to use plywood or OSB with a thickness of 15 millimeters or more for lining the ceiling.
However this option:
- Noticeably more expensive per square meter of ceiling;
- To a greater extent, there is a risk of the ceiling sagging under its own weight and the weight of the insulation. The use of intermediate lathing will reduce the strength of the ceiling. Do not forget that the weight of insulation (especially bulk insulation) can be quite significant.
Alternative option
The ceiling height in a private house, especially an old one, can be low. In this case, hemming the rough ceiling from below the beams will be wasteful in relation to your living space. An excellent solution is not to fasten the shield from the boards from below, but to lay it on top, along the beams.
Here, if necessary, it is possible to use lathing . Don’t worry about the appearance of the ceiling: the finished surface will hide the sheathing; beams painted in a contrasting color to the main surface of the ceiling will decorate the design of the room.
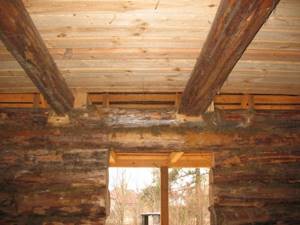
Laying the ceiling on beams is practiced primarily in old houses with low room heights.
Vapor barrier
The requirements for the properties of the vapor barrier layer in the case of a cold attic are somewhat different from the first option we considered. On the one hand, it must fulfill its main function: to prevent the heat-insulating material from becoming damp. On the other hand, it would be nice if it also reduces heat loss due to radiation.
How to achieve this?
- A layer of ordinary aluminum foil is laid above or below the thermal insulation layer . It will not reflect visible light, but infrared radiation, so its location is unimportant.
- It is also possible to use foil insulation based on foamed polyethylene instead of the usual vapor barrier. It will create an additional barrier to heat loss due to both radiation and convection.
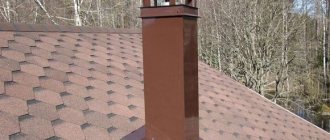
Important: in the case where a chimney passes through the ceiling, do not forget to cut the chimney pipe. There should be at least 25-30 centimeters between it and the flammable material.
Insulation
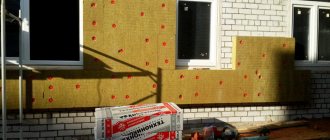
The list of insulating materials that are used to insulate floors in private homes is quite long. Let's look at popular insulation materials with their advantages and disadvantages.
Mineral wool
- The material is non-flammable. Fire safety will not be affected when using it.
- The thermal insulation qualities of mineral wool are beyond praise , but they deteriorate over time. Even perfectly dry mineral wool cakes over time. If there are flaws in the vapor barrier, it gains moisture and completely ceases to prevent heat loss.
- Small fibers of mineral wool are volatile and irritate the respiratory system. It is necessary to isolate this insulation from the living space especially carefully. At the same time, in other respects the material is impeccable in terms of ecology.
- The price is very affordable. Here we have one of the cheapest insulation materials.
- Mineral wool requires careful installation. It is strictly forbidden to press it: the greater its density, the less heat it will retain.
When laying mineral wool, it should never be compacted. More volume means better thermal insulation.
Basalt wool
What we have before us is, in essence, a type of mineral wool. But there is a difference: basalt wool holds its shape much better and is almost not prone to caking. However, it also gains moisture.
Expanded clay
- And here everything is fine with fire safety: the material is non-flammable in principle.
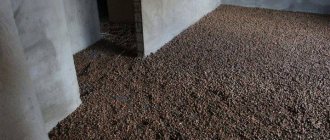
- clay is a large-fraction insulation material . Heat transfer in its layer due to convection is quite possible. That is why it is usually poured in a layer of at least 15 centimeters; better - 30.
- Compared to other insulation materials, it has a high specific gravity . If the ceiling is hemmed to the beams from below, under heavy load the boards may tear away from the beams. The consequences for the home will be the most unpleasant.
- Filling with expanded clay is perhaps cheaper than all alternative insulation options, despite the large thickness of the layer.
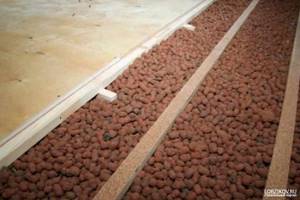
Bulk insulation with expanded clay is a very inexpensive solution. But in terms of the totality of qualities, it is not the best.
Styrofoam
- Unlike all alternatives, polystyrene foam is flammable.
- There is still controversy about the allocation of styrene Theoretically, foam plastic intended for insulation must comply with all environmental standards; Practically, it all depends on the manufacturer.
- In terms of thermal insulation qualities, the material is impeccable - 98 percent of its volume is occupied by air in closed cells: there is almost no heat loss due to convection inside the foam layer.
- The shape and size do not change over time. Sheets of foam plastic will still occupy the entire volume between the beams in ten years, as it did at the time of their installation.
- This property is somewhat beyond the scope of our article; however, polystyrene foam is popular as a material for attic insulation because it can be easily spaced between beams.
In this case, it is quite difficult to securely fix the mineral wool so that it does not slide down when the house sways and shrinks.
Polystyrene foam is very popular as a material for insulating attic walls. First of all, because it holds its original shape well.
- Finally, polystyrene foam can practically be considered non-hygroscopic and moisture-proof . Its use in theory makes it possible to do without vapor barrier at all.
- The cost of thermal insulation with its help, however, is quite high.
Waterproofing
A waterproofing layer is required on top of all materials except foam plastic . It can be either a special fabric or ordinary thick polyethylene film. The canvas is laid with overlapping strips of about 10 centimeters; The seams are taped.
Important: just in case, let us remind you that you cannot step on any soft insulation. This action is equivalent to removing most of the insulating material from the area where you step.
Read also about wooden ceilings.
Drywall (GKL)
None One of their main advantages is complete environmental friendliness. Drywall does not contain harmful impurities, and therefore it can be safely used even to decorate the ceiling in children's rooms.
However, the material does not tolerate moisture well, absorbing it inside and becoming heavier. Therefore, if you are not confident in the moisture insulation of a wooden house or are choosing a ceiling for the bathroom, it is better to abandon this idea. The variety of plasterboard structures allows you to use them in almost any interior style. Multi-level or single-level ceilings, arches and hanging elements... The use of drywall definitely leaves a lot of room for imagination.
Please note: Even more diverse design solutions can be found by combining drywall with tension fabric.
In addition, such a ceiling covers well all the imperfections of the ceilings and helps hide communications. If you need to hide a large pipe or panel, design a plasterboard box - it will look like an organic part of the interior, while reliably removing the unnecessary element from view.
The cost is also pleasing - plasterboards are considered one of the most inexpensive materials. This allows you to cover the ceiling of the entire house without particularly high costs. However, there were some downsides. In addition to the already mentioned tendency to absorb moisture, drywall is fragile. This requires extreme care when installing such a ceiling. It is not suitable for rooms with low ceilings - installing plasterboard boards can take about fifteen centimeters of room height at one level, and much more with multi-level ceilings.
But if space allows, this option may be ideal for you.
[custom_ads_shortcode3]
Features of wooden ceilings
Wood is rightfully considered the most expensive material for finishing ceilings. High cost, complexity of installation, the need to carefully check every element of the ceiling structure... Is it worth it to install wooden ceilings in a private house?
Definitely yes! Despite the high cost of the elements and the long installation time, such ceilings have virtually no disadvantages during operation.
First of all, it is necessary to note their impeccable appearance. Elegant wooden ceilings fit into any design. Even a high-tech interior can be combined with wooden ceiling elements if you show a little imagination and artistic taste.
For classically decorated rooms, it’s hard to wish for a better option.
Modern wooden ceilings are very easy to maintain. They have already been treated with various means that prevent the appearance of parasites, corrosion, moisture impregnation... This has a positive effect on both the need to devote time to caring for the ceilings and their service life.
In addition, now wood has ceased to be a monotonous material: a large number of processing methods allows you to choose the shade that you need. The material is also highly durable - they can, in fact, only be damaged intentionally.
Separately, I would like to note the coffered ceilings: massive wooden slabs look very elegant and, undoubtedly, impress both the owners of the private house and the guests. Fashionable during the Renaissance, ceilings are now gradually becoming one of the popular design techniques - why not take advantage of them?
Wooden ceilings are also combined with a large number of decorative elements. You can easily add elegant arches, carved elements and even stucco molding - everything that may look tacky on modern materials will be appropriate here if you know when to stop.
Another advantage of wooden ceilings is the cassette installation method. In this way, defects in ceilings, wires and communications are easily hidden. However, do not forget that installing a wooden ceiling is a complex process that must be entrusted to professionals. You are unlikely to be able to do the installation yourself; you risk simply ruining the expensive material.
[custom_ads_shortcode1]
Using plaster
Plastering is a previously popular method, which is gradually becoming less and less used. Its advantages include, perhaps, low cost, variability of subsequent finishing and the ability to carry out the work yourself. Most often, the surface is plastered before painting or whitewashing.
To do this, it is necessary to prime the ceiling partition and then cover it with a special mixture. Then you can apply a finishing touch - paint or whitewash.
Despite the fact that the process looks quite simple, there are many more shortcomings in it than it might seem at first glance. First of all, ceiling plastering work involves a lot of dirt and takes a lot of time. Think about whether the cost savings are worth the effort?
In addition, the plaster fits well on a flat ceiling. In order to cover up cracks and irregularities, you will have to spend a lot of effort. Again, this type of ceiling decoration does not hide communications, for which special boxes will have to be installed.
It is not always possible to successfully fit them into the interior, which noticeably spoils the appearance of the rooms and kills any, even the most beautiful design. Even if you have chosen a high-quality plaster mixture, it is unlikely that you will be able to do without finishing it with paint or whitewash - this will add additional time, effort and expense.
Please note: Plaster imposes restrictions on the choice of lighting devices - for example, recessed lamps will... simply have nowhere to be built in!
Therefore, if you have the opportunity to use another option, we recommend that you do so!
[custom_ads_shortcode2]
Repairing ceilings in an apartment with your own hands
Sooner or later you have to update the ceilings in any apartment. This allows you to refresh the space, give more light and comfort. This is especially true for the kitchen and hallway, where this surface gets dirty and needs refreshing faster than in other rooms. You can repair the ceilings in your apartment with your own hands or with the help of specialists. It all depends on personal abilities and level of training. The main thing is to choose a method that does not require excessive effort or adherence to complex technology. Then transforming the upper surface of the room will not be difficult.
Preparing for work
Repairing ceilings in an apartment with your own hands begins with the purchase of consumables and tools. After this, you will need to thoroughly clean the surface from the previous finish, remove all roughness and unevenness, and walk over the surface with a spatula.
If you ignore this stage, then all the actions taken will be of poor quality. Cracks and holes in the ceiling are sealed with plaster solution. In general, preparation should include the following work:
- Selection and purchase of building materials.
- Removing old material in a convenient way.
- Leveling the surface with rough finishing.
- Checking the level of evenness of the ceiling.
If the surface was previously whitened, it must be washed thoroughly. This can be done with an ordinary hard sponge.
Ceiling finishing
Repairing the ceilings in an apartment with your own hands is not complete without priming the surface. This work is carried out immediately after preparation is completed. Application of an antiseptic is recommended to prevent the appearance of mold and increase the adhesive properties of the surface. After this, a decorative coating is applied.
The application technology depends on the selected material. For example, it is recommended to start repairing ceilings in an apartment with your own hands using plasterboard only after thoroughly leveling the surface with plaster. This can be done using a level and special spatulas. You should repair ceilings in an apartment with your own hands only if you have confidence in your abilities or if simple materials are used in the process.
Using cassette ceilings
Not the most popular option in Russia, but worthy of attention are cassette ceilings on thin metal plates. If you imagined a faceless iron ceiling, you are wrong! Modern cassette designs are distinguished by a variety of designs, colors and shapes. You can easily select cassettes to suit any interior and be able to create a truly original ceiling.
Such ceiling systems are easy to install - even a person without experience can install them in a short time. Another plus is high hygiene. The specially treated metal does not collect bacteria even in rooms with high humidity, which means that such ceilings can be used in the bathroom and kitchen.
Caring for them is also simple - just wipe the ceiling occasionally with special products. Features of the installation process allow you to easily install any lamps - from large chandeliers to built-in spotlights.
The disadvantages include the lack of insulation and a fairly high cost, however, in general, the option deserves consideration for use in private homes.
Of course, in the review we were not able to list all the available types of ceiling design in private homes: wallpapering, attaching laminate to the ceiling, combined types of ceilings.
You can read about them in the corresponding section of our website, where each type is described in detail, with all the nuances and features. The main thing you should focus on when choosing a ceiling for a private home is the features of the room, its configuration, floor materials and your own preferences.
The task is difficult when you think about how to cover the ceiling in a private house, because there are a great many materials for finishing on the market today. It is worth considering the best options; perhaps the ceiling requires insulation, since even with good heating in winter it can be cold and damp in a wooden house.
- We whitewash and paint the ceiling . The method is known, simple and economical. A building mixture is used to level the surface. Next, the ceiling is whitewashed or a layer of water-based paint is applied. Applying a coat of paint or whitewash is the cheapest type of ceiling finish, but there is a lot of mess and cleanup left after the job. When it gets on nearby objects, lime is quickly absorbed, so it is advisable to remove the furniture from the room in advance. Anything that cannot be removed, as well as the floor and windows, should be covered with old rags. https://www.youtube.com/watch?v=jRhEPjyjX_8
- We glue wallpaper . Today it is fashionable to apply liquid wallpaper to the ceiling, but first the surface must be thoroughly primed and dried. To apply wallpaper you will need a grater, a spatula and a spray bottle. Thanks to this option, the ceiling can be made original by creating a certain pattern on the ceiling.
- Drywall for sheathing . With drywall the surface will become smooth. It is easy to install; the top can be painted or whitewashed. You can also sheathe the ceiling in a private house with plywood.
- We install suspended structures . Suspended structures are universal, suitable for any room, but with fairly high ceilings. For designers, the possibilities are endless, because the ceiling can be given different shapes, the volume and height can be adjusted, and additional lighting can be installed.
The basis of a suspended ceiling is a frame attached to the ceiling on a rough frame. Next, you can mount plastic, metal, or wooden panels. Many people, when deciding how to decorate the ceiling in a wooden house, immediately remember wooden lining.
The material is environmentally friendly and suitable for finishing in a private home. But, do not forget that wood does not tolerate moisture, which means it is not suitable for cladding in rooms with high humidity: in the kitchen, in the bathroom, in the bathhouse, in the sauna.
Plastic panels are the most durable and easiest to clean. The designs are respectable and quite affordable; they can even be found on the market with a mirror reflection. You can sheathe the ceiling in a wooden house with plasterboard.
The sheets are inexpensive, easy to care for, and will last for decades with proper care. When using plasterboard ceilings you can:

- make it multi-level
- hide wiring, ventilation, and other communication systems
- install lamps
- repair the structure, if one or several panels are damaged, simply replacing them, the rest of the structure will not be damaged.
A suspended ceiling reduces free space, and this is its disadvantage. With low ceilings in a wooden house, it would still be wiser to simply whitewash, paint, or cover it with liquid wallpaper.
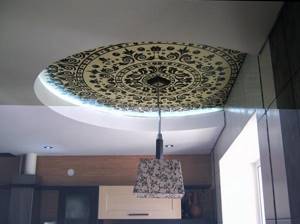
Stretch ceiling . Two-level stretch ceilings are in demand today, since the ceiling can be decorated in different variations, matched to the color of your interior, given a matte, mirror, glossy effect, and even applied with drawings and photo printing. Stretch ceilings come in different shapes. The structures in tiers, waves, and in the form of a tent look very beautiful. Tension fabric:
- practically non-flammable, which is important when installing in a wooden house
- does not allow moisture to pass through, will not allow flooding by neighbors, as it will hold up to 100 liters of water, and after drying it will not stretch or lose its previous appearance.
Installation of a stretch ceiling is suitable for any room and can be done in a matter of hours. Then you can decorate it with beautiful baguettes around the perimeter of the room, and place free wiring between the canvas and the main ceiling.
Glossy stretch ceiling.
[custom_ads_shortcode3]
What types of suspended ceilings are there?
Hemmed and suspended structures have a number of advantages: ideal alignment of any ceilings, unlimited design possibilities, the ability to provide additional heat and sound insulation. Their use is limited by increased cost, reduced room height, and increased installation complexity.
The most popular options are:
- Wood finishing. Most often, lining is used, which is attached with self-tapping screws to a crate made of wooden beams. You can line the ceiling with boards. All wooden parts must be impregnated with an anti-rot composition and fire retardants to increase fire safety. The final coating is provided with a varnish that emphasizes the wood structure.
- Drywall. Drywall sheets are most often used to level ceilings with significant defects that are difficult to hide with plaster. They are mounted on the initial and guide metal profiles, as well as suspensions mounted on the ceiling. The final finishing is done by putty and primer.
- Panels made of MDF and plastic. This coating has an important advantage - high water resistance, which allows it to be used in bathrooms, kitchens and toilets.
- Slatted ceiling. For its manufacture, metal panels in the form of slats are used, which are fixed to the sheathing. Aluminum panels with silver and golden tints, as well as chrome slats, are especially attractive.
- Armstrong ceiling. This is a modern version of a suspended ceiling mounted from mineral tiles. They can be plain, colored or patterned.
These ceilings may have different designs, but their installation principle is similar. A sheathing made of metal (aluminum) profiles or wooden beams is mounted on the ceiling.
Its fastening is ensured by dowels. To do this, first, using a hammer drill or electric drill, holes are made into which plastic dowels are driven. The sheathing elements are secured with screws. Next, the frame is lined with the required material.
Features of ceiling finishing
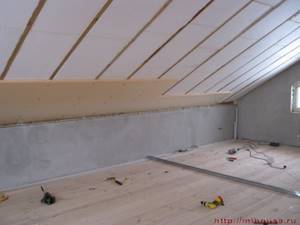
You need to approach the finishing of the ceiling in a private house differently, because the ceiling is not a concrete slab as in high-rise buildings. If there is no attic, then usually the ceiling is a roof slope; it requires insulation on both sides and hemming. You can hem the ceiling with plasterboard, boards, or multi-layer plywood.
The finishing design depends entirely on the roof structure. If the rafters are symmetrically arranged, you need to lay a layer of insulation between them, and if cracks appear, install additional bars. The rafters that remain visible after covering the ceiling with plasterboard must be sanded, painted, that is, made flush with the beams, and then sheathed with wood or polyurethane.
In a private wooden house, wood is the most common option for interior design, so sheathing it with laminate or parquet boards, which is more successful when finishing an attic.
Wooden cladding must be primed, filled with shingles, and plastered. But today, with the variety of materials on the market, this is not necessary if you cover the ceiling, for example, with boards, ceiling panels, tiles, and stencil painting can be applied to the boards.
Wooden ceilings.
[custom_ads_shortcode1]
Ceiling primer
Without these steps, it is almost impossible to repair the ceiling. The exception is the construction of suspended structures, which “allow” you not to bother with leveling.
If you act in stages, then the next stage is primer:
- First you check the seams and joints on the ceiling, each seam and joint should be filled with gypsum or plaster mortar, which is held there very firmly.
- Apply a primer to the surface, be sure to penetrate deeply, this will improve adhesion and subsequent finishing.
- The primer is applied with a brush or roller.
You can move on to the next work only when the current stage is completely completed. That is, when the primer has dried. Then you either putty or plaster the surface. Each master has his own arguments in favor of one method or another.
For example, plaster will reduce the height of the room by three centimeters, and in terms of weight it is not lightweight.
As for putty, it shrinks a lot, which therefore requires the application of several layers. It is easier to work with plaster, and this leveling process will take less time.
Both the process of plastering a wall and the process of plastering a ceiling are very similar. The only difficulty is that plastering the ceiling is physically more difficult, since the surface is non-vertical.