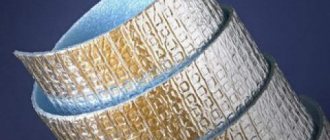
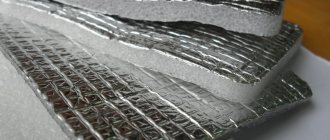
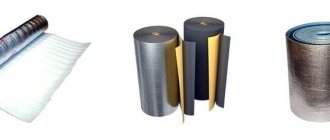
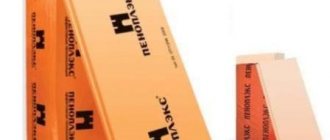
Penofol is both a heat, moisture and vapor barrier, a practical and environmentally friendly material. It is made of polyethylene foam and a 20 micron layer of foil. The foil is heat-fused to the polyethylene and polished, resulting in a heat reflectance of 50 to 70%. Due to this, heat loss in winter and room heating in summer are reduced by 40%. The sound absorption of 4 mm thick foam foam is about 32 dB.
Penofol is available in different thicknesses (from 2 to 10 mm) and comes in several varieties:
- Type “A” - covered with foil on one side.
- Type “B” - covered with foil on both sides.
- Type “C” - covered with foil on one side and a self-adhesive layer on the other.
- Type “M” - embossed, covered with foil on one side.
- Type “ALP” - covered with foil on one side and a polyethylene film applied to it.
Insulation materials
A multifunctional material is presented on the construction market - Penofol, which, with a minimum thickness, provides almost 100% results. It is used for heat and sound insulation of buildings of any type. It can act as an additional or independent layer.
Content:
Insulation Penofol
The range of Penofol allows its use in individual houses, civil buildings and industrial buildings:
- insulation of walls, floors, ceilings, attics and attics;
- insulation of pipes in water supply and heating systems;
- insulation of equipment in various industries, including agricultural, medical and food production;
- ventilation and air conditioning systems;
- insulation of various types of installations used for transporting cold and hot food products;
- rooms with high temperature conditions (drying chambers, baths, saunas, etc.);
- heat and sound insulation of passenger and truck bodies;
- This universal material is widely used in underfloor heating systems.
Foiled Penofol insulation
The combined material consists of a base layer, that is, porous polyethylene with one or two-sided coating of a metal sheet (foil). Its uniqueness lies in the simultaneous performance of several functions: convection and heat reflection. Thus, with a small thickness of Penofol, it is possible to achieve amazing heat and sound insulation. The material is produced in rolls. Sheets can have a thickness from 3 to 10 mm.
The comparative table presents different types of building materials, the use of which can achieve the same result. Penofol type B 4 mm thick is equivalent to:
| Name | Thickness (mm) |
| Brick | 672 |
| Sand-lime brick | 840 |
| Gas foam concrete | 348 |
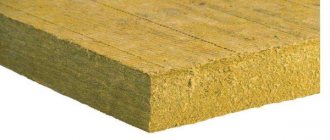
| Mineral wool | 67 |
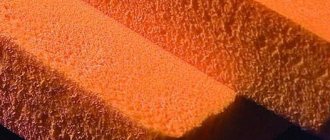
| Expanded polystyrene | 46 |
Advantages
- Ecological cleanliness. The raw materials for production are polyethylene and foil, which have been successfully used in the food and medical industries for many decades.
- A thin layer of material guarantees high thermal resistance. A sheet of Penofol 4 mm thick is equivalent to wall masonry of 2.5 bricks;
- High vapor permeability ensures free release of excess moisture. The absorbency of the material is zero, so its use is possible in rooms with high humidity levels. Foiled polyethylene foam is also used for outdoor work.
- The material is characterized by excellent sound insulation properties. It will protect the structure from acoustic and structural noise.
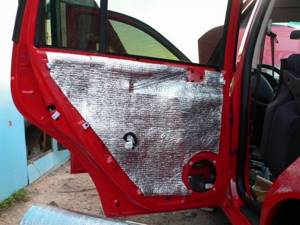
- The light weight of the sheets ensures quick installation. Thanks to its elasticity, the material fits perfectly on any surface. Lining can be done with an ordinary kitchen knife. Fastening is carried out using self-adhesive aluminum tapes and a furniture stapler.
- Non-flammability. Fire technical characteristics state that the presented material belongs to the low-flammable and low-flammability groups (G1 and, accordingly, B1). With prolonged exposure to open fire, the sheets may smolder slightly (smoke-forming ability D2).
- Convenient for storage and transportation. Lightweight and flexible canvases are rolled into compact rolls that fit even in the trunk of a car.
Flaws
- The softness of foamed polyethylene has a beneficial effect during installation, but negatively affects the further finishing of the building or room. The surface is not intended for plastering or wallpapering.
- Despite the high physical and technical characteristics of the material, it is used in most cases as an additional layer. To achieve effective thermal insulation results, it is recommended to use it in combination with other types of insulation.
Penofol application
The manufacturer presents several modifications, the letter designation of which informs about its features.
| type | Thickness (mm) | Length (mm) | Width (mm) | characteristics | scope of application |
| A | 3,4,5, 8 and 10 | With a thickness of up to 5 mm – 3000 mm; 8 and 10 mm – 1500 mm | 1200 | foamed polyethylene with one foil side | It is mainly used for insulating walls, attics and attics together with other types of insulation. This material is widely used for insulation of engineering systems |
| IN | 3,4,5, 8 and 10 | With a thickness of up to 5 mm – 3000 mm; 8 and 10 mm – 1500 mm | 1200 | Foamed polyethylene base with double-sided foil | Effective as an independent insulation for interfloor ceilings and internal walls, partitions |
| WITH | 3,4,5, 8 and 10 | 600 | One side of the polyethylene foam is covered with aluminum foil, the other with a self-adhesive layer. Installation is carried out without the use of additional fasteners | Used for insulating complex structures, optimal for hard-to-reach places | |
| ALP | 3 | 3000 mm | 600 | The base is covered with foil on one side. The foil side is laminated with polyethylene film | This product provides reliable protection against corrosion processes. Ideal for use in underfloor heating systems |
Today, products are also produced in other modifications, for example, with a reinforced base (fiberglass) or additional perforation, which are intended for external insulation of building structures.
How to insulate with Penofol
- Mounting the canvases is quite simple; fastening to the surface is done using staplers or adhesives. The sheets are placed end-to-end, but overlaps of up to 10 cm are allowed. The foil side should face the inside of the room, house, pipe, etc.
Benefits of penofol - debunking myths
Manufacturers and sellers of penofol attribute wonderful thermal insulation characteristics to this insulation, which is actually a myth.
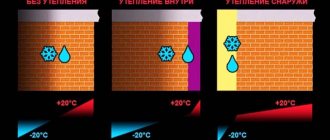
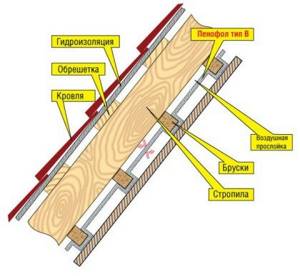
Also, installation diagrams with air gaps, one of which we described at the beginning of the previous section, can be considered misleading the buyer. How the manufacturer proposes to insulate floors and roofs is shown in the figures:
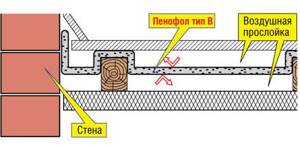
In fact, the presented schemes are nothing more than another way to improve the thermal insulation of external fences using air gaps, since penofol’s own resistance to heat transfer is absolutely not enough.
This can be easily checked by taking as a basis the best thermal conductivity indicator from the technical characteristics table - 0.037 W/m2 °C. Next, we take the canonical formula and determine the thermal resistance of a material 4 mm thick:
R = δ / λ, where:
- δ – penofol thickness in meters, taken 0.004 m;
- λ is its thermal conductivity coefficient, equal to 0.037 W/m2 °C.
We get R = 0.004 / 0.037 = 0.11 m2 °C/W. Now look at the comparison table, which is presented on the same resource as the technical data. It says that 4 mm of penofol can easily replace 77 mm thick mineral wool or 46 mm thick polystyrene foam.
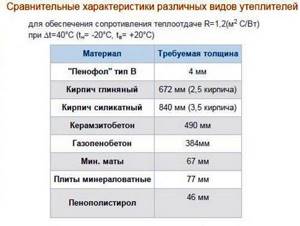
This means that, for comparison, it is necessary to determine the thermal resistance of a 77 mm mineral wool layer (its thermal conductivity is 0.05 W/m2 °C):
Rminwool = 0.077 / 0.05 = 1.54 m2 °C/W, which is 10 times more than that of foamed polyethylene.
Hence the conclusion: the presented comparative table is a pure fake. The data given in it is unreliable, and although the material is a good insulator, it is not better than others. The reason is that it is too thin, although its thermal conductivity is equal to extruded polystyrene foam.
Against this background, all other advantages of penofol fade. However, there is another myth - about the reflection of infrared heat back into the room thanks to the foil surface. But none of the manufacturers explains what the foil will reflect behind the interior trim. After all, infrared radiation spreads across open space; it will not pass through drywall or other obstacles.
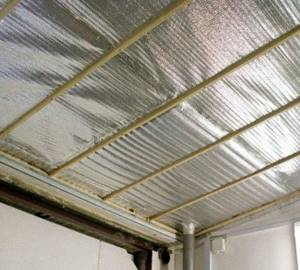
What is really good about penofol is its low cost and ability to act as a vapor barrier together with other insulation, as evidenced by reviews on the forums. In addition, it is easy to install and the process does not take much time. You can also note the durability of the insulation, reaching 50 years, provided that it is located inside the building and not outside. By the way, it is better not to use penofol for external insulation of walls; it will be of little use there. You should not use it for thermal insulation of a bathhouse, like any polymer; when heated to 100 ° C, the material will begin to release harmful substances.
Pros and cons of insulating walls with Penofol from the inside
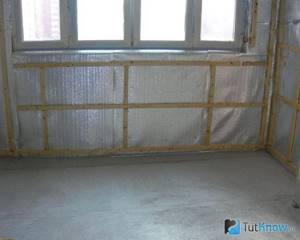
The material has more than enough advantages - it’s not for nothing that it has become so widespread. Let's name the following positive qualities:
- Saving usable space
. This became possible due to the small thickness of Penofol compared to other insulation materials. At the same time, it can replace heat insulators with a thickness tens of times greater.
Good thermal insulation
. Provided by the reflective ability of the material.
High degree of environmental friendliness
. The insulator is practically non-toxic because it is produced on the basis of aluminum foil and polyethylene, which have long been used in the food industry.
Fire safety
. This quality is due to the fact that Penofol is classified as a highly flammable material.
Low vapor permeability
. It doesn’t matter what the weather is like outside the window, since moisture is not absorbed by the insulation.
Sanitary safety
. Penofol is considered a material difficult to access by rodents.
Ease of transportation
. This is due to the fact that the heat insulator is rolled up and easily transported.
Excellent sound insulation
. If such material is mounted on the main structure, it will help protect against acoustic noise.
- Ease of installation
. Penofol can be easily cut with any knife, and it can be secured not only with small nails, but even with tape. But at the same time it is difficult to break or crumble.
However, as is the case with other thermal insulation materials, Penofol also has certain disadvantages. They are as follows:
- The need to use an additional layer that will help reflect thermal energy and protect against moisture.
The lack of sufficient rigidity does not allow it to be used for plastering or wallpapering. The material can be pressed through with light pressure.
How to glue correctly: advice from professionals
Preparatory work
High-quality penofol adhesive is not a guarantee of a positive outcome. In order for the material to firmly adhere to the base and to restore a reliable monolithic screed between the elements, it is necessary to properly prepare the intended plane for the front of the work. To do this you need:
- Eliminate existing defects on the concrete surface, such as chips, cracks, depressions and unevenness.
- To improve adhesion, treat the surface with a primer.
- Dust the site, remove dirt, remove elements that have peeled off from the base.
- Treat the existing metal parts with a special agent that prevents the corrosion process.
- Apply an antiseptic solution to the concrete surface.
Gluing stage
Modern industry has simplified the fastening process by developing self-adhesive penofol. Ordinary polyethylene foam is glued using a special adhesive. The selected glue is applied in an even layer to the side where there is no foil. The edge parts of the penofol are lubricated with the substance more abundantly to avoid material lag at the joints. To ensure that the glue sets properly, wait 1 minute, then glue the polyethylene to the plane. To ensure high-quality installation of the material, the penofol is leveled and pressed until it is fixed. The resulting seams are additionally treated with glue. The plastered structure can be used 12 hours after installation of the heat-insulating material.
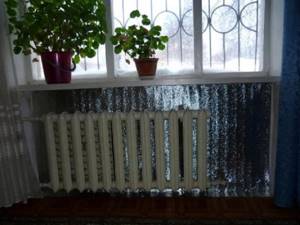
How to glue penofol to the wall behind the battery
All of the listed brands of glue can be used to make reflective screens from foil polyethylene foam. Provided that the distance from the penofol glued to the wall to the heating device is at least 40-45 cm.
For a water heating battery, you have to use a different method:
All that remains is to place penofol from the inside behind the battery and lightly press along the contour. To prevent the reflective sheet from falling off while the sealant dries, we temporarily fix the insulation to the wall with ordinary tape.
If everything is done correctly, there will be an air gap of several millimeters between the screen and the wall from the inside. This is more than enough to compensate for the expansion and contraction of polyethylene during strong and moderate heating of the battery. It is clear that the best screens are made from penofol with smooth foil.
How to insulate with penofol
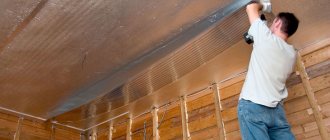
It should be noted that insulating anything (a wall, ceiling or roof) with penofol is really quite simple. If you follow the manufacturer's instructions, then to achieve maximum efficiency it is necessary to provide an air gap of 1.5 to 2 cm wide on both sides. To create such a gap, rolled penofol will have to be attached to wooden sheathing strips attached to the base.
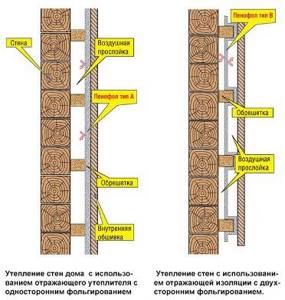
That is, first you need to take 20 mm thick planks and attach them to the wall vertically or horizontally at intervals equal to the width of the penofol roll. If the house is wooden, then the planks are fastened with self-tapping screws; for brick or concrete bases, dowels will be required. Then strips of the required length are cut from the roll and attached to the planks with staples from a construction stapler.
Step-by-step instructions for insulating a loggia with your own hands
To successfully insulate a balcony with your own hands using penofol, follow these instructions:
- Fix the penoplex to the wall using screws with a wide head on one side.
- The rolled material is cut and placed next to each other so that the joints coincide in the vertical direction. If necessary, you can move each sheet slightly.
- The cracks are treated with polyurethane foam.
- When the foam dries, armed with screws, secure the penofol.
- If only one side is covered with foil, position the material so that the shiny surface is inside the loggia.
- Proceed with the installation of the sheathing on which you need to fix the sheathing material. The best is considered to be a lathing equipped with slats, providing a plane between the penofol and the decorative cladding.
How to attach foil polyethylene foam
Reliable and high-quality installation will ensure the proper functioning and durability of the thermal insulation. To install insulation, special adhesives are most often used. Penofol is a fairly lightweight material that is easy to attach to almost any surface. For installation, you can use universal or special glue, which must withstand temperature changes. Some craftsmen allow fastening with liquid nails or polyurethane foam. In some cases, the rolled material can be additionally secured with construction staples. Class C penofol is produced on a self-adhesive base with waterproof glue. This type usually does not require additional installation tools.
Remember that the condition and preparation of the base for insulation is one of the most important factors for reliable fastening. So, the surface should be leveled as much as possible, get rid of bumps and irregularities, thoroughly clean and degrease. Make sure that the inside of the insulation is not dirty. It is recommended to additionally prime concrete, wooden and metal bases before installing penofol. Penofol layers are attached strictly end-to-end, and it is advisable to cover the assembly seams with aluminum adhesive tape.
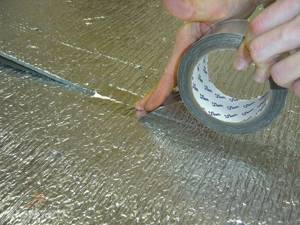
Glue selection
The range of adhesives for penofol on the modern market is quite wide. Therefore, it is important to take into account the different characteristics of materials.
General rules
Penofol adhesive is selected based on the following:
- the product has durable adhesive properties;
- the thermal range coincides with the temperature characteristics of the insulation;
- a non-toxic certified product is used in the interior decoration of residential premises (apartment, office);
- for external finishing, you need glue that is resistant to temperature changes and weather conditions;
- saunas and baths require mixtures with water-repellent properties;
Watch the video to understand better:
Water-based glue is not suitable for gluing isolon!
A water base will not create the required level of penetration into all the pores of foil polyethylene foam. The grip on the surface will be insufficient.
Types of glue

Choose what to glue with, also evaluating the surface:
- Weicon Easy-Mix PE-PP 45. Bonds polypropylene and polyethylene. It hardens for a long time;
- Titanium. Optimal for concrete base;
- Atlas Stopter K-20 glue. Adheres to mineral substrates;
- T-Avangard-K is used at high humidity;
- Contact Acrol or Neoprene-2136 spray is glued to penoplex;
- Ceresit and Olfix are universal - they are attached to any surface, including concrete;
The seams are treated with Tilite or special tape.
Advantages and disadvantages
Before using insulation, you should also consider its advantages and disadvantages. The advantages include:
- good reflection of heat rays, which allows for a good indoor climate not only in winter, but also in summer;
- high wear resistance;
- insulation can partially serve as a waterproofing agent;
- small weight;
- ease of mounting and dismantling;
- does not deform under the influence of cold or hot air;
- protection from street noise;
- absence of harmful components in the composition of penofol;
- fire resistance;
- the layer has a thickness of 4 mm , while it is more effective than other materials;
- no need for additional vapor barrier;
- resistance to the influence of biological factors: mold or mildew does not form on the surface of penofol, it does not rot;
- ease of transportation and installation.
This insulation also has disadvantages. It is soft, so it is not suitable for finishing with plaster or wallpaper. To secure the material to the surface, you will have to purchase special adhesives. Penofol is not always enough for maximum insulation.
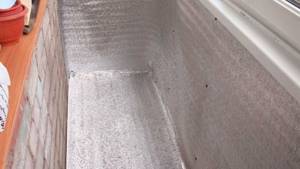
wall pie
To better understand the further installation process, it is worth getting acquainted with the structure of the wall pie, which consists of various layers of material. The sequence of layers is indicated in the direction from the inside of the wall to the outside:
- interior finishing materials;
- panel osv;
- penofol;
- frame racks;
- windproof material;
- sheathing;
- exterior finishing.
Wall pie is indicated for the frame type of house. For other types of structures, some materials can be excluded or added as necessary.
It is worth paying attention to the need to provide a vapor barrier layer in the wall of the cake. Opinions on this matter differ, but in most cases, vapor barrier is not used for insulation from inside the room.
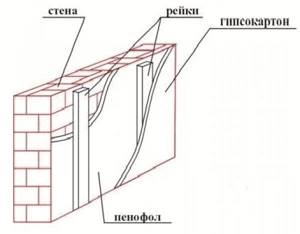
Wall pie device
If penofol is used for external insulation, then a vapor barrier layer is necessary, because the material tends to allow vapor to pass through only in one direction (except for type C).
Recommendations and common mistakes
The most common mistake in installing thermal insulation is the excessive use of self-tapping screws and staplers to fasten the sheet. At the same time, the penofol layer is also deliberately stretched to obtain an even plane. As a result, the panel breaks and the integrity of the insulation is compromised.
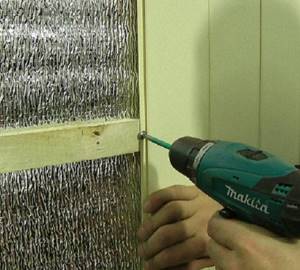
The lining is fastened so that a second air gap remains, and the screws do not reach the penofol panel
If it is not possible to use glue, then the material is fastened to the sheathing with thin upholstery nails 20-25 mm and be sure to drive them through a wooden batten. The fabric is secured in the same way when laying the roof insulation from the inside.
Ceiling insulation
Penofol allows you to insulate the ceiling in the best possible way, since the material is thin and light in weight. In addition, its installation will require minimal effort.
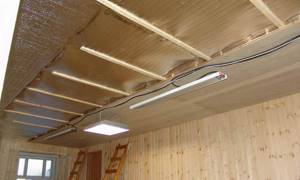
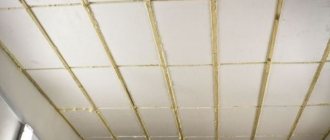
Ceiling insulation with foam insulation
Before insulation, you will need to ensure that you have:
- penofol;
- wooden slats;
- hardware;
- metalworking tools;
- cladding.
Execution technology
- Thermal insulation of the ceiling surface is provided in two steps. The initial layer is fixed to the ceiling by means of slats in the longitudinal direction. The next layer is similar in the transverse direction, with the material extending onto the walls within 100mm. The slats are secured with self-tapping screws.
- A cladding made of plastic, foam, or other lightweight component is installed on top of the installed layers.
