Mulwatt
5156 0 0
Mullvatt September 5, 2016Specialization: Capital construction work (laying a foundation, erecting walls, constructing a roof, etc.). Internal construction work (laying internal communications, rough and fine finishing). Hobbies: mobile communications, high technology, computer equipment, programming.
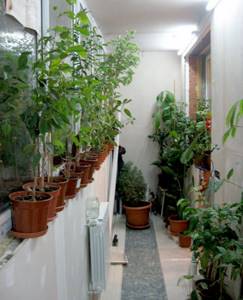
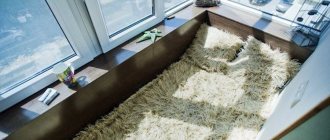
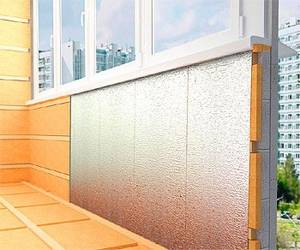
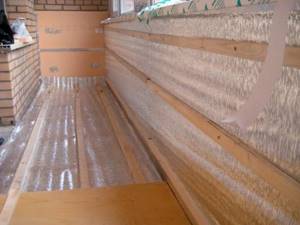
Thanks to insulation, even tropical plants can grow on the balcony.
Today I will tell you how to insulate a balcony with foam plastic with your own hands. The fact is that one of my neighbors decided to turn her loggia littered with garbage into a greenhouse with rare species of ornamental plants. That is, one might say, she imagined herself to be the wife of the great king Nebuchadnezzar II. And for this, since we live far from Babylon, we need to perform high-quality thermal insulation of this room.
I am sure that many people want to expand their apartment by turning a balcony or loggia into a living room. Therefore, the instructions for insulating a balcony, presented to your attention today, are unlikely to be superfluous.
What type and method of insulation to choose
It is necessary to take into account first of all the purpose of the balcony room. If the loggia is not used year-round, the main task is to reduce heat loss from the living space. In this case, it is enough to insulate the side adjacent to the room.
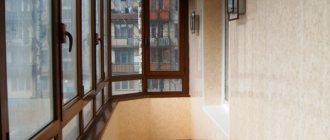
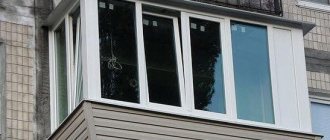
When the loggia is intended for storing vegetables, all walls are insulated. The room does not need to be maintained at room temperature. Therefore, it is enough to choose a material that provides an average level of thermal insulation. Read more in the article “aluminum windows for the balcony.”
High demands are placed on insulation materials used on a balcony that is used year-round or combined with a living room. A thick layer of high-density insulation is required. All surfaces are insulated and it is checked that no drafts pass through the windows.
The specifics of installation work are determined by weather conditions. Insulation materials can be used at sub-zero temperatures. But for polyurethane foam, glue and solutions, you need to take into account the temperature conditions specified by the manufacturer. Frost-resistant products are more expensive.
If fire safety plays an important role, it is necessary to choose fire-resistant building materials. Mineral wool is considered the most resistant to open fire; penoplex has the least resistance. Another parameter is the budget. It determines the choice of insulation and the area covered by it. If funds allow, it is better to entrust construction work to professionals. Otherwise, you will have to purchase additional tools.
What are the requirements for insulation?
The following are desirable characteristics for wall, floor and ceiling cladding.
High-quality insulation must have the following properties:
- Light weight - this parameter is important so that a high load is not created on the balcony slab.
- Fire safety and environmental safety.
- Small volumes - the material will not take up much space in a cramped room.
- Possibility to carry out installation without the help of specialists.
- Affordable price.
What to look for when choosing a material
The heat-saving characteristics are affected by the density of the material. The thicker the sheet we choose, the more area it will take up. With a sheet density of 25 kg per cubic meter, a sheet 80 mm thick will be sufficient.
If the density of the extruded material is higher, then a sheet with a thickness of 50 mm can be used.
When choosing a material, pay attention to:
- all slabs are of the same thickness, width, length;
- granules of the same size, evenly distributed;
- no foreign odor;
- packages are marked;
When using polyurethane foam, we take into account that toluene, which is sometimes included in its composition, dissolves polystyrene foam.
Insulation for balconies and loggias - types and properties
Insulation materials differ not only in cost and thermal insulation properties. When choosing, you must also take into account the installation method and the load created. Some building materials are only suitable for loggias with a solid concrete base.
Expanded polystyrene
Sheet high-strength material that resists open fire well. It provides a high level of thermal insulation and is at the same time resistant to prolonged exposure to moisture. Not affected by mold fungi. Available in the form of sheets that are easy to cut. But when burned, it can release life-threatening hydrocyanic acid.
Balcony insulation with foam plastic
This lightweight building material has high thermal insulation and sound insulation properties. It is affordable, and installation can be done on your own, without the help of professional builders.
Polystyrene foam has been tested by time; it has been used for insulation in both apartments and country houses for decades. It is easy to cut and is not afraid of high humidity and temperature changes.
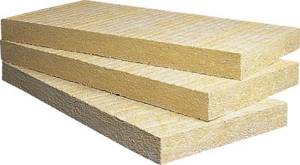
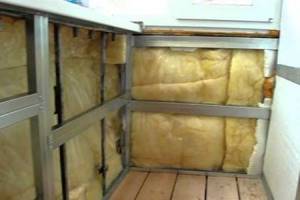
Mineral wool
It is produced from rock melts, less often - from metallurgical slag. It has a structure with many small fibers.
Advantages of mineral wool:
- It is a non-flammable building material and does not deform when exposed to high temperatures.
- Due to the fact that there is air inside the pores, heat does not pass through the cotton wool.
- Fungus resistance.
- Low degree of shrinkage - the sheet retains its original shape.
The main disadvantage is the lack of resistance to moisture. If the insulation gets wet, it will lose its properties. To avoid getting wet, it is important to take care of waterproofing the balcony. Another drawback is that to install mineral wool you will have to build a frame from timber.
It can be used on unheated balconies, but there should not be high humidity in the room. Installation requires knowledge in the construction field; it may be difficult for a beginner to work with mineral wool.
Polyurethane foam or PPU
This low-flammability material is sprayed onto the walls using a special gun with a hose connected to a pressure-injecting unit. It can be easily sprayed onto any surface, including wood, metal and concrete. Can be used at temperatures from -150 to +140 degrees.
Polyurethane foam does not react with other materials, so they do not corrode when in contact with it. For installation you will need to call specialists. When exposed to fire, polyurethane foam does not melt, but forms coking coal. This means that in the event of a fire it will not become a source of fire. Even when heated to 80 degrees, it does not produce toxic fumes.
The advantage of polyurethane foam is that when sprayed, a seamless coating is obtained. As a result, there are no cold bridges and no need to fill the cracks with foam. You can choose how thick the layer to apply and thereby adjust the degree of insulation. Two centimeters of polyurethane foam have the same heat-saving properties as a half-meter brick wall.
Penofol
Usually consists of two layers - penofol and a reflective aluminum substrate. Varieties are produced where there is a third layer - aluminum foil or a self-adhesive backing. Polystyrene sheet has excellent thermal insulation properties. The aluminum backing reflects heat into the house.
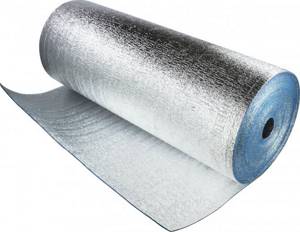
Thin penofol does not take up extra space. Therefore, there will be room for heated floors, built-in furniture, and a suspended ceiling. Penofol can be installed separately or together with other insulation materials. For maximum insulation, it is advisable to choose a variety covered with foil on both sides.
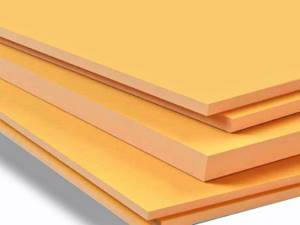
Penoplex or extruded polystyrene foam
Produced from polystyrene by extrusion. The insulation is resistant to mechanical loads, heat-intensive, and does not accumulate moisture. Penoplex is environmentally friendly and has a long service life. To insulate a home, sheets 4-6 centimeters thick are used. In terms of insulation efficiency, they are superior to mineral wool and polystyrene foam.
Read more in the article “How to insulate a balcony with penoplex.”
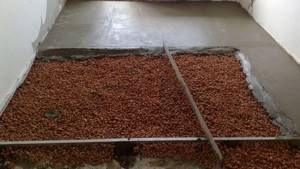
Expanded clay
This bulk material is porous granules of baked clay. It is used only if they want to insulate the floor on the balcony; the recommended fraction size is from 10 to 20 mm. With its help, you can improve not only thermal insulation, but also sound insulation. The only condition is the presence of double-glazed windows, otherwise the sound will pass through the windows strongly.

For thermal insulation, a layer at least 10 cm thick is required, which means that the ceiling height will decrease. Granules strongly absorb moisture, and wet expanded clay loses its valuable properties. Therefore, it is advisable to put waterproofing on top of the expanded clay.
Choosing a method of insulation and thermal insulation material
To insulate balconies with reinforced concrete enclosing structures, there are two ways to install thermal insulation:
- On the outer surface of the walls.
- From inside the room.
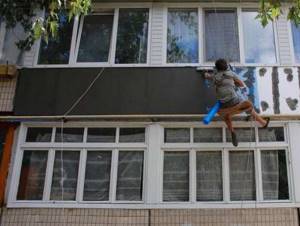
External insulation of a balcony requires specific skills from the builder.
The first option is more effective in terms of heat-retaining properties, but in this case you will have to buy climbing equipment or rent a bucket truck. In the first case, you need to have rock climbing skills, and in the second, a large amount of money that will have to be spent on renting engineering equipment.
But in the case of insulating a balcony or loggia, thermal insulation material can be installed from the inside. Thus, the estimated cost of the operation, the time to implement the project and the labor intensity of the work are significantly reduced.
Therefore, I prefer and advise everyone to carry out internal insulation of balconies and loggias in city apartments.
Even a novice master can install insulation inside the loggia.
Now regarding the choice of insulation. Now I will not divert your attention to a description of exotic and (or) complex methods of thermal insulation using sawdust, polyurethane foam, expanded clay, and so on. I will focus on only two options:
- expanded polystyrene;
- basalt fiber insulation.
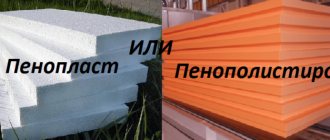
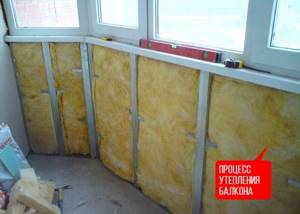
So, what is better to insulate a balcony: mineral wool or polystyrene foam? I’ll say right away that mineral wool, being a vapor-permeable material, not only insulates the balcony, but also helps to create a microclimate inside that is comfortable for human habitation with a normal level of humidity.
But in my case I had to abandon the use of mineral wool. The customer was put off by the high price of the material, and I was put off by the need to install waterproofing and sheathing (in this case, the usable area of the already cramped balcony would have to be significantly reduced).
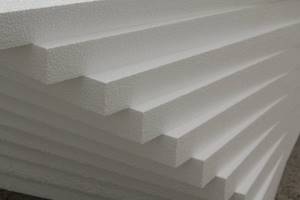
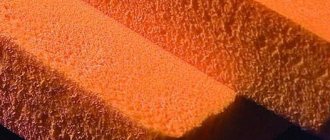
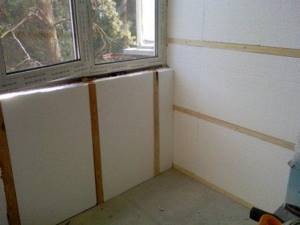
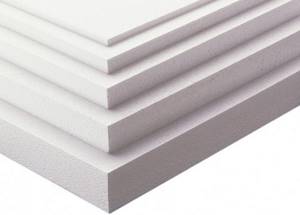
Expanded polystyrene (pictured) is perfect for thermal insulation of a balcony.
Therefore, the choice fell on block polystyrene foam, that is, banal polystyrene foam. I’ll say right away that its use in no way affects the quality of insulation, since the mentioned material has a large number of additional advantages, outlined in the table below.
| Characteristic | Description |
| Low thermal conductivity | Expanded polystyrene has perhaps the lowest thermal conductivity coefficient among other materials on the market. The thickness of the foam for insulating a loggia can be from 5 to 10 cm. |
| Strength | The material tolerates external influences well and is strong enough to withstand finishing in the form of a thin-layer cement screed (followed by decoration with facade plaster). |
| Waterproof | In direct contact with liquid, foam absorbs no more than 3-4% of its own volume without changing its heat-retaining properties. Therefore, there is no need to worry about installing an additional waterproof membrane. |
| Antiseptic | The insulation, even if used in humid air, does not rot or become covered with mold and mildew. It is damaged by mice, but on the 10th floor of a city building, I think there is no need to be afraid of small rodents. |
| Chemical neutrality | Polystyrene foam does not react chemically with alkalis and other chemicals found in building mortars and decorative finishing materials. |
| Availability | The material in question is the cheapest among other popular insulation materials, so you won’t have to spend a significant amount of money on its purchase. |
| Easy to install | The insulation is easily installed on all surfaces of the balcony using conventional hand and electric tools, without the use of complex engineering equipment (for example, aerial platforms or a compressor for spraying polyurethane foam). |
Some experts do not recommend using polystyrene foam, citing its low vapor permeability. However, here you need to take into account that the reinforced concrete parapet and walls of the room themselves practically do not allow air to pass through (unlike brick, foam concrete or wood). Therefore, the insulation layer will not affect air infiltration in any way.
There is no need to worry about the destruction of polystyrene foam under the influence of ultraviolet radiation. After completing all the work using the technology I describe, it will be reliably protected with a cement screed.
Therefore, the only disadvantage is the high fire hazard. To insulate loggias and balconies, I strongly recommend using only construction polystyrene foam with fire retardants, which promote self-extinguishing of the material in case of fire and limit the further spread of fire.
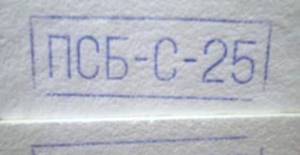
Make sure that the foam is marked accordingly.
PSB-S-25 polystyrene foam with a density of 25 kg per cubic meter is most suitable for thermal insulation of a balcony. It is sold in slabs measuring 100 by 50 cm and 10 cm thick. This is ideal for installation in a small room.
Which material to choose
If a high level of sound insulation of the balcony is not required, it is enough to purchase inexpensive polystyrene foam. The density of the foam is only 10 kg/m3, it is lightweight and does not create a large load. Penoplex is a little more expensive, it is stronger and more effective than polystyrene foam. Mineral wool has better performance, with which you can turn a cold loggia into a room for year-round use.
But the prices are higher, and additional costs will be required for the purchase and installation of vapor barriers.
Penofol or isofol are effective and inexpensive building materials. They are recommended to be combined with other insulation materials, or laid in several layers. The reason is the insufficient thickness of the roll materials. If we compare a layer of polyurethane foam and polystyrene of the same thickness, then the first option has higher thermal insulation properties.
But the installation of polyurethane foam must be carried out by specialists, whose services will have to be paid separately.
Features of insulation of “cold” balconies
Let's consider the reconstruction of the balconies of the top floor in a panel house. With a light roof and simple glazing, the balcony freezes even at the lowest temperature.
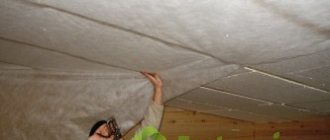
First of all, it is necessary to insulate the roof. Some insulation options are the application of a layer of foaming polyurethane foam, the use of other insulation materials - mineral wool, foam sheets, expanded polystyrene.
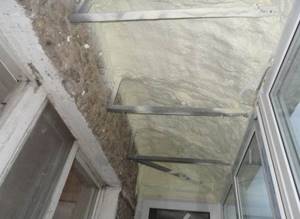
Balcony roof insulated with foaming polyurethane foam
Insulating walls is similar to the method discussed above. And the insulation of external fencing has its own characteristics.
The internal insulation of the balcony may not be enough to shift the dew point outside the balcony room. It is necessary to install additional insulation on the outside of the fence.

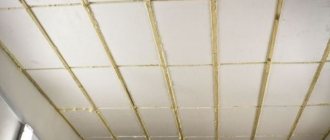
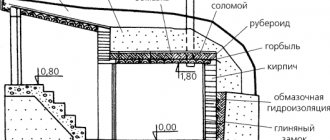
Scheme of combined insulation of a balcony
As can be seen in the diagram, in this case two sandwich panels are used. They do their job well and retain heat on such balconies.
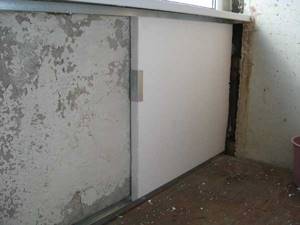
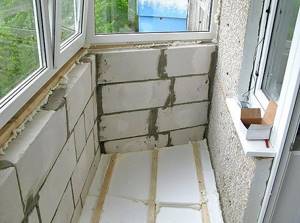
With a strong balcony slab, it is possible to replace the metal fence with a parapet. It is better to make it from foam blocks, since brick and cinder blocks are heavy, and the slab may not withstand the additional load. Insulation of the parapet can only be done from the inside.
Preparation
Before carrying out work, it is necessary to prepare the balcony. The number of preparation stages is determined by the state of the building, the building materials used and the selected installation technology.
Preparatory work includes the following steps:
- Cleaning things and furniture from the balcony.
- Removing or installing new fencing is usually required in older buildings.
- Construction of a parapet or its strengthening. It is convenient to use foam blocks for construction.
- Sealing cracks. In most high-rise buildings, the loggias are not initially glazed, but even after glazing there are many gaps left. They can be located at the junction of the slabs, between the floor and the wall. They should be sealed with foam.
- Strengthening and leveling the concrete slab.
After completing the above operations, installation begins. This may require preliminary installation of waterproofing.
Preparing for work
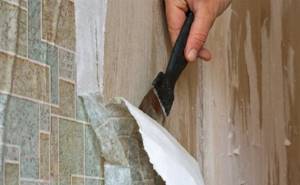
Immediately before the insulation process itself, it is necessary to clear the balcony of unnecessary objects, inspect the surface of the walls and parapet, and, if necessary, carry out related work. It is necessary to get rid of the old coating, strengthen the cracked areas of the walls and floor, and also cover up all the holes and other surface defects remaining after dismantling.
After the walls have been repaired and the glazing has been checked for tightness (on an unglazed balcony the need for insulation disappears by itself), you can proceed directly to the surface preparation itself.
What is the preparation process:
- Seal cracks and cracks with putty.
- If necessary, remove mold and mildew.
- Treatment with deep penetration primer.
- Installation of a waterproofing layer.
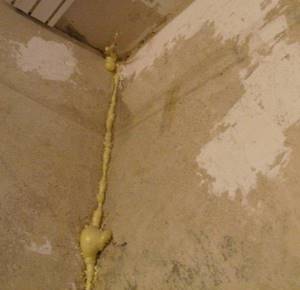
Polyurethane foam is ideal for sealing cracks.
The further process depends on the chosen method of attaching the foam sheets. If the adhesive method is used, the surface should be as leveled and strengthened as possible. When choosing the method of installing the sheathing, you should pre-install guides with a given distance and frequency.
Installation
The sequence of actions is slightly different for different insulation materials.
Typically the following steps are followed:
- Laying waterproofing – protects against moisture penetration. It is important to remember that dampness can penetrate micropores in a concrete slab. To avoid this, it is recommended to first coat the walls with a primer. If mineral wool is used, it should be covered on both sides with a waterproofing film.
- If the frame method is chosen, the racks and crossbars are screwed on.
- Next, the insulation is installed. With the frameless method, it is glued without first performing waterproofing.
- A membrane, film or penofol is laid on top. The insulation of the PPU loggia is carried out by professionals using specialized equipment.
- The floor on the balcony is being insulated.
- The final stage is finishing the balcony with plasterboard or clapboard (for more details, see the article “how to cover a balcony with clapboard with your own hands, step-by-step instructions”).
Insulation materials produced in rolls are attached directly to the wall. Tile materials, for example, polystyrene foam or polystyrene foam, are installed in several ways. The sheet can be glued with glue or attached with dowels. In this case, space is saved, since there are no gaps between the heat-insulating building material and the wall.
The second method, which is used most often, is fastening to a wooden or metal sheathing.
The insulation is cut according to the cell size, usually it is 60x60 centimeters. The resulting parts are placed inside the cells. When using this method, condensation does not form on the walls; due to the air gap, the level of thermal insulation is higher. You can screw the trim to the sheathing - plasterboard, hardboard or clapboard.
Two ways to install sheet or roll insulation
If you use the frame method, you will first have to secure wooden posts or a galvanized profile. Most often, wooden racks are used, since they can be selected according to thickness, and they are cheaper. The vertical elements are connected by crossbars. To make the structure, a 50x50 cm beam is suitable. Then you need to lay thermal insulation material inside the frame.
Do-it-yourself insulation of a balcony with polystyrene foam can also be done using a frameless method. It is easier to secure the sheets with glue; there is no need to install racks. Due to the absence of a frame, there are no cold bridges formed in places where the wood is not covered with insulation.
Only rigid material can be attached directly to the wall. In this case, the mineral wool will not hold. It is important to remember that the absence of a frame leads to increased loads on the thermal insulation. Over time, the sheets will begin to deform and their properties will deteriorate.
Calculation of the required amount of polystyrene foam
Builders recommend purchasing expanded polystyrene, the dimensions of which are 50x100 centimeters. If the balcony or loggia is small, then you can, in principle, use a whole sheet in height. But the length will most likely have to be reduced, but this will not pose any difficulties for you. This material is very easy to cut.
It is worth noting: this insulation material crumbles quite heavily. You need to be extremely careful when cutting it, and also immediately remove its crumbs.
As for the thickness, the greater it is, the better the thermal insulation. If you plan to make your balcony as an extension of the room, then it is better to choose the thickest polystyrene foam.
READ MORE: Insulation of balcony and loggia ceilings
We can come to the conclusion that for good thermal insulation you need to purchase polystyrene foam 20 centimeters thick. For the floor - 16, and for the ceiling ten centimeters is enough.
Balcony insulation with foam plastic
This type of thermal insulation is recommended to be installed at temperatures ranging from -5 to +30 degrees. To securely fasten it, it is recommended to use glue and fasteners. An adhesive is applied to the sheets and then pressed against the wall.
Typically, builders glue the foam using a gun filled with polyurethane foam. One cylinder is enough to treat 10 square meters.
Dry adhesive mixtures are suitable for insulating a balcony with polystyrene foam inside and out; they can be used to attach the sheets to a wooden sheathing. But dry mixtures are not suitable for fastening to concrete.
It is not recommended to use liquid nails; they do not create sufficient fixation. But nails harden quickly, so they are often used in combination with long-drying foam or glue. In this case, you will not have to put up supports to prevent the sheet from falling before the foam hardens.
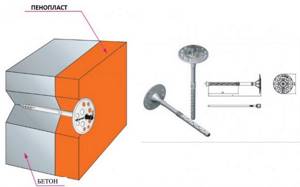
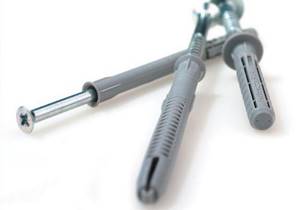
To secure the foam securely, it is advisable to use fasteners. They can be combined with glue or used instead. For this operation, a mushroom dowel is used, which does not cause deformation of the thermal insulation.
Insulating a balcony with polystyrene foam step by step:
- Select the dowels according to their length - they must pass through the material, a layer of glue and old plaster. Next, the fasteners penetrate the concrete to a depth of at least 50 mm, and the curvature of the wall must be taken into account. Typically, for foam plastic 50 mm thick, a dowel 110 mm long is enough.
- Holes are drilled in the foam that will be used for fixation. For 1 m2, six holes are enough - four in the corners and two in the center.
- Screw the mushroom dowel using a screwdriver; if fasteners with a nail are used, it is simply driven in with a hammer.
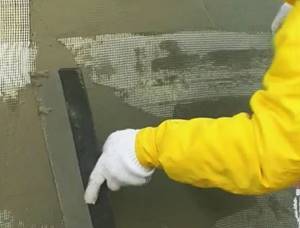
After installation, it is recommended to cover the foam with a mesh and apply reinforcing glue on top. You can attach trim on top of it. It is advisable that the reinforcing adhesive be made by the same manufacturer as the fastening adhesive.
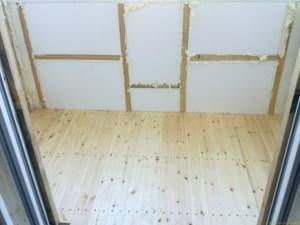
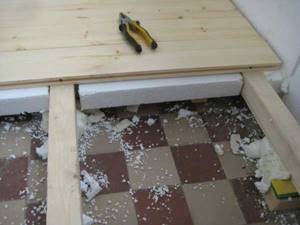
When insulating a floor with polystyrene foam, logs from timber are first installed, then sheets are laid between the sheathing. The remaining gaps are sealed with polyurethane foam. The material should be flush with the wooden beam. The top is covered with plywood.
You can insulate the floor without installing a frame. But in this case, you will have to put a reinforcing mesh on top, and then make a concrete screed. This method is rarely used, since performing the screed requires some skills.
Both frame and frameless methods are suitable for attaching polystyrene foam to the ceiling. If wooden lathing is used, a layer of film must be placed between the frame and the material to avoid the formation of condensation. The foam is cut exactly to the size of the cells, since it is not subject to deformation. If the sheets are glued with glue, several additional fasteners are installed. For finishing you can use sheets of plasterboard.
How to choose foam
Foam plastic of different thicknesses and densities is used as insulation. In addition, it must have the necessary fire resistance class, as well as safety for indoor use. The biological resistance of the material avoids dampness and the spread of mold.
Main selection criteria:
- The thickness of polystyrene foam for insulating external walls varies from 5 to 10 cm, depending on the climate of the region of residence. The density of the material should be within 25 kg/m³.
- To cover the floor, foam plastic must have a density of at least 35 kg/m³ in order to withstand increased loads.
- Internal insulation is carried out in sheets with a thickness of 4 cm, the density of which is from 15 to 25 kg/m³.
When purchasing, always check product certificates and labeling. There are many fakes on the market, in the production of which toxic substances could be used, and the quality may not meet the stated requirements. The use of such materials indoors is simply dangerous, because under the influence of temperature toxic substances can be released into the air.
Important: installation of polystyrene foam often involves the use of fasteners. In this case, plastic parts are preferable, because metal screws can develop rust stains on the plaster over time.
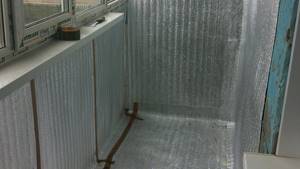
Balcony insulation with penofol
It is convenient to work with rolled insulation; it is easy to cut and does not crumble. Balcony insulation with penofol is carried out at any time of the year, regardless of temperature. Work begins with cleaning the wall of old wallpaper, eliminating cracks and leveling. All cracks must be filled with foam or sealed with cement mortar.
Penofol is attached to the wall using self-tapping screws. If double-sided material is used, it is important to secure it so that the foil is on top. The joints must be glued using foil tape. When insulating a loggia with penoplex and penofol, the foil material is secured with a second layer, attached to the sheathing.
The floors need to be cleaned and leveled (for more details, see the article “how to level the floor on a balcony”). Before installing penofol, it is advisable to put another insulation, since the slab conducts cold very well. To do this, you will have to lay down timber and make a sheathing. Then fill the gaps with polystyrene foam or polystyrene foam, pour polyurethane foam into the cracks. Penofol is placed on top with the foil side up. Sheets of plywood are screwed to the sheathing.
Insulation of the loggia with penofol - after leveling, the floor is covered with penofol in two layers. The insulation will be held on wooden slats. The first layer is mounted using transverse slats, the subsequent one - using longitudinal ones. It is important that the last layer extends a few centimeters onto the walls. It will be convenient to attach the trim to the slats nailed on top.
Finishing the balcony
After you have insulated the entire balcony with polystyrene foam, proceed to its final finishing. If you decide to complete the insulation of the balcony by installing plasterboard sheets, then it is best to attach them to foam plastic, secured by a frame method. For the glued option, you will need to install additional wooden batten sheathing on the walls.
- Install the drywall sheets using self-tapping screws onto the frame.
- Fill the gaps between the sheets and the heads of the screws.
- Paint the walls the color you want.
Balcony insulation with mineral wool
Work is carried out only if there is glazing. If you are insulating a balcony with mineral wool yourself, you must first install a wooden sheathing. For its manufacture, timber with a thickness of 50 to 100 mm is suitable.
Thus, it will be possible to leave a gap between the insulation and the wall. Due to the air gap, the degree of thermal insulation will increase. It is inconvenient to use a metal sheathing; in this case, the cells should be 1 cm smaller than the insulation being laid. Then, after shrinkage, the mineral wool will not fall out.
It is important to install the material in the correct sequence - first the ceiling, then the walls, and the final stage - the floor.
First, a vapor barrier is stapled to the joists - this is a standard film 200 microns thick. Mineral wool is attached to the walls and ceiling using a mushroom dowel. For installation on the floor, you must use special glue. To increase the thermal insulation properties, it is advisable to lay sheets of insulation in two layers according to the principle of brickwork.
The mineral wool must be laid tightly so that there are no gaps. Another layer of vapor barrier is attached to the top. Next, the trim is attached; floorboards or plywood can be placed on the floor.
Preparatory work
Before insulation, it is imperative to prepare the surface that will be insulated, as well as the balcony itself. To insulate a balcony with extruded polystyrene foam, you will need to thoroughly clean it of construction and any other debris, remove clotheslines (if any), as well as shelves and various fasteners that stick out. After this, you need to dispose of the garbage and vacuum the room well.
READ MORE: Floor insulation on balconies and loggias
The second stage will be dismantling the old finish. If cracks or holes are found on the floor, they must be removed using a wet or dry screed.

The last operation will be to treat the walls with an antifungal primer that penetrates deeply into the wall. It will help strengthen the walls and protect them from various types of moisture and mold.
This insulation can be fastened in two ways: fasteners or glue.
Insulation of the floor on the balcony with expanded clay
First you need to clean the surface, seal cracks and irregularities with cement-sand mortar.
Now you need to set the beacons so that the floor remains level after insulation:
- Screw one screw into two corners of the loggia; it is important that it rises to the height of the expanded clay layer. Typically its thickness is 10 centimeters. A laser level is placed in the center of the room.
- One long strip is placed vertically on each self-tapping screw.
- At the point where the beam intersects with the staff, you must mark a point with a marker. One point is placed in both corners.
- If the mark does not coincide with the beam, you need to screw in or unscrew the screw harder. Thus, markings are made in the remaining corners.
Cement mortar must be poured onto each self-tapping screw. Next, the guides are secured, the beacon is placed on top of the solution and pressed. When it hardens, you can move on to the next stage.
Next, thin layers of expanded clay are poured and each layer is leveled with a rule. This is necessary so that there are no voids left, otherwise in some places the level of thermal insulation will be lower. After backfilling and leveling, a concrete screed is made. Before doing this, it is advisable to spill the expanded clay with cement laitance. If expanded clay is poured inside a wooden sheathing, a screed is not needed. The top is covered with plywood.
We cover the openings
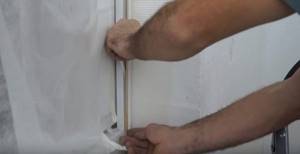
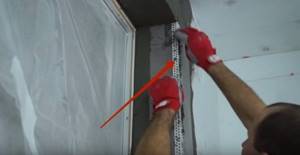
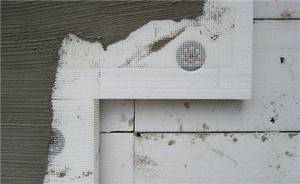
Perhaps this is the most difficult stage of work on insulating a balcony with polystyrene foam. For a balcony, these openings most often experience loads during operation. Corners are the weak points of any building. Tried and reliable finishing method:
- To begin with, a reinforcing profile is attached to the window block. It is necessary to clean the window block from mortar and dirt and degrease it.
- The profile has an adhesive layer with a protective tape. It is removed and pressed tightly against the door or window block. You won't be able to tear it off, so do everything carefully and the first time.
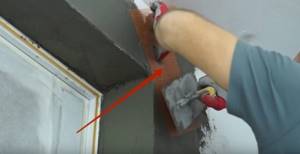
- Next, the slope is treated with a layer of glue. The mesh that is attached to the profile is sunk into the adhesive layer with a float.
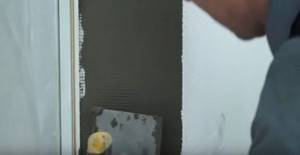
- Then a plastic corner with a mesh is installed at the corner of the opening. Again, glue is applied to the foam, about 10 cm wide, and a corner is immersed in it. The excess will come out through the hole, and the mesh will also be embedded in the glue.
- The section of the wall at the corners is treated with a mesh gusset. The fact is that there is a lot of tension on this place. That's why it needs strengthening. The fiberglass mesh is recessed as usual.
- The same must be done with the inner corners of the window opening.
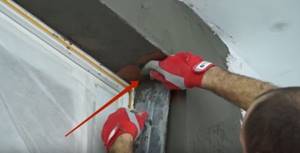
Now everything is ready. If there are protrusions or other decorative elements, it is also recommended to reinforce them with mesh.
How to insulate a balcony with extruded polystyrene foam
Installation is carried out on leveled walls; after sealing the cracks, it is advisable to cover them with a layer of putty.
Balcony insulation with penoplex (expanded polystyrene) is carried out in the following sequence:
- Cut polystyrene foam with a construction knife to the size of the floor, ceiling and walls.
- A foil vapor barrier is attached to the wall. The foil should be on the polystyrene side.
- Glue is applied to the cut parts pointwise, retreating 5 millimeters from the edges. The thickness of the adhesive layer must be at least 2 mm.
- To improve fixation, plastic dowels are additionally attached for thermal insulation. It is recommended to install at least six dowels per square meter.
- Next, install the second layer of vapor barrier.
- After installation, a reinforcing mesh is installed on top of the glue. The cell size should be 5 millimeters. The mesh should not be pressed too hard and should not be buried in the glue.
When the insulation of the balcony with extruded polystyrene foam is completed, plaster can be used as finishing for the walls (for more details, see the article “finishing the balcony with decorative plaster”) or plasterboard. Installation on the floor is carried out only after leveling the slab. After installation, a concrete screed is poured over the reinforcing mesh. The next layer is to apply floor leveler.
How to insulate a balcony or loggia with polystyrene foam with your own hands?
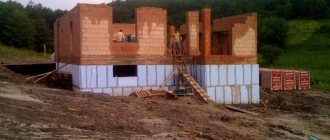
A balcony attached to an apartment requires a special approach to its insulation, because its design is a slab protruding from the facade of the building with a metal fence on the outer sides. There is only one supporting structure - the floor. Therefore, the question of how to properly insulate a balcony with polystyrene foam is encountered quite often among consumers.
Why polystyrene? This is one of the most advanced thermal insulation materials, which is a derivative of foam plastic. But it is several times denser, warmer and stronger, plus excellent qualities in terms of low water absorption. Let us add that if this particular insulation is chosen for the balcony, then it is better to use the extruded option.
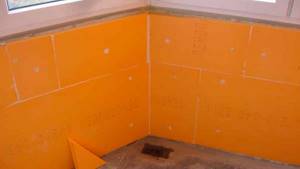
Insulation of walls with foam plastic
Paying attention to the huge list of positive properties of polystyrene foam, experts say that it is perfect for insulating balcony walls.
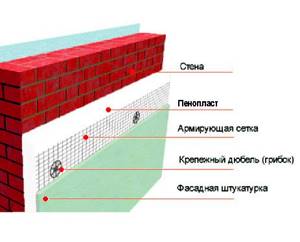
Wall insulation scheme
Here are the main stages of construction work:
1. Clean the walls from dust, dirt, and previous building materials. If there are large and deep cracks, blow them out with foam.

2. Using a thin layer of cement adhesive, the sheets are attached to the surface. Each of them is carefully pressed against the walls to avoid deformation.
3. The foam is secured on top with dowel nails (they have wide heads that, unlike regular ones, will not be pressed when tapped with a hammer). When performing this type of work, you cannot do without a drill, because there is no other way to hammer a nail into concrete. A dowel is inserted into the resulting hole, and a nail is driven into it.
4. Using liquid nails, penofol is attached to the resulting surface of the balcony. It has excellent thermal insulation properties, which will make your living space even more comfortable. 5. Tape the joints between the foam sheets with foil tape.
6. If the balcony walls will not be painted, a sheathing of bars is installed along the entire perimeter at a distance of up to 40 cm from each other (their recommended thickness should not exceed 5 cm).
7. Putty on the dowel heads.
8. Putty the resulting surface twice (before applying the second layer, you should wait until the first one has completely dried, which will avoid cracking).

9. Glue the reinforced mesh onto the cement mortar onto well-glued foam.
10. Apply a primer and then paint it in the color you like or use another finishing material.
Return to content
Installation of foam between the frame
Having decided to mount the sheets behind the frame, there is no need to prepare the surface in any special way. Usually they are primed with deeply penetrating soils (Aquastop, Gidrostop) or the joints are coated with bituminous mastics (primers). Sheets of foam plastic are placed in the space between the frame and the wall. After laying, it is necessary to blow out all the cracks between the sheets with foam. After hardening, the foam is cut off and the front finishing is performed.
Option for installing foam plastic by laying it in a frame.
Important: Before starting installation inside the balcony, you should check from the outside all connections of the balcony for the presence of cracks. If they still exist, you need to blow them out with polyurethane foam (all-season) and install strips and canopies to drain water.
If you decide to glue foam plastic with mounting adhesive, then you will have to remove the remains of concrete, old paint, and protruding foam after installing the window. Let's consider the second option in more detail. After all, it saves a lot of space, and this comes in handy. The walls are cleaned with a spatula; the paint can be removed with a special attachment on a drill. After this, the dust is removed using a vacuum cleaner. Prime and allow to dry for at least 6 hours.
Before insulating a balcony (loggia) using this principle, preparatory work is simply necessary. It is advisable to apply coating waterproofing on the seams and floor.
Let's sum it up
Insulating a balcony with polystyrene foam is not a difficult task, however, you cannot do without detailed instructions. This article will help a beginner cope with the task without any problems. As for the second method of insulating a balcony with polystyrene foam, it involves creating a frame on the wall where the foam plastic will be installed. The stages of work are similar: first, the walls of the balcony are prepared, after which a frame is created, into which polystyrene foam is laid, all of which is lined with hydro- and vapor barrier material. The wiring is hidden under the frame. In the end, all that remains is to cover it with plasterboard, clapboard or plastic panels. You will learn more about how to implement the second insulation method in this video.
Recommended Posts
How to equip a small balcony + photo
Do-it-yourself insulation of a loggia + video
Balcony sofa with drawer + photo
Curtains for the balcony
Project of a house with an attic and a balcony + photo
How to increase the balcony in Khrushchev