Insulation
Date of publication: 07/15/2016
2
11749
- In what cases is it necessary
- How does the insulation installation process work?
- Risks and consequences
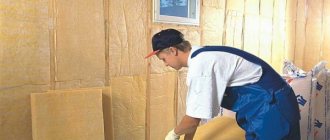
What do we expect first of all from a frame house? Safety, comfort and, above all, warmth. It is the thermal characteristics that have confidently brought frame houses to the top of the most popular buildings, and have kept them there for several years. However, there are times when the house needs to be additionally insulated from the inside, and you can do it yourself.
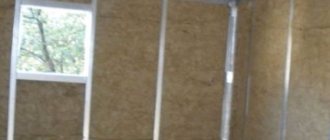
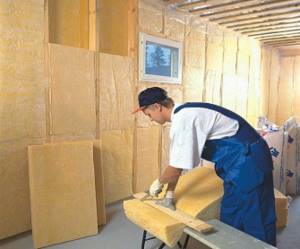
Thermal insulation of the wall from the inside
Materials
It is important to choose the right insulation. All thermal insulation materials are divided into two categories: organic and synthetic. Organic materials are impractical, they are susceptible to rotting, absorb moisture well, and are flammable. These are materials such as tyrsa, shavings, peat.
Synthetic insulators are more modern, practical, retain heat well, and have low flammability. First of all, these are mineral wool, glass wool, polystyrene foam, and expanded polystyrene.
Thermal insulation thickness
Calculation of the thickness of insulation for walls is carried out taking into account climatic conditions (regional coefficients) and technical properties of materials. You should multiply these indicators, the result will be the desired number.
The average value for central Russia is:
- polystyrene foam - 100 mm;
- mineral wool - 150 mm;
- sawdust in clay - 40 cm;
- ecowool - 100 mm;
- expanded clay - 300 mm;
- polyurethane foam - 80 mm.
These are the minimum numbers. You should add 10-25% to them based on abnormal temperature fluctuations.
Ways to make your home warm
There are many options for insulating a house, depending on the material chosen and the method of laying it.
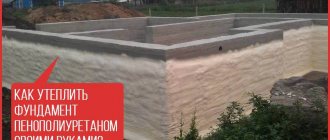
PPU
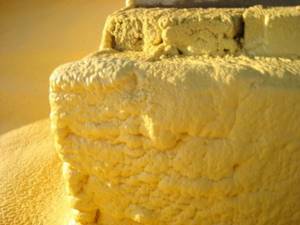
Insulation with polyurethane foam, which is obtained by mixing liquid components in certain proportions, is effective. Using compressed air, it is applied to the insulated surface and fills the voids. After applying the material and hardening the surface, the excess is cut off.
The result is a solid, monolithic surface without seams or joints that does not allow heat to pass through. The advantages of the method are that the foam does not absorb moisture, retains heat well, and does not require a waterproofing film for additional protection. This insulation is reminiscent of working with polyurethane foam. The disadvantage is the high cost and the need to contact specialists.
Styrofoam
Insulating a house with polystyrene foam, which has characteristics similar to foam, is even easier, because no equipment is required to produce polyurethane. Some people oppose foam insulation, talking about the release of harmful substances in the event of a possible fire. But practice shows that those who chose this material are satisfied with the result. Each material has its own advantages and disadvantages.
Working with foam plastic
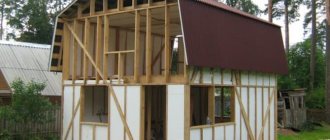
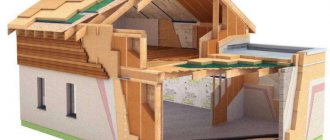
The main material for frame-panel country houses is wood. Such a building initially has insufficient insulation; its design is designed for comfortable living in warm weather; for year-round living, the house must be insulated. At the same time, there are requirements for insulation, and thermal insulation technology has been developed.
The material must have low thermal conductivity and be durable. Installation should be simple, not require special knowledge, labor-intensive costs, or expensive equipment. Therefore, foam insulation is often chosen as the best option.
The main advantages of polystyrene foam are its versatility, excellent thermal conductivity, good resistance to mechanical loads, and minimal density. You can select the thickness of the walls yourself. Work and materials are cheaper than using glass wool or mineral wool. Polyfoam resists moisture well; there is no need for vapor barrier or waterproof films.
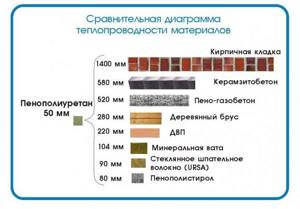
Polystyrene foam is a lightweight material, it is easy to cut and adjust the size of slabs for insulating the foundation, roof, and basement of a building. The loads on the walls and foundation are minimal. At the same time, 12 cm of polystyrene foam can replace 2 m of brick wall and 4 m of concrete in terms of thermal conductivity.
Thermal insulation of walls with foam plastic boards should be carried out correctly at above-zero temperatures.
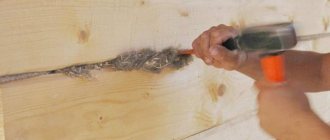
The only drawback is increased fire safety requirements; foam plastic is not resistant to fire. Therefore, before insulating a frame wooden house, additional protection is carried out - fire protection treatment of frame walls.
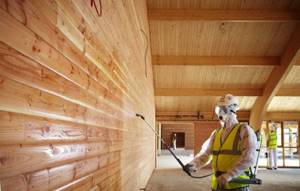
Fire protection treatment of walls is needed to prevent fire of foam plastic.
Membrane
After installing the insulation, we protected the walls and roof from wind and moisture using a membrane. The membrane protects the insulation from blowing out and from moisture getting inside the insulation. This material is vapor permeable and promotes the release of steam through the thickness of the wall. There is nothing complicated in installing the membrane, however, there are still “craftsmen” who attach it with the wrong side. As a rule, all membranes are mounted as they are wound on a roll. That is, you don’t need to invent anything, just take a roll, attach its edge to the wall and roll it out.
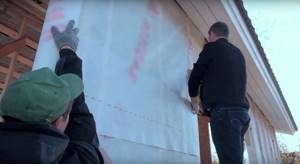
The minimum overlap required for membrane sheets is 15 centimeters. The upper sheet must cover the lower one, i.e. installation must be done from the bottom up. Like a vapor barrier, the membrane is attached to the studs using a stapler. One of the most common mistakes workers make during frame construction is the incorrect use of membranes and vapor barriers. Such errors violate the very principle of frame house construction and give rise to incorrect myths and facts about it.
In the next, final part, we will tell you about roof installation, exterior finishing and window installation.
Subscribe to our Telegram channelExclusive posts every week
Insulation from outside
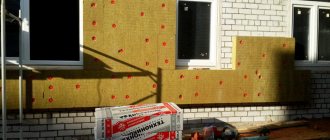
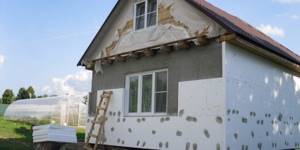
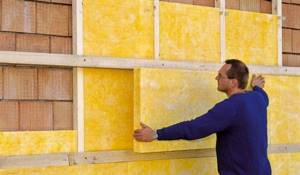
Heat loss occurs through the walls of the house; its rate in a frame house can exceed 40% of total heat loss. Therefore, wall insulation is mandatory. It can be internal or external. External insulation is the most practical; on the street side it is easier to lay thermal insulation boards made of foam plastic or mineral wool.
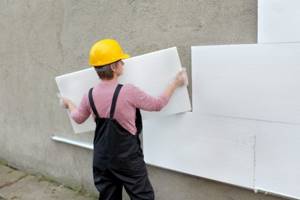
The cheapest option is to insulate the walls with foam plastic. External insulation is carried out in several layers. The first step is to level the surface of the wall so that the foam boards fit along the entire plane. We restore and renew the surface.
The wall should be as smooth and clean as possible. We process it and prime it with an adhesive solution.
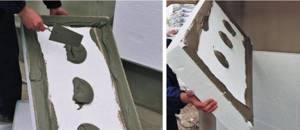
Now let's start gluing the foam boards. They need to be attached using the glue that was used to treat the walls. It takes time for the foam to set between the foam and the wall. Only then can you begin additional fastening with plastic dowels. Metal dowels are not suitable, as they can conduct heat and create cold bridges.
After installing the insulation, a protective coating can be applied. To do this, a reinforced fiberglass mesh is attached to the foam plastic, and a layer of putty is applied, twice for a better effect. Decorative plaster and façade paint can be used as decoration and protection from temperature fluctuations and moisture.
Technology
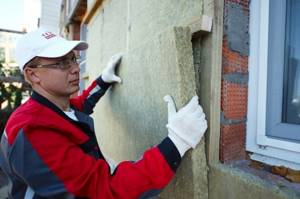
Those who prefer to insulate a house with their own hands should first read the instructions and learn how to properly glue mineral wool to a wooden or brick wall or aerated concrete base.
First of all, you need to prepare the surface of the external walls. They must be cleaned of dirt and dust, and all irregularities must be eliminated. If there is old paint or plaster, it can be removed using a spatula or solvent.
Preparing and laying insulation
Let's start preparing the surface of the mineral wool. To do this, you can use special adhesive compositions, for example, glue such as Ceresit CT 180. This composition must be applied to prepared mineral wool slabs using a special spatula. The glue layer should be no more than 0.5 centimeters. In order for it to adhere better, one or two layers of primer must be applied to the mineral wool.
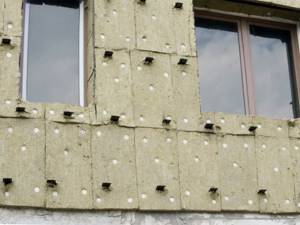
When the wool slabs are prepared, they need to be carefully glued to the facade. In those places where the wool joins the window, you need to make sure that the joint of the insulation does not border on the edge of the window opening. Otherwise, heat leakage may occur. You also need to make sure that the mineral wool tightly covers the space between the beams.
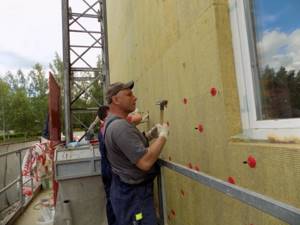
When the mineral wool is well glued, it is worth doing additional fixation. This is required in order to increase the safety of the entire structure, because the weight of a cotton block is twice that of foam blocks. Dowels can be used as additional fastening. However, additional work can be carried out only after a day, when the glue has completely dried.
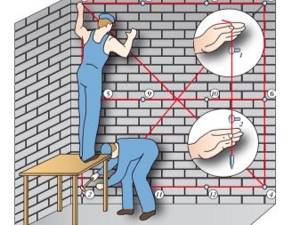
For one block of mineral wool you will need to use 8 fasteners. To do this, you need to make holes in the wool blocks, the depth of which will be several centimeters greater than the length of the dowel itself.
Next, you need to start installing “patches” in the corners where the openings and walls meet. In this way, the entire façade structure is strengthened. Lightweight “patches” are made from pieces of reinforced mesh. At the very beginning, a layer of glue is applied to the desired places. After this, a reinforcing mesh is installed on these areas.
When all the “patches” are ready, you can begin installing the reinforcing mesh. To do this, you also need to apply an adhesive composition, on which the mesh is fixed. If insulation is done under siding, then only a layer of mineral wool will be sufficient - laying reinforcing mesh will not be required in this case.
Waterproofing
To protect the room from moisture penetration from the inside of the house, a layer of vapor barrier must be laid under the mineral wool. To do this, it is best to use a diffuse membrane that allows air to pass through perfectly. It should be mounted directly on the wall using a regular construction stapler.
It is also possible to attach individual membrane strips. To fix them, it is best to use brackets. All seams must be well insulated with adhesive tape.
To summarize, we can say that insulating the walls of a house with mineral wool will help cope with such a problem as heat loss.
For tips on insulating with mineral wool, see the following video.
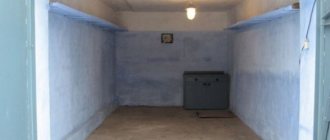
Internal thermal protection
The insulation of the internal wall is carried out in the same way as the thermal insulation of the external side. The surface is cleaned, leveled, primed and foam boards are glued. Then they putty and apply a decorative coating. Additionally, the foam layer can be sheathed with sheets of plasterboard. It is secured using mounting adhesive, secured with wide-headed dowels for reliability, and finished with a fine finish.
Insulating a frame house from the inside reduces its internal dimensions and is less effective than insulating it externally. The insulation layer does not allow the walls to accumulate heat, warm up, and in the event of a slight failure of the heating system, the interior quickly cools down. Therefore, internal insulation is recommended only if it is impossible to do it externally.
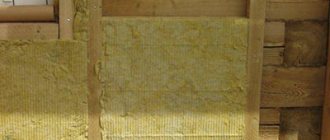
Insulation
After this, the roof was ready for insulation. We carried out the insulation from above, using insulation mats 50 mm thick in three layers, with overlapping seams. Again, the small size of the house and the simplicity of the roof design made it possible to complete this work in less than a day. The frame was insulated from the outside, since the inside of the walls were covered with OSB sheets. The insulation is placed in the space between the frame posts. The ideal option is when the width of the insulation mat is 1 centimeter greater than the distance between the studs; in this case, the insulation stands up without jamming the edges, and its middle does not stick out.
In places where, according to the design, the distance between the posts was smaller, we trimmed the mats with a special knife.
In our case, when the roof is insulated from above, and the frame is insulated from the outside, all work should be carried out only in good weather, since wet insulation significantly loses its properties.
Floor
Insulating the floor in a frame house is no less important than insulating the walls. Methods for thermal protection of floors differ in the materials used, the method of laying the insulator, and the degree of complexity.
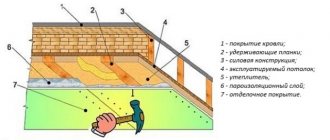
Thermal insulation on joists
One of the most popular methods is a double floor system. The essence of the method is to install a rough and finished floor with an air gap between them. First, boards treated with an antiseptic are installed on the beams. To protect against rodents, the boards are covered with fine-mesh metal mesh. Then the thermal insulation material is laid.
This could be mineral wool, polystyrene foam boards or other materials. To save money, it is permissible to combine insulators, for example, mineral wool with polystyrene foam. Then the surface is covered with a vapor barrier membrane. Afterwards the finished floor boards are laid. The floorboard is installed by placing wedges under it. The boards cannot be screwed on straight away; they must rest for 1–2 days.
Floor on the ground
Sometimes the floor in frame houses is built on the ground. In this case, for insulation, waterproofing material (polyethylene film or bitumen paper) is first laid. Then comes a layer of loose insulation. The most popular option is expanded clay. To level the insulation layer, it is convenient to use a building rule.
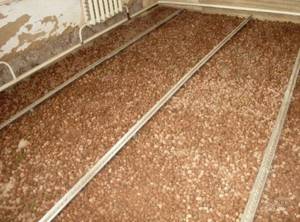
Floor insulation with expanded clay.
Then the insulation is filled with cement-sand mortar, on top of which a screed is placed. The finishing material is laid after the screed has completely hardened.
Instead of expanded clay, you can use extruded polystyrene foam. Then a reinforcing mesh is placed in the middle layer of the screed. The screed can be replaced with two layers of moisture-resistant plywood.
How to insulate a frame house from the inside - step-by-step diagram
Step 1: Installation of the waterproofing layer
We measure the walls of the frame house and cut the waterproofing material we have chosen into appropriate strips. Using a construction stapler, we attach it to the posts, completely covering the frame. It is best to lay the waterproofing overlapping, leaving about 10 cm under the top layer. Fastening is carried out at the junction every 10 cm.
Step 2: Installation of vapor barrier
Even if materials that are not afraid of moisture are used as insulation, it is still necessary to perform a vapor barrier. The reason for the seemingly unnecessary costs at first glance is that in addition to the insulation itself, the wall frame also contains other elements that should be protected from steam penetrating into the walls from inside the building, for example, the same wood.