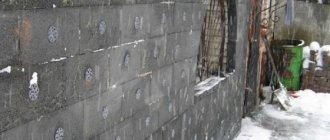
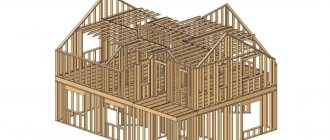
Features of insulation with mineral wool under plaster
One of the common methods of insulating buildings and structures is the use of mineral wool. Experts recommend placing glass wool under the plaster mortar. It is distinguished by high flexibility, safety margin, and excellent thermal insulation.
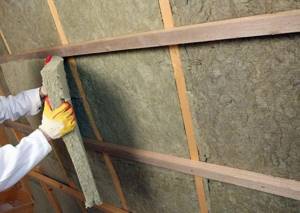
Insulation is supplied in the form of rolls and mats.
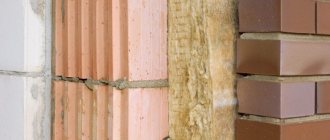
Mineral wool protects the facade from condensation and helps retain heat in the room
Tools for work you will need:
- hammer;
- dowels and screws;
- set of spatulas;
- adhesive solution or liquid nails;
- guides;
- primer;
- drill and screwdriver;
- scissors.
The insulation process begins with surface preparation.
It is cleaned of the old coating, dirt and fastening elements are removed. Cracks are sealed with mortar. The surface is primed. Warming is carried out in several steps.
| 1. Installation of the plinth guide. The plank is attached to the bottom of the wall. This is where the installation of insulation begins. The guide is fixed according to the level. |
| 2. Preparation of the solution. An adhesive solution is used to attach the insulation. It is kneaded according to the instructions on the package. |
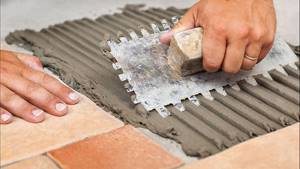
| 3. Applying glue. A small volume of glue is distributed over the surface of the sheet. A spatula is used for application. To be safe, place several straps around the perimeter. Shoes are needed in case of an uneven wall. |
| 4. Installation of slabs. The insulation is installed on the base strip and pressed against the wall. Next, the sheets of the first row are mounted. |
| 5. Installation of the remaining sheets. The remaining slabs are glued in a checkerboard pattern. The principle is similar to laying bricks. To insulate the window opening, whole sheets are used. |
| 6. Insulation of slopes. The last to be insulated are the slopes. For them, use mineral wool no more than 20 centimeters thick. |
After the glue has completely dried, the material is secured with dowel nails. They are driven into each corner of the sheet, slightly recessing the cap.
Installation of insulation
In accordance with the accepted insulation technology, it is recommended to begin laying mineral wool by gluing the first row. If there is a protruding plinth or foundation strip at the base of the building, then the first slabs are simply glued to the walls supported by leveling wooden pads. This method is recommended for insulating blank walls without window and door openings.
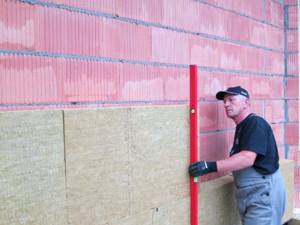
In a private house, there are always a couple of windows or protruding decorative elements on the facade, so you have to glue mineral wool in two or three rows at once.
We install insulation in the following order:
- We mount the starting profile, fasten it to the facade with dowels, having previously aligned the bar along the horizon line;
- We first try on the slab on the wall, cut it if necessary, if it is necessary to make a pipe or window opening;
- We place the mineral wool on the table and apply glue with a spatula, rubbing some of it over the surface, some along the perimeter of the slab;
- Place it on the wall and press it tightly, some of the glue should squeeze out through the seams;
- We grab it with fungi in the center and on the sides in the upper part of the insulation.
After setting, after 10-15 minutes you can pat the surface of the laid insulation with your hand. If there is no characteristic flapping sound indicating a poor fit, then we fasten the remaining dowels and move on to gluing the next slab.
Types of mineral wool
Mineral wool is a modern high-quality insulation for house facades. Its use ensures optimal moisture release through the plaster without the effect of forming an ice crust. Mineral wool protects the facade from condensation and helps retain heat in the room.
There are several types of material. The choice is made depending on the functional purpose. Therefore, before starting construction work, it is necessary to determine the performance characteristics of the insulation.
- Stone. The insulation is made from rocks. The stone wool material layer is fire-resistant, vapor-permeable, and soundproof. It can withstand high loads and is fireproof. It is vapor permeable.
- Basalt. A type of stone wool. It is made on the basis of basalt. Separated into a separate category due to its fire-resistant properties. When exposed to open fire, it does not burn, but begins to melt. Other characteristics include low moisture absorption.
- Slag. Budget option for insulation. The main disadvantage is hygroscopicity and high thermal conductivity. The material is demanding on layer thickness. It is laid 2-3 times thicker than analogues. The acidity of the material should also be noted. As a result of contact with the insulation, metal surfaces oxidize.
- Glass wool. It has elasticity, high strength, and low hygroscopicity. Has low thermal conductivity. It is the best option for insulating the facade of a building. Disadvantages include the requirement for safety precautions during installation. The material contains small glass fibers that can harm the respiratory and visual organs.

Stone insulation is made from rocks
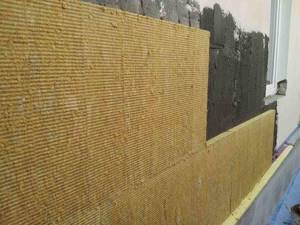
Glass wool is the best option for insulating the facade of a building

Slag wool - a budget option for insulation

Basalt stone wool has fire-resistant properties
For mineral wool, an important indicator is density. It is formed at the stage of material production. The higher the density, the thinner the layer required. The recommended parameter for facade finishing is from 130 to 160 kg/m3. In the case of a ventilated facade - 80-130 kg/m3.
Insulation is supplied to the market in rolls and in the form of slabs. The last type differs in thickness. The acceptable range is from 5 to 15 centimeters. For facades, the material chosen is in slabs. It is more convenient to install. Among the manufacturers, Rockwool, Isover, Knauf, and TechnoNIKOL have proven themselves.
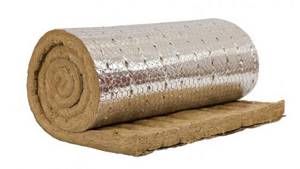
Insulation can be supplied to the market in the form of rolls
Plastering on mineral wool - the main stages of work
Of the huge number of materials used for insulation, mineral wool is in particular demand. This unusual product has many advantages. To obtain the desired result, you need to know how it is laid and how plastering is done on mineral wool.
About the material
There are four types of mineral insulation material:
- glass wool It has a high level of strength and elasticity, a low level of hygroscopicity, and low thermal conductivity. These qualities have made wool the optimal option for insulating the external walls of buildings. During the installation process, it is recommended to comply with safety requirements, since glass fibers are dangerous to the skin and respiratory system;
- basalt. It is based on diabase and gabbro and has a low degree of water absorption. When exposed to fire, it melts without igniting;
- slag. The cheapest option for cotton insulation, which has its drawbacks. It absorbs water and transmits thermal energy. To ensure effective insulation, such material is laid in a thick layer;
- stone. Fire-resistant, vapor-permeable cotton wool that almost does not absorb water. It is distinguished by good strength and the ability to protect against extraneous noise.
An important characteristic of mineral wool is its density. It depends on the production process and is the main factor in the use of a particular material as insulation.
For interior decoration and sound insulation, light mineral wool with a density of 30 to 80 kg is used. per cubic meter. When arranging ventilated external walls, preference is given to insulation, the density of which varies from 80 to 130 kg.
When installing “wet” walls, they use a special series for facade finishing, the density of which is 130 - 160 kg. This insulation is quite durable and can withstand the weight of the plaster layer.
The slabs have dimensions of 50 by 100 or 60 by 120 cm, the thickness ranges from five to fifteen centimeters. Rolled material is also available, but it is difficult to find the appropriate density for finishing facades with it.
Advantages and disadvantages
The demand for such insulating material is due to its positive qualities:
- low level of thermal energy conductivity;
- the ability to perfectly protect against unwanted noise;
- good level of fire resistance;
- ensuring vapor permeability;
- resistance to the formation of fungal mold and rodents;
- environmental safety;
- easy installation.
Unfortunately, there are certain disadvantages:
- insulation is capable of changing its volume and forming cracks if there is no reinforcing mesh;
- mineral wool, not protected with hydrophobic compounds, absorbs water and loses its thermal insulation properties.
Selection of plaster composition
To apply plaster on stone wool, which is used more often than other types, it is allowed to use various plaster mixtures.
Only one condition is taken into account - the solution must fit well without causing difficulties during operation.
To form a reliable layer of three millimeter thickness, it is recommended to use the following solutions:
- silicone. Sold in finished form, it has special advantages. This plaster is not subject to mechanical damage, is resistant to moisture, and does not lose its properties under sunlight. The hardened surface perfectly allows vapor to pass through and cleans itself in rainy weather;
- mixture on white cement. An excellent vapor-permeable solution is prepared from the dry mixture, which is important when applying it over mineral wool insulation. There is a long operational period of the finished layer and an acceptable cost of the raw materials;
- silicate. An excellent option for application to mineral wool, sold in ready-to-use form.
Acrylic-based plaster composition is rarely used. The fact is that the level of its vapor permeability leaves much to be desired. At the same time, the material is resistant to damage and sunlight.
Many developers, in order to save money, apply cement plaster over stone wool. This composition has a grayish color and needs painting.
The plaster composition chosen for the job must meet certain requirements:
- have sufficient strength to reliably protect the insulating layer from external influences;
- be elastic - capable of changing shapes without accompanying destructive processes. As a rule, this refers to the period of shrinkage of the building and seasonal movements of the soil composition;
- good steam flow;
- resist exposure to damp environments.
Main stages of work
Let's consider the features of fastening the insulation and the technology of plastering with mineral wool.
To properly install mineral wool, you should prepare the necessary tools. To complete the work you will need:
- dowels with wide caps;
- adhesive composition;
- hammer;
- electric drill;
- guide perforated profiles;
- construction level;
- mineralized cotton wool;
- surface reinforcement material;
- spatulas with blades of different lengths;
- plaster mixture for finishing the facade.
Before installing the insulating material, the surface of the walls is thoroughly cleaned of dirt and dust. Existing cracks and chipped places are sealed with mortar. After such preparatory measures, it is allowed to begin the insulation process.
To glue the mineral wool slabs evenly, guides are installed. It is best to use profiles made of metal or wooden slats for this. The horizontal guide is attached to the lower part of the wall, from the base, at a height relative to the soil composition of at least sixty centimeters. The slats are fastened with dowels.
Mineralized wool is glued using the prepared adhesive composition. The mixture is applied to the slab with a spatula and spread over its surface in an even layer. The plate is placed on the wall and pressed.
Once the adhesive solution has completely dried, dowels are installed as additional fasteners. Holes are drilled through the slab into the wall, placing them in the center and corners of the material. This measure subsequently helps to avoid deformation of the insulating layer. Having installed the fasteners, the caps are covered with glue.
The use of dowels is mandatory for laying any type of mineralized wool.
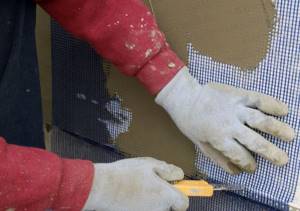
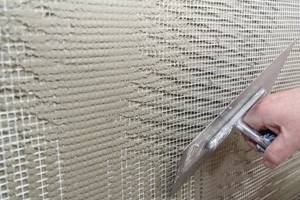
Having finished working with the insulation material, a reinforcing layer of fiberglass mesh is installed. Attach it to the glue solution.
Having applied a thin layer of the mixture, the mesh is placed on the surface and sunk into the solution, pressing tightly around the perimeter.
To make the reinforcing layer reliable, pieces of mesh are applied with a ten-centimeter overlap. After the glue has dried, they proceed to applying the plaster solution.
Let's look at how to properly plaster mineral wool.
The insulation is installed, the reinforcement is completed. Now you need to prime the surface to ensure reliable adhesion. You need to use a primer that is sold complete with the plaster mixture or purchased separately, but is suitable specifically for your covering material.
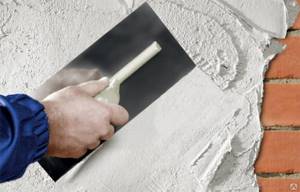
As soon as the primed surface has dried, the application of the finishing begins. It is recommended to carry out the work with a spatula with a wide blade, stretching the plaster mortar into a layer, the minimum thickness of which should be three millimeters. If you neglect this recommendation, the plaster on the facade will soon begin to peel off and crumble.
If you decide to work on mineral wool with acrylic plaster, you will have to apply the material as quickly as possible so that all areas look the same in color.
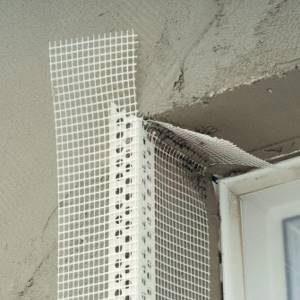
In the process of applying the plaster mixture, special attention is paid to the corner sections of the walls, window and door openings. Here you will have to install perforated corners and install additional fiberglass reinforcement.
Any mineralized cotton material is plastered at an air temperature of at least five degrees Celsius.
To give the surface an unusual texture, plaster solutions are used that contain fillers in the form of fractions of mineral origin. These functions are performed by small stones, the size of which varies between two and three millimeters. When rubbing such a solution, the surface of the wall is covered with small grooves located in a chaotic manner.
Those who want to decorate the facade with a “fur coat” use rollers or a trowel. If everything is clear with the first tool, then the second one must be firmly applied to the wall and sharply torn off.
The “lamb” textured solution is made exclusively with a mixture based on sand and cement material. The solution is applied with a pneumatic bucket, which evenly distributes the composition over the façade surface.
Conclusion
The plaster mixture applied to the facade in accordance with technology forms a reliable surface with protective and decorative functions. The finishing will last a long period, while being a good decoration for your building.
Types of plaster for facades
Mineral wool is an insulation material that is sensitive to the negative effects of external factors. To protect it, additional finishing methods are used, for example, plaster.
There are several varieties of mixtures available for working with mineral wool. When choosing, take into account the plasticity of the material, ease of distribution over the surface, and resistance to mechanical stress. Not least important are water-repellent properties and vapor permeability.
Experts distinguish 4 types of facade plaster. They differ in performance characteristics and composition.
Mineral
Mineral plaster is made on the basis of cement with the addition of components that increase its plasticity, moisture-repellent properties, and degree of adhesion.
Cement mortars are durable, but less plastic. They are difficult to apply and are not recommended for finishing facades, where serious mechanical stress is possible.
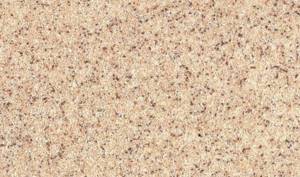
Mineral plaster is made on the basis of cement with the addition of components that increase its plasticity
Acrylic
Acrylic mixture is a material based on acrylic resins with the inclusion of mineral components. The solution is plastic, durable, and resistant to temperature changes.
Advantages of the composition:
- moisture resistance;
- high degree of adhesion to the base;
- ease of use;
- high speed of setting and drying.
Acrylic plasters are available in a variety of colors.
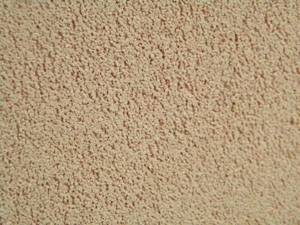
Acrylic mixture - a material based on acrylic resins with the inclusion of mineral components
Silicate
Silicate plaster is made from potassium silicate with the addition of acrylic resins. This combination makes the resulting coating strong, durable, and resistant to mechanical stress. Silicate plaster is best suited for finishing mineral wool.
The disadvantages of the material include its demanding installation and short pot life. The solution sets quickly.
Silicate mixtures are supplied to the market ready-made in containers of various sizes.
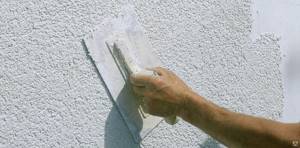
Silicate plaster is made from potassium silicate with the addition of acrylic resins
Silicone
Silicone mortars include the advantages of other types of plasters. They are plastic, vapor permeable, and resistant to fungus. The material has a high degree of adhesion. The finished coating has an antistatic effect and does not attract dirt. Environmentally friendly.
Disadvantages include the high cost of the mixture and the requirement to adhere to operating technology.
It is necessary to apply silicone primer under the plaster.
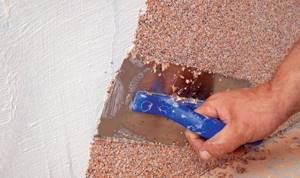
Silicone solutions are plastic, vapor-permeable, and resistant to fungus
Advantages and disadvantages
The demand for such insulating material is due to its positive qualities:
- low level of thermal energy conductivity;
- the ability to perfectly protect against unwanted noise;
- good level of fire resistance;
- ensuring vapor permeability;
- resistance to the formation of fungal mold and rodents;
- environmental safety;
- easy installation.
Unfortunately, there are certain disadvantages:
- insulation is capable of changing its volume and forming cracks if there is no reinforcing mesh;
- mineral wool, not protected with hydrophobic compounds, absorbs water and loses its thermal insulation properties.
Materials and tools for performing work
It is necessary to begin any construction or finishing work with the preparation of tools and materials.
Finishing materials you will need:
- powdered or ready-made mixture;
- primer;
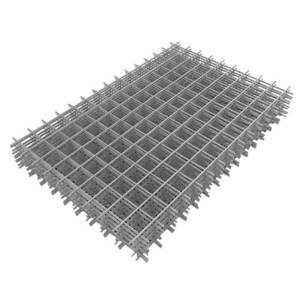
- reinforcing mesh;
- dowels with self-tapping screws;
- construction adhesive;
- scotch.
Construction tools needed:
- containers for water and solution;
- brushes, roller;
- set of spatulas;
- rule;
- construction mixer;
- industrial scissors.
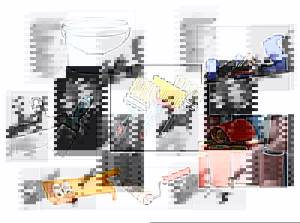
Tools should be located so that everything necessary during the process of laying the solution is at hand
Tools must be clean. They are laid out so that everything necessary during the process of laying the solution is at hand.
Mineral wool plastering technology
The facade can be plastered only after the insulation has been installed. To ensure a reliable fit of the solution, experts recommend using reinforcing mesh. It can be plastic or fiberglass. They are lightweight and easy to install.
Plastering the facade includes several successive stages:
- surface preparation;
- reinforcement;
- primer;
- applying plaster.
All stages are performed at intervals to allow the binding materials to dry.
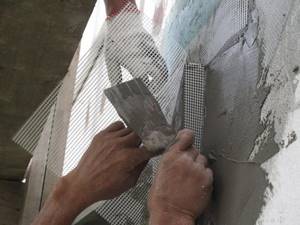
To ensure a reliable fit of the solution, experts recommend using a reinforcing mesh
Preparing a façade with mineral wool for plastering
The preparation of the facade plays a decisive role in how reliably the solution adheres to the surface of the insulation. Therefore, experts recommend following the following sequence of actions:
- If the insulation is installed with gaps, they are eliminated with small pieces of mineral wool or sealed with foam.
- The presence of differences of more than 2-3 millimeters is eliminated by sanding the material with a float. The quality of the surface is checked with a construction or laser level.
- If polystyrene foam was chosen as insulation, then its surface is treated with a metal brush or a needle roller to roughen it.
- The surface of the mineral wool is primed with a deep penetration solution with antiseptic properties. It is recommended to apply 2 layers with an interval of 12-24 hours. It may also be necessary to install a waterproofing layer if the mineral wool is not treated with a hydrophobic compound.
- Metal corners are installed at the corners of the building. The places where they are attached are covered with putty or construction adhesive.
The prepared surface should not have defects or differences of more than 2-3 millimeters.
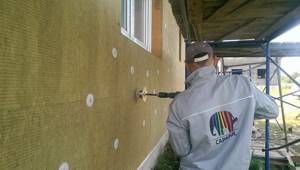
The surface prepared for plastering should not have defects or differences of more than 2-3 millimeters
Reinforcement
The next step after preparing the facade is reinforcement. Its main task is to strengthen the finishing material, ensure its better fit to the base, and create a monolithic layer.
Reinforcement is carried out using the following technology:
| 1. The mesh is cut into pieces of the required size. The overlap margin is 10 centimeters. |
| 2. Slopes are reinforced first. For them, strips are cut with a margin of 15 centimeters for the establishment of an angle. A thin layer of adhesive solution or plaster is applied to the slope. |
| 3. The mesh is applied to the corner, unfolding from top to bottom. The material is smoothed with a spatula so that no folds or bends form. |
| 4. After reinforcing the corners, work is carried out along the entire perimeter of the facade. The mesh is laid sequentially. The sheets should overlap each other by about 10 centimeters. |
Subsequent work begins only after the reinforcing layer has dried.
Primer
The primer increases the degree of adhesion of the plaster solution to the base. It ensures a reliable fit and creates a monolithic layer.
Experts recommend using a roller for priming. It is moistened in the solution and rolled out on the wall. The work is carried out without pressure, the surface is generously moistened.
The primer is chosen depending on the type of mixture (silicone is suitable for silicone, silicate is suitable for silicate). It is also possible to use universal acrylic compounds.
Drying time of the layer is from 4 to 24 hours.
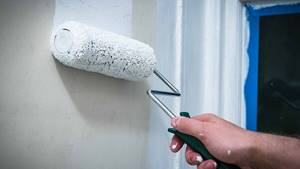
The primer increases the degree of adhesion of the plaster solution to the base
Applying plaster
Vapor-permeable mixtures are used for plastering mineral wool. This avoids moisture accumulation in the insulation and peeling of the finish. The best options for mineral wool are silicone, silicate or acrylic plasters.
Vapor-permeable mixtures are used for plastering mineral wool.
The solution is applied to the walls after priming according to the rules:
| 1. The plaster is diluted in a separate clean container in small volumes. When mixing, strictly follow the instructions and the ratio of the proportions of water and dry mixture. Uniformity of the composition is achieved using a construction mixer or a drill with a special attachment. |
| 2. The solution is applied to the walls in small portions with a trowel or wide spatula. The working layer should not exceed 3-5 millimeters. Work is carried out from the corner, from bottom to top. The surface is leveled according to the rule. |
| 3. To create an original texture, the plaster is rubbed with powder 10 minutes after application. During this time, the top layer begins to set. Grout gives the material an original texture. |
| 4. After finishing, the façade is left to dry for a day. After this, the surface of the walls of the house is primed in 2 layers. |
Finishing begins 7-10 days after plastering. During this time, the solution has time to gain strength and reach performance characteristics.
Facade surface preparation
Before starting to work with insulation and plaster, it is necessary to clean the surface of the walls from oil stains and dirt and level them. According to technology, all metal elements that may rust must be removed from the walls outside. If these are strategically important metal elements, then it is necessary to ensure the flow of oxygen under the plaster, i.e. this immediately excludes the use of acrylic-based plaster.

The insulation material must have low thermal conductivity. Therefore, mineral wool, namely its variety with a density of 140 kg/m², is ideal.
If there are remnants of the old coating on the walls, be it paint, plaster or anything else, then insulation cannot be placed under the plaster.
Before starting insulation, it is worth using sags to mark the boundaries of the zones. Sags are strong nylon cords pulled between the reinforcement pins (these pins must then be removed, so do not drive them in too tightly), fixed at a designated point in a vertical, horizontal position and diagonally.

Sags are installed to assess the geometry of the wall
Once the sags are in place, it becomes much easier to evaluate the wall geometry. The sags must be attached so that they retreat at least 1 cm from the mineral wool. After the wall is marked, you can begin installing the guide profiles.
Finishing
The final stage of façade finishing is the finishing coating. Depending on the designer's idea, it may differ.
Common finishing options are:
- structural or decorative plaster;
- Venetian covering;
- use of decorative stone;
- painting.
Among the common methods is the use of decorative plaster. A pebble mixture is applied using bark beetle. The coating is reliable and attractive in appearance.
Another option is painting. It belongs to the budget category. For work, choose an outdoor type of paint that is resistant to ultraviolet radiation, temperature changes and other adverse external factors. The paint is applied in 2-3 layers.
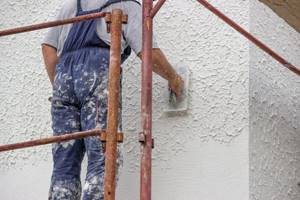
The final stage of façade finishing can be decorative plaster.
Recommendations and possible errors
Novice repairmen often make mistakes that lead to poor-quality results and subsequent redoing of the entire job.
To avoid common shortcomings, you need to carefully approach each stage of work and study the recommendations of specialists:
- Planning and cutting of material. It is important to calculate and cut the material so that there is a minimum number of joints.
- Insulation of window openings from leftovers. Window coverings are made from solid slabs with cut corners.
- Insufficient application of glue. A lack of glue leads to an unreliable fit of the insulation to the facade of the building. As a result, air pockets form. The glue is applied in two stages. The first is a small layer on the surface of the slab. Second, the remaining mass is distributed around the perimeter with slaps.
- No primer. Some repairmen refuse to prime each stage of work. This leads to a decrease in the degree of adhesion of the material, possible peeling and cracking of the surface.
- Refusal of reinforcing mesh. The mesh creates a monolithic surface and ensures adherence of the material. The layer is reliable and durable.
- Incompatibility of materials. When choosing a plaster mortar and primer, compatibility is taken into account. The same type of primer and plaster are used.
Insulation with mineral wool is considered a complex type of finishing work. However, the correct choice of materials and strict adherence to installation technology will allow you to obtain a high-quality coating that effectively reduces the heat loss of the room.
Have you ever had to plaster mineral wool? What difficulties did you face? Share your experience in the comments.


