0
10129
09.01.2014
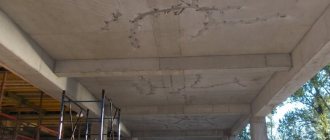
Waterproofing the floor before the screed is necessary for two reasons: firstly, it prevents the penetration of moisture vapor from the basement or from the lower floor into the concrete screed, and secondly, it protects the floor slabs from possible water leaks in wet rooms. It is especially important to carry out high-quality waterproofing of the floor before screeding on the first floor of a private house that does not have a basement. Water vapor and capillary moisture rising from the ground often have an acidic or alkaline environment; they actively interact with the components of concrete, and after just a few years the screed can become covered with a network of cracks and begin to collapse.
How to properly install waterproofing for floors and more
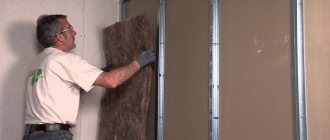
It is difficult to underestimate the importance of such a stage in the construction of a house or other structure as vapor barrier. This term refers to various methods and means designed to exclude or minimize the penetration of moisture in the form of condensation into structural materials. It is important to determine which side to lay the vapor barrier on, and the tips or instructions below will help with this. Insulation materials are the most vulnerable to moisture. Under the influence of moisture, the structure of most modern insulation materials is damaged, and as a result, their thermal insulation properties decrease or disappear. However, this is far from the only threat posed by condensate penetration. In a humid and closed environment, fungal organisms, that is, mold, which is completely unnecessary there, begin to actively develop. They negatively affect the reliability and durability of load-bearing structures, especially wooden ones.
Coating waterproofing for the bathroom
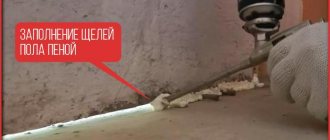
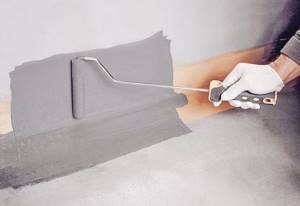
This type of protective coating is performed by applying a plastic composition. Its thickness, depending on the number of applied layers, can be different: from 1 mm to several cm.
The main advantage of coating waterproofing is that its use creates a seamless, durable but elastic coating. Another advantage is that it does not require a perfectly flat surface and can be applied to any base. The use of coating compounds as waterproofing for floor tiles in the bathroom is preferable in cases where it is necessary to fill the screed.
A plastic moisture-proof mixture is applied with a thickness of 1 mm to several centimeters
Useful advice! In general, for a waterproofing layer 2 mm thick per 1 m2 of surface you will need 3.2 kg of bitumen mastic. Therefore, its use is one of the most budget-friendly options.
The specific type of material depends on the place of its use:
Treating corners in the bathroom with moisture-resistant sealant
Pasted waterproofing is made from a waterproof coating in the form of film, sheets or rolls, fixed in several layers using special adhesive mixtures. To obtain sealed seams, the sheets are overlapped.
Important! Sometimes, to secure sheets of adhesive waterproofing, heating their edges with a gas burner is used, however, this method is unsafe.
The advantage of waterproofing using pasting is the low cost of the material. However, it will be necessary to calculate its quantity, precise cutting, and laying and leveling the panels is a rather labor-intensive process. After cutting, the pasting material should lie flat for 24 hours.
Adhesive waterproofing of bathroom walls using sheet material
The surfaces are leveled and, after complete drying, the screed and plaster are coated with a primer, all seams are waterproofed and, if necessary, polymer glue is applied. Then they begin laying the sheets - from any place on the floor.
After the formation of the first layer of waterproofing, sides are installed that extend onto the walls, about 20 cm high. Additional protection of areas adjacent to sanitary equipment is also possible. When pasting walls, the sheets are applied from bottom to top.
Vapor barrier material options
The modern building materials market has a wide range of vapor barrier coatings. They are divided according to many characteristics, primarily by vapor permeability, which is needed to select the location for installing the insulation. Also, vapor barrier materials have a fairly wide price range, which should also be taken into account when choosing a material.
The main types of vapor barrier are:
- Traditional vapor barrier film;
- Film with a layer of aluminum foil;
- Membrane film.
Unfortunately, there is no material that is equally acceptable for any area of vapor barrier, be it a roof, walls, one of the floors, or a foundation. Therefore, it is extremely important to take into account the structure of the materials being coated, the purpose of the insulation and the area of coverage, and based on this, choose the right specific material, as the instructions will tell you.
In addition, it is necessary to take into account the characteristics of each type of vapor barrier. If a vapor barrier film made of polyethylene is installed, it would be correct to leave gaps, because in addition to insulation from steam, the film is completely airtight, so condensation will form in a closed structure without air access.
Laying technology and materials
Installation of waterproofing is quite simple and is not difficult even for novice craftsmen. The most important thing is to follow the basic rules of work:
- methods of applying or laying a layer of waterproofing will directly depend on what technology is used and what materials are used;
- It is necessary to attach a damper tape around the perimeter of the room;
- joints between adjacent layers of waterproofing materials must be completely sealed;
- the surface to be treated must be perfectly clean;
- a primer should be used;
- The application of a waterproofing layer can only be done on a dry surface.
Bitumen mastic
It is worth remembering that the slightest mistake when installing screeds and laying waterproofing can cause large expenses. These procedures do not tolerate flaws. In some cases, it may even be necessary to completely dismantle all laid layers. However, it is extremely difficult to make a mistake during this work.
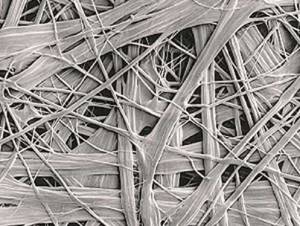
Features of membranes
Membranes, in addition, are divided into pseudo-diffusion, diffusion and super-diffusion. They differ in vapor permeability coefficient, which is 300 g/m2, 300-1000 g/m2 and more than 1000 g/m2, respectively. Based on this characteristic, the suitability of membranes for insulating certain structures is determined. Pseudo-diffusion practically does not allow moisture to pass through, and is most suitable for vapor barrier of the outer layer under the roof. However, an air cushion is needed between the film and the insulation. And such films are completely unsuitable for insulating facades. The pores of the membrane become clogged with external dust, and condensation begins to remain directly on the material.
The remaining types are more versatile due to their larger pore diameter. This makes it difficult to clog them and allows you to avoid leaving air gaps.
Types of insulating materials
All types of waterproofing materials can be divided according to the place of application - for external or internal. Division by composition is also valid. Then they are called bitumen, polymer, mixed (bitumen-polymer) and including mineral components.
In most cases, it is convenient to distinguish materials for waterproofing by the method of application. The most effective and therefore popular are:
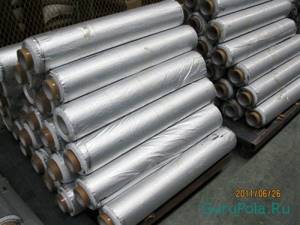
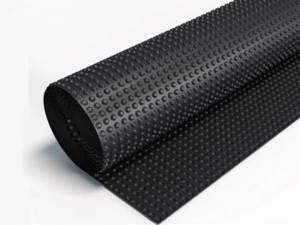
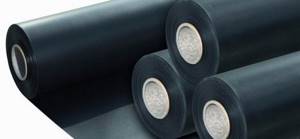
- Roll, film (membrane, lining) materials ; including painting, coating, plastering compounds and mastics. These options are optimal for those who want to carry out the work themselves. Difficulties may arise with high-quality installation and connection of parts of the roll covering.
Roll materials are a reliable way to protect the floor Source myprofnastil.ru
- Penetrating waterproofing . Its use is accompanied by a number of conditions, and when applying it is important to strictly follow the instructions.
- Bulk waterproofing . A labor-intensive option used under screed. Upon contact with water, the granules form a gel (paste), stopping its further spread.
- Self-leveling polymer floors (3D floors) . A capricious and unpredictable material for floor waterproofing if there is no practical experience and equipment.
- Sprayed polymer coatings (polyurea) . For high-quality application, experience, special clothing and appropriate equipment are required.
See also: Catalog of companies that specialize in house design
Correct placement of material
A key role in achieving good insulation of structures is played by which side to lay the vapor barrier. The answer to this question also depends on the chosen vapor barrier material:
- Vapor barrier polyethylene film is laid with either side facing the insulation, but there are special vapor-condensate films with roughness for better evaporation of condensate. In this case, the film is placed with its smooth side facing the insulation. Such details are usually determined by the attached instructions.
- Laying a vapor barrier from a diffusion membrane, by analogy with a vapor-condensate film, is done with the smooth side facing the insulation.
- Materials containing energy-saving foil should be correctly mounted with the foil side facing the inside of the room, because it reflects heat.
Installation instructions for dry screed
Dry floor screed does not force you to rack your brains over how to make the floor screed evenly. The prefabricated structure is not very durable, but it is easy to install and has excellent heat and sound insulating properties.
The main components of a dry screed are sheet material and backfill. Expanded clay, perlite, vermiculite and other fine-grained bulk materials with low hygroscopicity are used as the latter.
Sheet material also varies, most often these are gypsum fiber sheets.
The cost of a dry screed depends primarily on the thickness of the backfill and the selected materials. GVL panels for the floor will cost an average of 300 rubles per piece (600×1200 mm).
The approximate cost of a bag of expanded clay weighing 50 kg is 100 rubles. The finer the fraction, the higher the cost of backfilling. Additional materials (film, edge tape, glue, screws, etc.) will also require some expenses.
The entire process of installing a dry screed takes from one to two days.
There are several rules necessary to properly screed a floor with expanded clay using the dry method:
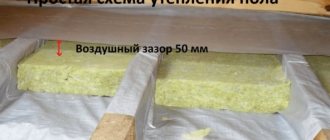
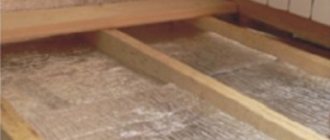
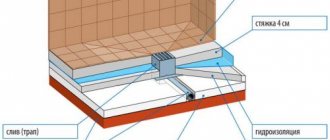
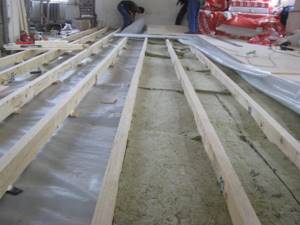
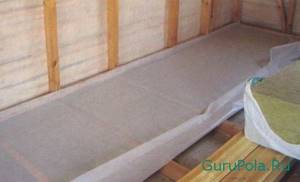
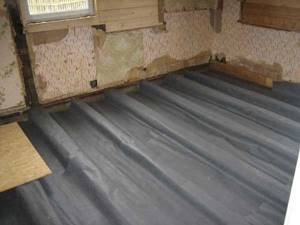
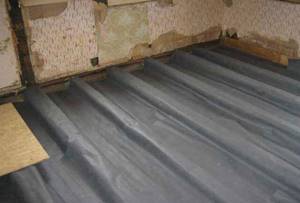
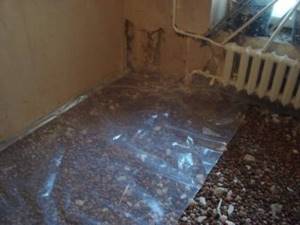
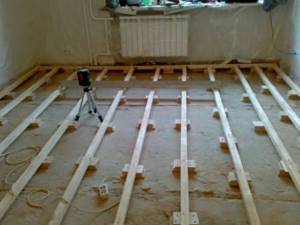
Waterproofing. The polyethylene film is laid on the prepared base with an overlap, overlapping adjacent sheets by 20 cm and extending onto the walls up to 15 cm [6].
Along the perimeter of the room you need to lay an edge (edge) tape - a strip of foamed polyethylene, the width of which is about 15 cm, thickness - from 4 to 10 mm, and length - 50 m. Marking and installation of beacons. These operations are carried out in exactly the same way as when installing a wet screed.
Backfill. Expanded clay is placed in the space between the beacons and leveled. It is better to backfill in portions as the sheets are installed.
Important! The thickness of the dry screed is determined by the presence/absence of communications, the characteristics of the base, and thermal insulation requirements.
The backfill height recommended by experts is 3–5 cm [7]. For larger thicknesses, it is recommended to lay an additional layer of slabs to increase the strength characteristics of the screed.
Installation of sheets.
The slabs should be laid offset relative to each other, like bricks. The fold of the first sheets must be removed, otherwise they may be buried in the expanded clay. The fastening of the plates is carried out using self-tapping screws; for greater reliability, it is better to glue the seams.
DIY vapor barrier
Vapor barrier of a room is a procedure that can be done with your own hands. If you take into account the above rules, correctly determine which side the insulation is laid on, and choose the right material, then even without the help of professional builders, it will be done reliably.
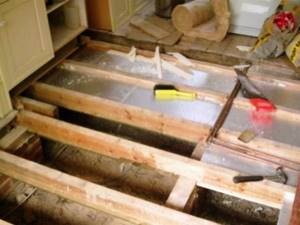
The most indicative would be a do-it-yourself floor vapor barrier. Before installing insulation and vapor barriers, it is strongly recommended to treat underground structures with compounds against wood rot and against insects. This treatment is of particular importance for structures located closest to the ground and foundation. After this, the logs are installed, and the subfloor of the first floor floors is mounted on top of them. This will be the basis on which the floor vapor barrier is laid.
The selected vapor barrier material is laid on top of the subfloor, with an overlap of 15–20 centimeters. It can be secured with nails or a construction stapler, but the most correct method would be the previously mentioned adhesive tape. Places that are difficult to reach, abutments to walls and raised areas of floors, require additional treatment with bituminous material, because it is almost impossible to properly lay film in such places. After laying the vapor barrier, the installation of thermal insulation begins. It is important to lay these materials (mineral wool, polystyrene foam and others) close to the joists.
The vapor barrier of the floor, however, does not end there. Moisture can get into the insulation from inside the house from the first floor. Therefore, when insulating, you need to lay another layer of vapor barrier, similar to the bottom layer. Any type of membrane insulation is most suitable for this purpose. This layer is also overlapped. You can confidently lay the main floor on top of it. In this case, you need to leave 1-2 centimeters as a gap.
Selection of waterproofing materials
It is necessary to select high-quality waterproofing materials taking into account the following factors:
- Humidity conditions in the room.
- Presence of underground levels.
- Type of subfloor (wooden, concrete).
- The type of insulators used (for the rough base or finishing coating).
There are situations when hydro- and vapor barrier materials must be selected based on what kind of heat insulator is used. There are varieties of it that lose their effectiveness when interacting with moisture. Accordingly, the thermal insulation layer made of such material must be reliably protected from moisture.
One of the following materials can be used as waterproofing:
- paints;
- mastics;
- insulating fills;
- backfill;
- roll
It is necessary to decide before purchasing all the advantages and disadvantages of the above materials, and therefore each of the above options will be considered further.
First mistake - wooden beams were wrapped with vapor barrier
If you study the topics on the portal about vapor barrier films and diffusion membranes, a paradoxical situation arises. The more a developer reads, the more confused he becomes. Cause? A huge amount of conflicting information from different manufacturers and builders. The situation is getting worse because... There are dozens of materials on the market with different technical characteristics.
I am building a one-story house with a cold attic. The ceiling is made of wooden beams with a section of 100x250 mm. I want to leave some of the beams, about 15-20 cm, open, as in the photo below. So they look beautiful in the interior. I'm thinking of putting a vapor barrier film on the beams. Place 300 mm of mineral wool insulation on top. But after reading the portal, I doubted it. People write that if you cover the beams on top with a vapor barrier, then at the point of contact with the film, the wood will not “breathe.” This will lead to moisture accumulation. Is it so? Or is it better to lay plasterboard on completely exposed beams, then a vapor barrier, and only then lay mineral wool?
By the way, I found one picture. Tell me, wooden beams can be wrapped with a vapor barrier, provided that part remains visible in the interior. In my opinion, the film prevents water vapor from escaping from the wooden floor. Or, am I misunderstanding something?
Questions are answered by a member of the Dragofol portal, who professionally installs roofing and vapor and waterproofing films. First, the “pie” of the attic floor, which he recommends to vasoo:
- Exposed wooden beams visible in the interior.
- Wooden flooring.
- Vapor barrier, with gluing of overlaps and junctions to walls.
- Insulation on the frame.
- On top of the insulation is a dust- and windproof material that releases water vapor. Moreover, there is no need to chase expensive branded films. It is enough to use inexpensive domestic nonwoven materials.
- Wooden platforms on a frame for free movement around the attic and preventive inspection of the under-roof space.
How to properly screed a floor using the wet method
First, let's get an idea of how to make a smooth floor screed using the wet method. Having mastered the basics of classical technology, it is easier to master other techniques.
Installation of a wet screed requires a minimum of materials. The solution is prepared from cement, sand and water. PVA glue can be added as a plasticizer.
The construction market offers an assortment of ready-made dry mixtures for preparing mortar. They are certainly more convenient to use and are often cheaper than cement.
Important! The industry produces various brands of cement.
For example, the M400 marking [1] indicates the ability to withstand a load of 400 kg per cm 3. The larger the number in the designation after the letter M, the higher the strength of the cement.
On average, to prepare 1 m 3 of M150 solution, approximately 490 kg of M400 cement is required [2]. To calculate the required volume of screed, you need to multiply the area of the room by the thickness of the layer.
In the case of the finished mixture [3], the consumption is about 1800 kg per m 3.
The approximate cost of a bag of M400 cement weighing 50 kg is 250 rubles, ready-made dry mix is 120 rubles for a package weighing 25 kg.
According to technology, installation of a wet screed should be carried out in one step.
Storing the finished solution is not allowed because it hardens quickly. The recommended use time is no more than 1.5–2 hours. In this case, the floor in the room must be filled completely, not partially.
But even if pouring a wet screed takes a little time, its hardening is a long process. It is generally accepted that it takes 1 week for 1 cm of mortar to dry, while the recommended thickness for residential premises is at least 4 cm. Thus, on average, a month or even more will pass from the moment of pouring to laying the decorative coating [4].
Proper floor screeding in a house is carried out in several stages.
Marking and calculations.
First of all, you need to use a level to determine and mark around the perimeter a horizontal plane relative to which the floor will be leveled. From the drawn line you need to draw as many verticals as possible to establish the highest and lowest points of the base.
This will help determine the optimal thickness of the screed and calculate the required amount of mortar.
Preparing the base. The subfloor should be cleared of debris and dust, and cracks should be repaired with mortar. Next, a layer of primer is applied.
Its task is to improve the adhesion of the screed to the base. Laying a heat-insulating layer (if necessary). For this purpose, polystyrene foam boards or expanded clay are used.
If the screed is mounted on the ground, thermal insulation is a mandatory structural element. Waterproofing. It is required for rooms with high humidity (kitchen, bathroom, toilet).
Roofing felt and thick polyethylene film are used as waterproofing material. Installation of beacons. To get a perfectly flat surface, you need to know how to correctly set the beacons for floor screed.
They are horizontal guides made of a metal profile along which the leveling tool (rule) moves when pouring. Thus, the height of the beacons corresponds to the thickness of the screed. The guides should be installed at a distance of 20 cm from the wall and 1–1.5 m from each other [5].
Self-tapping screws and cement mortar are used for fastening. Preparation of the solution. A mixture of sand and cement is prepared in a ratio of 1:3.
The components are mixed until a homogeneous mass is obtained. It is best to use a construction mixer for this purpose. After adding ½ part of water, the solution is thoroughly mixed again.
The finished building mixture is diluted with water according to the instructions on the package. Filling. You should start laying the solution from the far side of the room.
The mixture is evenly distributed between the beacons using a rule. The freshly applied layer of solution must be pierced in several places to release air and prevent the formation of bubbles. A day or two after pouring, you need to remove the beacons and fill the resulting depressions with a solution, after applying a layer of primer.
The maximum thickness is not limited, but in practice it rarely exceeds 15 cm. A large layer of screed is necessary in rooms experiencing increased load, for example in a garage.
Care during the hardening period. The main measures at this stage boil down to preventing drafts and regularly moistening the surface with a dampened roller.
Water is needed for the curing process to proceed properly. Otherwise, the solution will dry out and cracks will form.
Finishing processing.
It is advisable to sand the frozen layer of mortar to smooth out any existing irregularities. If linoleum or other thin material is chosen as a decorative covering, a self-leveling mixture (the so-called self-leveling floor) is applied on top of the screed. This allows you to make the surface perfectly smooth.
The second mistake - the vapor barrier was laid on both sides of the insulation and the wooden floor
How to properly vapor barrier a wooden floor in a wooden and frame house? This issue worries many developers, and is a bottleneck in many designs. Let's say right away that we are talking about the overlap between two residential and constantly heated floors .
We are insulating the floor of the second floor in a wooden house. I'm already confused about where to install the vapor barrier! On some sites they write that the first layer is laid between the finished ceiling of the first floor and the subfloor of the second. On others, that on the subfloor and insulation immediately on it. It turns out there will be a vapor barrier on both sides?
I also saw on the Internet many schemes for installing vapor barriers in the ceiling of the first and second floors. Moreover, some manufacturers recommend laying a vapor-proof film on the bottom and top of the insulation. Tell me how to properly make a vapor barrier for the ceiling if the first and second floors are heated?
To answer these questions, we think logically.
- In frame walls and ceilings, vapor barriers are installed where there is a temperature difference. Those. the room, where there is a plus, is thermally insulated from the street, where it is cold.
- In the interfloor ceiling, between two heated floors, there is no sharp temperature difference. Therefore, water vapor trapped in the insulation will not condense.
- Hence: mineral wool insulation, laid in a wooden floor between the first and second heated floors, is rather needed not for insulating the structure, but for soundproofing the floor.
- That is, in fact, you can do without films, but the living space must be protected from the possible release of thermal insulation particles into the air.
- But, do not forget that in the house, where the residents live, there are constant sources of moisture and water vapor - the kitchen, bathroom and toilet.
- Water vapor, due to the pressure difference, will tend to get from a warm room to a cold zone - through the walls to the street, or from bottom to top, into a cold attic through the ceilings. Or in the under-roof space, if we are talking about an insulated attic.
So, we have insulation laid between wooden beams in the ceiling of the first and second floors and water vapor, from which these structures need to be protected. Water vapor, if it gets into the ceiling, must be able to escape from it. Therefore, the overlap pie must provide this opportunity. Because Now we are talking about covering the first and second floors, we offer this “pie”:
- Finishing and rough finishing of the first floor ceiling.
- Vapor barrier.
- Insulation.
- Vapor-permeable diffusion membrane.
- Rough and fine finishing of the second floor floor.
With this scheme, water vapor will freely escape from the ceiling, and the structure will “breathe”.
Important! In an insulated wooden interfloor ceiling, do not install a vapor barrier on both sides.
↑ Waterproofing the floor in the kitchen
The floor in the kitchen is exposed to moisture not only from below - from the ground, but also from above - during washing, cooking and other kitchen work, a lot of water gets on the floor.
Therefore, it is necessary to protect the floor not only from below, as was written above, but also from above.
The principle of waterproofing a kitchen floor largely depends on the finishing floor covering.
It is not advisable to install a wooden floor in the kitchen, since it is most susceptible to moisture and will be difficult to protect. If you decide to lay parquet, parquet boards or solid boards in the kitchen, you should cover their surface with waterproof varnish.
If you plan to use linoleum as a finishing coating in the kitchen, then the concrete base on which it is laid should be treated with a waterproofing material, for example, by painting or coating. Then put the linoleum on the glue. In this case, the linoleum itself will act as a waterproofing material.
Ceramic tiles also have water-repellent properties, but as a safety net, it would be a good idea to treat the concrete screed with bitumen-polymer mastics, paints, or another method. And for better adhesion of the tile adhesive to the base, the top of the waterproofing must be impregnated with a special primer.
Waterproofing the floor in a private house is a very responsible matter. If this is not done on time and efficiently, over time fungus and other mold may appear that cannot be removed. And the structure of the entire house will gradually collapse. There is no need to talk about high humidity indoors, which leads to frequent allergies and other diseases. It is better to think through everything and complete it on time than to rebuild and repair it later.
Creating high-quality waterproofing in your own home (private) is one of the most important stages in arranging floors. The article will discuss what type of subfloor waterproofing is and how it should be applied so that the room is protected from the influence of such dangerous moisture.
The third mistake is the refusal of moisture and windproof film in the ceiling of a cold attic
Having read the article to this point, you have already understood the basic principles of vapor barrier of wooden structures and floors. Let's move on to the nuances. Another “stumbling block” is the correct pie of a cold attic, for example, the second floor of a country house.
I'm finishing up the cold attic ceiling. The ceiling is insulated. I know that first they install a vapor barrier and only then, between the beams, do they lay mineral wool. How to cover the insulation on top? The manufacturer's booklet says that you need to install a waterproofing, vapor-permeable membrane. Why is she needed there? Maybe just lay out some cheap hydro or wind protection?
In my opinion, the insulation in a cold attic does not need to be covered with any films at all. Otherwise, you will damage it due to condensation. Let him lie there and lie there.
Let's answer Bolt41's question first.
The manufacturer correctly recommends covering the top of the insulation with a waterproofing material - a membrane that allows water vapor to pass through, but does not allow moisture to enter the insulation. Remember that membranes have their own characteristics. First of all, pay attention to vapor permeability. It varies up or down.
Then the next question. Membranes are usually mounted on pitched insulated roofs close to the insulation. Those. water flows down them and does not linger on the surface. And if you lay the membrane horizontally, will it not leak?
If you are concerned that a horizontally installed superdiffusion membrane will leak or leak water due to roof leaks, choose a material with higher water resistance. The simplest and cheapest vapor-permeable membranes have low water resistance. Therefore, they are laid obliquely, because standing water will sooner or later leak through them into the ceiling.
Now let's return to the words of alligator135, that the insulation on top does not need to be covered with films. Is this approach justified?
Stone wool is dusty. Therefore, the insulation must be covered with films on both sides. On the heat side, a vapor barrier, and on the cold side, a membrane with high vapor permeability. Over the years, the insulation becomes increasingly dusty. Think about your health! In addition, the wind that blows through the attic, which is necessary to ventilate the under-roof space, blows heat out of the mineral wool fibers. If the insulation is closed, then it, as a heat barrier, works more efficiently than one not covered with film.
As a result, I ended up with the following cold attic pie, from bottom to top:
Important! In a cold attic, cover the top of the insulation with a vapor-permeable moisture-proof membrane , which will additionally protect the insulation from wind and moisture, and you from inhaling particles of stone wool.
Types of materials and methods of their application
In order to provide high-quality future protection for a floor made of concrete, you need to choose the right waterproofing material. Next, we will study the main types of materials.
Important: When choosing a suitable material, you should not choose based on the principle that the cheaper the better. In most cases, higher quality materials are more expensive because higher quality ingredients are used in their production and expensive components are added in a higher proportion than their cheap counterparts. Do not forget that if the completed waterproofing is damaged, the cost of redoing it will be at least 2 times more expensive than initially making high-quality insulation, and this does not even count the cost of possible repairs as a result of flooding.
Pasting
This category includes roll products that have an adhesive base and are mounted by pressing the existing adhesive base to the surface. Pasting products are mounted overlapping each other in 1-2 layers.
Pasted insulation
You can download detailed installation instructions by clicking on the link - Installation instructions for adhesive insulation
You can read more about roll systems in the article – Installation of roll waterproofing.
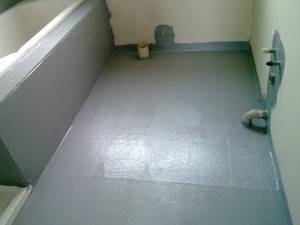
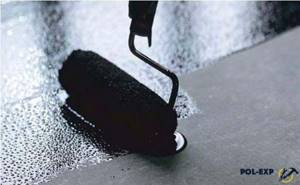
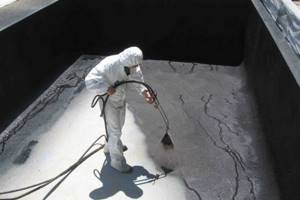
Coating
We are talking about various types of mastics based on bitumen, polyurethane or acrylic. These compounds are applied using a roller or brush in 2-3 layers. When applying each subsequent layer, you must wait until the previous one has dried. The most popular materials in this category are bitumen-based mastics.
Coating floor insulation
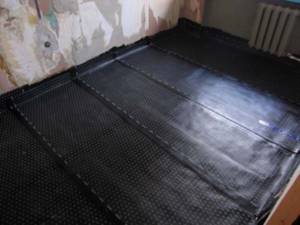
Welded
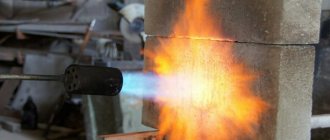
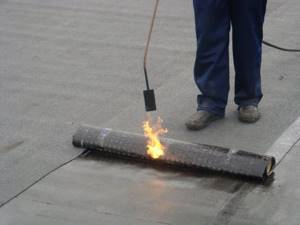
Here we are talking about fused rolled materials. These systems are fused to the surface using a torch. When the bitumen layer melts, the rolls are glued to the base, creating a barrier to water and moisture. When it comes to the floor of a plinth or basement, roll fused insulation is applied in 1-2 layers, depending on the presence or absence of groundwater. The rolls must be fused overlapping each other and when fusing the second layer, overlap the seams of the previous one.
You can read more about roll systems in the article – Installation of roll waterproofing.
Built-up floor insulation
Liquid rubber
Liquid rubber is a bitumen-latex emulsion. Liquid rubber is applied manually by coating or spraying. When ZhR is applied to the surface, a seamless, elastic coating with 100% adhesion to the base is formed. The absence of seams and high elasticity make this type of insulation extremely effective and durable. High-quality liquid rubber can last at least 50 years.
You can read more about liquid rubber in the article “Waterproofing with liquid rubber.”
Cement
Cement compositions are those materials that have a cement base to which various polymers are added. Cement and polymer-cement compositions are applied by coating in 2-3 layers onto a dry or slightly damp concrete surface. High-quality polymer-cement compositions can withstand negative water pressure from outside to inside.
You can read more about cement insulation in the article – “Cement-based waterproofing: Features, types and methods of its application.”
Cement floor waterproofing
Waterproofing additives for concrete
Additives to concrete help improve its properties in terms of strength and water resistance. Additives to concrete must be added at the time of its preparation, strictly following the instructions.
Important: No additives or additives to concrete can change its porous structure and make it completely waterproof, which is why when using any additives it is necessary to waterproof it.
Comparison table of materials
This table shows the advantages and disadvantages of the main materials above. Studying them will help you better understand each material and make the right choice.
| Liquid rubber | Bitumen-based coating mastic | Fused and adhesive membranes | Cement | |
| Working with negative water pressure from outside to inside | No | No | No | Yes |
| Can be applied to wet surfaces | No | No | No | Yes |
| Seams and joints in waterproofing coatings | No | No | Yes | No |
| 100% adhesion to the base | Yes | Yes | No | Yes |
| High elasticity coefficient | Yes | No | No | Yes |
| Effective operation in high groundwater and aggressive environments | Yes | No | No | Yes |
| Warranty period for work | 7 years | 3-5 years | 3-5 years | 7 years |
conclusions
To install a high-quality waterproofing coating under the floor, it is best to use seamless waterproofing systems that have a high coefficient of elasticity and 100% adhesion to the base (so that there are no voids or cavities under the material), and during the dynamics and movement of the structure it does not tear or separate at the seams. stretched.
Examples of such systems:
- Liquid rubber – FlexLock type. Used as a layer between the concrete preparation and the floor, as well as between the floor and the screed. This material cannot withstand negative pressure and therefore requires pressure, for example, using a tie.
- Polymer cement system – HydroPaz Prime. Can be applied to a slightly damp base, which saves time waiting for the concrete to dry completely. It works on negative water pressure, which allows you to use this insulation without the need to press it with a screed, which gives the contractor the opportunity to use it as a finish and immediately lay tiles on it.
conclusions
We talked about the basic principles of installing vapor barrier films and membranes in insulated wooden floors. The main approach is to protect the insulation from steam and, if water vapor gets into the ceiling, to escape. Those. do not lock the thermal insulation into two layers of vapor barrier , and this mistake is often made. And do not wrap wooden beams with vapor barrier, unless it is a film specifically designed for this purpose. Another nuance - ensure the tightness of the vapor barrier . Overlaps, joints, and junctions with walls, skylights, stove and ventilation pipes must be sealed with materials recommended by film and membrane manufacturers.
We recommend the topic Waterproofing in a cold attic, which tells you whether it is necessary to install waterproofing under the roofing.
- What does improper vapor barrier lead to: real experience and repair methods
- The correct “pies” of a frame wall, which are recommended by FORUMHOUSE users.
- The most complete instructions on the RuNet for installing a roof window with the stages of installing a vapor barrier, a moisture-proof film and a gutter for condensate drainage.
Types of wet subfloor screed
Knitted. The simplest option. The screed is laid directly on the base (slab).
Waterproofing and finishing flooring can be laid on the screed.
On waterproofing. A waterproofing layer is laid on the slab, and a screed is placed on it.
On thermal insulation. As a rule, such screeds are used on soil foundations. First, sand is laid on the ground and compacted, then comes insulation, waterproofing and screed (necessarily reinforced, since it lies on the insulation).
If thermal insulation is laid on a slab, then sand bedding is not needed.
With self-leveling coating. The self-leveling subfloor coating is poured onto a hardened screed to create a perfectly flat and smooth base for laying sensitive coatings (for example, linoleum).
Which side should the hydro vapor barrier be laid on?
According to all the canons of physics, when the temperature decreases, vapor from the air always condenses, turning into liquid. In construction, this rule is always taken into account when arranging structures operating at the junction of the temperature difference between the room, insulation and the street, the ground. These include the roof, walls, base, and floor. Without high-quality insulation, a large amount of moisture accumulates on surfaces and in the structure of materials. This inevitably leads to deterioration of the properties of the foundations and their gradual destruction.
To avoid the negative consequences of the condensation process, when constructing critical structures, a specialized film is used - hydro-vapor barrier. Which side to put it on correctly is an important question.
Installation of water vapor barrier: which side?
Cost of modern materials
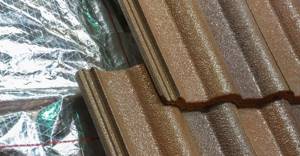
The cost of waterproofing materials may vary. This factor is influenced by the online store chosen by the buyer, the manufacturer and the type of insulation itself. The most affordable in terms of price are: perforated films, membranes and roofing felt. Although they are more difficult to work with. Rolled materials require strong heating, so they require special equipment - a gas burner. And you need to work with the film very carefully so as not to tear it.
More modern hydrobarriers include liquid, dry and penetrating mixtures. They are somewhat more expensive, but are considered effective and versatile. Buyers can find out the specific cost of waterproofing in the price list of the selected online store. Here you can get advice from online consultants. Experienced specialists will help you choose a product, complete the purchase, and select a payment and delivery option convenient for the customer.
Why is waterproofing needed?
In fact, a wooden floor is a multi-layer structure, which includes logs, insulation, sheathing and a finishing coating. And these elements need reliable protection from moisture penetration.
The fact is that in the room where life activities take place, there is a high level of humidity. And this is fraught with the following consequences:
- the boards will periodically swell and dry out, and this will lead to deformation;
- If there is high humidity, condensation will form on the joists, which will lead to rotting or deformation. As a result, the flooring will need to be replaced.
- Over time, the floorboard is sure to become affected by mold and mildew, and this has a detrimental effect on the microclimate in the room.
In addition to the fact that excess moisture affects the wood from the outside, the lower part of the floors is also affected. And in some cases it becomes detrimental. This usually happens in two cases:
- When the room is on the ground floor and the floors are laid without screed, the wood suffers from discharge from the soil.
- If the room is above the bathroom or kitchen, excessive fumes penetrate through the ceiling and damage the wood.
Thus, waterproofing the floor in a wooden house is necessary. Coating elements must be treated and reliably protected from water. Only in this case will the coating last a long time and not cause problems.

Wooden floor
Main types of waterproofing
According to regulatory documents and work practice, the following types of floor waterproofing are possible:
- Waterproofing by pasting with rolled materials;
- Painting floor waterproofing;
- Waterproofing is monolithic;
- Plaster waterproofing;
- Impregnation waterproofing of porous surfaces;
- Backfill waterproofing.
In practice, for installing floors in apartments and private houses, roll waterproofing , including simple flooring of polyethylene film for floating screeds, and painting waterproofing with liquid polymer mastics. Less commonly, monolithic waterproofing is made from waterproof solutions or mastics based on bitumen (asphalt). For concrete floors, liquid penetrating waterproofing with penetron and penecrete compounds is becoming popular.
Materials
Today there are a lot of waterproofing materials for floors. In addition to classic films, this includes modern membranes, liquid rubber and mastics.
They differ in cost and work technology. However, the main difference is the effectiveness of protection against moisture penetration.
Mastics
They are made on the basis of bitumen and are a thick, mushy mixture. Used for exterior and roofing work. However, sometimes the use is justified in residential premises.
They are used for complex work as a base layer when installing multilayer insulation: in bathrooms and bathrooms. The joints between sheets of base material are sealed with mastics.
Important! Regardless of the material for waterproofing, wooden elements are treated with protective impregnation.
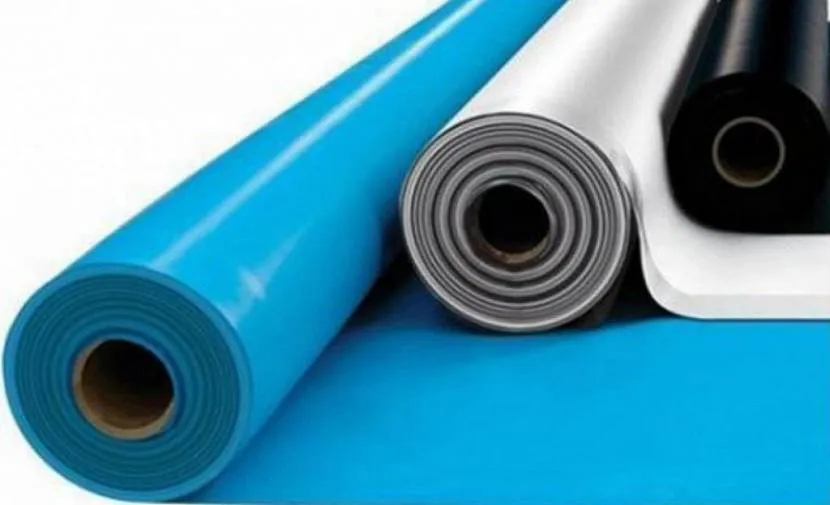
Polyethylene
One of the most affordable materials. It became widespread due to its low cost. There are two types of such film:
- regular - used for waterproofing;
- perforated - can be used as a vapor barrier installed on a wooden floor.
In addition, there is another type - there is an additional layer of reinforcing mesh on polyethylene. It prevents condensation from draining from the surface.
But despite its prevalence, this film has a number of disadvantages:
- low strength - this material has a short service life;
- creates a greenhouse effect - condensation collects under the film. Therefore, when laying, a ventilation gap is provided - this is done using lathing. Thanks to this, the condensation evaporates and does not cause harm.
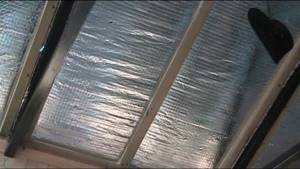
Another type of film is foil. It is chosen for waterproofing and insulating baths or saunas. Because Thanks to a layer of aluminum foil, it is able to protect the coating from moisture and reflect heat.
Important! When using any type of film, choose a two-layer material with an additional coating that retains condensation.
Foampropylene
This material is superior in quality to polyethylene. The main advantages of polypropylene foam:
- low cost;
- strength;
- ease of installation;
- durability.
There is a film on sale equipped with an additional layer of cellulose - it serves to retain condensation. When humidity rises, the layer absorbs water, and then it gradually evaporates.
Like polyethylene, this film is placed on the sheathing to provide a ventilation gap.
Membranes
This is a relatively new material, which is a multilayer porous fabric. There are two types:
- allows air to pass in only one direction;
- allows air to pass in both directions.
Three-layer membranes are effective - they are equipped with special fibers that retain condensate. And thanks to the breathable surface, the material evaporates it in small portions.
Vapor barrier of a floor in a wooden house using diffusion membranes is considered an effective solution. But the main disadvantage over other materials is their high cost.
Membrane for waterproofing
Liquid rubber
This is a modern insulating material based on polymers. Suitable for working with any materials, including wood. Its operating principle is simple - rubber is supplied in liquid form and applied to the floors like paint. After the material dries, a thin protective film forms on the floor, which ensures complete sealing of the coating.
But liquid rubber has a drawback - it won’t be possible to lay it on the joists. The base surface must be continuous. Therefore, such an insulator is chosen in cases where a wooden floor is mounted on a concrete base.
Cost of materials for waterproofing
| Name | price, rub. | Price for 1m2, rub. |
| Hydroisol based on steklohost, 2.5 mm, 9 sq. m. | 400 | 45 |
| Uniflex TechnoNIKOL, 3 mm, 10 sq. m. | 1200 | 120 |
| Ruberoid, 15 sq. m. | 400 | 27 |
| Technoelast TechnoNIKOL, 4 mm, 10 sq. m. | 1400 | 14 |
| Aquastop - Perfecta, 20 kg (coating) | 650 | 130 |
| WaterStop SLIMS, 20 kg | 850 | 190 |
| Mastic Flachendicht, Knauf, 5 kg | 1250 | 227 |
| Bitumen mastic, 20 kg | 350 | 70 |
| Rubber mastic, 22 kg | 1350 | 60 |
| Construction bitumen, 25 kg | 600 | 50 |
| Bitumen primer, 20 l | 650 | 65 |
| Bitumen primer TechnoNIKOL, 20 l | 1800 | 27 |
How to properly install waterproofing
The wooden floor is a multi-layer structure and consists of the following layers:
- first layer of waterproofing;
- main logs;
- rough flooring;
- insulation;
- sheathing;
- waterproofing;
- fine coating.
Thus, the waterproofing of a wooden floor is applied in two layers. This achieves two goals. Moisture does not penetrate from the room and does not rise from the ground. And this is an important point, because... damp soil is the main threat to a tree.
When laying waterproofing there are rules:
- The joints of the film sheets must be taped. The overlap of the canvases is 10-15 cm
- When laying the material, you must follow the manufacturer's instructions, because materials work differently and installation requirements may differ;
- two-layer materials are laid with the smooth side facing the insulation. Those. the absorbent surface is located in the direction of steam penetration.
During installation, tape the places where the film is attached to the bars - they can become areas for condensation to penetrate.
A brief educational program, or What kind of floor screed do you need?
Before raising the question of how to make a floor screed, it is necessary to agree on terms. A screed is usually called a layer of construction mixture laid between the base of the floor and the finishing floor covering. This layer performs such important functions as:
Depending on the composition of the mixture and the installation method, there are several types of screed.
Cement-sand mortar is most often used as a floor leveling material. Industrially produced dry mixes are most common in construction.
They are made on the basis of cement and sand with the addition of plasticizers - agents that impart elasticity and plasticity, fiber fiber and other components that improve the properties of the screed.
Depending on the installation method, floor screed can be wet, dry or semi-dry.
The classic method - wet - consists of filling the base with screed mortar and then allowing it to harden.
The mixture is laid directly on the floor slab or on a layer of hydro- or thermal insulation. The last requirement is mandatory when installing the screed directly on the ground (for example, structures like a garden gazebo). A waterproofing layer is necessary for rooms with high humidity (bathhouse, bathroom).
Currently, wet screed is used less and less because it has many disadvantages:
A dry screed is made of sheet material, which is laid on the base on top of an insulating layer (expanded clay, sand, etc.). The advantages of this method are speed and ease of installation, low weight of the structure. The main disadvantages of dry screed are that the sheet material is afraid of water, so it cannot be used in rooms with high humidity, as well as its high cost.
Semi-dry screed can be called an improved version of the wet method. The composition is prepared on the basis of cement-sand mortar with the addition of fiber fiber and plasticizers. When laying, a pneumatic blower is used, which mixes the components and delivers the mixture to the object.
This method is called semi-dry because the additives significantly reduce the moisture content in the solution. Thanks to this, the screed becomes light, strong, and elastic.
It takes only 12 hours for the solution to dry. After a few days, the final decorative coating can be laid on the screed. This method has, perhaps, only one drawback - the need to use special equipment.
Preparing the base base
Work on installing wooden floors begins with preparing the base foundation. The service life of the rough flooring material depends on the correctness of the work carried out.
Difficult conditions for wood are exposure to open ground, so the base is prepared as follows:
- the top layer of soil is removed to a depth of 50-60 cm;
- the bottom of the resulting pit is compacted - this is done using a manual tamper or a special machine. The main thing is that the surface is hard.
- then a sand cushion 10-15 cm thick is arranged. It is compacted.
- the last layer is a backfill of crushed stone or expanded clay.
If desired, a thin screed is made on top of the crushed stone layer - this will increase the effectiveness of the cushion made. Usually a layer of sand and crushed stone is enough to prevent moisture rising from the ground. And the remaining space between the cushion and the joists effectively ventilates the subfloor.
Preparing the base for a wooden floor
Technology for making gravel-sand cushion
- Preparation of the base consists of leveling the soil under the future floor and removing from it the fertile layer containing organic impurities. This is usually done at the stage of site preparation for construction.
- Crushed stone with a fraction size of no more than 50 mm is poured onto the prepared soil. Backfilling is carried out over the entire floor area. The gravel is compacted and leveled to eliminate large differences in height. The thickness of the layer is at least 0.2 m, and in areas with close groundwater - at least 0.5 m.
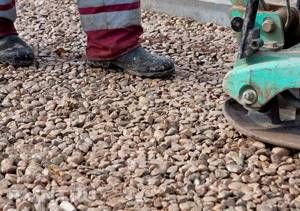
Gravel compaction process - Backfill with coarse sand in a layer of 0.1-0.4 m. The sand is spilled with water and thoroughly compacted with a hand roller.
- Cover the gravel-sand cushion with a layer of geotextile. Geotextile strips are glued using a construction hair dryer. Geotextiles play the role of a shock absorber and protect the insulation and waterproofing from damage.
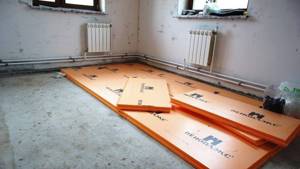
- Foam insulation, for example, polystyrene or penoplex, is placed end-to-end on top of the geotextile. Polystyrene foam is not recommended due to its low mechanical strength.
- After completing these operations, you can waterproof the prepared base with rolled materials or immediately begin screeding the floor.
Installation of waterproofing
Laying a vapor barrier for a wooden floor is a small area of work that includes several stages of arranging the coating. And each of them must be approached thoughtfully and carefully. This is the key to the durability of the wooden covering.
Preparation
First of all, you need to prepare the base surface. There are two options here:
- floors are laid from scratch;
- The room has old flooring.
If there are old wooden floors in the room, they are dismantled. In this case, all layers are removed.
- Important! Dismantling is carried out carefully - old logs and subfloor can be reused.
After dismantling is completed, it is necessary to clear the base of debris and check the base. If it is concrete, then there should be no cracks in it - because. This is a path for moisture to penetrate into the room. In addition, cracks in the screed will lead to rapid deterioration.
Most often, you can get by with local repairs. However, if the base is in poor condition, it is better to fill it with a thin layer of mortar. The final stage is impregnation of the concrete with a primer and antiseptic.
Installation of logs
Before installing the joists, the first layer of waterproofing is applied. The material must be laid in such a way that there is an overlap of 10-15 cm on the walls. The joints are glued with tape, and the places of contact with the walls can be coated with mastic - this is much more reliable. It is advisable to make a lathing between the base and the film. This will prevent condensation from occurring.
After this, the logs are installed. It’s simple here - the main thing is to make sure that the bars are at the same level. The next stage is laying the insulation: it is placed in the gaps between the wooden blocks. The material can be in slabs (foam plastic) or in rolls (mineral wool). It is important to install it so that there are no gaps left anywhere.
Installation of logs
The final stage
A second layer of insulation is laid over the insulation, which serves as protection against moisture penetrating from the premises. When installing, make an indentation from the insulation, otherwise it will quickly become saturated with water.
Thus, vapor barrier and waterproofing of the finished floor in a wooden house is done quite simply. The main thing is to follow the installation rules and follow the instructions of the manufacturers of the materials used. This will ensure long-term use and no problems.
Features of waterproofing apartments and country houses
Differences in waterproofing technology for a private house and an apartment appear only when installing a sand and gravel base for the floor. If concrete floors are used in a cottage or country house, there are no differences in the procedure for performing protective work between an apartment and a residential building.
How to properly lay a subgrade for a floor is shown here. Next steps are as follows:
- the soil is covered with geotextile to protect rolled waterproofing materials from mechanical damage;
- Rolled waterproofing is installed.
The lifespan of a new floor is determined by many factors. But its protection from moisture is decisive. All types of floors, except ceramic floor tiles, are actively subject to irreversible changes under the influence of open water or its vapors in the air.
Which side should the hydro vapor barrier be laid on?
According to all the canons of physics, when the temperature decreases, vapor from the air always condenses, turning into liquid. In construction, this rule is always taken into account when arranging structures operating at the junction of the temperature difference between the room, insulation and the street, the ground. These include the roof, walls, base, and floor. Without high-quality insulation, a large amount of moisture accumulates on surfaces and in the structure of materials. This inevitably leads to deterioration of the properties of the foundations and their gradual destruction.
To avoid the negative consequences of the condensation process, when constructing critical structures, a specialized film is used - hydro-vapor barrier. Which side to put it on correctly is an important question.
Installation of water vapor barrier: which side?
There are several types of films. According to their structure they are divided into:
- Single-layer and double-layer (multi-layer);
- Diffusion;
- Anti-condensation.
The main task of builders is not to make a mistake on which side to lay a particular type of water vapor barrier, depending on the installation location. Incorrect application will lead to the opposite process: subsequent condensation of moisture on the surface of the membrane, as evidenced by the photo of improper arrangement of water vapor barrier.
Which side to lay a single-layer hydro-vapor barrier?
Simple single-layer films are made from polyethylene. Sometimes it is additionally reinforced with a polymer mesh to add strength. This material retains water, but allows steam in, in both directions. Therefore, the choice of installation side does not play a special role here .
It is only worth noting that such products have lost their relevance due to low efficiency and the emergence of membrane films.
Which side should the diffusion hydro-vapor barrier be laid on?
Modern film water vapor barrier for roofing is produced using a woven method from pure, 100% polypropylene. Its structure, if you look closely under a microscope, is a network of thin threads. Their interweaving forms microscopic cells. Their size is not sufficient for the unimpeded passage of water molecules in a vapor state.
High-quality diffusion hydro-vapor barrier for floors or roofs is made in two layers. Its specificity lies in its operation on the principle of a valve: passing steam from the air in only one direction (from an area of high pressure to an area of low). When there is oversaturation of moisture in the air in the room and under the influence of steam pressure (diffusion), water molecules literally seep through the film and excess moisture is removed outside.
Such material is laid when organizing a system of ventilated facades, on top of mineral insulation with the obligatory arrangement of a ventilated gap. This water vapor barrier is suitable for floors and walls.
Diffusion films usually have markings for installation, which are different for each manufacturer. Before installation, you must carefully study the instructions. Often such material is made dark and rough on the back side, lighter and smoother on the outside.
Installation is carried out with the light (water-repellent) smooth side facing away from the room in the following cases :
- for insulation when arranging the under-roof space;
- under insulation when laying the floor on concrete or soil;
- external thermal insulation when installing ventilation facades.
When installing a floor under a screed, protecting walls and ceilings in wet rooms (for example, baths, saunas), the water-repellent side should face the inside of the room:

Which side should the anti-condensation hydro-vapor barrier be laid on?
To give the material improved vapor barrier properties, one side of the diffusion film is coated with a special moisture-absorbing hydrophobic coating, polyester fabric, or an aluminum reflective layer is applied. Such membranes are called anti-condensation and superdiffusion. Due to the absorption of condensate, this hydro-vapor barrier is best suited for cold roofs: pitched type with metal decking. The absorbed moisture prevents the formation of metal corrosion. The additional layer provides better thermal protection.
Antioxidant hydro-vapor barrier is installed in the same way as diffusion barrier: with the water-repellent side facing away from the material that needs to be protected from moisture . Typically, manufacturers apply markings on the outer (water-repellent) side such as: “This side up”, a logo or brand designation.
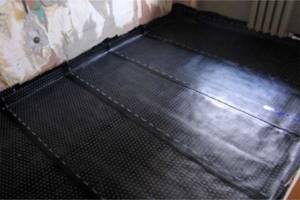
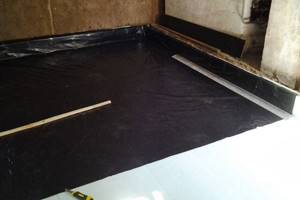
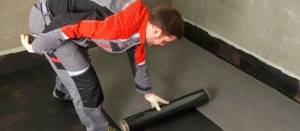
Waterproofing the floor with roll material: step-by-step instructions
Waterproofing the floor with roll material
As an example, let's look at the most popular method of waterproofing a floor - roll adhesive materials. This type of waterproofing has gained popularity due to its low price and relatively quick turnaround time.
The application of such materials requires the presence of a perfectly flat floor in the room without holes or bumps.
For better leveling, it is recommended to use a liquid self-leveling compound, which, when hardened, will give a smooth, high-quality surface.
Step 1. Remove all small debris from the floor surface with a broom or brush. Dust is removed using a vacuum cleaner.
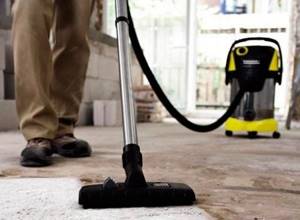
Cleaning and dust removal
Step 2. All cracks on the floor, down to the smallest, are sealed with putty.
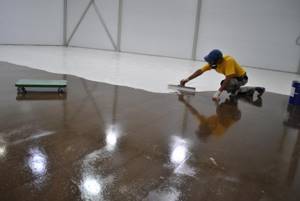
Step 3. A primer is applied to the floor surface, on top of which a solution is poured to make a liquid floor.
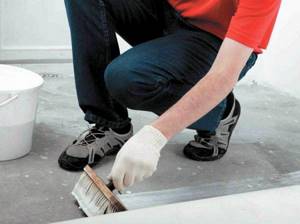
Applying primer
Step 4. During pouring, the liquid itself will spread evenly over the surface, but small air bubbles may remain inside. To get rid of them, a special roller is used, on which many small needles are installed.
roll waterproofing
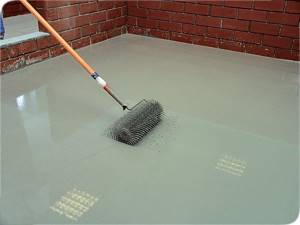
Leveling the floor with a self-leveler
Step 5. When the liquid floor composition has dried, we can prepare the surface for waterproofing work. To do this, we again remove dust and small debris using a vacuum cleaner and a damp cloth.
Step 6. We re-check the surface for cracks, chips, and holes. Particular attention is paid to corners and places where the floor meets the walls. All found areas are sealed with concrete mortar.
Step 7. Mastic or bitumen emulsion is applied to the floor surface near one of the walls. It is enough to apply mastic to the floor in several stripes crossing each other.
Applying mastic
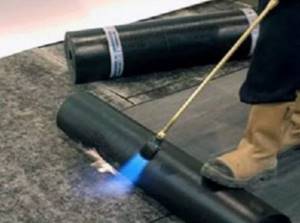
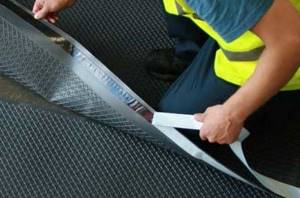
Step 8. Using a hair dryer or torch, heat the edge of the insulation roll and place the edge in the corner of the room. While the material is hot, the entire roll should be leveled to avoid gaps. Also, do not forget to leave about 10 cm of material on the wall.
Step 9. Gradually heating the roll with a burner, roll out the material over the entire surface. As it cools, the waterproofing will set and form a continuous layer.
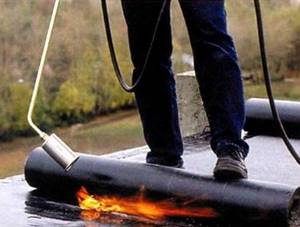
Waterproofing fastening technology
Waterproofing fastening technology
Step 10. Patches are placed at the joints, which should be melted using a burner. This ensures maximum tightness of the layer. Instead of patches, you can leave a supply of material measuring 5-7 cm.
Step 11 .
When the waterproofing material has cooled and completely fixed, you can begin installing the floor screed.
Functions of moisture-resistant materials
A moisture-resistant layer in the form of polyethylene or other types of insulation in an apartment, wooden house or garage ensures a long service life not only for the decorative coating, but also for the rough concrete base.
Waterproofing the floor prevents moisture from affecting the subfloor if liquid gets on the finishing material. At the same time, polyethylene film, coating insulation or other material ensures long-term operation of the decorative coating without loss of quality. As a result, waterproofing compounds and coatings prevent fungi from growing on the walls. In such a house/garage, the humidity after completion of work will correspond to normal levels.
Waterproofing on concrete and wood structures