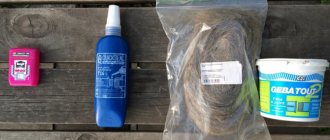
Materials for sealing and insulating gaps and cracks
The easiest way is to cover the cracks with foam. But as the foam expands, it can deform weak masonry or plaster. In addition, the service life of such sealing is a maximum of five years, no more.
You can treat cracks that are previously insulated with other materials with polyurethane foam:
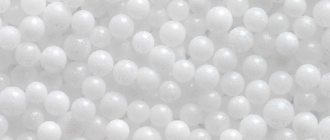
- polystyrene foam is the most affordable and accessible material. Minus - there is no guarantee that all voids will be filled with insulation;
- sprayed penoizol or polyurethane foam is a durable, hermetically sealed protective film, literally a monolith. But, an apparatus for applying insulation is required; such insulation is not cheap;
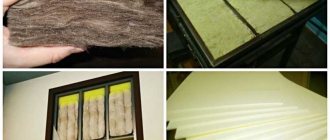
- mineral wool is the best option for any material of walls and gate leaves. Mineral wool does not burn and reliably fills all voids in cracks.
An important rule is that when insulating with mineral wool, it is imperative to reliably seal the cracks with plaster or water-repellent mastic, since mineral wool loses its properties when wet.
Another modern method of thermal insulation is paints with a warming effect, fire-resistant. This paint contains polymers and ceramics and creates a reliable thermal insulation film. You need to apply two layers of this paint, waiting until the first layer has completely dried.
Step-by-step execution of work
In order to insulate a garage door from the inside with polystyrene foam, cotton wool or foam, you will have to perform several stages of work.
And the first of them is preparing the door leaf.
Stage 1: preparation
In particular, preparation involves completely cleaning the metal from rye and paint residues. There are three ways to get rid of corrosion:
- Mechanical. Using a special brush with metal teeth or the same discs and a grinder. The metal is well processed over the entire surface. Especially in areas of rust.
- Chemical. A rust converter can be used here. They cover the entire inner surface of the gate and wait for a reaction.
- Using paint. There are 3-in-1 compositions that simultaneously function as a rust converter, primer and paint. Hammerite behaves especially well in this case.
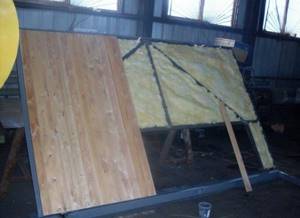
Stage 2: waterproofing
Even if you decide to insulate your garage door with plywood, you still need to pre-treat the metal with a waterproofing material. It protects any insulation from moisture and fungus. And most importantly - from losing your airiness.
Roofing felt, bitumen mastic, 2 mm thick isolon or a membrane are used as waterproofing. The waterproofing is applied overlapping so that there are no gaps.

Stage 3: making the sheathing
It is made from thin timber 40x40 mm. It can be a little thicker if the thickness of the insulation is greater. It is important that the slabs or rolls lie flush with the sheathing beams. It is advisable to treat the wood with fire retardants and an antiseptic against burning/rotting.
Slats or beams are attached to the door leaf vertically in increments equal to the width of the insulation (slabs or rolls). To strengthen the structure, you can also make transverse bars of the sheathing. All beams are attached to the metal through and through using screws or self-tapping screws. But first it’s worth marking the places of fastenings and drilling holes in the wood in advance. This is necessary so that the bolt does not split the wood.

Advice from craftsmen
Simple, proven advice from garage owners will help you reliably seal all the cracks and gaps in garage doors.
Recommendation one - polyurethane foam
The perimeter of the gate frame must be lubricated with grease or machine oil, and the ends of the gates must be thoroughly cleaned and moistened with water from a spray bottle. To treat the gate you will need two cans of frost-resistant polyurethane foam.
Now we close the gate and apply mounting foam. We wait until the foam expands and dries a little, and open the doors.
According to reviews, this option for sealing cracks in gates lasts one to two years. This quick tip is good when you need to quickly eliminate cracks in the gate, but it is not suitable for reliable thermal insulation.
If there are cracks and large voids around the perimeter between the frame and the wall, then first you need to clean out the voids, remove dirt, dust and loose pieces of masonry, and then seal the cracks with polyurethane foam. When the foam has dried, the excess is cut off and the perimeter of the box is additionally plastered with a regular mixture of M150 cement and sand.
Recommendation two – tape and sealant
For a standard gate, two tubes of silicone sealant and a roll of wide tape will be enough. Operating procedure:
- open the gate leaves all the way;
- clean and degrease the surface;
- We stick adhesive tape along the entire perimeter of the gate leaf (choose the width of the tape according to the width of the gate leaf);
- Apply a layer of sealant around the perimeter of the frame, in places where the doors are adjacent to the frame (it is better to use a mounting gun, as the consumption is less);
- close the doors and wait for the sealant to harden;
- When the gate is closed, we also apply sealant to the gaps that remain.
If the gaps between the sash and the frame are large, then this sealing is performed in two steps. So that the first layer adheres well.
Recommendation three - PVA and sawdust
Durable and reliable putty for the gaps between the frame and the walls - a mixture of fine sawdust and ordinary window putty, with the addition of PVA glue. As soon as this mixture begins to thicken a little, carefully seal all the cracks in the gate.
The glue ensures tightness and protects against moisture, and sawdust and putty reliably fill all voids in the gate. The recipe is suitable for small gaps in garage doors around the perimeter of the frame.
Recommendation three - porous rubber
The thickness of such a rubber seal is no more than 20 mm. The porosity of the material allows you to seal gaps of different sizes between the doors and the frame, ensuring a tight fit.
We glue rubber onto the gate leaves at the top and bottom using a universal moment. The surface of the valves must first be degreased. In the places where the hinges are attached, we glue such a rubber seal onto the end of the gate leaf.
Recommendation four - regular cement
If the gate frame is installed in an opening with large voids, then you will have to make side slopes - simple sealing with polyurethane foam will not work. We assemble formwork for the mortar from narrow boards or plywood around the perimeter of the box, and connect it together with wire.
Into such formwork we pour a cement mixture, preferably a thick mixture of sand, M150 cement and water. When installing such formwork, it is imperative that the solution fills all the voids by punching the screed several times with a reinforcing rod.
Let the screed harden for at least two weeks, then the formwork can be removed. Important - the cement mixture should be very thick, like soft modeling clay.
Recommendation five - seals for gates
Gate seals provide high-quality sealing and beautiful appearance. The price of the material is from 200 to 500 rubles per meter, depending on the width and quality of the seal. This insulation is easily mounted on gate leaves and around the perimeter of the frame.
Be sure to degrease the surfaces before installing rubber or silicone seals.
Recommendation six - a regular rubber hose for watering
Vertical gaps between the doors and the frame can be isolated with a regular rubber hose. We attach a hose to the end of the sashes using metal screws. An important point is that you need to make holes for the screws on one side of the hose so that the head of the screw is inside the hose after fastening.
The disadvantage of a rubber hose is that in severe frosts the rubber becomes hard and cracks. As an alternative to a garden hose, you can use D-shaped window seals, 12 - 15 mm. The rubber in such seals is soft and resistant to low temperatures.
Some car owners have found a simple solution - how to remove cracks on garage doors, a regular seal for refrigerators. It is mounted on the ends of the sashes and reliably seals all joints.
If you carry out complete insulation of the gate, then the best option is mineral wool over a lath made of metal or wooden beams. But the cracks still need to be sealed, even with high-quality insulation of the sashes.
What to use as a sealant?
To insulate gates, you can use the following types of materials:
- Glassy.
- Mineral wool.
- Styrofoam.
- Polyurethane foam.
Glass wool and mineral wool are characterized by increased fire resistance. If we compare them with other heat insulators, they do not have sufficient moisture resistance. This is why they are inferior to polystyrene foam and polyurethane foam.
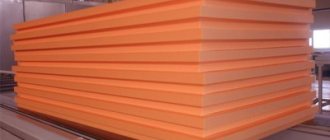
The moisture resistance of extruded polystyrene foam is quite high.
However, its fire resistance is low. The thermal conductivity of polystyrene foam is reduced.
The use of polyurethane foam is particularly effective. Such a heat insulator is expensive, but it is especially popular among consumers. It can be classified as lightweight and temperature-resistant insulation. With polyurethane foam you don't have to worry about exposure to chemicals, which is why it is more preferable in garage environments. Applying insulation using the spraying method allows you to create effective seamless insulation structures.
Polystyrene foam is in great demand among garage owners because it has low thermal conductivity and a low price.
If it is installed correctly, it can serve for a long time. This will close all the cracks, providing a high level of thermal insulation.
When starting to install the seal yourself, you can use ready-made material by purchasing it in the required quantity. This will eliminate the need to purchase the listed types of insulation for the gate. In any case, before purchasing, you should carefully measure all cracks and gaps.
When planning to purchase a rubber seal, you should take into account every feature of the material when calculating. It is better to purchase it with a reserve, as trimmings may remain. They can be used if the seal is not enough.
Why are seals needed?
The temperature inside the garage affects not only the driver’s comfort in the room, but also the things stored in it - spare parts, tools, chemicals and more. Special insulation materials can cope with this problem perfectly.
There is an opinion that only metal structures negatively affect the thermal insulation properties, however, when installing even wooden garage doors, the procedure also often makes sense. When to carry out thermal insulation work?
This is usually done at the gate installation stage, but even if no one took care of the insulation earlier, it is possible to fix everything at any time and even on your own.
Stages of insulation work
The technological process can be divided into several stages:
- preparatory stage;
- frame fastening;
- installation of thermal insulation material;
- external finishing.
At the preparatory stage, it is necessary to clean the surface of the gate from existing rust and paint it to reduce the likelihood of rust appearing under the insulation layer and to increase the overall service life. You can read more about garage insulation in this article - /nyuansy-pravil-nogo-utepleniya-garazha/

The technological process can be divided into several stages.
To attach the outer cladding, it is necessary to create a power frame. It is made from wooden blocks, less often metal profiles are used. They are attached in increments that take into account the dimensions of the future facing material. If type-setting MDV panels or boards are used as cladding, then it will be enough to make several guides: from below, from above, if necessary, one or two slats can be placed in the middle.
If the facing material is sheet, then it is necessary to take into account that the slats should pass through the middle and at the joints of the sheets.
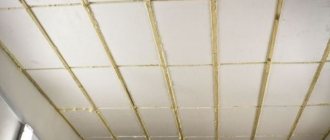
The technology for installing polystyrene foam or expanded polystyrene boards does not differ from each other. If necessary, the sheets are cut to the required size and filled with them the space between the frame. The joints of the sheets and the places where the sheets adhere to the frame are foamed with polyurethane foam. Excess polyurethane foam is cut off. We discussed earlier why you shouldn’t insulate a garage with polystyrene foam.
After installing the thermal insulation material, it is necessary to attach the outer cladding to the existing frame. Wooden boards, MDF panels, galvanized metal sheets and many other finishing materials can be used as facing materials. The choice of facing material directly depends on personal preferences.
Insulation of cracks
When insulating garage doors, do not forget about the need to minimize heat loss due to the gaps between the door leaves and the frame
When insulating garage doors, do not forget about the need to minimize heat loss due to the gaps between the door leaves and the frame.
If the gaps are small (up to 1 cm), then you can use standard foam rubber insulation tapes or rubberized tapes to insulate standard metal doors.
If the gaps are much larger, then additional false slats will have to be installed. To do this, you need to screw a rail around the perimeter of the frame, slightly larger than the gap. The rail is attached in such a way that it overlaps the gap by 1-2 cm and is located at a distance of 0.5-1 cm from it. Foam insulating tapes or rubberized tapes designed for insulating doors and windows can be glued to the flap rail.
Optimal temperature conditions
When insulating garage doors, you should not achieve complete sealing of the garage. It is the lack of fresh air that may not work in your favor.
When insulating garage doors, you should not achieve complete sealing of the garage. It is the lack of fresh air that may not work in your favor.
A properly created microclimate in the garage should provide the necessary air circulation to remove moisture vapor. It is the heat and excess moisture in the garage that can lead to corrosion. The ideal ratio would be when the temperature inside the garage does not differ significantly from the temperature outside. Significant temperature changes can lead to condensation.
An air damper or vent, with which you can regulate the air flow, is easiest to make in the gate. This should be taken care of before installing the insulation. Sometimes natural air circulation is not enough, then forced ventilation is necessary. For this, a regular household ventilation fan is suitable, which will turn on as needed.
As a result, we can conclude that it is quite possible to insulate the gate yourself. This does not require specific knowledge or skills, but it is necessary to clearly calculate all the nuances of ensuring the microclimate and air circulation, make clear measurements, purchase the necessary materials and carefully carry out insulation step by step.
Common Misconceptions
When it comes to insulating a garage, there are several misconceptions that every home owner may encounter.
Therefore, it would be useful to note some points:
- The seal won't last forever. Whatever material you choose, sooner or later it will need to be replaced. This need often arises due to bends, pinching, temperature changes and others; in other words, any material wears out.
- Even well-installed gates require additional thermal insulation. Regardless of the type of gate and the quality of its installation, there will still be places where it is necessary to use a sealant.
- There is no ideal material suitable for these purposes. All materials have advantages, but none of them will do the job well. An excellent option is a set of several options, since each is good only for certain elements.
Thermal insulation
Depending on what type of insulation you decide to use, further steps will look like this:
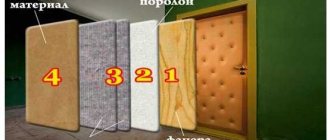
- Styrofoam. He is placed on polyurethane foam. There is no need to apply too much of it, as it will greatly increase in volume as it dries. Just apply a little foam to the back of the sheets and immediately press the squares to the surface of the door leaf. Place all panels end to end. Then blow out all remaining seams, cracks and gaps with foam. After drying, remove excess with a knife.

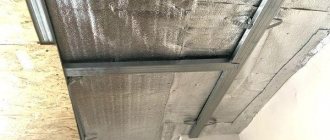
- Mineral wool. Its rolls or slabs are driven tightly between the lathing slats. If you use rolls, you must first coat them on one side with glue and only then press them against the door. Fill all joints and cracks with foam. Attach a layer of waterproofing to the top of the door leaf (oilcloth will do). But be sure to completely cover the entire surface of the cotton.
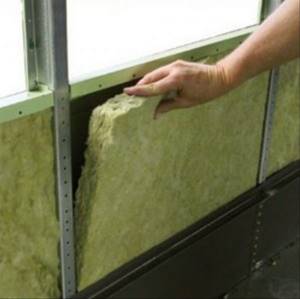
- Polyurethane foam. It is simply sprayed in even rows onto the door leaf directly from the can. Leave approximately 7-9 cm between the rows. Later the foam will expand and occupy all the voids. On average, 5 cylinders of polyurethane foam are used per 7 m2. After drying, the excess that protrudes beyond the sheathing is cut off with a knife.
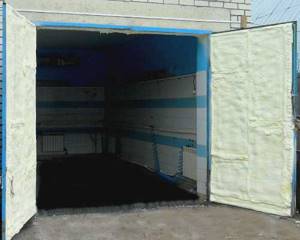
Stage 4: door trim
To make the doors look aesthetically pleasing from the inside, they need to be lined. For this purpose the following materials are used:
- OSB boards. Durable, dense material. Attaches well to the sheathing. Lets air through. But quite heavy. Be prepared for garage doors to add 10-13 kg in weight.

Insulation of the entire garage with OSB slabs
- Profiled sheeting. Durable, moderately lightweight finishing material. In addition, you can choose its color at the request of the master.

- Lining. Moreover, both polymer and wood. The first option is especially good. Not afraid of water and temperature changes.
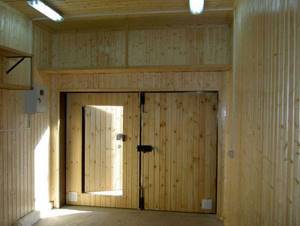
Any exterior door trim is mounted on sheathing beams. The main thing is to choose the right parameters according to the parameters of the canvas.
To learn how to insulate a garage door from the inside with your own hands, watch the video. And remember, warm doors are the key to your comfort and safety of your car.
Insulation materials
Particularly popular are:
- Rubber. The material is the most common, available in different types and forms, and the color and length may also differ, which allows you to most accurately select the product. Rubber seals are most often used for fixed elements of gates.
- Silicone. They are most often used in the presence of automatic gates; they are also well suited for other types of structures. The material most often comes in the form of a soft and elastic tape, which will allow you to easily fill any gaps or cracks.
- Brush. This type is mainly used in garages with sectional doors. Brush seals are impregnated with a special solution, which ensures long service life and easy cleaning.
- Polyurethane foam. Foamed polyurethane foam is a universal material that is easy to install and then takes the required shape, filling all the empty space.
Sectional door repair costs
The cost of repairing sectional doors depends on the nature of the breakdown, the workshop’s policy and the complexity of the measures. The following prices apply to different companies operating in Moscow and the region.
| Type of work | Price |
| Replacing hinges on canvas panels | From 300 rub. (a piece) |
| Replacing the bracket for the roller with a loop | 700–7000 rub. |
| Replacing the roller | 500–1000 rub. |
| Replacing/installing an additional button | 2000–3500 rub. |
| Repair/replacement and adjustment of locks | 2000–3000 rub. |
| Electric drive adjustment | RUB 3,000–10,000 |
| Replacing cables | RUR 2,500–14,000 |
| Drum replacement | 3500–4500 rub. |
| Antenna replacement/installation | 2500–3000 rub. |
| Replacing/installing a radio channel | 3500–5000 rub. |
| Replacing/installing a flashlight | 4000–5000 rub. |
| Shaft replacement | 5000–7500 rub. |
| Replacement/installation of photocells | 5500–6000 rub. (for 2 pcs.) |
| Replacing a torsion spring | 6,000–20,000 rub. |
| Replacing the electric drive | RUB 6,000–14,000 |
| Replacement/installation of chain gear | RUB 7,000–10,000 |
| Repair with engine overhaul | 6000–7000 rub. |
| Replacing the drive control unit | 8000–9000 rub. |
| Panel replacement | RUB 8,000–20,000 |
Urgent repairs of sectional doors usually cost more than planned and/or preventative measures. Amounts are indicated taking into account the cost of materials. We offer repair services for sectional gates only under warranty situations listed in the service agreement.
How to choose material for insulation?
When choosing seals for garage doors, you must first of all take into account the type of structure. As mentioned earlier, rubber copes well with fixed parts. The material is inexpensive and practical, due to which it is widely used in almost every garage.
Silicone tape is similar in structure to rubber, but more of it will be required during thermal insulation work. Well suited for both fixed elements and various gaps in other places.
For sectional or swing garage doors, a brush seal is often used. Impregnation from a special composition guarantees a long service life, up to 8 years. A brush seal is perfect for beginners - its simple design and the absence of the need to calculate the material make it easy to get the job done.
Do-it-yourself garage door sealing
When building a garage, some people make minor mistakes that negatively affect the thermal insulation properties of this room. One of the main sources of heat loss is the gate. Therefore, during their manufacture and installation, it is extremely important to properly insulate them. At the same time, insulation must be comprehensive, otherwise it will not give any result.
In this article, we invite you to familiarize yourself with all the details of which seal is best to choose. After reading this article, you will be convinced of the truth of the statement; sealing garage doors yourself is quite possible and without the involvement of a specialist.
Why do you need a seal?
No matter what kind of garage door you install, there will be gaps in it. It doesn’t matter whether they are folding, hinged, sliding, or the like. Cold penetrates through the cracks that form during the cold season. To level out heat loss, the right solution would be to seal the valves. If you do this job well, you can completely eliminate the possibility of cold air entering through the door cracks.
Today you can come across the opinion that only metal products should be sealed. However, if you have a wooden gate, they also need it.
At what stage should a garage door seal be installed? In most cases, this is done at the construction stage, namely when installing gates. If these works were not completed, then the seal can be fixed after a while. Let us immediately note that doing this work is quite simple. First, let's look at what material is best to use for this.
Comfort and convenience of the garage
Along with its direct purpose, the garage is used as a workshop. During the cold season, even a short stay in the garage will require a lot of willpower. It is convenient to do small repairs in the garage yourself, and good ventilation is essential here. Basement smell, mildew and mold on the walls are not all the troubles. Staying in such a room is life-threatening. Often, openings for supply ventilation are left in the gates. On the topic of how to insulate a garage door, there is a useful video at the end of our article.
Important! Ventilation openings must be left in the thickness of the insulation.
Types of sealing material
On the modern market you can find a variety of seals that will successfully cope with the task. Let's look at the main types of seals.
- Rubber compressor. This material is considered the most common and in demand. A rubber seal for garage doors will completely eliminate uneven cracks through which cold air flows. This material comes in different types and shapes, such as tubular, tape-shaped or flat. The choice will depend on the size of the gap.
- Silicone seal. This insulation is suitable for different types of surface. Most often it comes in the form of a tape, which is very soft and elastic. Thanks to this, it is very easy to level out the resulting gaps.
- Brush seal. Mainly used for sectional doors. The material is impregnated with a special composition, due to which their service life will be quite long. The brush seal is easy to clean from possible contamination.
- Polyurethane foam seal. Its main feature is that after installation it will take on the required shape, filling the entire space of the crack.
These are perhaps the main materials that can be successfully used for garage doors. Each of them has its own advantages and disadvantages.
You should choose a seal for a garage door based on the type and design features:
- For swing gates, the optimal solution is a brush seal impregnated with wax. It will serve you for about 8 years, or even more. On the market you can find this material with various types of impregnation.
- It is best to attach a rubber or silicone seal to fixed structural elements.
So, in each individual case the choice should be made individually. Plus, the choice is also influenced by the thickness of the gap.
How to insulate correctly?
In general, the process of insulating garage doors is quite simple.
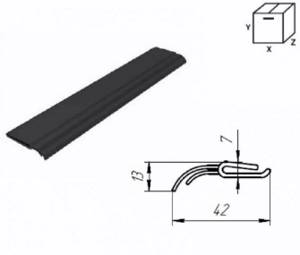
Diagram of the seal with dimensions.
Attention should be paid to preparation:
- carefully inspect the garage door;
- choose the right seal according to its characteristics;
- calculate the required quantity.
The first point is especially important; you need to examine the structure for cracks or gaps from different sides, pay attention to their thickness, which as a result will also affect the choice of the type of insulation.
Homemade seal
Separately, it is worth mentioning homemade seals, which are made from improvised materials. For example, you can use an old rubber tire. The final result will depend on your skills. Some people use a heavy-duty garden hose. Moreover, the final result will be in no way inferior to the purchased material. Plus, you'll save money and be able to express your creativity.
On the other hand, the choice of source material should be approached responsibly. It must be strong enough. If you are concerned about fire safety, the material must be treated with special compounds. Also, the seal should not be too hard, otherwise gaps may remain when the gate is closed.
Insulating a garage from the inside with construction foam
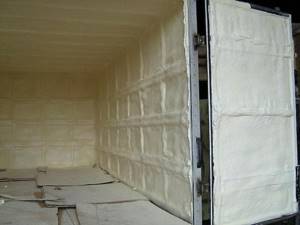
Another method of insulating garage doors with your own hands is polyurethane foam. Of the ways you can insulate garage doors with your own hands, this is the easiest way.
- Polyurethane foam in cylinders (consumption of 5 cylinders per 7m2).
- Spray the foam in an even layer (cut off excess material after drying with a sharp knife)
- Decorative finishing (the covering can be chipboard, lining or any other material).
The advantages of insulating garage doors with your own hands using foam are that the material penetrates even into small cracks. This will also strengthen the entire gate structure.
The safety of your premises and vehicle in proper condition depends on the quality of garage door insulation. Safety also depends on choosing a reliable garage lock.
Features of insulating gates with your own hands
So, let's look at the main features and sequence of gate insulation. The process itself is simple. The main thing is to carry out the preparatory work efficiently. First of all, you should choose the material used, whether it is purchased or homemade. It is also worth having your garage door diagnosed. This includes the following:
- Where there are gaps (bottom, top or sides).
- Gap thickness.
- How and with what to seal moving and fixed structural elements.
- Surface quality.
With a detailed analysis, the conclusion will arise on its own. If the gap is small, then a thin and elastic material is needed, which, when closing the sash, will not create unnecessary tension on the awnings. If the gap is large, then a larger and more rigid insulation will be required that will completely cover the gap.
Special attention should be paid to the method of fastening the seal. If you bought ready-made ones, then some have an adhesive surface. In this case, the surface of the gate leaves and fixed elements must be carefully prepared. If there is rust, it should be cleaned off. There are many tools for this. In order for the insulation to adhere securely, it may be necessary to degrease the surface with appropriate compounds.
Once you have decided on the type of material and the method of fastening it, you need to make the correct measurements. The rule here is measure several times, cut once. Therefore, after taking measurements, cut the material with a small margin of up to 100 mm. Afterwards, carefully secure the material to the seams at the bottom, top and sides of the gate.
Upon completion of work, it is worth checking. To do this, close the doors and make sure that there are no gaps at all. To do this, you can go inside the garage and see if there is any clearance. If not, then you did a great job.
The process of insulating a garage from the inside
To insulate your garage door you will need the following tools:
- Electric drill;
- Drills for wood and metal;
- Hacksaw or jigsaw for wood;
- Metal brush or drill attachment (brush);
- Screwdriver.
Also don’t forget about a tape measure, a paint brush, a hammer, a corner and a ruler, a sharp knife, a core, sandpaper and clamps. A clamp is a means for clamping parts. They will be convenient for attracting slats to the gate frame.
The order of work will depend on the insulation and type of construction.
Preparing the sashes
Cleaning
Remove old paint, rust and all dirt. This can be done conveniently and quickly using a power tool with an attachment.
Padding
The applied primer will protect the metal from corrosion. To work, take a wide paint brush. Anti-corrosion primer is applied in two layers. One across and the other along the surface.
Eliminating gaps between the frame and the canvas
Use a rubber seal. It will not interfere with the operation of the mechanism and will close unnecessary holes. Next, we will look at how to insulate garage doors from the inside.
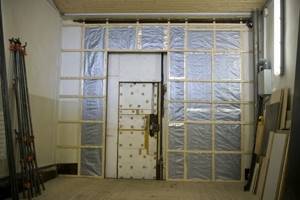
We insulate swing gates with foam plastic.
Swing gates are durable, reliable and easy to use. The system consists of two steel sashes welded onto a frame made of a profile pipe or angle. Sometimes corrugated sheeting is used, but a steel sheet 2-3 mm thick is stronger.
It is good when the insulation of swing gates is carried out by their manufacturer. Otherwise, you can insulate your garage door yourself. After choosing the material, you should calculate how much is required. You also need to decide on the finish on top of the insulation. The final version with different types of gate cladding can be seen in the video. There are many options for covering garage doors.
Types of facing materials:
- Lining;
- Profiled sheeting;
- Fiberboard or MDF panels;
- Waterproof plywood;
- OSB or OSB boards.
Experience has shown that the latter are more suitable for cladding. OSB boards are plates made from glued and pressed sawdust and wood chips. If you look at the photo of the product, you can see its composition of several layers. The layers have different arrangements, which gives the sheets special strength and flexibility. This finish is easy to process, has low vapor permeability and is very economical.
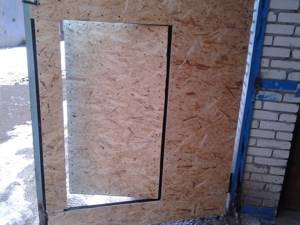
Advice! For rooms with a high degree of humidity, use OSB-3 or OSB-4 boards with a width of 10 mm.
The cladding will be fixed to a wooden frame. The lathing is installed around the entire perimeter and on the area of the canvas. Galvanized wood screws are used to secure the wooden frame. • 3.5*30 mm - for the side surfaces • 4.5*70 mm - for the end
Attention! If the gate frame is made of profile pipes, then the length of the screws increases by an amount equal to the cross-section of the pipe.
To fix the finishing slabs to the sheathing, take screws with a 4.2 * 32 mm press washer. Insulation boards are laid between the sheathing. The foam is attached with special glue or professional mounting foam. If you are working with foam, wait 5-10 minutes after application until the composition increases in volume. The main thing is to avoid empty spaces. The slabs must be tightly laid between the grate slats. Treat the slightest cracks with sealant. Leave the mounting locations for locks, valves and ventilation free.
Laying waterproofing
We install waterproofing between the metal and the insulation. This could be bitumen mastic, foil, or a vapor barrier membrane. Extruded polystyrene foam does not require waterproofing.
After installing the insulation, proceed to cladding. OSB is cut using a hacksaw or power tool. The fastening step is 10-15 cm around the perimeter of the frame, and 20-25 cm along the horizontal beams and in the center. To prevent the wooden blocks from splitting, mark the holes with a thin drill bit. To achieve the best fit of the shutter or gate, you can additionally seal these places with tape. A garage finished in this way will have a very neat appearance.
Dispelling myths and misconceptions
Today you can hear many different opinions regarding this issue. Some of them do not deserve special attention because they are not supported by facts. So, one of the myths is that there is no durable seal. This is not true! There are high-quality materials that will last for many years. Once you seal the gate once, you will forget about it for many years.
There is also an opinion that it is enough to insulate the gate itself, and not the cracks. Even if you use the most modern thermal insulation material on the gate frame, the presence of gaps will reduce the effectiveness of insulation. For this reason, the cracks must be sealed. Among other things, there is an opinion that there is only one good material. This is just a cheap marketing ploy. Each of the sealants listed in this article has its own advantages and disadvantages. And in each individual case it will be effective in its own way.
Choice of insulation
Today there is a fairly wide selection of thermal insulators. Each of them has both advantages and disadvantages, based on which you can choose the most optimal option.
Mineral wool
The material has been popular for decades. There are different types, of which basalt wool is considered the best. It is not only a good insulator, but also perfectly protects against noise. Mineral wool is produced in the form of rolls and mats.
Styrofoam
One of the most common insulation materials. It is inexpensive and long-lasting, is not susceptible to insects and fungi, and is easy to cut. The light weight of the sheets allows you to install it yourself.
However, it is worth considering that polystyrene foam requires protection from direct sunlight and mice, and the garage must be equipped with ventilation to prevent condensation from accumulating. Penoplex has properties similar to polystyrene foam, but its cost is noticeably higher.
Glass wool
You can cheaply insulate a garage with glass wool, which is the only positive quality of this material. Otherwise, you need to work with it very carefully and be sure to use protective equipment. Otherwise, problems with the skin and organs of vision are possible. Glass wool also requires good protection from moisture, since its thermal insulation properties are lost when wet.
Polyurethane foam
The insulation is resistant to external influences. After application, the material expands and fills all gaps well and has good adhesion to the metal. Thus, you should not be afraid that condensation will accumulate under it.
Polyurethane foam is also a non-flammable insulation material. However, its application requires special equipment, which indicates the need to contact specialists.
