Give me advice on garage door trim materials!
Good day everyone! The question arose about insulation and the inner lining of garage doors! I went through a lot of options! I want something cheap and civilized because the funds are scarce (lining, plastic panels are expensive), and the hands are out of place. I was thinking about using fiberboard, but I’m afraid that it will swell with time and humidity and it will be in vain! Maybe it’s worth soaking it with something? Suggest options! Thanks in advance!
For one standard gate 2*3 you will need: ..1.C8 simple galvanized sheet metal - 3 sheets of 2 m each/price 155 RUR/sq m/ ..2.Galc corner 40*40*1.2 - 4 sticks of 3 meters each /from the facade system ..3.Polyfoam 3 sheets 1*2 50 mm ..4.balloon of professional foam ..5.Seeds with a drill - a handful. Procedure: Glue the foam onto the foam along the entire inner surface of the gate. Most likely, the frame is from the 50th corner. Great. Then we measure the profiled sheet and attach it to the foam on the same foam. It will stick. Then we cut the corners to size and insert them between the corner of the frame gate and polystyrene foam. Covering the cut edge of the corrugated sheet with this. We fasten everything with self-tapping screws.
I have foam inside, and it’s sewn with plywood, and it’s painted. It’s been 7 years now, and it’s great! It doesn’t lead, it doesn’t twist, it doesn’t get wet. There’s no cheaper option.
arnega It is better to prime the plywood well with GF-021 primer and paint on top with another layer or two of PF-115 enamels. Then it certainly won't get wet. Personally, all my garages are lined with clapboards, except for one - there I’ll use plywood, as mentioned above.
I sheathed the foam with regular, non-profiled galvanization - very kosher.
- We fasten bars 40 along the perimeter of the gate leaf (flush with the corner, including on the middle horizontal crossbar, if there is one). To do this, we drill around the perimeter of the gate leaf corner every 30-40 cm and fasten these bars with wood screws. We have a frame!
- We try it on and cut the plywood to size 10 - the larger the sheets, the better!
- We insert glass wool or any 40-50 insulation and on top of it we screw the plywood with self-tapping screws to the frame made of bars. That's it, the gate plane is closed with 40-50 mm of insulation and 10 mm of plywood
- Further. I've had varnish on stain fine for 3 years, nothing has swollen, although in winter drops of water often flow down the plywood from the inside, it's very smooth, beautiful, and warm. You can paint it - there are many options.
- Before this, it is advisable to paint at least the inside of the gate, then it will not be possible without complete disassembly. Carefully foam the cracks in the gate rail. Lapotaaaaa.
Vladimir_Vas wrote: I sheathed the foam with ordinary, non-profiled galvanization - very kosher.
and it’s terribly uncomfortable, like in a Soviet workshop; plywood is many times better. and if it’s dark Pinotex and under a glossy varnish like mine, it looks great and is durable!
No matter how many different things I have seen, there are certain disadvantages in some things. What do you need from insulation? What would be warmer. What's happening? If it’s warm in the garage, then when it’s cold, the metal condenses moisture, and it needs to be reliably cut off. We glue self-adhesive isolon onto the painted gates. why her? Yes, because any glue, and especially foam, will leave unadhesive areas. where condensation will form. Next, we screw the slats over the isolon, again, so that there is no contact with the metal and the slats do not rot. We glue the polystyrene foam onto the isolon using adhesive for strip tiles. Here the air is no longer particularly important. We sew panels or lining, or something else onto the slats.
There was never any leakage or dripping from the gate, there was no frost anywhere, I often heat the garage up to +16. It has never been below -3 in the garage either.
If the garage is unheated, then there is absolutely no point in insulating it. This will not add heat.
***** I’d rather decorate everything with a trailer and in the last garage it’s more comfortable, you know, and there’s no condensation **** and it’s not cold to lean against a piece of wood, you know. All my garages are finished from the inside with clapboards - both the walls and the ceiling, and 40 pieces of polystyrene foam underneath everywhere, of course. In addition, all this is impregnated with fire and bioprotection. So not everything can definitely be measured only in banknotes.
chico63 wrote: I’d rather decorate everything with a trailer and in the last garage - it’s more comfortable, you know, and there’s no condensation ***** and it’s not cold to lean against a piece of wood, you know.
We have already mentioned above how condensation flows from inside such a door. And when covering an iron door with iron over insulation, there will be no condensation inside the door, because 0.5 mm of iron has an absolute vapor barrier. With an iron sandwich, condensation occurs only on the outer surfaces. At the same time, the gates and garage are much drier than with wooden cladding. And one more thing about fire retardants - their service life is a couple of years. And with regular wetness from condensation - less than a year. And after that the wood burns beautifully. What is the supply of firewood in the garage? We regularly see in the program of emergency on NTV.
Your reasoning is quite understandable and logical, only, for example, many years of personal experience (about 20 years from the first garage and 14 years from the last one) shows that if everything is done carefully, then there is no special condensation in the sash and in the garage, even if The ventilation system is well made. My gate leaves are pre-primed from the inside and painted with several layers of GF and PF. Then a lathing made of 40 pieces of lumber with impregnation is tightly inserted and tightened with screws from the end of the sash. Then sheets of 40 mm foam plastic are inserted into it very tightly, without any gaps. If you want, you can cover it with glassine paper. On the outside, everything is carefully sewn up with cheap clapboard or primed and painted plywood. A strip of thin rubber is also attached along the perimeter of the sash - it covers all the cracks. Nothing leaks anywhere. Moreover, there are two ventilation holes in opposite corners of the garage, and one of them goes into a high, 6-8 meters, ventilation pipe. But as for the fire hazard - a stock of flammable liquids is much more dangerous in a garage, and even more DANGEROUS are full or poisonous gas cylinders and poor electrical wiring (including in the car itself) and electrical appliances. Well, of course, headless welding work. For example, I do all my welding exclusively on the street next to the garage. I also have provisions for installing a large collapsible canopy measuring 2.5 x 3.5 meters - so there’s no drips on top either. Of course, the ideal garage option from the point of view of firefighters is a thick-walled concrete box with walls and floors completely lined with 5 mm steel sheet. But, for example, my car is always parked on the street, and in the garage it’s just a workshop.
general information
Insulation of the garage is possible both outside and inside. The choice of installation method, material, finishing method depends on the type of garage, its location, frequency of use and other factors.
Interior or exterior work
Natural wood retains heat well.
External insulation is considered a more practical option. In order to maintain optimal temperature and humidity conditions inside the room, each subsequent layer of wall cake from the inside to the outside must have greater vapor permeability. Since materials with high friability and open pores are most often used for thermal insulation, this requirement is much easier to comply with by installing insulation on the outside.
It is not always possible to sheathe the outside of a garage door. Exceptions:
- If the garage is not an outbuilding at the dacha, but one of the boxes in a common cooperative building, this is simply impossible to do. It is only the doors that are insulated from the outside, and the rest of the room inside is unprofitable.
- The metal box has high thermal conductivity and zero vapor permeability. It doesn’t matter where the insulation is located, the problem of removing moisture from the room is still solved only with the help of ventilation.
- Not all materials are suitable for exterior finishing. Mineral wool is sensitive to moisture. If you insulate it from the outside, you will need very good waterproofing, additional vapor barrier and lathing with a ventilation gap. From the inside, the mats can be attached directly to the wall.
- If the garage is attached and is part of the building, its external decoration must exactly match the facade cladding. In this case, it is more rational to do insulation from the inside.
Garage doors are often sheathed for the sake of attractiveness. It is irrational to insulate from the inside and finish from the outside.
Preparing the gate leaf
Most often, garage doors and gates are made of sheet steel approximately 5 mm thick. This design allows heat to pass through without delay. But due to the characteristics of the material, it is more convenient to insulate it from the inside, since it is difficult to attach waterproofing and sheathing to a smooth metal surface without damaging it.
Before you can sheathe the outside or inside of your garage door, you need to prepare it. Step-by-step scheme of work:
- Clean the surface from dust and dirt. Using a metal brush or drill with an attachment, remove the old layer of paint and rust stains, if any.
- The gates are treated with a special anti-corrosion primer. The composition creates a waterproof film on the surface, thereby preventing rusting. Use a regular brush or roller.
- Sealing rubber is installed around the perimeter of the door frames. This is a common element of thermal insulation: when closed, the sash fits tightly against the racks, which prevents the penetration of cold air.
The seal also prevents impacts and damage when opening too sharply.
Tips for specific materials
The choice of insulation depends on many factors:
- Gate material – when thermally insulating a steel sheet, the vapor permeability of the insulation does not matter. If the sash is made of wood, you need to remember: the material for the interior decoration should have a lower vapor permeability than wood, and the exterior - a higher one, which is quite difficult.
- Design - swing or sliding doors are essentially the same. The finishing requirements are also similar here. Lifting sectional doors require insulation only from the inside and only with special materials.
- The thickness and amount of heat retention is determined by the weather conditions of the region and the type of building itself. If it is a brick building with a wall 20–25 cm thick, mineral wool or thin foam plastic will be required to insulate the gate. It takes some effort to insulate a metal box.
- It is important to assess the fire hazard of the material. A supply of fuel, oil, lubricants and other flammable liquids is stored in the garage. Therefore, fire safety requirements here are very high. Preference is given to non-flammable materials such as basalt or mineral wool.
The easiest and fastest way to insulate gates is to use special paint. After drying, a polymer-ceramic film with good heat-saving abilities is formed on the surface. The gates are painted in several layers.
Features of various insulation materials
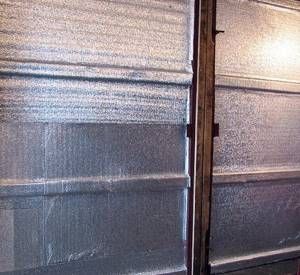
Since the garage is not a residential premises, it can be insulated with any materials and using any technologies. There are 3 categories of thermal insulators:
- Slab - produced in the form of sheets with a thickness of 50 mm. They are based on highly porous organic material: penoplex, polystyrene foam. The main advantage is insensitivity to moisture. The downside is high cost and low vapor permeability. The latter is not very important for interior decoration.
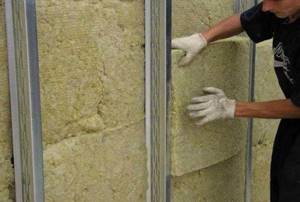
- Rolled - basalt, mineral wool, glass wool. Available in the form of mats and rolls. This material is very loose and soft. It is placed by securing it in the cells of the sheathing, which makes installation somewhat more difficult. The materials are not afraid of fire, but are more sensitive to excess moisture and need waterproofing.
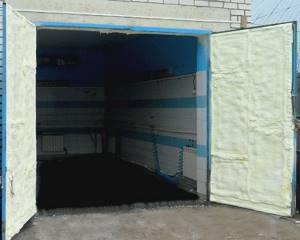
- Sprayed - polyurethane foam, penoizol. When applied, a material similar to polyurethane foam forms many air bubbles in its mass. The substance hardens in air, turning into a solid, highly porous layer, absolutely insensitive to either water or fire. The downside is the high cost and the need to use special equipment for spraying.
For gates, it is recommended to choose materials that are as light and compact as possible, so as not to complicate opening.
Why sheathe garage doors?
As a rule, a garage built independently or purchased already has thermally insulated walls and a roof. At the same time, gates are the main source of heat loss. Therefore, insulating garage doors should be done without delay. Covering the doors will save on heating costs in winter and keep you cool on hot summer days.
Garage doors come in different types. One of the most common ones is made of a material having a three-layer structure (sandwich panels). This gate option is quite frost-resistant and moisture-proof; it will be quite warm in the garage. Meanwhile, metal gates cause the formation of ice during the cold season and require insulation.
Sandwich construction
During frosts, this type of shutter transfers cold air from outside into a room with a positive temperature.
Such processes lead to freezing of garage doors and loss of heat inside the garage.
Hinged door design
The resulting ice is fraught with the following negative consequences:
- rapid occurrence of rust on the doors;
- condensation settling on the metal body of the car. As a result, the car body becomes susceptible to premature corrosion;
- a large accumulation of layered ice mass that prevents the gate from opening.
Frame assembly procedure
Timely prevention of the problem will eliminate the mentioned consequences in the future. Therefore, it is better not to put off insulating the gate and quickly select a suitable material for covering.
Sectional Representative Scheme
Among the existing types of gates (swing, overhead, sectional), only swing gates are insulated. Other types of sashes are insulated during production with polyurethane foam panels 4.5 mm thick.
The modern market offers thermal insulation materials of several variations, which have many advantages, with a high coefficient of resistance to heat transfer and increased fire resistance.
Insulation with mineral wool
Why do you need garage lining inside?
Finishing the garage will keep the room dry and warm. The creation of such conditions is necessary to keep things in the garage, as well as the vehicle, safe and sound.
If finishing work is not carried out, the humidity in the room will always be high.
Dampness will contribute to the beginning of the process of rotting of the car and the appearance of rust on its spare parts. Tools and other things stored in the garage will also deteriorate.
Finishing work is intended not only to create an aesthetic appearance in the garage, but also to maintain hygienic conditions in it. And working in a warm, well-maintained garage is much more comfortable.
How to cover the outside of a garage door
It is advisable to finish the sashes from the inside and outside. In the first case, we lay insulation. Exterior finishing involves improving the appearance of garage doors and additional insulation.
The external surface is finished using the following materials:
- wood-laminated boards (plywood);
- profiled metal sheets (corrugated sheets);
- thin cladding boards (lining);
- facing panels (siding).
When choosing thermal insulation products, they take into account condensate indicators and dew point temperature (the temperature of the air at which the steam it contains condenses into dew).
External finishing material of sufficient thickness will not allow the dew point to pass through it when the sub-zero temperature outside is constantly decreasing. Thus, condensation will not accumulate on the surface of metal gates, including stainless steel ones.
Use of edged wood
Now we will look in detail at the process of installing each finishing material individually.
Finishing the sashes with plywood
Wood-laminated board is the most inexpensive and easiest to install finishing material. The cladding process consists of 4 stages:
- Using a hacksaw or jigsaw, cut plywood sheets to fit the gate. To avoid the doors not closing tightly, the markings are made with an indentation of 50 mm.
- Plywood boards and sashes are measured.
- Using a drill with drills for metal and wood, through holes are drilled in the desired areas of the surface.
- The sheets are fastened with bolts and nuts to the outer surface of the sashes using wrenches.
It is recommended to fix plywood with galvanized fasteners, which are matched to the color of the material.
Upon completion of installation, the finished surface is covered with protectors or paint. This is necessary to increase moisture resistance.
Use of grade 2 material
The process of covering the sashes with clapboard
External cladding with clapboard will give the gate an attractive appearance, but will require large financial and labor costs.
Finishing is done using:
- drills with drill bits for metal and wood;
- nuts, bolts and wrenches;
- electric jigsaw;
- small diameter nails and a hammer.
Lining in finishing
To cover the outer surfaces of the gate, follow the step-by-step instructions:
- we cut the block into pieces of the required length (3-4 pieces for each sash);
- We mark the sashes and guides, then drill them through;
- We lean the lumber against the outer surface of the doors so that the holes match. Having inserted the bolts into them, from the opposite edge we connect the fasteners with nuts and screw the bars to the surface of the gate with keys;
- we cut the lining, then using a hammer we nail the finishing material to the guide bars with thin nails.
Product layout diagram
Having completed the plating process, we coat the surface with colorless varnish.
In order not to hide the natural grain of the wood, it is not recommended to use paint.
Finishing gates with siding
Siding is considered the most expensive cladding option. The high cost of the material is due to a number of significant advantages:
- Durability and resistance to precipitation and unstable thermodynamics. Gates finished with siding panels look beautiful for many years.
- There is no need for finishing treatment. Siding does not need to be painted or protective compounds applied.
- Easy to care for. Lining with plywood requires annual treatment. Siding panels will only need periodic washing.
Example of completed work
The technology for covering doors with this material is identical to finishing with clapboard, including the process of additional insulation.
Technology of gate cladding with corrugated sheets
Covering gates with corrugated sheets is an option for internal insulation that is very popular, judging by the numerous positive reviews left by users on thematic forums on the Internet. Old metal gates are perfectly finished with profiled sheets.
Swing gates with corrugated sheet cladding
Installation is carried out using:
- manual or automatic drill;
- Bulgarians;
- screwdriver;
- self-tapping screws.
Scheme of swing gates with corrugated sheet cladding
Sheathing is carried out as follows:
- First, measurements are taken.
- Cut off the sheets of the required parameters.
- Mark the profiled sheet and sashes.
- Drill holes with a diameter smaller than that of the mounting screws.
- The sheets are screwed with a screwdriver and self-tapping screws to the surface of the garage doors.
The material is fastened to the installed frame
The use of painted corrugated board does not require additional finishing.
The photo shows a gate finished with corrugated sheeting.
Garage design
Work order

To insulate the gate, you must follow a certain sequence:
- Inspecting surfaces for defects.
- Removing rust and cracks by stripping and caulking.
- Padding.
- Coloring.
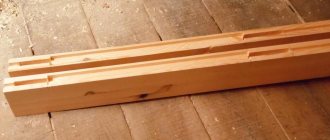
- Preparation of wood for creating sheathing: cutting, treatment with antiseptics, installation (vertical).
- Laying thermal insulation between the slats. If necessary, foam boards should be cut into the necessary pieces that can be easily fixed. For reliability, glue is used. Make sure there are no gaps. If there are any, it is worth using polyurethane foam or sealant.
- After the installation of the foam is completed, you can proceed to covering the sash. A variety of methods and methods are suitable for this, but the simplest and most accessible is the use of boards or lining.
- At the last stage, the casing is opened with varnish or stain. The metal plate is painted.
Pay attention to the cracks during insulation, especially at the junction of two doors.
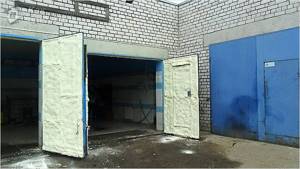
Gates insulated with polyurethane foam
How to line a garage door from the inside
With internal insulation, low temperatures will affect the load-bearing part, but the dew point will not pass through the inner layer of insulation and will not affect the formation of condensation. Before sealing the garage door with insulating material indoors, take into account the location of the electrical wiring.
Most often, gates are insulated with the following thermal insulation materials:
- polystyrene foam;
- extruded polystyrene foam;
- penoizol.
Laying in prepared sheathing
Their thickness, depending on the region of use, should be at least 20 mm.
Next, we will consider each type of insulation in more detail.
Scheme of the main nuances of the assembly
The bulk of the foam is occupied by gas, which causes toxic smoke during combustion. The material has a high resistance to heat transfer. It is incompatible with most paint and varnish products. Given the high flammability, polystyrene foam is placed between fire-resistant materials. Also, to reduce fire, fire retardant components of organic origin are added to it.
Fixing the material onto polyurethane foam
Extruded polystyrene foam
Refers to foamed types of insulation. It is a product of polystyrene and its derivatives. Extruded polystyrene foam consists of fine-cell granules. Its mechanical properties are determined by different densities. The denser the material, the lower its moisture permeability and higher strength.
This type of insulation is flammable, so when finishing it is placed between fire-resistant fittings. However, the flammability indicator in its labeling may vary. This material is widely used in thermal insulation of walls and internal barrier structures.
Urea-formaldehyde foam (penoizol)
It is similar to ordinary polystyrene foam in color and fine-cell structure. Transportation is carried out in liquid form. It is applied to the surface to be treated under pressure.
When in contact with oxygen, the product swells, filling the free space. When interacting with open fire, it deforms, but does not melt. Does not emit smoke or toxic gases.
Layout of materials
Having discussed the main properties of thermal insulation products, we move on to detailed instructions for the internal cladding process.
Photo of garage walls insulated with foam insulation.
Treatment of internal walls with foam insulation
Material requirements
The main requirements when choosing a finishing material are to have the following properties:
- fire resistance;
- resistance to the effects of substances containing chemical elements;
- increased strength and durability;
- the material should be easy to clean even from the most difficult contaminants;
- resistance to deformation;
- resistance to absorption of odors.
Since a lot of work is carried out with various chemicals, finishing work must be done from exclusively high-quality, proven materials. Let's take a closer look at how you can decorate a garage.
Plaster
Plaster has become less and less used for finishing work, since it is very difficult to work with it, especially if there are no special skills. In damp and cool weather, this material dries completely only after a few days.
Suitable for both wall and ceiling decoration. You most likely won’t be able to create a neat and high-quality plaster finish yourself and will have to hire a specialist.
Plaster tends to burst due to temperature changes. Over time, the appearance of such cladding deteriorates greatly - the plaster becomes dull and quickly becomes dirty. Getting rid of dirt on plastered walls is not easy.
How to insulate gates from the inside
To properly sheathe garage doors, you will need skills in finishing with the selected class of thermal insulation products. The technology of the finishing process is based on several basic rules.
- Installation of thermal insulation is carried out on a clean and dry surface, otherwise the material will not adhere well.
- The cleaned surface is treated with anti-corrosion agents. Mortise and built-in locks are repeatedly tested for functionality (defective ones are lubricated or replaced).
- Upon completion of the preparatory work, the thermal insulation is fixed.
- After sheathing with insulation, the sashes are finished with high-strength material that protects from mechanical damage.
- Insulation materials such as polystyrene foam, polystyrene foam and penoizol are used as the middle layer.
- In order to increase the fire resistance of the insulation, garage doors are covered with non-flammable material or a foil insulating layer.
Internal thermal insulation using polyurethane foam
Foam sheathing process
Sheathing with foam plastic is carried out in several stages:
- Preparation stage. Rust and old finishing coating are carefully removed from the internal planes of the sashes. Bitumen mastic is applied as waterproofing or the surface is painted over.
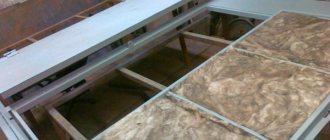
- The stage of creating the sheathing. A sheathing is created from wooden blocks cut to the width of the sash and matched to the thickness of the foam insulation. The slats are fixed to the sashes with nuts and bolts. The bolt heads should be located on the outside of the doors.
- Finishing stage. After cutting the foam panels to the required sizes, the insulation is fixed to the sheathing using polyurethane foam sealant (spray foam). Also, foam plastic can be attached to the sheathing with other adhesive thermal insulation products.
Installation process and seam taping
After completing the cladding process, to give garage doors visual appeal, it is recommended to trim them with plywood, OSB sheets or plastic panels.
Photo of garage doors insulated with foam plastic.
Sheathing with foam plastic boards
Extruded polystyrene foam finishing process
This material will be more expensive compared to polystyrene foam. However, its high price is justified by three advantages:
- An effective solution to the problem of thermal insulation inside a garage due to reduced heat transfer.
- There is no need to create sheathing (the material is strong and rigid, so it is attached directly to the surface of the sashes).
- A material with a one-sided foil coating that does not require the application of an additional waterproofing layer.
Foil material retains heat in the room
Expanded polystyrene panels are attached with mounting adhesive. It is advisable to use high quality adhesive products, preferably from imported manufacturers. The insulation is best fixed with German liquid nails. The joints are sealed using polyurethane foam.
Pre-installation of stiffeners
The insulation is decorated with plywood, plastic or thin cladding boards. Wallpaper is also used for finishing, but then the surfaces will need to be puttied.
Garage doors of any type, except roller and sectional ones, are best sealed with insulation. You can do the work yourself. When choosing a thermal insulation material, attention is paid to its weight.
Trimming that is too heavy will strain the hinges or power mechanism of automated doors.
Application of fiber material
To protect your car from corrosion and extend its service life, the climate in the garage should be conducive to the rapid cooling of the car and to prevent the formation of condensation.
How to give an aesthetic appearance from the inside
One of the important factors is the aesthetic appearance; all the work done is assessed by it. Therefore, they are not limited to installing insulation when covering garage doors, but cover it with some kind of material.
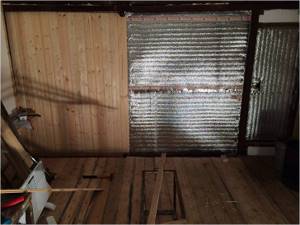
To cover the gates on top of the insulation, 12.5 mm thick lining is suitable. It is advisable that it is subsequently deeply impregnated with paint and varnish material, since many gates open outward and can be exposed to water. The material is attached vertically to a durable wooden frame. If you used one for installing insulation, you can attach it directly to it. Before installation, it is necessary to keep the lining indoors for at least 48 hours. Garage owners, if they have the means, often do not limit themselves to covering only the gates, but also trim the walls and ceiling with clapboard. Garages finished in this way look very presentable inside.
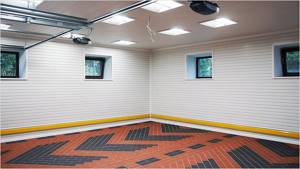
Another type of finish that works well for lining a garage door is siding. It is easy to install. Installation of siding is carried out both on a wooden frame and on a steel profile. There is also a wooden type of siding. Siding can also be used to cover both the gate and the entire garage.
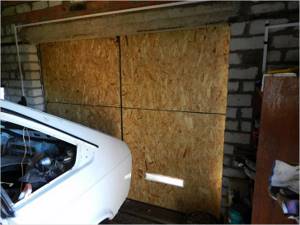
You can use plywood and OSB for cladding. Working with these materials is easy and does not require special skills. Sheathing is carried out mainly on wooden sheathing. Before installation, all wooden structures must be protected from precipitation and moisture. After that, sheets of material are attached to the finished sheathing with screws. The entire garage can be covered with plywood or OSB. After completing the sheathing, all joints must be caulked and sanded. And then you can paint it.
Another piece of advice from personal experience. You need to know the minimum temperature for storing your car. Basically, the optimal temperature for many cars is 5–10 C°. You can take the garage temperature on duty in this range. And when repair work is being carried out and you are in the garage for a long time, the temperature is temporarily raised to the desired setting using heating devices.
Video: insulating gates with foam plastic
The gates are insulated with foam plastic using foil insulation, and then sheathed with OSB sheets.
We have studied the insulation of garage doors in detail, revealed all the pros and cons, all that remains is to wish you success in completing the work.
How to cover the outside of a garage door
To sheathe the outside of the garage door, buy plywood, lining, siding or corrugated sheets. These materials are ideally suited for decorative and protective finishing.
Covering garage doors with plywood
Plywood is the most budget-friendly finishing material. The work will not take much time.
For sheathing you will need the following tools and materials:
- plywood sheets of selected thickness;
- drill with drills for metal and wood;
- nuts, washers and bolts;
- electric jigsaw or hacksaw;
- two wrenches of the required size.
Finishing takes place in 4 stages:
- Cut sheets of plywood to fit the dimensions of the sashes. When marking, keep in mind that you need to retreat 0.5 cm on each side. Allowances are necessary to ensure that the gate closes easily and tightly.
- Mark the sheets and sashes.
- Drill through holes in the required locations.
- Secure the sheets to the sashes using keys, bolts and nuts.
Note! For fixing, galvanized fasteners matched to the color of the plywood are best suited.
After completing the installation work, cover the sashes with protective compounds and/or paint. This will increase the moisture resistance of the coating.
Photo No. 1: garage doors lined with plywood
Covering garage doors with clapboard
Gates covered with clapboard look much more attractive, but such finishing involves more serious labor costs and will cost more.
Photo No. 2: garage doors covered with clapboard
During the work you will need:
- drill with drills for metal and wood;
- bolts, washers and nuts and keys;
- jigsaw;
- thin nails and a hammer.
The materials needed are lining and timber for the manufacture of guides.
To sheathe the outside of the gate, proceed according to the following scheme:
- Saw the timber into pieces of the required sizes (3-4 pieces for each sash).
- Mark the guides and sashes.
- Drill through holes in them. At the same time, do not forget that the bolt heads must be recessed.
- Attach the bars to the sashes.
- Cut the lining.
- Nail the strips to the guides with thin nails.
Important! With this option of decorative and protective finishing, you can additionally insulate the garage. To do this, before attaching the lining, place the material selected according to the thickness of the bars between the guides.
For finishing, colorless varnish is best, since paint will hide the natural texture of the wood.
Covering garage doors with siding
Siding is the most expensive finishing option. However, this material has a number of important advantages:
- Excellent technical characteristics. The panels are durable and resistant to precipitation and temperature changes. Gates covered with siding will retain a presentable appearance for decades.
- No finishing required. The material does not require painting or treatment with protective compounds.
- Easy to care for. The lining and plywood will have to be treated annually. The siding only needs to be washed periodically.
Photo No. 3: garage doors covered with siding
Garage door siding is covered using the same technology as in the case of lining. Additional insulation is possible.
Covering garage doors with corrugated sheets
This finishing option is also popular. Sheets of corrugated sheets are perfect for covering old metal gates.
Photo No. 4: garage doors covered with corrugated sheets
During the work you will need:
To sheathe the gate with corrugated sheets, proceed according to the following scheme:
- Take measurements.
- Cut out the sheets.
- Mark the material and sashes.
- Drill holes (the diameter should be less than the diameter of the screws).
- Screw the sheets to the sashes.
If you purchased painted corrugated board, no additional finishing is required.
Garage finishing with PVC plastic panels
Finishing a garage with plastic panels begins with the installation of sheathing - wooden or metal. Or the panels are mounted without it - it depends on the material of the walls. The sheathing pitch and fasteners are selected individually in each case.
Finishing a garage with plastic has a number of advantages. Such panels are easy to clean (thanks to their tightness and special design), and they do not change their appearance - they do not turn yellow, do not fade, and scratches are not visible on them, since they are completely cast from white plastic and are not painted on top. All our clients can safely say this - owners of perfect garages, of which GarageTek has already completed several hundred during its work in Russia since 2008.

Having a beautiful garage finish is important. But the main advantage of TekPanels is that they are not just a finishing material, but also serve as the basis for accessories and furniture from the GarageTek storage system - cabinets, racks, shelves, baskets, hooks, brackets, holders and other garage equipment.
EXPERT OPINION Olga, head of development department GarageTek
You can also screw shelves to regular walls. What is the difference?
Firstly, in modularity. The panels have longitudinal grooves into which mating parts of accessories are inserted. There is no need to nail or drill anything. Accessories can be easily removed and moved. A striking example of this is the garage we equipped in the “Fazenda” program on Channel 1, which we quickly changed for the winter and summer seasons. Secondly, there are more than a hundred different accessories in the GarageTek storage system. Thirdly, accessories can withstand loads from 2 to 120 kg. And on the panels you can place any number of any accessories, the main thing is not to overload each of them. Permissible loads are indicated in the GarageTek product catalog.
How to sheathe a gate from the inside
Do you want to sheathe the inside of your garage door to create the most favorable conditions for preserving and repairing your car? Polystyrene foam, extruded polystyrene foam and foil-foamed polyethylene are suitable for this.
It is worth noting that automatic sectional garage doors do not require sheathing, since the thermal conductivity of high-quality sandwich panels is comparable to the same characteristic of a 0.6 m thick brick wall. Below we will look at methods of insulating traditional metal swing structures.
Garage door interior lining with polystyrene foam
Polystyrene foam is most often used to insulate garage doors for three reasons:
- Low cost. This insulation is the cheapest.
- Light weight. The load on the hinges will practically not increase.
- Durability. The material does not deteriorate at high air humidity.
Laying foam plastic will not take much time and effort.
- Preparation. Thoroughly clean the internal surfaces of the metal doors to remove any old finish and rust. Paint the gate and apply a layer of bitumen mastic for waterproofing.
- Creating a sheathing. For this purpose, wooden blocks selected according to the thickness of the foam and cut to the width of the sashes are suitable. Secure the strips with nuts and bolts. Their caps should be located on the outside of the gate. The optimal step for fixing the guides is 30–50 cm.
Photo No. 5: covering the gate with foam plastic
- Installation of insulation. Cut the foam into panels of the desired size. For fixation, use polyurethane foam, which also has thermal insulation properties, or any suitable adhesive.
If you want to create an additional protective layer and give the gate a finished and attractive appearance, cover the gates with plastic panels or sheets of plywood.
Important! To do this, you will have to make sure that the bolts do not stick out from the guide bars.
Garage door interior lining with extruded polystyrene foam
Extruded polystyrene foam is more expensive than regular polystyrene foam, but compared to it it has three advantages.
- The material is better suited for maintaining a comfortable indoor temperature due to reduced thermal conductivity.
- If you buy extruded polystyrene foam foiled on one side, no additional waterproofing will be required.
- Due to its high strength and rigidity, the insulation can be attached directly to the sashes. There is no need to do the sheathing.
Photo No. 6: gates lined with extruded polystyrene foam on the inside
To attach the panels to the sashes, use high-quality imported mounting adhesive. German quick-hardening liquid nails are perfect. Don't forget to seal the joints with foam.
Note! Plywood, lining, plastic panels and even wallpaper are suitable for finishing. In the latter case, you will have to putty the surfaces.
Internal lining of garage doors using foil-foamed polyethylene foam
Photo No. 7: foil-foamed polyethylene foam
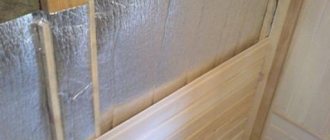
The thermal insulation properties of this coating are lower than those of the materials described above. Foiled polyethylene foam is used as the main insulation only in regions with mild climates. For fixation, high-quality quick-hardening liquid nails are usually used.
Photo No. 8: garage doors lined on the inside with foil-foamed polyethylene foam
The main advantage of this coating is its excellent waterproofing. The flexible material fits even into the most difficult to reach places without any problems. Thanks to these qualities, foil-foamed polyethylene is excellent for creating combined cladding.
The ideal option is 3 layers.
- Foiled polyethylene foam.
- Extruded polystyrene foam.
- Foiled polyethylene foam.
This way you will get maximum thermal and waterproofing properties of the cladding.
Why you shouldn't use mineral wool
Many garage owners use mineral wool for insulation, but this should not be done (even if you use foil).
Photo No. 9: foiled mineral wool
This airy material perfectly absorbs water, which makes it unsuitable for use in garages where humidity levels are significantly higher than normal values. At first, mineral wool will provide the necessary thermal insulation, but over years of service it will lose its properties and become unusable. The sheathing will have to be redone.
Choosing an insulating material
Many car owners in the recent past have lined the inside of their garage doors with wood. Today the construction market offers a wide range of more suitable products. Its main types include:
- mineral and stone wool;
- extruded polystyrene foam (expanded polystyrene);
- polyethylene with foil;
- corrugated sheeting;
- liquid penoizol.
All of the above insulation materials have excellent performance characteristics.
How to sheathe a gate from the inside
In a garage, you can use various materials to cover the inside of the gate with your own hands. Let's consider the most acceptable options:
- Styrofoam. An affordable material, it is distinguished by durability and light weight.
- Extruded polystyrene foam. Belongs to the category of expensive products. However, it has an advantage, since it is convenient to use high-quality imported mounting adhesive to fix the panels to the gate leaves.
- Foiled polyethylene foam. Suitable for regions with mild climates, since the thermal insulation characteristics of this coating are slightly lower than those of other materials. Liquid nails with a quick-hardening effect are suitable for fastening it. The main advantage of the product is its excellent waterproofing and flexibility, allowing it to be used in hard-to-reach places. This layer of insulation is an excellent option for designing combined skins.
How to cover the outside of a garage door
If you have to solve a dilemma - how to cover a garage door on the street side, then it is better to use plywood, lining, corrugated sheets or siding. These product options are ideal for decorative and protective cladding of structures.
- plywood: budget material, does not require much effort and time for fastening;
- lining: attractive in appearance, but requires serious labor and investment;
- siding: expensive material, has high technological performance;
- corrugated sheeting: an excellent option for decorating old metal structures.
How to properly sheathe a garage door with your own hands
To properly sheathe your garage door with your own hands from the outside and inside, carefully study the following professional advice:
- Fix materials to surfaces and joints as tightly as possible and pay special attention to sealing joints. Maximum exclusion of air layers will give tangible results.
- If the gate does not have a wicket, install one. The amount of heat loss will be significantly reduced.
- After cutting, finish the edges of the panels. In this case, the materials will not crumble. You will get perfect joints.
Important! If your garage has very thin walls, you can create a good microclimate only if you line the entire structure.
Methods of additional insulation
There are two good ways to provide additional insulation.
Awning manufacturers market a wide range of single- and multi-layer tarpaulin and PVC canopies. Products equipped with eyelets are excellent for additional insulation of garages.
Photo No. 10: garage insulated with a tarpaulin canopy
To hang a curtain:
- weld the steel cornice;
- fix it above the doorway;
- tie a rigid metal wire on one side;
- thread the free end through the eyelets of the canopy;
- raise the curtain and complete the installation.
Sealers for cracks
To seal the side and top cracks, buy a roll of sealant at the construction market. Silicone self-adhesive tape is best. It is characterized by reduced thermal conductivity. Installation will take place as quickly as possible and will not require the use of adhesives.
Image #1: Self-adhesive silicone tape
To seal the bottom cracks, buy special wax-coated nylon brushes. Their installation will not complicate the operation of the gate.
Photo #11: Wax coated nylon brush
Video: getting to know siding better
Now you can find out even more useful information about siding. It is this material that is increasingly popular as the main exterior cladding of garage walls.
This video tells in detail about siding, its main technical characteristics, and advantages.
Have you finally decided to use siding to cover the walls of your garage? It's a good choice. But you will need to understand in more detail how best to install a metal profile under the siding. The following video will help you.
Watch the video carefully. It clearly presents instructions for installing a metal profile under siding. By following the recommendations, you will achieve reliability and durability of the cladding.
How to cover sliding gates
Do you want to cover your sliding gates yourself? There are two options:
- Buy the necessary tools, materials and components and do everything yourself (which is extremely difficult).
- Order the production and installation of sliding gates without filling the frame at a competitive price in Moscow.
Next, we will talk about how to cover the gates on the street and show interesting design solutions.
Note! Filling the frame yourself will not require significant time investment. Sheathing involves only fastening selected materials using screws or welding.
Covering sliding gates with corrugated sheets
Corrugated sheeting is the most popular material for cladding sliding gates. Galvanized steel sheets treated with high-quality paints combine:
- low cost;
- wide choice of color and design solutions;
- light weight;
- resistance to adverse weather conditions and temperature changes;
- long service life.
Photo No. 12: sliding gates covered with corrugated sheets
Covering sliding gates with European picket fences
Covering sliding gates with European picket fences will help maintain the area's airflow. The structure will not experience serious wind loads.
Photo No. 13: sliding gates lined with Euro picket fence
Covering sliding gates with wood
Wood is an excellent choice for those who want to combine modern technology and traditional natural materials. This option for filling the frame has one important drawback. Gates lined with wood will have to be regularly treated with protective compounds.
Photo No. 14: sliding gates covered with wood
Covering sliding gates with sandwich panels
Covering sliding gates with sandwich panels is popular when decorating street and sectional garage structures in the same style. To fill the frame you will need a welding machine. The result is a rigid structure. Sandwich panel fabric does not make loud sounds when moving.
Photo No. 15: sliding gates covered with sandwich panels
The process of insulating a garage from the inside
To insulate your garage door you will need the following tools:
- Electric drill;
- Drills for wood and metal;
- Hacksaw or jigsaw for wood;
- Metal brush or drill attachment (brush);
- Screwdriver.
Also don’t forget about a tape measure, a paint brush, a hammer, a corner and a ruler, a sharp knife, a core, sandpaper and clamps. A clamp is a means for clamping parts. They will be convenient for attracting slats to the gate frame.
The order of work will depend on the insulation and type of construction.
Preparing the sashes
Cleaning
Remove old paint, rust and all dirt. This can be done conveniently and quickly using a power tool with an attachment.
Padding
The applied primer will protect the metal from corrosion. To work, take a wide paint brush. Anti-corrosion primer is applied in two layers. One across and the other along the surface.
Eliminating gaps between the frame and the canvas
Use a rubber seal. It will not interfere with the operation of the mechanism and will close unnecessary holes. Next, we will look at how to insulate garage doors from the inside.
Advice from professionals
At the end of the insulation process, the thermal insulation material must be hidden. For finishing, professionals recommend using moisture-resistant and durable sheet material. In reality, car enthusiasts attach everything that is available: lining, plywood, chipboard, fibreboard, galvanized sheeting, corrugated sheeting. For many owners, it is not customary to specifically buy expensive decoration for the garage.
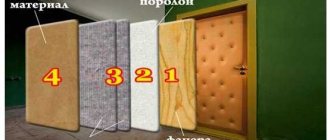
A budget option is fiberboard cladding. The lining will make the gate truly attractive. Artificial leather will create a presentable look, but it will not last long in the garage.
