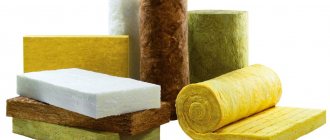
Wall insulation
Throughout the evolution of our housing, the inevitable use of clay has always been visible. Currently, there are also several options for its use for wall insulation. These include:
- the use of adobe, in the form of dried building blocks consisting of clay with filler;
- during frame construction, when a cavity is made in advance, subsequently filled with clay with a binding material;
- due to the application of clay with filler to the inner surface of the wall.
When using it in its natural state, it is imperative to use a binding element in the form of fine straw or sawdust, which helps maintain the integrity of the structure when completely dry.
How to prepare the composition
To insulate the ceiling, several methods of preparing the solution are used. All of them were discussed more than once on the Internet and were even filmed in amateur videos. The most common ones are those with the addition of cement, lime or clay. For preparation you will need:
- Dried sawdust - 10 parts.
- Lime – 1 part.
- Cement 1 part.
- Copper sulfate or borax (they act as an antiseptic).
- Water from 5 to 10 parts.
Preparation of the solution:
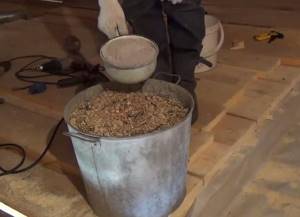
Lime is mixed with cement. The sawdust is poured into a clean container (this can be an old bathtub or a bowl for preparing cement mortar). You can use a concrete mixer. This will make the solution easier to prepare and mix better. A mixture of cement and lime is added to the sawdust and everything is mixed.
3 tablespoons of copper sulfate or borax are diluted in a bucket of water, but you need to understand that this is poison and you need to use rubber gloves and a mask. This solution is slowly poured into the prepared mixture of cement and sawdust. In this case, you need to stir constantly so that the solution does not turn out to be too liquid. You can check the readiness by making a lump of the mixture. It should not fall apart when the palm is unclenched. But at the same time, excess moisture should not be released from it either.
The second recipe for making sawdust insulation is more suitable for the ceiling of a bathhouse. It is not recommended to use copper sulfate here at all. When heated, it releases harmful fumes. For preparation you will need:
- Sawdust – 10 parts.
- Clay – 5 parts.
- Lime – 1 part.
- Water 7-14 parts.
Preparation:
The clay is poured with 2 parts of water and left until completely soaked. The solution is thoroughly mixed and brought to the consistency of thick sour cream, without lumps. Sawdust aged for 6 to 12 months is mixed with 1 part of lime. This composition is added to the clay and mixed. Sawdust should be added in portions, stirring constantly. The composition should be viscous and thick. You can check readiness using a simple stick. If you stick it into a container with insulation, it should not fall. If the solution turns out to be too liquid, let it sit for a day without covering it with a lid. Excess moisture will disappear.
There is another recipe instead of clay, which uses gypsum in the same amount. It is also suitable for insulating the ceiling of a bathhouse, but has a major drawback - it dries quickly. You can only cook in small portions. And to insulate a larger area, you need 20 or more such portions.
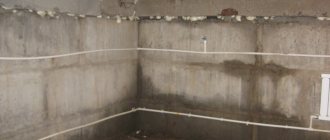
Waterproofing works

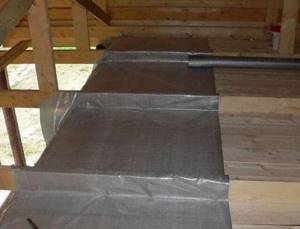
Ceiling waterproofing
The clay mixture is placed on the flooring wet. Therefore, it is necessary to somehow protect the base from moisture. Usually a simple film is used for this. It is laid on top of the ceiling and attached to it with staples or some other way. The same film will protect the insulation from fumes from the room, for example, if clay is used in a bathhouse.
It is not recommended to use various impregnations and chemicals. Moreover, varnish or paint. Especially in a bathhouse or in a room with a stove. When heated, chemicals begin to emit harmful fumes, and varnish and paint can melt, “cry” and also evaporate toxic substances.
Types of sawdust
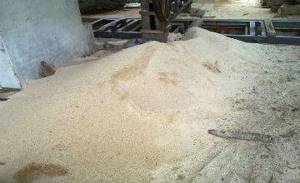
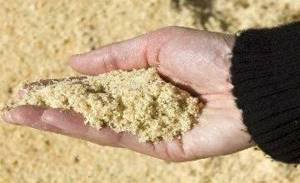
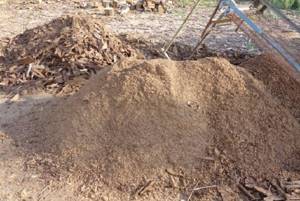
Sawdust is particles of processed wood that are formed during the sawing process. In appearance they resemble dust. There are also wood wastes such as shavings. They are formed as a result of drilling or planing. The chips are large in size, which is the main difference. The length can vary from 30 to 50 mm.
To insulate the ceiling of a house, it is better to choose the middle fraction. Large chips have less thermal insulation properties, and material that is too small is more difficult to work with. When insulating, elements scatter, generate dust, and become clogged in the respiratory tract.
Sawdust produced in chamber-drying carpentry production has good properties. This material does not need to be dried additionally, which increases the service life of the insulation. If waste was generated as a result of processing wood with natural moisture, then it will have to be dried before use. Sawdust is placed under the canopy. It is forbidden to cover them with polyethylene, as they will rot and begin to rot.
It is recommended to choose shavings from deciduous wood for the ceiling in the bathhouse, and from coniferous wood for the house. They contain resin, which increases resistance to external influences. In addition, this material is less susceptible to damage by bugs and insects.
To insulate the ceiling, you should take shavings that have lain for 6-12 months. During this time, sugar comes out of the particles, which contributes to the development of rot. If you keep sawdust for more than a year, they can also begin to rot.
We suggest you familiarize yourself with: Insulating the walls of the floor and ceiling of a bathhouse from the inside
For thermal insulation, you should take clean sawdust, free of debris and foreign inclusions. If necessary, the material is sifted through a construction sieve.
It is recommended to pre-treat sawdust with an antiseptic or fire retardant solution. After drying, you can mix the insulation with a 10% lime solution and copper sulfate (or borax).
Main characteristics of sawdust
There are several characteristics that help you compare different insulation materials and choose the one that best suits your specific situation.
These are the characteristics:
- cost (excluding delivery);
- thermal conductivity;
- vapor permeability;
- resistance to high humidity and condensation;
- life time.
Cost is one of the most important parameters, especially if you have to insulate a large area. After all, the cost of 1m2 of the cheapest modern material, even without taking into account delivery costs, exceeds 150 rubles.
Therefore, when insulating a large house, the cost of purchasing insulation alone amounts to hundreds of thousands of rubles. Sawdust is much cheaper.
You can read more about their costs here.
Thermal conductivity is another important parameter on which the thickness of the layer required to reduce heat loss to a given level depends.
In this parameter, sawdust is inferior to all modern insulation materials, but you can slightly increase the thickness of the layer and bring heat loss to a given level.
In terms of thermal conductivity, 10 cm of wood sawing waste corresponds to a layer of mineral wool 8–9 cm thick and a layer of polystyrene foam 7 cm thick.
Vapor permeability is the ability of a material to pass water vapor through itself. This characteristic is very important for materials that are used to reduce heat loss in breathable houses built from wood or hollow clay bricks.
In terms of this parameter, sawdust leaves any other materials far behind, because of all modern insulation materials, only mineral wool allows steam to pass through at least a little. The rest of the materials completely block this process, which is why the microclimate in the house changes not for the better.
Resistance to high humidity and condensation is important for any insulating material, because humidity is always present in the air, and condensation occurs when temperatures change.
Sawdust absorbs excess moisture, and after a while, when air humidity drops, it releases steam. Therefore, humidity cannot harm them, which cannot be said about mineral wool, which, even if it gets a little wet, sharply loses its thermal insulation properties.
The actual service life of a material can only be determined by its condition after some time.
Polystyrene foam, polystyrene and polyurethane foam rarely withstand 30 years, because they are destroyed by oxygen and ultraviolet radiation, mineral wool can withstand 50–70 years, and sawdust can easily withstand a service life of 150 years.
In Russia and other countries there are houses built in the early and mid-19th century and insulated with sawdust. Despite such a considerable age, the sawdust insulation is in excellent condition and does not require either repair or replacement.
All this allows us to draw an unambiguous conclusion - in terms of the totality of its characteristics, sawdust is in no way inferior to any modern insulating material, and when used correctly, it is noticeably superior to them.
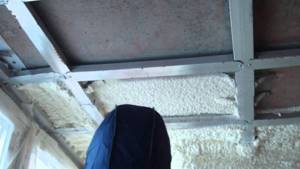
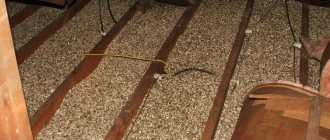
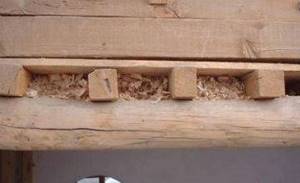
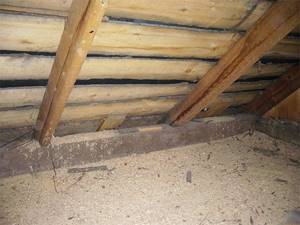
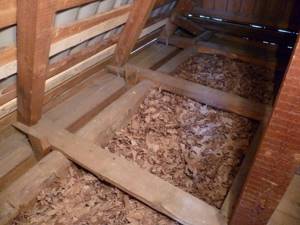
The process of insulating the ceiling with clay and sawdust
Impregnate all wooden surfaces with antiseptic. Coal tar creosote works well.
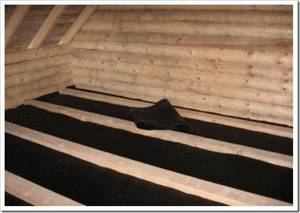
Keep the base area clear of debris. For the substrate under the sawdust layer, thick cardboard from boxes or packaging of large items is used. It is nailed to the wooden parts of the base.
The composition of the insulation mixture consists of 10 parts wood and one part clay. First, the dry ingredients are mixed, and water is added gradually along with thorough mixing. The above composition of materials uses approximately 1–1.5 parts of water.
Mixing the clay solution with sawdust is done in small batches below and lifted into the attic in buckets. If insulation is carried out with an uncovered attic roof, then winches and lifting roller mechanisms can be used for supply.
Ceiling insulation is done in two layers. The first is made from larger wood waste with a thickness of 5 to 10 cm. The second should be prepared practically from dust, its thickness ranges from 8–15 cm.
Laying the second layer ensures that the first one dries completely. When setting, small cracks will certainly appear on the surface of the mass, which are sealed with the same solution.
When applying insulation, a light seal is made. To do this, you can make a primitive rammer from scrap materials with a working base area of approximately 25 by 25 cm.
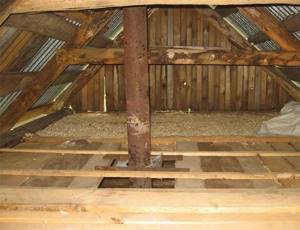
Complete drying of the insulation is achieved within 3–5 weeks. Next, a floor is made on which people will walk when using the attic space.
The floor screed is made from cement-sand mortar in a ratio of 1 part cement and 3 parts sand. Further finishing of the floor depends on the wishes of the customer and the functional purpose of the attic.
If a plank floor is provided, then the installation of the joists is done before laying the insulation, and sawdust is placed in the spaces between the joists. In this case, it is necessary to protect not only the floor surface, but also the joists with cardboard.
Insulation using a mixture of sawdust and clay
The floor surface is covered with a waterproofing material - even ordinary polyvinyl chloride film is acceptable. You can first place cardboard underneath it as another layer of insulation, but remember that this is a flammable material and does not help reduce the fire hazard.
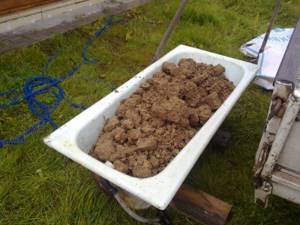
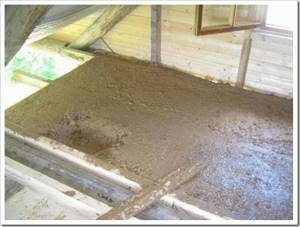
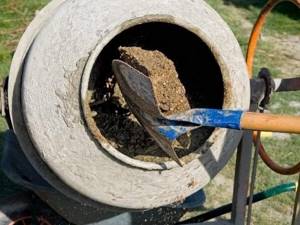
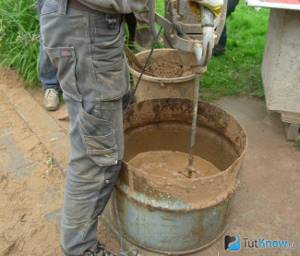
- A solution is prepared: for this, about five buckets of clay are poured into a barrel and filled with water. The material must be mixed well with water to form a mixture with the consistency of liquid sour cream. Two buckets of the mixture are placed in a concrete mixer, then sawdust is loaded into it: the resulting mass should be quite thick. You can knead the solution with your own hands, but this will require more time and effort.
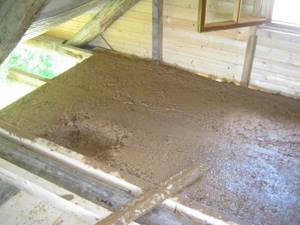
- The mixture is applied in a uniform layer 10 cm thick over the entire floor surface. The insulation is dried for several days - from 3 to 7. The surface of the clay-sawdust coating may crack. In this case, it is recommended to fill the cracks with ordinary clay.
- The attic can be covered with wooden boards. How to insulate a ceiling using clay sawdust is described in more detail in the video.
Cement can be used instead of clay. To do this, sawdust - 10 parts, mixed with cement - 1-2 parts, and filled with water. Here it is allowed to use wet sawdust. The mixture is then distributed over the floor surface up to 200 mm thick. The advantage of this method is strength, durability and low sensitivity to moisture. The disadvantage is the long drying period, since cement requires at least a month to achieve proper strength.
It is recommended to insulate the ceiling in this way in the spring so that the material reaches the required properties over the summer.
How to insulate a ceiling in a private house
Sawdust processing
In order for a homemade heat insulator to meet standards, the first step is to prepare sawdust. They should be cleaned of any impurities (sifted, washed and dried), if any.
Next, you need to impregnate the sawdust with special agents in order to increase their fire-resistant qualities and protect them from rotting processes and the effects of pests.
As you know, each type of wood has its own characteristics. Oak sawdust is highly resistant to bacteria and is practically not susceptible to rotting; its size and density do not change under the influence of moisture.
Softwood sawdust contains a large percentage of essential oils - a natural antiseptic that will protect walls from mold.
What clay and sawdust are best used to prepare an insulating mixture?
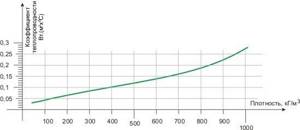
Diagram of the thermal conductivity coefficient of sawdust.
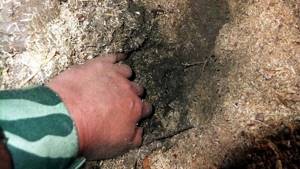
The correct choice of basic materials for the preparation of insulation material determines how well the heat will be retained in the room in the future. Clay is the main binding agent. When wet, the clay is very plastic and very similar to children's plasticine. It is believed that it is best to use red clay to prepare the mixture, since it is more plastic, hardens faster and is less susceptible to being saturated with water. However, if it is not possible to get red clay, it is quite possible to replace it with other varieties of this material, for example, white clay. This will not affect the final result so much, but the finished surface may require more careful care.
Particular attention should be paid to the choice of sawdust. Oak sawdust is best suited for making an insulating mixture. Oak materials are considered the best option, since they are almost not saturated with moisture, and even if contact with moisture occurs, there will be no particular harm from it. Oak sawdust does not rot or increase in size due to saturation with water. If it is not possible to obtain oak sawdust, you can use waste from cutting coniferous trees, including larch, pine or spruce. Using sawdust from these types of trees also has its advantages. The wood of these trees contains a large amount of essential oils that have a pronounced antibacterial and antifungal nature, which will significantly reduce the risk of mold and mildew on the surface of the material and in voids.
Advantages and disadvantages
Positive aspects of ceiling insulation with sawdust:
- Ecological purity of sawdust insulation. Clay, cement and lime are completely natural materials and do not emit harmful substances. When kneading at home, the consumer is not interested in adding chemical additives to the mass for insulation.
- Excellent thermal insulation characteristics of the resulting material. Wood has very low thermal conductivity; this quality is transferred to sawdust as insulation.
- It is relatively easy to insulate the ceiling with sawdust. Wood waste has a low volumetric weight and will not add load to load-bearing walls and foundations.
- A layer of clay in the construction of private houses is very often used as a water barrier. When the attic roof leaks, moisture will saturate the clay, it will absorb it and will not transfer it to the base. Alternating periods of wetting and drying ensure that moisture never reaches the inner surface of the ceiling.
- When insulating the attic floor with sawdust, you can add additional layers of screed on top of it or lay a plank floor. The attic can be used and walked on such a foundation.
Disadvantages of sawdust as insulation:
- The ecological purity of the material can attract various rodents and insects to live in the sawdust mass. To repel them, sawdust is mixed with a small amount of lime and gypsum, which makes it difficult or impossible to make passages through the thickness of the insulation.
- Wood shavings and sawdust are hydrophobic materials and can become saturated with moisture from condensation from a room located below the ceiling. This drawback can be corrected by installing a vapor barrier layer directly over the ceiling before insulating it with sawdust.
- Wood waste is susceptible to combustion, creating a high risk of fire in the attic. Sawdust mixed and hardened in cement and clay is not a flammable material.
- The logical conclusion is that using sawdust in bulk, without mixing with other natural binders, is not considered advisable.
Methods of using sawdust
There are 4 methods for insulating with sawdust:
- backfill;
- fill;
- plastering;
- use of slabs.
To backfill, wood sawing waste is mixed with lime, which prevents the appearance of rot or mold even with increased humidity and protects the insulation from rodents and various beetles.
After 2-3 years, and sometimes earlier, you have to add additional sawdust, because the lower rows are caked and compacted.
To fill, wood sawing waste is mixed with various binders in different proportions.
Then the finished composition is poured into voids or cavities prepared for it, where it turns into a fairly strong and hard material with low thermal conductivity.
By changing the amount of sawdust and binder, the thermal conductivity and strength of the insulating material are regulated.
For plastering, the same compositions are used as for pouring, only more suitable proportions are selected. In addition, before plastering, the walls are lined with chain-link mesh or its plastic equivalent, this improves the adhesion of the insulating layer to the wall.
Insulating boards are made from the same compounds that are used for pouring and plastering, only by selecting the most suitable binder.
In addition, they can be laid in floor cavities formed by floor joists and the lining or ceiling of the lower floor.
The following are used as binders:
- cement;
- gypsum;
- clay;
- PVA.
Read more about these insulation methods, as well as about choosing the optimal binder and the correct proportions here.
We insulate the bathhouse ceiling with sawdust
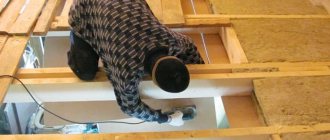
Lathing is laid along the floor beams. The pipe must be insulated with metal sheet or asbestos. Laying a layer of vapor barrier
Please note that you cannot use film or roofing felt, they will not withstand constant heating. It is worth buying a modern heat-resistant vapor barrier material
The mixture of clay and sawdust is laid and compacted as described above.
The thickness of the thermal insulation layer depends on the seasonality of the building. For a summer bath, 5 cm will be enough, for a year-round bath – from 15 cm.
The solution dries for about a month. When dry, cracks appear, they need to be coated with the same composition. After drying, the insulation is sprinkled with ash and the vapor barrier layer is repeated.
The above solutions for ceiling insulation can also be used for a pitched roof
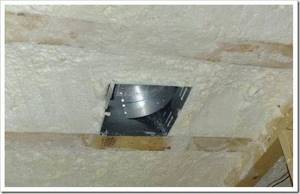
Pay special attention to the insulation of electrical wires. Place them in a corrugated pipe or wrap them in non-flammable materials
Read a detailed description of the technology for insulating the ceiling in a bathhouse in a separate article.
We recommend studying:
Properties and uses of clay
The modern building materials market offers a wide range of means to improve the thermal insulation performance of premises. Next, we will consider whether the clay-sawdust mass is inferior to them in its parameters.
An undeniable advantage is the low cost: often all the ingredients are obtained completely free of charge. Further maintenance and, if necessary, minor repairs of adobe coverings also do not require special costs.
The disadvantages of the material most often include labor intensity: in order for the mixture of clay and sawdust to become insulation, it must be subjected to a number of manipulations.
Do-it-yourself insulation of a bathhouse ceiling
Bathing procedures have long and deservedly regained their popularity, but not as a daily hygiene procedure, but as a good way to spend time, which is also beneficial for the body.
At the same time, even on a small plot you can build a bathhouse on your own.
Bathroom ceiling insulation with foam plastic
Polystyrene foam, the most common insulation material of artificial origin, is largely due to its affordable cost compared to other similar insulation materials.
The disadvantage of polystyrene foam is its flammability and reaction to high temperatures in the form of an unpleasant odor and the release of harmful volatile compounds, therefore experts do not recommend using it to insulate the ceiling of a bathhouse.
The advantages include very low weight and ease of installation, therefore, if no other insulation options are available, all measures should be taken to avoid discomfort.
In addition to the fact that the joints of boards or wooden ceiling panels must be reliably sealed, a layer of polyethylene film is made from the attic side, this will prevent the passage of steam, and a layer of foamed foil polyethylene is laid on top of the film, reflective side down, and polystyrene foam is laid on top of it.
The total thickness of the insulation must be at least 20 cm, therefore, installation is carried out in several layers.
Foam plastic is not placed around the chimney; according to standards, the distance between the heated parts and the insulation must be at least 20 cm, so the pipe is enclosed with a square board box, inside of which non-flammable insulation is poured - sand, expanded clay or earth.
Insulation of a bathhouse ceiling with earth
The most economical option for insulating the ceiling in a bathhouse is to use improvised materials. If you still need to get clay, sand or sawdust somewhere, then you can get the soil completely free of charge.
The use of earth as insulation a hundred years ago was the only available option, not only in bathhouses, but also in residential buildings, so it is not surprising that today, when building bathhouses on a limited budget, they turn to it.
Before embankment, the prepared soil is well dried in the open air, and in order to avoid the germination of plant seeds, the establishment of rodent nests and the appearance of insect colonies, the soil is mixed with lime.
It is necessary to protect against moisture coming from below, since the soil absorbs it quite well and dries for a very long time, so before filling, the entire insulated surface is covered with plastic film, and the top is covered with a vapor barrier with foil, the latter should be facing down.
The soil is poured on top and leveled, the height of the layer should be at least 15 cm, due to the non-flammability of the material, no additional work needs to be done near the chimney. Unlike other materials, an earth-insulated surface can be used, and a deck can be laid for ease of movement.
How to insulate a bathhouse ceiling with clay
Clay used for coating stoves and other household work is also perfect as insulation for the ceiling of a bathhouse. Inexpensive and sometimes completely free material, does not contain any chemically aggressive substances, is not demanding in terms of installation and has no service life.
It is advisable to use clay that has lain in the open air for a year, then the solution has the best qualities, but if this is not available, then any one can be used. Add lime or sawdust to the clay, about ten parts of clay, one part of lime and the same amount of sawdust, then mix well, achieving a homogeneous mass; it is advisable to have a concrete mixer at your disposal, since the clay has a high viscosity.
The surface must be waterproofed; for this, a polyethylene film is used, a layer of foamed polyethylene with foil is placed on top of it, after which a solution is applied. Laying clay is done with a shovel or by hand, but it is imperative to compact it and allow it to dry.
To make drying go faster, you can create a draft if there is a window in the attic, and only after drying can you lay the floor, if provided.
Alternating clay and sawdust for thermal insulation of the ceiling in a bathhouse
We carry out the work in the following sequence:
- We lay a vapor barrier on the attic floor with an overlap of 5-10 cm. For these purposes, you can use glassine or roofing material.
- Soak the clay and add straw or sawdust to it in a ratio of 2:3.
- Mix the resulting mixture thoroughly until it reaches the consistency of thick sour cream. To do this, it is recommended to use a concrete mixer.
- Lay out a layer of 2-3 cm, level it with a board and leave until completely dry.
- We seal the cracks that appear with liquid clay. In some cases, cracks may need to be repaired several times. Each subsequent grouting is carried out after the previous one has dried.
- After hardening, add a layer of sawdust, shavings, and dry oak leaves. The latter, by the way, have strong antibacterial properties and will prevent the appearance of fungus.
- We make a 5-centimeter layer of dry soil on top.
If you plan to use the attic in the future, then install a wooden floor on top. Otherwise, the backfill can be left as is. This method is labor-intensive, but effective and cheap.
Types and nuances of vapor barrier
Regardless of the type of bathhouse chosen - a sauna or a wood-burning Russian bathhouse - the room will be constantly exposed to high humidity and temperature. Installing waterproofing in the ceiling area will help maintain a healthy microclimate in the room and will also minimize the likelihood of moisture condensation.
The simplest and most obvious option is to use film. Budget materials can be either rough or smooth; more expensive ones include reinforcement.
- Membrane material. Its woven surface retains moisture and eliminates the formation of condensation.
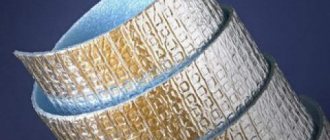
- Foil is one of the best options for use in a bathhouse. The material not only provides a vapor barrier, but is also an excellent thermal insulator.
- Izospan is a combined material with high vapor barrier properties. Enjoys increased popularity.
First of all, you need to decide on the choice of the base material, and then proceed with the installation of the vapor barrier layer of the bath ceiling. A correctly installed ceiling of a steam room looks like a layer cake, with the following layers:
- The top finishing layer is often linden lining.
- The lathing, which serves as a support for the finishing, also serves as an additional ventilation duct.
- Vapor barrier laid over the entire area of the ceiling and extending onto the surface of the walls.
- The ceiling itself and the logs are made of wood.
- Vapor barrier film.
- Insulating material of the selected type - clay with sawdust, mineral wool, polystyrene foam, expanded clay, etc. The minimum layer is 10 centimeters.
- If the attic is needed for storing household items. equipment, installing flooring.
- In the case when the attic space is not used, it is enough to simply cover the insulating material with film. This is necessary in order to protect the insulator from possible heat loss, as well as accidental ingress of moisture and condensation.
As for waterproofing, you can use either special films, which can be found in any hardware store, or cheaper roofing felt or dense polyethylene.
Common vapor barrier materials: 1. Geosynthetics. 2. PVC membrane. 3. Glassine. 4. Tol. 5. Aluminum foil. 6. Thermofol.
Required tools and materials
To insulate the ceiling with sawdust, you will not need complex tools or special knowledge in the field of construction. But keep in mind that this is a labor-intensive, physically demanding process. This means that having free hands at the construction site will not be superfluous.
List of necessary materials and tools for construction that will help ease physical stress:
- Chips and sawdust of different sizes, large and small;
- Special antiseptic and heat-resistant additives. Instead, you can use ash, lime and copper sulfate.
- Clay, cement, lime or gypsum are used as an additional component.
- Ruberoid, plastic film or other type of vapor barrier in a roll.
- Cardboard.
- Sawdust and shavings of different fractions.
- Mounting foam, adhesive tape and bitumen.
- Several shovels, a screwdriver, a hammer and a construction stapler.
- Fasteners: staples, nails, screws.
- The container in which the mortar will be mixed - a bathtub and containers for moving it - buckets, stretchers, etc.
- Planed board.
- Pneumatic lift or partner.
- Concrete mixer or screwdriver with a mixing attachment.
- Sufficient supply of free time and patience.
Formation of the rough layer
Sawdust provides reliability to the plaster mortar. If they are not available, in order to apply the rough composition to the gypsum surface, you will need to attach a reinforcing nylon mesh. It is better to fix it directly with a solution; when used to secure nails, the integrity of the wall is compromised and the strength deteriorates. It is practical to treat clay walls with plaster with an assistant who will point out places that need improvement. The process includes the following steps:
- To work, you will need a grater board or spatula.
- Two or three mounds of plaster are applied to the working tool.
- The tool with the solution is pressed tightly and distributed over the surface.
- The direction of movement is from bottom to top. You should try to distribute the plaster as evenly as possible.
- The flat surface of the wall is checked using a building level. Identified irregularities are eliminated immediately after detection.
If the wall is relatively flat, a starting layer of 1 cm is sufficient. If there are significant unevenness on the clay surface, the plaster layer can increase to 3-5 cm.
Advice! When processing large areas of clay walls with your own hands, it is much more convenient to apply plaster using beacons. This will speed up the entire work process and increase the quality of the finish.
After applying the rough layer of plaster solution, time is required for it to dry completely. The entire process takes on average 4-6 weeks. The approximate drying period for a 1 cm thick layer at room temperature is 5 days, and it is not recommended to speed up the process using a technical hair dryer or heaters. Therefore, it is better to plan the work for the warm period. It is optimal when the initial finishing begins in late spring - early summer, although it all depends on the region where the house with clay walls is located. Professional steps for applying plaster to walls can be seen in the following video:
Flaws
In addition to a large number of obvious advantages, insulating the ceiling with clay has several disadvantages. These features must be taken into account in order to soberly assess your strengths and correctly calculate the time it will take for repairs:
- clay is quite difficult to work with, physically, it will require a lot of strength;
- the insulation process is labor-intensive;
- clay takes a long time to dry, even in hot weather it will take at least 15 days for the layer to dry completely, in cloudy, cool or damp weather - up to 1 month;
- Repairs can only be done in summer; work is not recommended in winter.
Sawdust as ceiling insulation: high quality and economical
Smaller sawdust has excellent thermal insulation properties, but at the same time they have much more weight. In addition, they create quite a lot of dust and get clogged even in the smallest crevices. Large sawdust is well suited for arranging a subfloor, because it takes up quite a lot of free space and creates a certain air cushion.
Before using sawdust as insulation, they are dried well, so the finished material retains heat much better and is lightweight.
A properly and efficiently insulated ceiling allows you to simply save on heating costs. The easiest and most economical way to insulate a ceiling is using sawdust and, in addition, it is a completely environmentally friendly material, so you can use it without any fear.
Sawdust has a number of advantages as an insulating material.
Among all the advantages of using sawdust as an insulating material, the following can be highlighted:
- Affordable price;
- Versatility;
- Ease of use;
- Duration of operation.
When purchasing sawdust at woodworking factories, you can save a lot and buy this material very cheaply. Sawdust is considered a universal material, so it is perfect for insulating ceilings of various types. The ease of installation of this insulation allows you to install the attic floor yourself and you do not need to use additional fasteners or brackets that will fix the sawdust on the surface.
Types of sawdust
Only in appearance it seems that all sawdust is the same. In fact, they differ significantly from each other. And each type must have its own preparation and installation techniques.
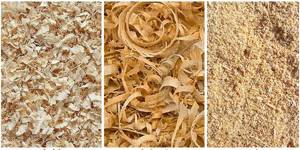
Various types of sawdust
Let's look at the main differences.
Dimensions
There are two types according to fractions:
- Trash. These are small particles of wood formed when wood is cut. The exact dimensions depend on the saws used. The dust usually contains wood dust.
- Shavings. This is mainly carpentry waste generated during planing and drilling of wood.
Fine dust is considered the best option for thermal conductivity. It forms a dense layer that does not allow heat to pass through and has little sagging over time. An insulating layer made from one shaving is inferior in thermal conductivity to dust and subsequently decreases significantly in volume.
But usually a mixture of both types is used in different proportions.
Wood species
The suitability of sawdust for thermal insulation also depends on the tree from which it is made. For insulation, it is recommended to choose those made from coniferous trees - pine, spruce, larch. The resin contained in their wood prevents rotting and repels insects and rodents.
Beech and oak sawdust are considered good. Birch waste has low thermal conductivity. But birch wood is easier to rot than coniferous wood.
Humidity
This is an important characteristic of the material, especially for dry insulation, when backfilling is carried out without the use of additional binding agents. In this case, humidity should not exceed 12 - 14%.
Carpentry waste has the lowest moisture content, since dried wood is used for this work. Most sawdust obtained from sawing logs is not dry enough. Therefore, they must be additionally dried before use.
Material quality
The following characteristics are taken into account:
- First of all, this is the duration of sawdust storage after receipt. The longer they were stored, the greater the likelihood that rotting processes began in them. Therefore, it is better to take sawdust immediately after receiving it.
- Presence of bark in sawdust. This is a serious deterioration in quality. The bark not only worsens thermal insulation, but also serves as a breeding ground for insect larvae and the initiator of rot.
- In some industries, wood waste may contain traces of machine oil. But apart from the unpleasant appearance, there is no other deterioration in their quality.
Stage one. Selecting raw materials
If sawdust is available exclusively from round timber, which has natural moisture, then before laying it should be spread out under some kind of canopy and dried thoroughly. There is no need to cover, otherwise they will start to rot.
Choosing sawdust for ceiling insulation
What types of sawdust are more suitable? Give preference to coniferous species - they contain a lot of resin, which creates a lot of inconvenience for various types of pests. But if you are insulating a bathhouse, it is preferable to use sawdust from deciduous trees.
Also, before laying, sawdust should be left to rest for up to 1 year - during this time the level of sugars, which provoke rotting, will noticeably decrease
Pay attention to ensure that the raw materials are free of debris and other foreign impurities; if any are present, sift the sawdust and remove large debris manually
Sifting sawdust
Clay plaster composition and recipe
There are many clay plaster compositions, but there is no universal recipe; the quality of the composition depends on the components. And the main one is clay for plastering walls, it is divided into 2 types: light and oily, the latter is the most suitable.
To check the quality, you should roll a ball of small diameter out of clay, place it on a flat surface and flatten it. If the edges remain intact, then the material is suitable for plaster; if cracks appear, the composition is of little use. Another test is to roll up a flagellum 200-300 mm long, with a cross-section of 10-20 mm and carefully bend it; the edges of high-quality material do not crack.
Ways to check the quality of the material
Recipe table, proportions in parts:
| Clay | Gypsum | Sand | Cement | Sawdust, fiber | Lime | Asbestos |
| 3 | 1 | 1 | 2 | 1/5 | ||
| 4 | 2 | 1 | 1 | 1/25 | ||
| 1 | 2 | 1 | 1/10 | |||
| 1 | 3 | |||||
| 1 | 3 | 0,5-1 |
For plastering stoves, you should use fireclay clay 1 tsp: 2 tsp sand: 1 tsp. cement.
Due to the fact that there are a lot of recipes, let’s look at the characteristics of the most popular ones:
- Sand-clay mortar for plastering walls - used for finishing, has high thermal conductivity, and is therefore not suitable for the base layer.
- To improve the thermal insulation characteristics, finely chopped straw or sawdust, or in the modern version, synthetic fibers (fiber), are added to the solution of clay and sand.
- Plaster with clay and sawdust, without sand. The composition dries quickly, loses elasticity, is difficult to work with, but the finish is very strong and durable.
Tip: To increase the elasticity of clay plaster, it is recommended to add dung and wheat flour. To improve thermal insulation - finely chopped straw, reed fibers, hemp, wool, cattails.
A clay-sand mixture is suitable for a smooth finishing layer.
How to mix the solution
To prevent clay plaster from losing its qualities, it must be prepared according to strict rules:
- The clay is crushed, placed in a container, filled with water, and left for a day.
- Grind through a construction sieve, mesh no more than 3*3 mm.
- Mix with sand and add other dry ingredients, mix the mixture well so that it comes off easily from your hands.
- Add crushed fiber, straw, sawdust, etc. The finer the fractions, the easier it is to apply the plaster on the walls, the layer will be smoother.
- Dilute with water to the desired consistency (thick sour cream).
Correct consistency of material
Clay preparation
Clay also requires preparation. The ideal component is clay, filled with water for the winter and thawed in the spring. The type of clay also matters; it is determined by the geographic location of production and a number of criteria.
The main one is fat content: breeds are divided into “fat” and “skinny”. The higher the fat content, the better the plasticity characteristics. At the same time, when drying, fatty rocks shrink significantly, as a result of which characteristic cracks can form on the surface.
Attention! If you have to deal with “oily” clay, you need to add sand to the mixture.
The weather outside also matters. A warm, sunny day is most favorable for work, so that the mass has time to dry.
Technological solutions are the key to successful results and quality of the heat insulator. You will need:
- concrete mixer;
- buckets;
- two barrels: for kneading and the resulting mixture.
The clay is soaked in one of the barrels for several hours. Stirring it periodically, you will see when the mass becomes homogeneous. Using a bucket, pour a certain amount into a concrete mixer, add sawdust in the proportion of 1 bucket of clay to 2/3 bucket of sawdust.
Sometimes industrial salt is added to the composition to improve thermal insulation qualities, which is especially important in cold latitudes.
Attention! When technical salt is added to the composition, the proportional ratio of clay and sawdust changes: 1:1 – a bucket of clay to a bucket of sawdust.
Transfer the resulting mixture to a second barrel or other container of sufficient size. The finished insulation needs to be installed.
The most common installation methods are:
- removable formwork;
- installation of slabs;
- fixing the insulation using a grid of bars;
- design features as formwork for ceiling insulation.
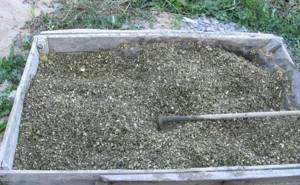
Removable formwork
Formwork is constructed from boards nailed together. The mixture is filled with the space between the formwork and the insulated surface; when it hardens to the point of being able to maintain strength on its own, the formwork is removed.
Installation of slabs
Another method is quite popular: molds are made from boards in the form of slabs or bricks, the mixture dries in them and in this form is mounted on an insulated surface.
This method is especially relevant in rooms where renovation work has already been completed, as it reduces contamination to a minimum. The slabs are fixed end-to-end on the surface, the joints and gaps between them are treated with the remainder of the clay mixture.
We invite you to familiarize yourself with the Wood Combustion Temperature - SECRET SQUIRREL
The bars are packed onto the insulated surface in such a way that they form a lattice with square or diamond-shaped cells approximately 300 x 300 mm and at least 100 mm deep.
If necessary, a plywood sheet is pre-attached to secure the grille if the surface features require it. The cells are filled with the prepared solution.
Attention! It is not recommended to dry the insulated clay structure in direct sunlight. The room should be shaded during drying.
Choosing a frame for a bath
The frame of the bathhouse consists of wooden racks 3-3.5 m long with a lower frame made of boards, an upper frame made of hewn poles and braces at the ends of the frame. Then the frame is sheathed on both sides with a hewn slab or well-hewn poles. As the sheathing is completed, its space is filled with cheap dry insulation (sawdust, peat) with the addition of lime or gypsum. In the process of backfilling the walls, the insulation should be lightly compacted layer by layer to prevent its settling and the formation of voids.
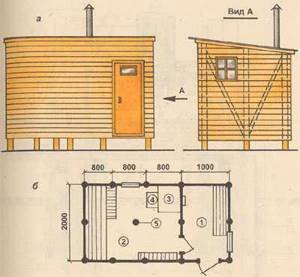
Rice. 1. Bathhouse with backfill walls: a – general view; b – plan of the bathhouse; 1 – dressing room; 2 – steam room; 3 – stove-heater; 4 – hot water tank; 5 – support under the floor joist.
How to insulate a ceiling with prepared sawdust
Before applying a solution mixed according to a particular recipe, a number of preparatory work should be performed. The most important of them is vapor barrier. The following options are popular:
- Modern semi-permeable membrane films. They are laid on the boards of the rough ceiling, the canvases are fastened together with double-sided tape.
- Glassine or roofing felt. It is laid overlapping, secured with tape or glued with mastic.
- Clay-sand screed. Prepare a thick solution of clay and sand in a ratio of one to four, apply it in a thin layer on the boards, then level it. After the screed has dried, an insulating solution can be applied to it.
General insulation scheme
High-quality vapor barrier will help to avoid waterlogging and wetting of the insulating layer.
The sequence of actions when applying a clay-based solution is as follows:
Perform a vapor barrier using one of the methods listed above. Prepare the solution according to recipe No. 2
Particular attention should be paid to the absence of lumps before adding sawdust. If you cannot grind and stir them, you will have to strain the solution. Cover the surface of the ceiling with an even layer of the prepared solution.
Layer thickness 10-15 cm. Allow to dry. The drying time depends on the temperature and humidity. It is better to apply the solution in early summer, before a period of hot and dry weather. If the building is located in a region with a cold climate, a second layer of insulating solution is applied. After drying, cover the insulation with a layer of waterproofing. Attach film or roofing felt to the beams.
Clay mixture applied
The dried mixture is a strong porous mass. You can even walk on it.
Such solutions, which are called sawdust concrete, have a high density and are well suited for durable floors that can support their weight. The procedure is as follows:
- Perform a vapor barrier using one of the methods listed above.
- Prepare the solution in accordance with recipe No. 1.
- Apply a layer of 20-25 cm.
- Let it dry.
- Perform waterproofing.
Applied cement mixture
Cement-based compositions dry many times faster than clay ones. It can be applied in wet weather and at low positive temperatures.
Sometimes cement is replaced with lime. A completely lime mortar has less strength after setting. It is used if you plan to lay floors on top of insulation, and it will not be subject to loads.
We insulate the bathhouse
When insulating the ceiling of bathhouses, there are several nuances. The baths are different:
- high humidity;
- large temperature changes.
Due to high temperatures, especially above the steam room, special requirements are placed on the vapor barrier material. Ruberoid or conventional polymer membranes are not suitable. When heated, they may melt or release harmful substances. A clay screed or specially designed heat-resistant vapor barrier materials, covered on one side with foil, should be used.
Changes in temperature and humidity can also lead to cracking of the insulating layer. To avoid this, add rock salt to the solution at the rate of 6-12 tablespoons per 10 liters of water.
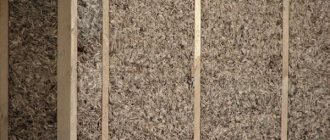
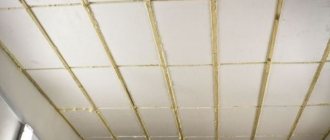
Thermal insulation of the ceiling with sawdust
Insulating the ceiling space of a bathhouse using sawdust is quite common. This material is good for use in baths that will be used by children and the elderly, since it is completely safe for human health.
But do not forget that if you use only sawdust, it can become a source of the following problems:
- high level of fire hazard, any spark is potentially dangerous;
- too much dirt, a draft can cause a mess.
Experts advise mixing sawdust with cement or clay mortar. You already know the benefits of clay, and the tandem of sawdust and cement can serve as the basis for a durable ceiling screed. Another common option is when a layer of sawdust is sprinkled with a layer of earth. This method is characterized by fire safety and good thermal insulation properties.
Insulation of a bathhouse ceiling with clay and sawdust
Do not forget that the ceiling “pie” must be executed according to all the rules:
- First you need to prepare the ceiling - arrange the flooring or assemble the formwork frame.
- Divide the ceiling into fragments to make work easier.
- Be sure to take care of the insulation from moisture - lay down roll insulation material or, at worst, cover the existing cracks with a clay solution.
- Lay down the wood-clay mixture.
- If necessary, when the clay is completely dry, you can build a sand layer on top of it.
The work process itself is not too complicated. It is important to prepare the mixture correctly, without disturbing the proportions of the main components, and to achieve the required thickness. Sawdust and clay also need to be selected according to certain criteria. As for clay, you can use any type of clay. Red clay is the most common type. With sawdust it is somewhat more difficult - you need to choose exclusively dry material. Oak sawdust has proven itself well, but it is not so easy to find it on sale. Coniferous wood products are often used.
Clay is diluted with water in the proportion of 4 or 5 buckets per metal barrel of water. Then the mixture is left for several days to detune, after which it must be thoroughly stirred, draining off excess water. Once the solution is homogeneous, sawdust is introduced into it. The ratio of sawdust to clay is 2/3 to 1.
The ceiling space is laid with the finished solution. For central Russia, the recommended layer thickness is from 8 to 15 centimeters; for regions with a harsh climate, the backfill thickness can be increased to 30 centimeters. It is not necessary to exceed this figure, since the weight of the clay is significant and can create an excessive load on the building structure. The composition is applied evenly in two passes. First, the base layer is laid. As it dries, it is re-installed.
REFERENCE. If expanded clay is laid between the clay-sawdust layers, this helps create an air gap that will positively affect thermal insulation.
Insulation of a bathhouse ceiling with sawdust and cement
The arrangement of layers is similar to the previous method, with the difference that waterproofing is not limited to covering the cracks. Film materials for waterproofing are indispensable in this case. Such a solution will have even more significant weight and put a greater load on the house. The maximum thickness should not exceed 15 centimeters. The minimum layer is 8 centimeters. Mixing the cement mixture is faster, especially when using a concrete mixer. The mixture is mixed based on the following proportions: 1 part cement, 2 parts sand and 6 parts sawdust. The insulated surface will require additional leveling.
ADVICE. This type of screed can serve as the basis for the floor of an attic or attic space. The surface is characterized by high reliability and durability.
The process of insulating a ceiling structure with sawdust
Ceiling insulation using sawdust is possible only in the upper part of the structure. In order to complete this work, you need to stock up on wooden boards with which you need to flash the beams. The thickness of the purchased material should be no more than 3 cm. See the article on the topic of interfloor ceilings on wooden beams.
In order to firmly fix the boards to the beams, it is worth using screws and nails
When attaching the material, it is important to remember that the weight of the insulating mixture is quite large, so the result of the work must be of high quality
Ceiling insulation with sawdust
The fasteners must be driven into the tree at an angle, with each one being in the opposite direction from the previous one. The length of screws must be at least 50 mm, and nails - at least 100 mm.
Next, all wooden surfaces must be treated with special antiseptic agents. Their action is to protect the material from mold and fungi. If this point is not followed, you can see the consequences that will subsequently affect the surface of the ceiling itself.
Next, the vapor barrier film is laid. Roofing felt is often used for these purposes. After this, a mixture of wood insulation material with cement and lime is laid out, which should ultimately have a smooth and compacted appearance. Insulation with sawdust should be carried out to the floor level. Experts recommend sprinkling sawdust with some ash, as it can prevent the material from rotting.
Next, you should stop all work for a couple of weeks to allow the moisture to evaporate from the insulation. After this, the surface is again covered with a layer of vapor barrier. You can use a stapler to attach this film.
To finish the ceiling of a room such as a bathhouse, where sawdust is also used as insulation, it is necessary to take more serious waterproofing measures, since there is excess moisture there.
Insulation technology
The choice of a suitable method of ceiling insulation is determined by the design features of the bathhouse building - the presence of an attic, attic, flat or pitched roof.
In practice, the following options for insulating a bath ceiling are used:
- Hemmed - for large baths.
- Flooring – for small-sized buildings.
- Panel - for various types of structures.
The main requirement for arranging ceiling bases is the presence of properly installed waterproofing and vapor barrier - reliable protection of the insulating material from high humidity.
Flat ceiling
The floor ceiling structure consists of 5 cm thick boards mounted on the bath walls. It is used for buildings with a cold roof up to 250 cm wide.
Insulation of the ceiling in a bathhouse with a cold roof, in which an attic is provided, is carried out using sawdust, clay or expanded clay.
All do-it-yourself ceiling insulation work is carried out step by step as follows:
- Sheets of vapor barrier material (film or roofing felt) are laid overlappingly on the ceiling flooring and secured with metal staples or nails.
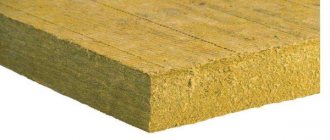
- Next, install thermal insulation protection - mineral or basalt wool.
- If bulk insulation is used - expanded clay, sawdust with cement or clay, an additional edge should be installed around the perimeter of the ceiling surface. The thickness of the layer of loose insulation is 30 cm.
- The multilayer structure is covered with waterproofing material - polyethylene film or membrane.
- Finally, a wooden flooring made of boards or plywood sheets is installed.
false ceiling
The hemming type design ensures the creation of a practical bath ceiling. The boards are mounted to load-bearing floors from inside functional rooms and from the attic.
Multilayer thermal insulation is installed between the floorings. The installation process includes the following steps:
- A vapor barrier film or membrane is laid on the ceilings with an overlap of 12 cm, overlapping the wall surfaces. The canvases are fixed with thin wooden slats, which are stuffed in compliance with minimal technological gaps. A double layer of vapor barrier and insulation material is laid over the steam room.
- A wooden lining, pre-treated with antiseptic impregnation, is mounted on the ceiling structure to the slats.
- The load-bearing beams in the attic are insulated with expanded clay, basalt or mineral wool. Thermal insulation is laid in a dense layer without gaps or cracks. The height of the insulating layer is 10 cm.
- A waterproofing protection is mounted on the heat insulator with an overlap of 12 cm, with the joints tightly sealed.
- Finally, the installation of wooden flooring from boards or plywood is carried out.
Panel ceiling
A panel ceiling pie is a panel structure made of identical bars interconnected. This is the most complex and labor-intensive type of ceiling base that can be installed in a private bathhouse.
How to insulate a ceiling with wooden panels step by step:
- A board up to 65 cm long is nailed to parallel bars one at a time. The wood is carefully treated with an antiseptic compound. The protrusion of the wooden elements on all sides of the structure is 6 cm. During the joining process, an insulating layer is installed in the gaps formed.
- A vapor barrier protection is fixed to the inside of the shield with an overlap of 10 cm.
- The prepared structure is mounted on a lathing installed on the bottom of the ceiling beams.
- Moisture-resistant thermal insulation is installed in the ceiling panels - mineral wool, basalt wool or expanded clay.
- Finally, a vapor barrier layer of polyethylene film is installed, which provides reliable protection against steam and high humidity.
- At the bottom of the ceiling, linden, cedar or aspen lining is mounted to the sheathing.
Insulating a bath ceiling is a responsible process. Using reliable and durable insulation, as well as following the technology of their installation, any bathhouse owner will be able to independently perform the entire range of insulation work, obtaining a practical structure for comfortable relaxation and strengthening the body.
Advantages and disadvantages of ceiling insulation with clay
Clay as a heat insulator for floors has become popular due to the following qualities:
- Low cost. The raw material has no competitors among analogues used for these purposes. You can always get it with minimal effort. In rural areas, the rock is often dug up and brought in independently.
- Clay is a fireproof material; it does not burn and does not contribute to the spread of fire. It can be safely laid near chimneys.
- Rodents and insects do not live in the thickness of the coating.
- The ceiling solution is prepared from a base and light fillers, which significantly reduces the load on the walls.
- There are no harmful impurities in its composition, so the ceiling is environmentally friendly.
- It’s easy to master insulation technology; you can do everything yourself.
- Clay and lumber interact well with each other. The wood remains in its original form for many years, and the insulating layer does not lose its qualities for a long time.
- If necessary, the already dried mixture removed for some reason can be reused, for which it is enough to wet it. This way, waste can be avoided after construction.
- After adding water, the rock becomes plastic and is able to fill any voids, which allows it to be applied to complex surfaces.
- Once the moisture evaporates, it becomes hard, so it is not necessary to install walk-on decking on the attic floor.
However, the material has practically been replaced by modern heat insulators. There are several reasons for this:
- This method of insulation is far from the most effective. In most cases, clay is used as an addition to the main heat insulator.
- To prepare the solution, it is necessary to carefully maintain the proportions, otherwise the insulating layer will crumble or simply not perform its functions.
- The finished batches are quite heavy, so the floors must be designed for heavy loads.
Advantages of home insulation with clay
Obviously, insulating a house with clay has many positive aspects that you should know about. And the advantages are as follows:
- Cheapness. This material is significantly cheaper than analogues that are currently available on the market. Thus, if any problems arise with the clay insulation process, you can safely abandon this idea. Like clay, sawdust can be obtained with a minimum of effort. The main concerns lie in the arrangement of insulation, and this must be remembered.
- Light weight. Again, unlike its analogues, clay has a fairly modest weight. This, in turn, has a positive effect on the insulation process. Quite often, insulation materials are heavy, and this can negatively affect the condition of the ceiling. Accordingly, there should not be such problems with clay, but just in case, you still need to carry out some tests that will allow you to establish the strength of the ceiling.
- Fire safety. There is no doubt that clay is a material that certainly will not cause a fire or its spread. If you need to choose safe insulation, then clay is an ideal option. You should not pay attention to the presence of sawdust in this insulation, since they certainly do not pose any danger.
Well, I would like to repeat again that the process of arranging clay-based insulation is quite simple. In this case, we do not need to have any original devices, much less specialists who deal with such activities. Everything can be done by yourself. Of course, an assistant in this matter will not hurt.