In this article, we will look at connection diagrams for heating radiators and you will understand which scheme to choose for you. Today the question is about choosing two schemes and two systems for the operation of radiator heating systems. The first is a gravity system that operates without forced circulation using a circulation pump. And the second system is precisely the system that operates forcibly using a circulation pump. But these systems can also cooperate with each other.
That is, we have a gravitational radiator heating circuit that works on its own, precisely according to the physical laws of heat and cold, but there is a forced system.
Operating principle of radiator heating systems
What could be simpler than heating radiator connection diagrams? There is a boiler: solid fuel, diesel, gas, etc. The coolant is heated in the boiler, which gets there under the action of a pump. The heated coolant goes into the radiator heating system; in the radiators, heat is transferred to the surrounding air. The coolant cools down and, already cooled, returns to the boiler, where it heats up again and so the circle is closed. Everything is very, very simple, but, nevertheless, in reality, schemes can be much more complex. Let's see what these schemes are and how they differ from each other, let's look at their advantages and disadvantages.
Useful links for beginners
We understand that it is impossible to consider all the nuances of designing and constructing closed systems with your own hands in one publication. A beginner will have to take many steps on the way to working heating; our other articles will help protect you as much as possible from mistakes:
- choosing a boiler that runs on solid fuel;
- which gas heat generators are better;
- how to select and connect heating devices;
- installation of a security group;
- installation of air vents;
- how to fill the pipeline network and remove air;
- what pressure should be in the heating network.
When collecting information about installing a closed heating system, try to get it from reliable sources. Don't listen to Uncle Vasya the plumber, whose work you have never seen. As an example, we suggest that you familiarize yourself with the video material, which clearly indicates where to install the expansion tank and why:
Spider radiator connection diagram
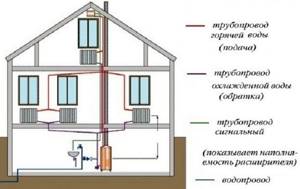
Let’s figuratively imagine a boiler from which we take a pipeline and bring it somewhere to the center of the house. Usually such a system is called a spider. We lower the risers and collect them, sending it all to the return line. We connect radiators to the pipes. The coolant rises up according to its natural physical laws. That is, the hot coolant goes up, and on the second pipe in the middle it leaves and falls down. It passes through the radiator, cools and enters the return line.
Please note that the lower pipes are sloped. This is the only problem, that you need to do slopes. But it is precisely in today’s time that many are again switching to these old systems, as problems with energy resources begin. For example, the electricity is often turned off, and the pump will not work. The system will just stop. But such a system works for you all the time. The boiler can be any: gas, coal, diesel and even electric. This whole system will work.
This system is very cumbersome. It must be practically brought out onto the roof and into the attic. Therefore, not everyone can master it.
Pipe selection
In order to correctly install the water supply system in your apartment with your own hands, it is recommended to use either metal-plastic pipes or purely plastic ones.
As for the use of steel or copper options, it is better to avoid them, because working with them requires not only skill, but also additional traumatic tools for cutting, welding and bending.
However, they remain the best option for creating a water supply system. No deposits appear on their walls during use, and the fairly low thermal conductivity makes it possible to use such pipes to provide hot water supply.
Of the variety of plastic pipes, polypropylene pipes are considered the best in terms of price/quality ratio. To solder polypropylene pipes, a special “soldering iron” is used, which is very easy to learn how to use.
Connection diagram "Leningradka"
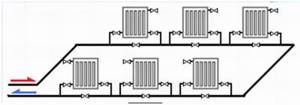
Let's consider the second system. When we take the feed from the boiler and then lower it down. We carry it out at the level of the radiators and then return it back to the boiler. Here, too, it is necessary to observe the slope. Figuratively, this is called a radiator heating system, since 2-3 radiators are mounted along the length. That is, the first one enters the hot coolant, some part goes down the return line cooled, and the hot part goes to the next radiator. This connection diagram for heating radiators is also called “classic Leningrad”. The only thing is to raise the pipes a little upward to create acceleration. Then the water will go down the slope, here they are also very important. This is not always convenient to do, because the doors will get in the way. Also, the fewer taps, the better this system works. If you do not follow this rule, you can plant the entire system.
Leningradka can work with a pump. He crashes into the return line. Due to it, the speed increases and the system works more efficiently. The only drawback of this system is the large diameter of the pipes. If in a forced connection scheme for heating radiators we take pipes with a diameter of 32, we will install a pump and it will push everything everywhere. Here, for the system to work, the pipes must be large. Therefore, these are very good systems now. In new buildings, we always recommend making just such a diagram for connecting heating radiators if there are problems with the electricity supply. And here you can heat the stove or even gas boilers. Now there are non-volatile systems with temperature control.
Main requirements for the boiler room
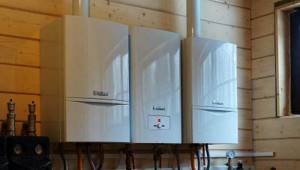
If you have not yet fully decided what kind of heating to install in a private house, then we advise you to choose a solid fuel boiler. This boiler is not that expensive, and if in the future you consider such heating to be unprofitable, the boiler can be easily converted to gas.
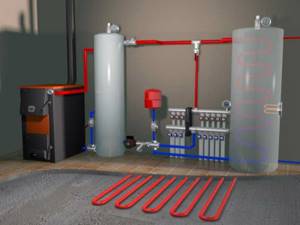
The room where the boiler will be installed must have good ventilation. This is necessary to maintain the combustion process.
You also need to install a high-quality concrete screed under the boiler; its thickness should be at least 5 centimeters.
All main equipment must be located in the boiler room, as this is required by fire safety regulations.
Single-pipe forced circuit
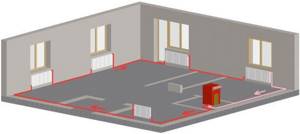
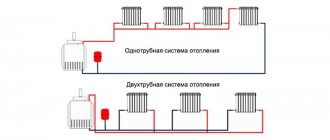
The simplest heating radiator connection scheme that is used in practice is a single-pipe system. The good thing about it is that it is simple and requires fewer pipes on the routes. It is because of this that it was often used back in Soviet times, precisely to save material.
However, this advantage of the “single-tube” looks dubious against the background of its disadvantages. The main one is parallel threads. The coolant enters the radiator, gives off heat to the surrounding air, and then returns to its own flow. But, since the coolant in the radiator has cooled a little, the flow temperature decreases slightly. That is, the coolant enters the second radiator cooler than the one that entered the first. The second radiator gives off heat again, the coolant has cooled again and is again mixed with the coolant that comes from the boiler and from the first radiator. It comes to the third radiator even colder than to the second. If the system is long enough, then temperature changes on the last radiator will be quite noticeable.
How can you correct the situation when different radiators heat differently? The only solution is to increase the size of the latest radiators. And the easiest way is not to use a single-pipe scheme, but to choose some other one. Which one? We will look at this further.
Recommendations for chimney installation
The chimney should be installed with a minimum number of bends and turns. Since in such places a large amount of ashes and various resins will accumulate.
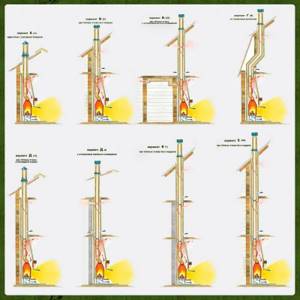
The pipe should be secured very securely, as it will exert strong loads, which can further damage the boiler.
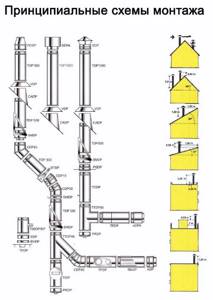
It is important to select the optimal length of the chimney, only in this case there will be excellent draft.
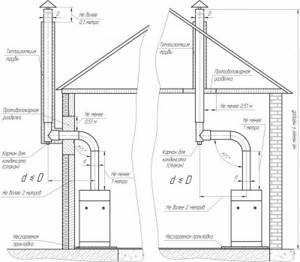
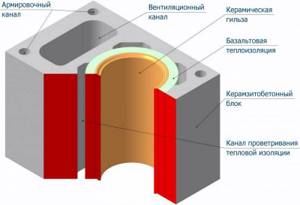
You will need to make brickwork in the wall under the chimney outlet. This is done for fire safety purposes; the pipe is also wrapped in asbestos sheets.
Two-pipe radiator connection diagram
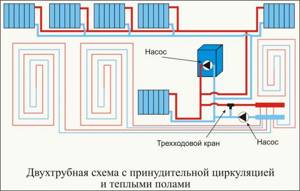
It is very simple: all devices in this heating radiator connection diagram are connected in parallel to each other. Like everything that moves, liquid, of course, chooses the path that is easiest for it. With a two-pipe design, it is easier for the coolant to flow through the first radiator. Further on, on the second radiator, the pressure will be weaker, so there will be less flow through it. On the third radiator there will be even less pressure, and so on throughout the network. If there are a lot of radiators, then there is a high probability that with such a scheme nothing will flow through the last radiator at all.
It turns out that the first radiator heats the best, the second heats worse, the third even worse, the fourth heats very poorly, and the last does not heat at all. The problem is similar to what we observed in the single-pipe circuit; it can be partially solved by increasing the area of the last radiator.
Both systems are bad because they are very poorly balanced. We can struggle for a long time with the fact that one radiator heats us, but the other does not. If we close one, the first one starts to heat up. We close the first one, the second one starts heating, but the first one stops heating. This kind of nonsense happens in two-pipe connection diagrams for heating radiators. It happens that there are two radiators next to each other, there is a flow through one, but there is no flow through the other. That's all. No matter how you fight, no matter how you adjust, either one or the other warms, but never together. Therefore, if you use such a system, then use it in very small spaces.
Which heating boiler to choose?
It's no secret that there is a fairly large selection of modern heating boilers. They are divided into types according to the fuel on which they operate. Which one to choose depends on the circumstances. The basis is the fuel that is easiest to find in your region and which is cheaper than all others.
Currently, manufacturers offer combined models that run on two types of fuel. For example, gas and firewood, gas and electricity, coal and electricity, firewood and diesel fuel. When one fuel runs out, it can be replaced with another. Therefore, my advice is to choose the boiler that is convenient for you both in terms of fuel supply and in terms of operation and maintenance.
Tichelman scheme: all radiators in the same conditions
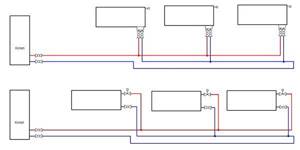
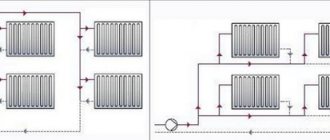
As the name implies, this heating radiator connection diagram is quite simple, but at the same time tricky. The first radiator is located closest to the pump, but farthest from the return pipe, and the last is located farthest from the pump, but closest to the return pipe. It turns out that the resistance on each radiator, or the pressure on each radiator, is the same. The flow through all radiators is the same. If we take and shut off any of these radiators, the rest will work as they did, the system balances itself. It seems like there are more pipes here, but in fact, if these radiators are located in a circle around the building, then the design turns out to be much lighter, simpler, and more elegant than the previous ones. The Tichelman loop can be tied around two or even three floors. Moreover, if you close all the radiators on one floor, they will continue to heat normally on the other.
Floor insulation for hidden wiring
Removing heating pipes out of sight is tempting from an aesthetic point of view. To prevent hidden heating wiring from subsequently causing the righteous anger of heating engineers with accompanying sanctions, it is advisable to prepare the floor accordingly. If the decorative flooring is laid on joists and additional floor insulation is not required, then the pipes are simply laid between the joists, and removable access hatches are installed above their connections.
Otherwise, the pipes must be laid in the floor. Methods for floor insulation are described in the corresponding article, and for this case we can recommend the following:
- We lay pipes.
- We form an additional warm screed from foam concrete. We fence the pipe connections until the concrete hardens with boards according to the required dimensions (see at the end).
- We lay 12-18 mm plywood flooring directly over the warm screed, gluing the joints with liquid nails or assembly adhesive. We cut out openings in the plywood above the pipe joints.
- We restore the finished flooring. We cut out the hatches for access to the pipes larger than the openings in the plywood - they will simply be removed.
The second method is somewhat more expensive, but it is easier to work with and provides access to the pipes along their entire length. To do this, we use foam concrete or aerated concrete slabs with cement-sand mortar as a warm screed. The rest is the same.
Radial diagram for connecting heating radiators
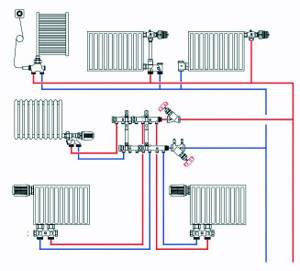
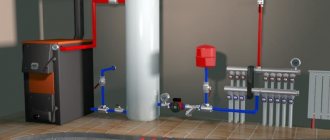
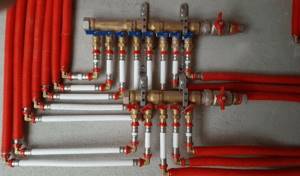
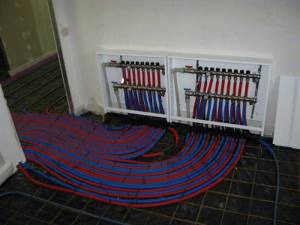
Let's consider a scheme in which a collector is used. The coolant from the boiler approaches the collector, and from the collector to each of the radiators there is its own pair of pipes: direct and return. If these pipes are hidden in the floor, for example, in the insulation of a heated floor screed, or even placed between the “subfloor” and the finished floor, then a room without pipes will look very aesthetically pleasing. Pipes to another floor can be routed along the ceiling. With this scheme, each of the radiators can also be turned off, but the others will continue to work.
Operating principle of closed CO
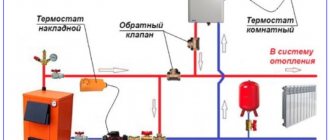
A closed (otherwise known as closed) heating system is a network of pipelines and heating devices in which the coolant is completely isolated from the atmosphere and moves forcibly - from a circulation pump. Any SSO necessarily includes the following elements:
- heating unit - gas, solid fuel or electric boiler;
- safety group consisting of a pressure gauge, safety and air valve;
- heating devices - radiators or underfloor heating circuits;
- connecting pipelines;
- a pump that pumps water or non-freezing liquid through pipes and batteries;
- coarse mesh filter (dirt collector);
- closed expansion tank equipped with a membrane (rubber “bulb”);
- shut-off valves, balancing valves.
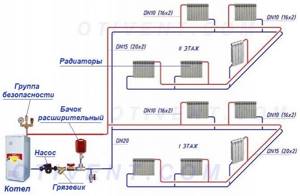
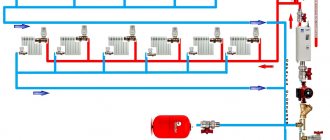
Typical diagram of a closed heating network for a two-story house
Note. Depending on the design, the ZSO additionally includes modern devices for regulating temperature and coolant flow - radiator thermal heads, check and three-way valves, thermostats, and the like.
The operating algorithm of a closed type system with forced circulation looks like this:
- After assembly and pressure testing, the pipeline network is filled with water until the pressure gauge shows a minimum pressure of 1 bar.
- The automatic air vent of the safety group releases air from the system during the filling process. He also removes gases that accumulate in pipes during operation.
- The next step is to turn on the pump, start the boiler and warm up the coolant.
- As a result of heating, the pressure inside the ZSO increases to 1.5-2 Bar.
- The increase in the volume of hot water is compensated by a membrane expansion tank.
- If the pressure rises above the critical point (usually 3 Bar), the safety valve will release excess liquid.
- Once every 1-2 years, the system must undergo an emptying and flushing procedure.
The principle of operation of an apartment building's SSS is absolutely identical - the movement of coolant through pipes and radiators is ensured by network pumps located in an industrial boiler room. There are also expansion tanks there; the temperature is regulated by a mixing or elevator unit.
How a closed heating system functions is explained in the video:
What and where should I finally use it?
Let's summarize. If you live in central cities and you do not have problems with energy, gas, electricity and others, we recommend using a two-pipe system, with counter movement, circular movement and forced circulation. Because then we save on the diameter of the pipes and the volume of coolant. Accordingly, the less water is needed, the less energy is required to heat it.
If you have problems with energy resources or emergency situations often arise, then you should consider connection diagrams for gravity-type heating radiators with natural circulation. Just in case, you can also embed a pump there, only it is embedded around the pipe so that it does not interfere with the main passage. For the time when you have electricity, you will drive it with a pump, because the speed increases, the radiators are all at a uniform temperature. The efficiency of the pump increases by 30-50%. When there is no electricity, this system will continue to work for you. You already know which radiators you have chosen, their number and size. Accordingly, you can now calculate what is needed in order to connect them. Let me remind you that in the first case, large, large diameters are needed; large valves can be used. And of course, in this case it is difficult to regulate the temperature. Of course there are options, we will definitely consider them in a more detailed review.
Technical specifications and commercial proposal
At the second stage, based on the approved preliminary design and preliminary calculations, the following are developed:
- a document containing a text description of the heating system being created - technical specifications (TOR);
- and possible investment costs for its creation - commercial proposal (CP).
Customers often come to us with the question: “How much do the services of your specialists cost and how much will the heating system of my home (workshop, enterprise, etc.) cost me?” At the same time, the person who asked such a question does not have any project for the desired heating system, and sometimes there is no answer to the question to himself: “What do I want?” Naturally, we cannot give a quick answer to such a question, and we have to explain for a very long time why we cannot do this. Therefore, we present below a standard form of technical specifications for the design of a heating system, from which it is clearly visible how many questions the designer needs to answer in order to complete the design work. And this is not a complete range of all issues. And only on the basis of the finished project, the estimator already has the opportunity to issue an estimate for the facility. And for us, as specialists, one thing is unequivocally clear: if someone “out of the blue” says the price, then this is just a shameless deception of the customer and nothing more. Miracles don't happen.
Radiator connection methods
A classic multi-section radiator consists of several sections that transfer heat from the coolant to the surrounding air. When assembling the radiator, thanks to a threaded connection, the upper and lower manifold of each section are hermetically connected to each other, increasing the total length. A closed system is formed that uses the coolant as an energy source.
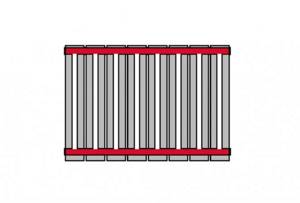
There are 3 schemes for connecting a heating battery to the system:
- Lateral.
- Bottom.
- Diagonal.
Let's look at each option in detail.
Lateral connection of radiators
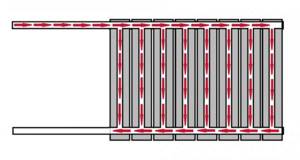
In the case of lateral connection of radiators, the inlet and outlet pipes occur on the same side. Most often, hot coolant enters through the entry point at the top of the battery, and spent coolant exits through the lower connection point. But there are exceptions when the connection is made the other way around. It is assumed that the coolant flows evenly along the entire length of the radiator, then goes down and exits. But in reality this is not the case; the coolant passes through the sections closest to the exit much faster than through those further away.
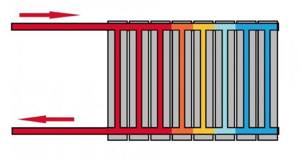
This is due to the length of the path, if for the near section it is 8-10 cm of the section width, vertical pipeline and 8-10 cm to the exit, then for the far section this path is many times longer. During the time it takes for the coolant to reach the far section and then return, two to three times more volume can pass through the near section. Because of this, the heating process of the battery occurs unevenly; the distant sections may be slightly warm, while those closest to the input and output will be hot.
There is also a diagram for the side connection of heating radiators, only from the bottom. With this scheme, the hot coolant comes from below and, in theory, rises evenly upward. But in reality we have the same thing as with the top connection: the first sections warm up perfectly. The rest are getting smaller and smaller.
Bottom connection of radiators
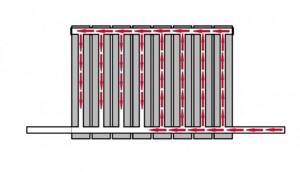
Quite often there is such a scheme for connecting heating radiators, when the incoming coolant flow is connected to the lower collector, while the output flow is connected to the lower collector from the other edge of the radiator battery.
Hot water has a lower density and, due to this, must rise upward, and the already cooled coolant must sink down. Thanks to this circulation, the coolant is replaced with a hotter one. But according to manufacturers’ calculations, with this type of battery connection, 10 to 20 percent of the coolant simply flows past the vertical pipelines and does not participate in heat exchange. This is due to the fact that the narrow channel does not facilitate effective circulation and the process of displacing the cooled coolant can occur very slowly. Naturally, when salts and scale are deposited on the vertical radiator pipes, the circulation speed will deteriorate and the efficiency will drop even more.
Metal-plastic pipes
Metal-plastic is considered one of the most common materials, however, it has a number of disadvantages that distinguish it from polypropylene:
- Installing heating pipes in an apartment made of such material will require quite a lot of expense.
- The process of replacing pipes can only be carried out with special tools such as a pipe cutter, a flaring press and a pipe bender.
- Considering the thinness of the material itself, there is a large outflow of thermal energy.
- Leaks may occur in places where metal-plastic is attached to other materials.
- Low impact resistance, as well as the impossibility of prolonged exposure to sunlight.
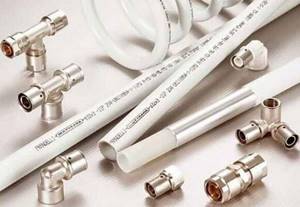
However, metal-plastic heating pipes in an apartment also have a number of advantages, which explains such widespread use:
- Possibility of savings through the use of inexpensive elements to connect the entire heating system.
- Good flexibility of the material, due to which the length of heating lines can be reduced as much as possible.
- Thanks to the special design of connectors for such pipes, inexpensive seals can be purchased.
Diagonal battery connection
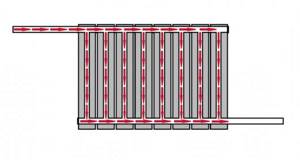
The most effective scheme for connecting a heating battery to the heating network. In this case, the incoming flow is connected to the upper collector, and the output flow is connected to the lower collector on the opposite side. The coolant flow moves diagonally and all sections are involved in effective heat exchange. This ensures maximum efficiency in the use of coolant and reduces losses.
