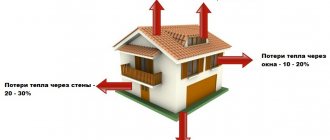
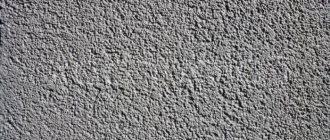
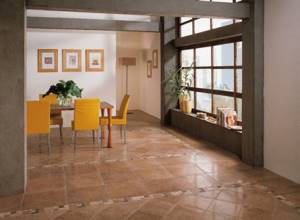
With the onset of cold weather, the most pressing question arises about the need for warm floors in the apartment. This is especially true for those rooms with tiled flooring. The fact is that tiles and ceramics have high thermal conductivity and almost always remain cool, making walking on such surfaces uncomfortable.
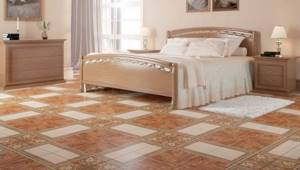
Warm floor scheme for tiles.
In this case, there is nothing else left to do but to insulate the floor under the tiles. Today, the building materials market offers a large selection of insulation materials, which differ from each other not only in cost and quality, but also in the method of production, installation, durability, etc.
Preparatory work
- Hammer or pulse hammer.
- Metal trowel.
- Roller and primer.
- Bitumen waterproofing and round brush.
- Foil material.
- Respirator.
At the very beginning, you need to prepare the surface for the work process. To do this, you need to clear the area of the old floor with all its elements. Using a hammer drill or pulse chipper, everything unnecessary is removed, and you need to work extremely carefully so as not to touch the interfloor slab.
Following the electrical engineering, when only small elements remain, you need to connect a metal spatula. They remove all small residues, then remove large debris with a brush or broom. Next, the surface is wetted and all dust is removed with a broom. This completes the basic part of the preparation.
Stages of installation of heated floors based on heating mats under tiles.
The floor is covered with a primer to ensure a high-quality joint between the base and the next layer. If the primer has soaked into the base, you will need to apply another coat. The total drying time for each layer is from 1 to 3 hours, and the room must be ventilated, and work should be done in a respirator (wearing gloves is desirable, but not necessary, since the chemicals are not particularly harmful).
All corners are coated with bitumen waterproofing, and if repairs are made in the bathroom, toilet or kitchen, then waterproofing is used over the entire area to provide maximum protection against leaks. The peculiarity of bitumen waterproofing is its durability and absolute protection, which none of its competitors can boast of, although it does not look the best.
The last stage of preparation: the foil material is lined with the reflector facing out. This move will allow the heat from the heating elements to be directed into the room, and not to the neighbors. It is advisable to use not a rubber base, but fabric or ordinary thin foil, since rubberized materials easily melt at high temperatures.
Main stages of work
- Pipes.
- Compressor.
- Reinforcing grid.
- Fastening elements for pipes and reinforced gratings.
- Aluminum profile.
- Construction knife.
- Gypsum plaster.
- Construction level.
- Drill with a nozzle for mortar.
- Leveling mixture.
- Rule.
Now you can choose the appropriate floor insulation option. There are several such options:
Types of heated floors under tiles.
- Semi-legal option. Water heating based on central heating. To do this, the system is installed in the unheated season to avoid any incidents. This option is used extremely rarely, as there are a lot of disadvantages.
- Water heating based on heating elements. For this, special boilers are most often used, although craftsmen adapt gas water heaters and solar collectors. This option will be described below.
- Electric floors of all types. This is a fairly complex and modern option, but without prior electrical skills, complications may arise.
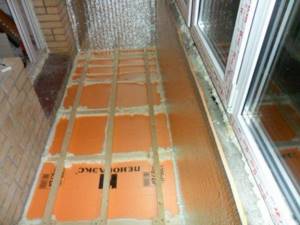
Before insulating the floor under the tiles, you need to prepare the area itself for the pipes. Initially, a special mesh is laid on the floor, to which the heating system will be fixed. Clamps or a special layer with recesses are used as fastening elements.
Regardless of the heating elements used, the PVC pipe system (plastics are not afraid of moisture, although all options are used) is laid on the floor in the form of a snake or snail. Each element is connected to the previous one and to the mesh from below, and the joints with the mesh occur in the amount of 1 piece. at 1 m.
Testing is carried out using soap foam applied to each joint. Then, using a compressor, the pressure is pumped up to 8 atmospheres, and if the foam makes itself felt, then such a joint needs to be redone, and if everything is fine, then the work continues.
Layout diagram of underfloor heating heating elements in the form of a snake.
Now the floor insulation under the tiles is pulled to the heating element, fully connected and started for a period of 12 hours. After this, the system is turned off and checked at all joints for reliability.
You may be interested in: How to remove ceramic tiles?
After the insulation has been laid, you need to use aluminum profiles. Their height should exceed the insulation by 3-4 mm, so that the heat has time to dissipate and rise to the feet in a free state. Due to the complexity of the system, the profiles will be cut repeatedly, while the aluminum does not come into contact with the insulation anywhere. In order for the profiles to lay correctly, you need to use a building level and gypsum plaster, which in this case serves as a platform.
When everything is prepared, you can mix the screed solution and pour it. The solution turns out to be quite thick, which is why it is very pliable. The work process starts from the far corner, and a 2-meter strip (rule) is used for alignment. After this, you just have to wait 4 days (some compositions take up to 7 days) for complete hardening, and you can begin installing the tiles.
Required Tools
In order for the floor insulation work to be successful, it is necessary to prepare the tools in advance. They differ slightly depending on what type of flooring will be changed.
Working with a wooden floor requires the following tools:
- fasteners (screws, nails), they allow you to securely fasten the structure;
- hammer, nail puller, saw, tape measure, level, pencil for marks;
- screwdriver;
- small brush.
A concrete floor requires the following tools:
- concrete mixers at the stage of pouring a new screed;
- a shovel to level the material and mix concrete;
- containers for storing material and carrying concrete;
- soil compactor (you can do without it, especially if the work area is small);
- level to correctly apply beacons, make markings and monitor the correct execution of work in the future;
- a device for smoothing a concrete screed until it “sets”;
- trowel for working with a small amount of concrete and leveling it;
- needle roller - eliminates cavities with air when the screed has not yet hardened;
- a construction wheelbarrow is useful for transporting materials, sealant, cement;
- metal brush for cleaning concrete that has already set.
Tools may vary depending on the format and volume of work. Only some of them are expensive, the rest can be purchased for personal use. They will come in handy more than once when carrying out repair work.
Important elements such as a concrete mixer or a screwdriver are already more expensive. Therefore, you can borrow them from friends or rent them for a few days.
When starting work, it is important to conveniently arrange everything you need so that the tools can be quickly used. To do this, you need to draw up a work plan, where you will describe step by step what to do and what to do.
Place materials and tools in this order: put essential things closer, and put away what will be used later.

Selection of thermal insulation materials
The modern building materials market provides a choice of insulation materials of different price categories. The assortment is filled with both items that have been tested over decades of construction experience, as well as the latest inventions. The most in demand will be those materials that have maximum ergonomics - the ratio of weight, fire safety and thermal insulation efficiency. There is a huge selection of all kinds of tools that will allow you to insulate the floor with your own hands, without the help of specialists.
Below we will consider the types and methods of insulation, starting with the simplest and least labor-intensive, and ending with the most capital and complex.
floor on the balcony
insulation of the floor on the loggia
Types of insulation
Next, we will consider how and with what materials you can insulate the floors in the house.
Wooden floors
Provided that your balcony or loggia is protected from moisture coming from outside, the easiest and cheapest way to improve the floor is to insulate it with wood. Wood as a material has a very low thermal conductivity, so it is recommended for use on concrete floors. There are two main designs of wooden floors:
- If your concrete floor is level enough, the boards can be laid directly on it. A significant disadvantage of this method is that most often concrete floors are not dry enough so that they do not harm the wood.
- The second method is to install floors on joists. This will provide additional ventilation and increase the distance between the boards and the concrete, ensuring less cold transfer from below. Such floors will last much longer compared to the previous option.
Important! It is necessary to provide the wooden floor with a sufficient slope so that accidentally spilled liquid drains off the flooring neatly.
The ideal material when working with wood would be coniferous species. They are relatively cheap, and due to impregnation with natural resin they have the greatest moisture resistance. It is not recommended to use plywood or chipboard - these materials are not durable.

Expanded clay
As an addition to a wooden floor, you can use insulation in the form of expanded clay. It is worth immediately noting that this option is unacceptable for weak structures that cannot withstand heavy weight - after all, of all the known insulation materials, high-quality expanded clay is the heaviest. It is used in a layer of ten to fifteen centimeters, spilling between the joists.
Features of insulation work and advantages
There are several options for constructing the frame:
- from wooden logs,
- from backfilling with dry heat-insulating compounds and concreting,
- made of concreting with insulation.
But to ensure the rigidity of the floor and eliminate subsidence and dips in the thermal insulation composition over the entire distance of the floor, it is advisable to use an additional timber frame, set according to the level and to a certain height, taking into account subsequent decoration.
The frame not only provides a level, but also makes it easy to place insulating materials between the joists.
To install wooden logs, use either a wide board, with a small thickness of insulating material, or a wooden beam with mounting supports made of metal, pieces of timber.
A wooden frame made of timber laid at a distance of half a meter will serve as a beacon level. The supports must be securely fastened to the floor of the balcony slab and to the beam frame.
After checking the level and reliability of the frame, you can insulate the loggia with materials and externally finish the floor.
How to insulate a balcony floor
The first thing you need to do is figure out how to insulate the floor on the balcony.
This can be done using two means:
- by laying insulating material (passive insulation);
- by installing a “warm floor” system on the balcony (active insulation).
Let's consider the features of each of the presented insulation methods.
How to choose the optimal insulation
Floor insulation on a balcony is usually carried out using the following types of insulation:
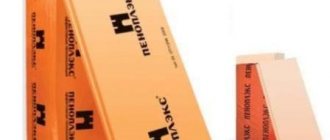
Penofol. This thermal insulation material is made of foamed polyethylene and aluminum foil. It has proven itself well both as a high-quality insulation material and as a means for sound and waterproofing. Penofol is produced with foil on one and both sides in rolls. The thickness of the material can be 3, 5 and 10 mm. Penofol insulation involves the joint use of the material with penoplex.
This is what a roll of foam foam looks like
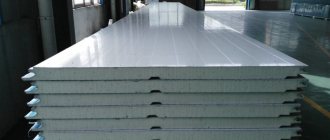
- Foam plastic has been used in construction for insulating balconies for a long time due to its combination of insulating qualities and low cost. Foam plastic is produced in sheets from 2 to 10 cm thick. Insulation of floors on a balcony with polystyrene foam is usually carried out in the form of laying it between wooden logs, followed by laying the covering on a wooden base.
- Foamed polystyrene foam or penoplex has very high thermal insulation properties. Among other advantages, Penoplex has low vapor permeability, chemical inertness, ease of installation, but is somewhat more expensive than alternative options. Penoplex sheets are available in a thickness of 2-5 cm. Penoplex is a good option for insulating balconies.
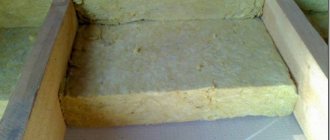
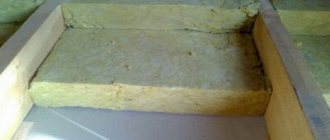
- Mineral wool. It is also a very common construction insulation, produced on the basis of basalt or fiberglass and reminiscent in structure of ordinary medical cotton wool. Such insulation for the floor on a balcony will perfectly retain heat and can be laid even in small cracks. Mineral wool is produced in sheets and rolls of various thicknesses.
Insulation with underfloor heating system
Another more than relevant solution is to lay heated floors on the balcony. The system can be a structure made of electric heating cables or metal-plastic pipes with water heating.
For a balcony, in most cases, it is rational to use the first type of construction, since a water heated floor is difficult to install and is beneficial only when insulating large areas.
Water heated floor for a balcony
Before insulating the floors on the balcony, you will need to select a suitable electrical system. When choosing a heated floor system for a balcony, you need to start from its power, which should be about 150 W/sq.m.
How to do
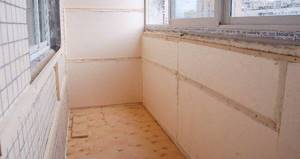
Before you insulate the floor on the balcony under the tiles, you need to decide whether a floor heating system will be installed. To connect, you will have to bring the wiring into the space of the balcony, ensure its safe connection, and so on. It is better to do all this work in advance. At the same time, you can prepare the surface - clean it from debris and dust, prime it and dry it. If liquid waterproofing is being applied, now is the time to do it.
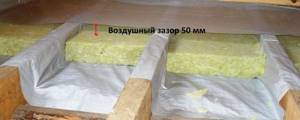
It will be easier later. A frame structure is installed on the waterproofed floor. It usually consists of bars of a suitable cross-section - about five centimeters. They are fixed with dowels. There should be at least ten centimeters of space between the wall and the nearest block. Two or three longitudinally spaced bars are enough. Between them there will be insulating material. If it is penoplex, then it is simply laid on glue or polyurethane foam. All the gaps and cracks are filled with it.
With mineral wool, the principle of work is slightly different. It is laid on a layer of waterproofing and is also insulated with a membrane on top. This way the heat-insulating layer will be protected from water ingress.
Sheets of moisture-resistant OSB or plywood with moisture-resistant properties are laid on top of the insulated frame. Then all that remains is to lay the slab in the usual way. If isolon is used, then after laying it, a thin, two and a half or three centimeter screed is poured, and tiles are laid on top of it.
In all cases, heating systems are installed after the rough foundation is ready. In cases with polystyrene foam, penoplex or cotton wool, it will be a ready-made base made of OSB or plywood, and in the case of isolon, it will be a screed. The tiles are fixed using the standard method - using an adhesive solution. At the same time, the heating cable needs to be filled with a sufficiently thick screed, the heating mats will be located inside a layer of tile adhesive, and infrared heating films are simply rolled out over the assembled structure and protected on top with polyethylene.
Reason for choosing electric floor heating
Modern materials and technologies enable owners of apartments and private houses to create water and electric heating of the floor surface. The water heated floor must be connected to the heating system. While this is feasible for a private house, it is problematic for an apartment. Along with large-scale work, the most difficult thing is to obtain permission to connect.
Installation of different types of heated floors
In addition, many people prefer electric floor heating for the following reasons:
- no coolant leaks;
- smaller thickness of the screed, and in some cases – its absence;
- ease of installation of heating elements (cable, film, rods);
- there is no need for bulky equipment.
High-quality thermal insulation and adjusted electric heating of tiled floors allow for sufficient energy savings.
Preparing for installation of heated floors
Despite the variety of types of electric flooring systems under tiles, general requirements always remain.
Thermal insulation
The underfloor heating system is insulated for the following purposes:
- To reduce heat loss from the room through the floor. In ordinary housing they reach 20% of the total volume. It is irrational to heat the floors, especially when there is a room below without heating. Even if there are warm rooms on the lower floor, a thin layer of thermal insulation is required.
- Achieving more uniform heating over the area of the room, since heat transfer to structures located below is reduced.
- Energy saving.
- Creating sound insulation. Here it is possible to create a “floating floor” if you choose a material with good soundproofing properties.
- Moisture does not penetrate into the house from below through the ceilings.
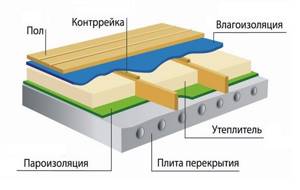
Laying thermal insulation under a heated floor
Leveling the base
Ceramic tiles require a level base. The surface under the heated floor must be smooth and complete. If there are differences in heights, unevenness, cracks and crevices, it is necessary to repair the base and fill it with a leveling screed.
Long-term operation of a heated floor requires reinforcement of the screed. It is necessary to install a damper tape around the perimeter to compensate for temperature deformations. A foamed polymer tape between the wall and the screed dampens expansion and closes the gaps between them.
It is most convenient to install an electric heated floor under tiles in an apartment where fairly even floor slabs are located. Leveling is necessary in an individual house if there is soil below. First, a depression is made in it and a layer of sand is added. A rough screed 5-6 cm thick is poured onto it.
A waterproofing film and insulation with a thickness of 5 cm or more are laid on top. A budget option is polystyrene foam. The next layer of screed will lie on it, which should be leveled under the warm floor and tiles.
The screed is reinforced if a warm water floor is used. The pipes create uneven pressure, which can cause cracking of the bottom screed. Reliable reinforcement is achieved using a mesh with a diameter of 5-6 mm. For an electric heated floor, a mesh with a wire diameter of 2-3 mm is sufficient. The metal also serves to equalize the temperature over the surface of the screed.
Network connection
Electric underfloor heating elements are connected to the network through a dedicated line with its own circuit breaker and RCD when the system power is 2 kW or more. Protection devices are located in the apartment's distribution board.
Connecting an electric heated floor
The power of the power cable that supplies power to the heated floor must correspond to the power consumption. Wiring in the bathroom is usually designed for lighting, and the wire cross-section for it does not exceed 1.5 mm2. The cable for underfloor heating consists of three cores of at least 2.5 mm2 (red - phase, blue - neutral, brown - ground). For it, you will have to lay grooves in the walls from the thermostat located outside the bathroom.
In the diagram above, the protective shutdown is intended for the entire apartment. If you install a separate RCD for a heated floor, it will be connected after the machine. Usually a 100 mA fire protection RCD is installed for the entire apartment, and 15-30 mA for individual lines to protect people from current leaks.
The grounding loop is connected to the terminals of the equipment, to the shielding wire of the heating cable and to the reinforcing mesh of the screed (if any).
Features of connecting the electrical system
Electric underfloor heating is more often used as inter-seasonal heating and is used when central heating is not yet turned on. Its main advantages include:
- Simplicity and speed of installation;
- No need for “wet” processes;
- Relatively low cost;
- Slight rise in floor level.
Unfortunately, there are also disadvantages:
- Electromagnetic radiation - according to manufacturers, it is within normal limits, but additional shielding will not hurt;
- High cost of operation - electricity is much more expensive than other types of fuel;
- Load on indoor wiring.
What cables can I use?
The main heating element of such a system is a special cable, which is laid on the floor like a snake and attached to the mounting tape. The connection diagram depends on which cable you chose:
- Single-core resistive is the cheapest and simplest type of cable in design. It is a heating core through which current passes. In this case, most of the electricity is converted into heat. The main feature of this type of cable is the need to connect both ends to the mains, which is not always convenient.
- Self-regulating cable - here it is not the current-carrying conductors that are heated, but special polymer couplings. This cable can rightfully be called the most convenient to use, but also the most expensive.
- Two-core resistive - in addition to the heating core, this cable also contains a conductive one. This will allow you to connect it to the network at only one end, and somewhat reduces the level of the magnetic field.
Please note that laying resistive cables on areas of the floor that will be filled with furniture is strictly prohibited. This will inevitably lead to overheating of the system and failure.
Connecting sensors and thermostats
The distance between turns is determined based on the required specific heating power and cable power. After laying the cable, we install the floor temperature sensor, having previously protected it with a corrugated tube.
The sensor is installed in the middle between the turns of the cable at a distance of 0.5 m to a meter from the wall. We place a vertical piece of wire connecting the sensor to the thermostat in the groove.
The first voltage supply to the underfloor heating cables should be made only after the concrete has completely dried - no earlier than after 28 days.
We hope that with the help of this material you figured out how to connect everything correctly yourself. If you still have any questions, we suggest you look at our other articles, or, if you don’t want to do everything yourself, seek help from highly qualified specialists.
Features of floor insulation by spraying
In addition to the insulation methods described above, there is another, professional one - spraying a thin layer of polyurethane foam (PPS) onto the base of the floor. As a result, a monolithic surface devoid of seams with a thickness of 50-100 mm is formed on the ceiling. The technology for applying PPS involves the use of special equipment and certain skills, so this work can only be done by specialists.
For spraying, high-pressure equipment is used, which allows the material to be applied to the floor in the form of an aerosol liquid. Within seconds, this liquid spray layer turns into rigid polyurethane foam. The effectiveness of the resulting thermal insulation layer is superior to any other insulation - PPS has a thermal conductivity coefficient that is lower than that of mineral wool, polystyrene foam, expanded clay, foam concrete, etc. In addition, polyurethane foam is absolutely moisture resistant, so it does not require additional waterproofing or vapor barrier. This material does not require floor preparation before application, is not damaged by rodents, does not rot, and does not burn. The service life of the thermal insulation layer of PPS is estimated by the manufacturers of this material at 30-50 years.
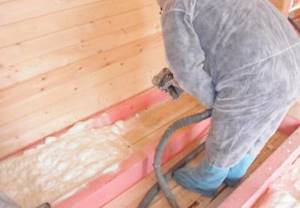
Polyurethane foam is an effective way to create an insulating and waterproofing coating in an apartment
A natural stone
This flooring option can be considered one of the oldest methods of floor decoration. The most commonly used stones are marble, granite or slate. In some cases, sandstone, travertine or onyx are laid on the floor.
The main advantages are wear resistance and, accordingly, long service life. Does not react at all to temperature changes and exposure to moisture. Easy care of the material, providing the room with a noble appearance.
Easy maintenance and the ability to carry out restoration work. It is used in both external and internal work.
Disadvantages include heavy weight and low resistance to acidic compounds. Most often used in hotels, swimming pools, restaurants and country houses.
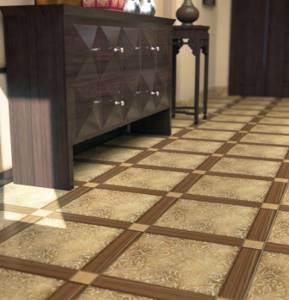
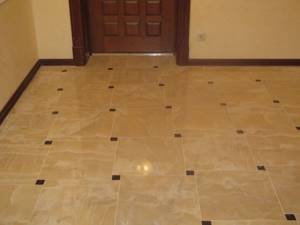
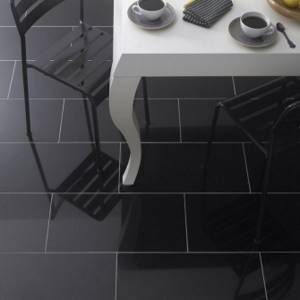
By carefully studying the characteristics of each floor tile individually and learning how the tiles are laid on the floor, you can choose the best floor finishing option for your room. A variety of floor tiles, photos of which can be viewed, will allow you to create a unique design in the room.
Stone flooring: 50 photo ideas Bathroom flooring - 80 photos Laminate flooring - 80 photos Wooden flooring: 65 photos of new products How to cover a floor with parquet - 50 design photos Finishing the floor in an apartment - 45 photos
Alternative methods of insulation
If heat loss through the floor is small, then you can use simpler insulation methods. Their essence is to use a material with a low thermal conductivity coefficient as a floor covering.
The simplest thing is to lay a carpet or carpet over the existing floor. Products made from natural wool with long pile have the greatest insulating properties.
Another option is to use thickened linoleum on a warm substrate (felt, jute) or on a foam base. Similarly, you can “insulate” the laminate by laying a thickened backing made of cork, polyethylene foam or polystyrene foam underneath it.
Thus, in order for the floor to maintain a comfortable temperature even in winter, it is not necessary to use additional heating systems and “warm floor” structures. In most cases, to increase the floor temperature by several degrees, it is enough to properly insulate it using available materials.
Advantages and disadvantages
Choosing the right flooring is not easy. You won’t be able to limit yourself to just a harmonious shade for the overall interior. It is necessary to take into account the quality of materials, their strength, wear resistance, and also take care of the arrangement of the floor, especially when it is planned to use tiles as a finishing touch.
Heated floors will bring additional comfort and coziness. Many people like to walk barefoot at home, but this is unpleasant on cold tiles or linoleum and can be harmful to health. Over time, joint diseases may begin to develop due to constant hypothermia. A heating system is a must with tiles, especially in the kitchen.
Advantages
The advantages of a heated floor are not only comfort, but also that it is a full-fledged heating system in the off-season, when it has already become cold outside and the central heating has not yet been turned on. The heated air rises to the top, warming the entire room well.

Advantages of the heating system
Classic heating is effective, but at its core it can be called a point source of heat, since the room is heated unevenly. At the same time, the cold actively penetrates through doors, windows, and walls facing outside. This heating method does not always maintain the same temperature, so recently heated floors have been in great demand. Its advantages are:
- natural body heating – from bottom to top;
- insulation of external walls, areas near windows;
- exclusion of drafts;
- possibility of temperature adjustment.
A floor insulated in this way becomes not just a luxury, but a necessary condition for comfort.
Even when the central heating is turned off, the power of the surface is enough to avoid any discomfort. This is especially true in apartments and houses where there are children.
Flaws
Design disadvantages include:
- dismantling the existing coating and reinstallation;
- the temperature in the cabinet compartments that are located close to the floor will be higher, so you need to reconsider the principle of storing food that spoils due to elevated temperatures;
- the cost of equipment and installation of the system is impressive;
- Electricity costs increase by approximately 1000 - 2000 rubles. per month.
How floors are insulated with infrared heating
This method is the most modern. It consists of installing infrared mats, which act as heating elements. Despite the fact that this option is much more expensive than the previous ones, such insulation is installed much faster. Its installation does not require a screed device or dismantling of the old coating.
Infrared mats require a flat surface. Therefore, the appropriate work will need to be done. Floors are insulated using these elements directly under the tiles. The mats are attached to the base using glue. A minimum of “wet” processes and ease of installation make this method of home improvement the most preferable.
Warm floor with water heating
This method of floor insulation is very popular, despite its fairly high cost. Therefore, in order to save on installation costs and not involve specialists, you can install the system yourself. Installation of heated floors under tiles is carried out in the following sequence:

Scheme of underfloor heating with water heating.
- Preparing the base. The old coating is removed, and all debris is removed from the spaces between the joists.
- Laying waterproofing and insulation. It is better to use penofol, foam or polyurethane boards as insulation. You can also purchase insulation on the market specifically designed for underfloor heating systems. Its special feature is the presence of recesses for pipes, which greatly facilitate installation. It should be noted that a space of at least 5 mm must be left between the wall and the foam, since when the pipes are heated, the material may be slightly deformed.
- Pipe laying. It is recommended to use polypropylene or metal-plastic pipes, as they are strong, durable and have good flexibility. There are two methods of installation: spiral and snake. When the pipe is arranged in a spiral, the entire floor area is heated more evenly, since the supply and outflow of water occur in parallel. When laying with a snake, the floor above the beginning of the pipe heats up more, but this method is indispensable when you need to bypass any obstacles or areas. For uniform heat distribution (for any installation method), the distance between the pipes should be approximately 30 cm. The pipes are attached to the insulation using U-shaped brackets, plastic brackets, clips or other special devices.
- Connecting a warm floor. After installation, the supply and return ends of the pipe are removed and connected to the manifold. The entire system is then connected to the water supply.
- Pouring screed and laying tiles. After checking that the system is installed correctly, you can begin the final screed. It is not necessary to fill the pipes with water before pouring, since they are quite rigid and should not deform under the pressure of the concrete solution. It is not recommended to turn on the heating at full power for some time after pouring to avoid the formation of cracks. After the screed has dried, the tiles are laid.
Main types of surfaces
In addition, the method of laying an electric floor under tiles can be used by every builder, even those who are not well versed in all construction processes. To install an electric floor, you just need to study all the features of the process in order to avoid major mistakes. But for all its positive characteristics, ceramics continues to remain very cold upon tactile contact. The best solution to the problem in this case would be to install a heated floor system.
The hardware store offers several options for installing an electric surface:
- heating cable, for installation of which you additionally need to buy special fasteners and a thermostat;
- electric mats, including a mesh on which a heating cable is already installed;
- infrared systems, which work on a different principle, but are installed in much the same way as a heating cable.