ROOM MECHANICAL TEMPERATURE REGULATOR
A room mechanical thermostat is a device that regulates the operation of climate control equipment, maintaining the set temperature parameters of the room. Can be used for both heating and cooling an apartment or house.
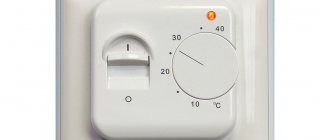
The main difference between mechanical room thermostats and other types of thermostats is that they are a separate, completely independent device, most often made in the form of an external electrical installation product, intended for installation inside residential premises.
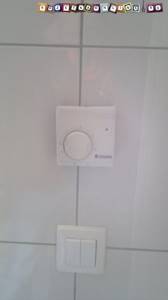
To put it simply, a mechanical thermostat, depending on the set program, turning on or off certain heating or cooling devices, maintains the required temperature in the room.
The main feature of a mechanical thermostat is the complete absence of electrical components, i.e. It does not require power, not even batteries, to operate.
How does a mechanical thermostat work, what exactly allows it to measure the temperature of the surrounding space and control electrical appliances?
PRINCIPLE OF OPERATION OF A MECHANICAL THERMOREGULATOR
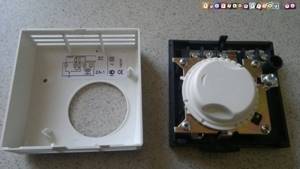
A mechanical thermostat is a device that perfectly reflects the principle - “Everything ingenious is simple!” Despite all the differences in designs and components used, the operation of mechanical thermostats is based on one single principle, namely the ability of some materials and substances to change their mechanical properties depending on temperature.
As an everyday example, familiar to everyone, which would explain the principle of operation of a mechanical thermostat, we can cite an ordinary mercury thermometer, with which we measure body temperature.
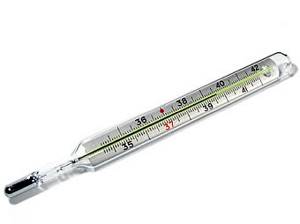
The mercury contained inside the thermometer increases in volume as the temperature rises and enters the graduated capillary, thereby showing the exact temperature.
Approximately the same processes occur in a mechanical thermostat, the only difference is that a change in temperature to a certain level, which is indicated by us separately with a control wheel, triggers certain processes, most often closing or breaking the electrical circuit, thereby turning the heating devices on or off.
To make it clearer how it all works, let's look at the design of a standard room mechanical thermostat.
Operating principle
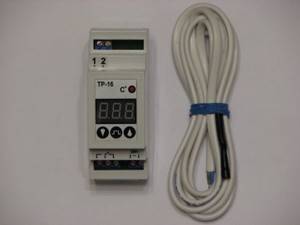
The thermostat circuit is multifunctional. Starting from its foundation, you can create any adapted device that will be as convenient and simple as possible. The supply power is selected in accordance with the available relay coil voltage.
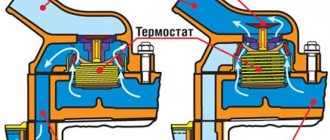
The principle of operation of the adjusting device is the ability of gases and liquids to compress or expand during cooling or heating. Therefore, the operation of water and gas configurations is based on the same essence.
They differ from each other only in the speed of reaction to changes in temperature in the house.
The principle of operation of the device is based on the following stages:
- As a result of a change in the temperature of the heated object , a change in the operation of the coolant in the heating mechanism occurs.
- At the same time , this causes the siphon to increase or decrease its dimensions.
- After this , the spool moves, which balances the coolant inlet.
- The inside of the siphon is filled with gas, facilitating uniform temperature regulation. The built-in temperature sensor monitors the external temperature.
- Each value of the heat level is equated to a specific value of the pressure force of the working atmosphere inside the siphon. The missing pressure is compensated by a spring that controls the operation of the rod.
- As a result of increasing degrees, the valve cone begins to move towards closing until the operating pressure level in the siphon becomes balanced due to the forces of the spring.
- If the degrees decrease, the work of the spring is reversed.
The result of the work depends on the type and functionality of the control valve, which is directly subordinate to the heating circuit and the diameter of the supply pipe.
Mechanical thermostat device
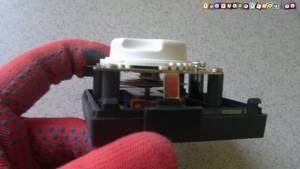
The main structural element of almost any room mechanical thermostat is a gas membrane. By the way, this is why they are often called membrane thermostats.
The special gas located inside the membrane, when the temperature changes, changes its volume, thereby affecting the walls of the membrane. Which, changing, trigger the mechanism of closing or opening the electrical circuit that supplies the heating or cooling system.
The choice of this particular method of device for a room thermostat is due to the possibility of organizing a simple way to adjust its operation temperature, as well as the fact that the device responds precisely to changes in air temperature, and not the surface, which is most important in heating and cooling systems. Therefore, for example, for heated floors it is more reasonable to use mechanical liquid thermostats with a remote sensor.
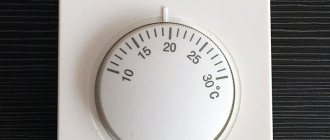
Adjustment of the response temperature of a membrane room thermostat is carried out using a control wheel with a scale, which is connected to the membrane mechanism. By turning the wheel, we move the membrane walls closer or further away from the control mechanism, thereby changing the temperature at which the electrical circuit will close or open. In other words, if the triggering mechanism is closer to the wall of the membrane, then the gas located in it only needs to change slightly in volume for it to trigger; accordingly, a lower temperature will be needed and vice versa. The adjustment wheel works on this principle.
Let's look at exactly how a mechanical thermostat can be used in the heating system of a house or apartment.
Using a mechanical thermostat in heating
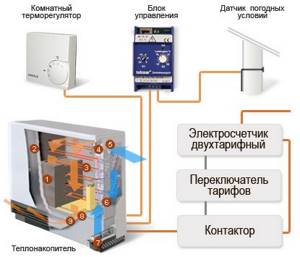
Most often, room mechanical thermostats are used in home heating, in conjunction with gas boilers. Manufacturers quite often design boilers to provide a connection diagram via a mechanical thermostat. The device is installed in the gap in the supply wire going to the boiler and when the air temperature in the room drops below the set threshold value, the circuit is closed and the gas boiler starts, starting to heat the room, maintaining the temperature of the coolant.
The basic diagrams for connecting a mechanical thermostat to heating or cooling are described in our article “Connection diagram for a mechanical thermostat”

Using exactly the same principle, home thermostats are connected to any electric heaters in rooms, be they oil heaters, infrared or any other used for heating indoor air. Thus, the heating process becomes fully automated, requiring virtually no human participation in its work after setup.
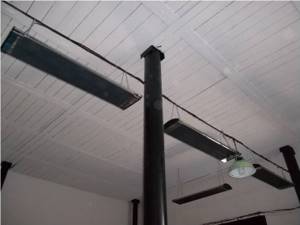
There are a lot of possible options for using mechanical thermostats; they are simply irreplaceable in heating automation because of their unpretentiousness and reliability. And the simplicity of the design allows manufacturers to produce mechanical room thermostats at a significantly lower cost than electronic ones, which is an important part of their popularity among consumers.
Overview of circuits
The difference voltage from the measuring arm is supplied to a paired transistor with a high gain, and an electromagnetic relay acts as a comparator. When the coil reaches a voltage sufficient to retract the core, it is triggered and connected through its contacts of actuators. When the set temperature is reached, the signal on the transistors decreases, the voltage on the relay coil synchronously drops, and at some point the contacts are disconnected and the payload is turned off.
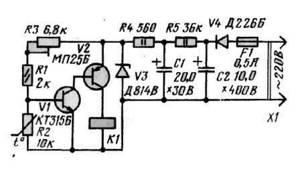
A feature of this type of relay is the presence of hysteresis - this is a difference of several degrees between turning on and off a homemade thermostat, due to the presence of an electromechanical relay in the circuit. Thus, the temperature will always fluctuate a few degrees around the desired value. The assembly option provided below is practically free of hysteresis.
Schematic electronic circuit of an analog thermostat for an incubator:
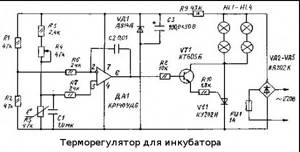
This scheme was very popular for repetition in 2000, but even now it has not lost its relevance and copes with the function assigned to it. If you have access to old parts, you can assemble a thermostat with your own hands almost free of charge.
The heart of the homemade product is the K140UD7 or K140UD8 integrated amplifier. In this case, it is connected with positive feedback and is a comparator. The temperature-sensitive element R5 is a resistor of type MMT-4 with negative TKE, which means that when heated its resistance decreases.
The remote sensor is connected via a shielded wire. To reduce interference and false operation of the device, the length of the wire should not exceed 1 meter. The load is controlled through thyristor VS1 and the maximum permissible power of the connected heater depends on its rating. In this case, 150 Watt, an electronic key - a thyristor must be installed on a small radiator to remove heat. The table below shows the ratings of radio elements for assembling a thermostat at home.

The device does not have galvanic isolation from the 220 Volt network; when setting up, be careful; there is mains voltage on the regulator elements, which is life-threatening. After assembly, be sure to insulate all contacts and place the device in a non-conductive housing. The video below shows how to assemble a thermostat using transistors:
Now we’ll tell you how to make a temperature controller for a heated floor. The working diagram is copied from a serial sample. It will be useful for those who want to familiarize themselves and repeat, or as a sample for troubleshooting the device.
Selecting a mechanical thermostat (thermostat)
Currently, there are a lot of manufacturers of mechanical thermostats, there are models from famous brands, but most often you will find unfamiliar, unknown names on sale. In my practice, I have built a large number of different mechanical thermostats and can advise the following:
— When choosing, be sure to pay attention to the maximum switching power. If it says that the thermostat is 10 Ampere, it will be possible to connect a load of no more than 2.2-2.3 kW to it. Thermostats with more than 3.6 kW of connected power are rare. If you need to connect more power, you will have to use a contactor, according to the connection diagram, the link to which I gave a little higher.
— Of the inexpensive thermostats, I liked this one — BALLU BMT-1 — you can buy it here. In design, it is completely similar to what is described in this article. It will definitely work for you for 3-5 years, and then it depends on the build quality of the particular model and operating conditions. For a dacha or a garage - just right!
If you need advice on choosing a mechanical thermostat model, write in the comments, I’ll try to help with advice!
Basic faults
The most common malfunction of homemade thermostats is instability of the thermistor readings caused by poor quality parts. In addition, there are often difficulties with setting modes caused by mismatches in ratings or changes in the composition of parts necessary for the correct operation of the device. Most possible problems directly depend on the level of training of the technician who assembles and configures the device, since skills and experience in this matter mean a lot. However, experts say that making a thermostat with your own hands is a useful practical task that provides good experience in creating electronic devices.
If you don’t have confidence in your abilities, it’s better to use a ready-made device, of which there are plenty on sale. It must be taken into account that a regulator failure at the most inopportune moment can cause serious troubles, the elimination of which will require effort, time and money. Therefore, when deciding on self-assembly, you should approach the issue as responsibly as possible and carefully weigh your options.

