Do-it-yourself exhaust umbrella for outdoor barbecue
Umbrellas for barbecues and barbecues are used mainly in closed gazebos, in which there is a stationary brazier.
Most often, such gazebos are designed according to the Finnish type: closed wooden structures with panoramic or regular-sized glazed windows.
An exhaust hood over the barbecue also performs protective functions, carrying away sparks when wood burns along with smoke from the brazier, preventing fires.
The design of the umbrella itself should be as smooth as possible so that unevenness does not reduce the traction force. Optimal materials for making your own or buying an umbrella for a barbecue: stainless steel or other similar metals.
The maximum smoothness of the hood is also guided by the minimum accumulation of products from the fryer, which it will draw in: fat, soot, soot. These elements can accumulate in uneven metal and thereby contaminate and clog the operation of the hood. It is easier to periodically clean the product than to clean a chimney clogged with deposits.
When choosing a ready-made exhaust hood in a store, you should pay attention to the internal volume of the chimney and exhaust pipe. The umbrella should be larger than the grill underneath it
A hood that is not suitable in size simply will not do its job.
A good exhaust system will also protect people near the barbecue from getting combustion products into their lungs.
The smoker may have additional functions that affect the price of the product:
- fan;
- spark suppressor;
- Other functions for removing smoke from the room are also possible.
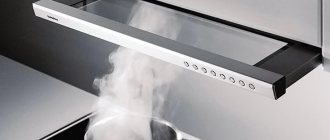
The fan will make the umbrella work better, creating additional traction. A device that extinguishes sparks is responsible for safety when using the barbecue.
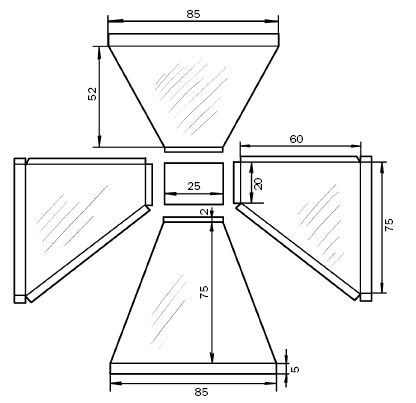
It is also possible to make a metal exhaust hood with your own hands, but you cannot do without an accurate drawing.
Selecting and lighting coal
The metal version of a do-it-yourself hood is the most common and easiest to design. For a metal barbecue, a brick hood would look inappropriate and ridiculous.
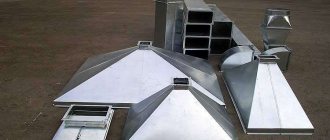
The smoke hood itself is a dome-shaped structure with a diameter of about 1.5 m of round, cone-shaped, rectangular, and square shapes. The best material for its manufacture is sheet steel with a thickness of 2 mm. Some use copper. The hole in the center of the dome is connected by the edges to a pipe, the height of which is from 2 to 3 meters.
It is not recommended to use asbestos cement pipes, as this is hazardous to health.
A homemade exhaust hood is attached with posts to the fireplace above it or suspended from the ceiling of the gazebo, but the pipe always exits in the center of the gazebo roof. In the case of design without supports above the barbecue, the umbrella is also attached to the ceiling with chains, for reliability. The roof material in contact with the pipe must be fire-resistant, since the pipe will heat up during operation. Metal smoke collectors are very functional and easy to maintain. They are easy to clean and perform their functions effectively if you clean them at least occasionally.
To prevent rust from appearing on the hood over time, it is worth covering it with a special substance.
Some problems
All hoods, purchased or homemade, may have problems:
- When lighting a barbecue, the smoke does not go into the smoke collector, but diverges to the sides. This is the case if the hood is not electric and is not equipped with a fan that can be turned on as soon as work on the grill begins. This happens because the smoke, when ignited, does not have time to heat up and has a low temperature. It is the same density as the air in the room. These factors are key to the lack of draft that will appear as soon as the fire in the hearth gets stronger and the smoke increases in temperature and density.
- If the smoke collector cannot cope with removing all the smoke, this is a sign that the cross-section of the chimney is small and it simply does not have time to exhaust all of it. This happens more often with brick hoods, the chimney cross-section of which should be at least 26-26 cm. In metal hoods, the pipes have a more aerodynamically convenient shape, the minimum diameter of which should be at least 15 cm.
- The top of the chimney must be at least 3 meters above the ground so that the smoke goes higher and dissipates into the air.
Fireproof paint for barbecue
A correctly selected or designed umbrella for the grill will protect your rest and make cooking on a brazier more comfortable.
Characteristics of manufactured umbrellas
- At the client’s request, instead of standard AISI 430 stainless steel, 304 can be used. It differs in thickness and a number of other characteristics.
- The standard order option has a polished, smooth surface. If necessary, it can be made matte or mirrored. The choice depends on the placement of the equipment itself and the interior of the room.
- The branch pipe is located on the equipment after discussing its location, required dimensions and cross-section with the customer. This is necessary so that during installation you do not make a mistake with the location of the insert into the system.
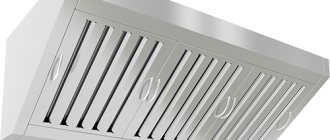
- Each unit comes with a high-quality grease filter that removes grease droplets and other impurities from the air. It can be easily removed for sanitary treatment.
The data is checked with the customer several times to take into account all the basic and additional requirements for the finished product. The ventilation hood is covered with a transparent film for protection before shipping.
Step-by-step production
Drawing of a metal hood
You can make a hood for a barbecue in a gazebo with your own hands. Ability to operate a welding machine is required. The step-by-step instructions are quite simple.
- Develop a drawing.
- Clean the corners from grease and cut to size.
- The lower base is welded from a metal profile and corners - a narrower opening of the dome.
- Assemble the lower part, which is wider. In shape it resembles a frame for a box with a low side.
- Weld the side elements onto the corners of both frames. The result is some semblance of a tetrahedral pyramid with a rectangular base.
- In the same way, the frame for the smoke collector is assembled - parts of the pipe of the required cross-section.
- After the seams have cooled after welding, they are processed with a grinding disc. It is recommended to paint the structure with heat-resistant paint.
- The components of the umbrella and smoke collector are marked on a sheet of steel or profiled sheet and the metal is cut. Bend the edges. The smoke collector is sheathed immediately. The sheets are secured with rivets.
- A metal sheet is installed diagonally into the frame of the hood. This plate improves traction. It is fixed in the lower rectangular part of the umbrella.
- The cut out fragments are sheathed on each side of the hood and secured with rivets.
- The finished product is painted with heat-resistant paint.
How to make it yourself?
A metal hood has the following advantages:
- light weight;
- it is possible to install additional options;
- low price;
- simplicity of design;
- ease of installation.
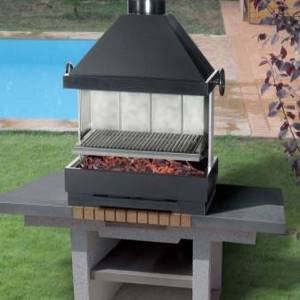
Brickwork has an undeniable advantage: such a structure can stand for a thousand years without visible damage.
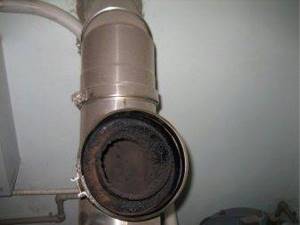
After all, it has a detrimental effect on the quality of prepared dishes and the operation of the air duct itself. Traction will sooner or later decrease due to accumulated dirt, so it is best to do preventive cleaning.
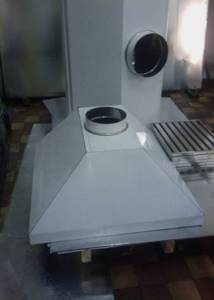
It is important to decide at the very beginning which type of exhaust device is preferable. The materials needed to create a metal hood are simple:
The materials needed to create a metal hood are simple:
- iron sheets 1–3 mm;
- corners with a section of 30 x 30 x 30 mm;
- bolts;
- thermal primer.
The height of the umbrella can reach 2 meters, the optimal size of the barbecue is 110 x 65 cm. The umbrella is composed of three units: a base, a dome with internal fastening and a pipe.
It’s not difficult to make a barbecue hood with your own hands. First, markings are made on a sheet of metal with a marker, which corresponds to the previously drawn sketches. Then, using a grinder, the necessary components are cut out, the parts are assembled and the joints are welded.
Brick hood has its own characteristics. It is created from special bricks (fireclay) mixed with clay and sand. The clay must be of a certain grade and soaked in water for 48 hours. In a brick hood, a special frame is made on which the brick is placed. In this case, the material must be treated with special fire-resistant enamel.
This is followed by brick laying. The base, that is, the first rad, is laid with the pushing side of the brick, the shortest. A typical smoke collector consists of 9–11 rows. The masonry is made in such a way that it tapers, that is, the displacement occurs about 16 mm at each level, at the end part 35 mm. Then a square-shaped pipe is laid from brick.
At the top, the pipe has a cross-section of 265–265 mm. This figure was obtained empirically; it is optimal for the operation of the retractor, while the height of the pipe is about 3 meters.
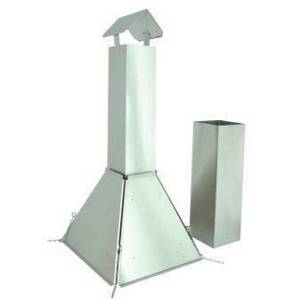
It is important to wait at least 3-4 weeks after finishing the masonry to allow the structure to settle for greater strength. There is no rush to use a “raw” structure
This can lead to deformation and cracking of the material.
The surface is covered with a special primer, which will protect it from exposure to high temperatures. As you can see, technologically there is nothing overly complicated in such work; masonry can be done by a person with minimal construction skills.
When working, be sure to use safety glasses and gloves.
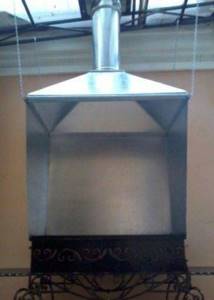
How to make an exhaust hood from metal sheets
How to make a hood for a barbecue without spending a lot of time and money on it? A light and durable hood over the grill in the gazebo will be made from the following materials:
- Iron. Sheet thickness 3 mm.
- Several metal corners.
- You can't do without a welding machine. A mask will be required to protect your eyes and face.
- A drill equipped with attachments for mixing concrete.
- Screws.
- Riveter and grinder with discs suitable for cutting metal sheets.
- Heat-resistant paint.
Exhaust umbrellas for barbecues are constructed from metal corners. First, the frame is welded and then sheathed with metal sheets. For a medium-sized gazebo, it is enough to make a hood 1.5-2 m high. It is suitable for a barbecue measuring 105x60 cm. You will need a machine for welding. In addition, electrodes need to be prepared for this equipment.
If we talk about the design, the exhaust hood consists of 3 parts, including:
- Smoke exhaust pipe.
- Exhaust dome for grilling with an internal jumper. It is necessary to improve traction.
- Base. It is mounted on the grill.
The hood dome, which is made of sheet copper, looks very nice. But you need to take into account that making a dome from copper will be difficult if a beginner takes it on. But you can make a hood with your own hands from simple sheet iron without an assistant, but it will take more time.
It is prohibited to use asbestos cement pipes in construction. The material from which they are made is heat-resistant, but it is hazardous to health. A vertical metal pipe for exhaust can be installed on the site.
Even before starting construction, it is necessary to decide how the metal exhaust hood will be installed. It can be suspended from the ceiling of the gazebo, in which case chains will be used for fixation. Another option would be to install a hood on stands above the fireplace. The exhaust pipe will pass through the center of the gazebo roof. In addition, the exhaust hood can be installed on the grill. It’s better to call an assistant, then the work will be done faster.
When installing a smoke hood, you should pay attention to the roof material. In those places where it is adjacent to the pipe, fire-resistant materials must be used
For example, a galvanized roof would be a good option.
A metal smoke collector can have a square or rectangular cross-section. It is functional, has excellent aerodynamics, so it captures smoke well.
To make a hood from a metal sheet, you must do the following:
- Clean the metal corners; to do this, remove the factory grease from them with a rag.
- Based on the drawings, mark the material.
- Use a grinder to cut the corners into pieces. You need to wear safety glasses when working.
- Assemble all elements and weld parts of the structure.
A homemade hood can be made of stainless steel or other material. Before use, the iron must be coated with a heat-resistant anti-corrosion coating. It is recommended to make a cap over the pipe.
Tools and materials
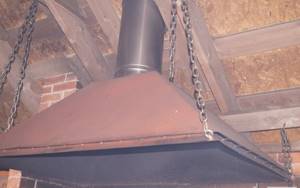
It’s easier to make a metal exhaust hood for the barbecue with your own hands. For this you will need:
- steel sheet 1–3 mm thick;
- iron corners with a cross section of 30*30*30 mm;
- bolts for fastening;
- grinder with diamond suit;
- welding machine;
- hammer and riveting tools;
- plumb line and angle to check verticality.
To secure the dome, you will need a metal or brick stand. In a gazebo or on a veranda, the hood is suspended on chains from the ceiling. It looks impressive and interesting.
Specifics
The main aspect that should be taken into account is this: the hood dome is necessarily larger in area than the equipment over which it is located. This way the smoke is collected much more efficiently. The chimney should have a narrowing and bend. This improves the dynamics of exhaust combustion products and prevents reverse draft. The top side of the pipe is usually positioned at least 3 m from the ground. This provides the necessary exhaust conditions. If the cross-section of the chimney is incorrectly calculated, the result is ineffective removal of combustion results.
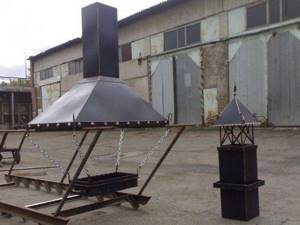
Every owner is especially proud when through his own efforts he creates both a barbecue and a hood for it
Thanks to additional components, the efficiency of the hood is improved. But this requires additional costs. These components are:
Spark absorber The position is the top of the chimney. This is a tubular metal sieve. Smoke flows easily through it and sparks are extinguished. Grease catcher. This frame has a special cassette inserted (the cassette is replaceable) for capturing fat. When this device becomes dirty, it needs to be rinsed thoroughly or replaced altogether.
It is important here how the model is set up and what filtering agent is used. Fan
It seriously develops traction power. When installing it, it is necessary to make competent calculations regarding the parameters of the required equipment.
Peculiarities
Barbecues can be portable or stationary. The mobile version is a simple design that you can assemble yourself. There is no need to make a hood for such a device.
A stationary barbecue is a more monumental structure that occupies a large volume in the room.
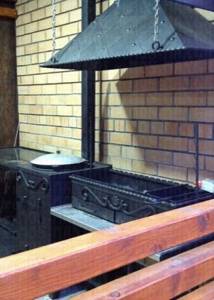
This unit is designed to prepare meals for a large number of people. Significantly more fuel is needed for its normal functioning. Without a good exhaust hood, such a design will not work effectively.
At first glance, there is nothing complicated about such devices. However, there are nuances that you should know. A large barbecue must have good ventilation, which would allow combustion products to be removed. Such devices, including barbecues, are often sold with ready-made hoods.
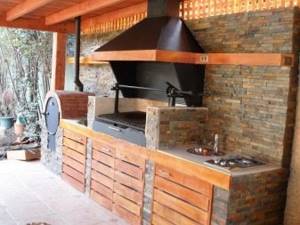
The device itself is made according to the principle of an exhaust hood; It is a small dome in the shape of a hemisphere, cut pyramid or parallelepiped. Often such hoods are decorated and become an integral part of the overall interior. They look natural and organic.
Mandatory condition: the area of the dome must be 30 percent larger than the area of the equipment itself. Only in this case will it be possible to effectively collect and remove combustion products. A necessary condition is also the presence of a tall pipe and a fan.
No less important characteristics:
- The chimney must have a narrowing and bend, which will generate good draft. The optimal distance between the ground and the top point of the pipe is at least 2.8 meters. The higher the pipe, the better the traction will be.
- A heat-resistant spark arrestor is placed on the top of the pipe. Its design is similar to a sieve through which smoke passes freely.
- It is necessary to install a grease trap in the form of a frame with a replaceable container. Fat leaking from hot meat accumulates in it. Such a container is periodically changed or cleaned, depending on the design.
- There must be a smoke exhauster - a fan that creates additional air exchange and increases smoke removal.
All of the above points are simple in design.
It is important that they are fitted correctly.
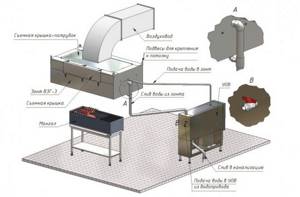
Specialized stores sell ready-made “umbrellas” made of metal, which have a channel smoke collector. They can be attached to homemade equipment.
Often, the hood in large barbecues is equipped with a fan , as well as a forced-air blower, which provides additional draft. The device itself has standard parameters and is not technically complicated. If the equipment is non-standard, it can be ordered from a specialized organization. For example, there are companies that make hoods even with complex pipe turns or an open design.
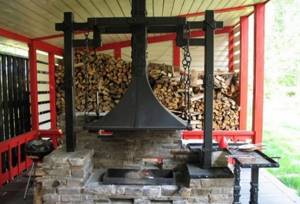
Fulfilling an individual order with additional options can be quite expensive. In order not to spend too much, you can do everything you need yourself.
Standard parameters of a four-slope hood for a wood-burning barbecue:
- metal that is suitable for such products has a thickness of 1 to 3 mm;
- smoke collector length 855–1550 mm;
- width – 660–950 m;
- a pipe with a height of at least 3 meters;
- pipe cross-section from 255 mm.
Sizes may vary significantly. However, it is important to keep the proportions unchanged.
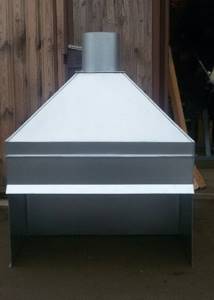
Purpose
A hood is needed for the tandoor to work properly. Its main purpose is to quickly remove smoke from the room generated during operation of the device.
The hood also allows for high-quality ventilation. And its last most important feature is the creation of conditions for better traction. Thus, a tandoor works better with an umbrella, which perfectly attracts clean air, removing smoke, which improves the functioning of the stove.
As for the design, the tandoor hood can be simple or very beautiful, decorated in oriental style
If a stylized model is chosen, it will also help to dilute the design, create an accent, and draw attention to the unique oriental attribute
Brick hood
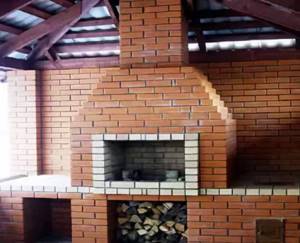
They have their own merits. This is a monumental, durable structure. With the right structure and the skill of the craftsman, such a barbecue will delight and decorate the area for many years. Advantages of a brick hood:
- Durability;
- Low heating of the brick surface;
- Aesthetically pleasing, with the help of a brick barbecue with a hood you can create a practical architectural miniature on your site;
- Combines the functions of a fryer and a hood.
Making a brick hood
If you wish and have good experience in construction, you can build a grill with a brick hood yourself. For this you will need:
- Brick;
- A mixture for laying bricks, or a solution of clay and sand, in a ratio of 7 parts clay to 3 parts sand;
- Metal corners to simplify installation of the hood;
- Tools for masonry, for cutting and welding metal corners.
Important: to build a hood and barbecue bowl, use only fireproof bricks (fireclay) and mixtures. Otherwise, under the influence of high temperatures, the entire structure will collapse
Instead of a heat-resistant mixture, it is permissible to use a solution of clay and sand.
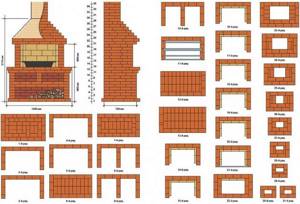
Installation sequence:
- Mark the position of the hood, not forgetting that it should be larger in size and volume than the grill itself;
- First, the supporting walls are laid out on which the smoke collector will rest. Rear and two side;
- A metal frame made of corners is installed on the brick supports. By analogy with a metal hood, it also has the shape of a truncated pyramid. First of all, the lower part is welded, then the upper narrowed part of the frame, and they are connected by corners, also by welding. For ease of masonry, you can assemble a chimney frame from corners, welding it to the frame of the hood;
- The finished frame is covered with brick. The first row is laid out with bricks perpendicular to the rear supporting wall, the second and subsequent ones - parallel, with an offset of 17 mm, creating the necessary pyramidality;
- The chimney is laid out with or without a frame, subject to a minimum internal diameter of 120 mm;
- Install a plug umbrella that protects from precipitation.
Do-it-yourself barbecue hood: drawings, instructions, options
If you have a brick or concrete barbecue at your dacha, you can make it more convenient - remove smoke from it and improve combustion. A DIY barbecue hood is a useful and practical project for every summer house.
If a homemade barbecue without a hood in the open air still creates some pleasant impressions, then a gazebo with a barbecue is simply impossible without a hood. Working on an exhaust hood for a barbecue requires an average level of training and the availability of certain tools, which may be difficult for a beginner.
But at the end of the article you will be able to find both lightweight versions of the same hood and more advanced ones. Let's start with the basic designs and drawings of a barbecue hood.

Hood for barbecue. Tools and materials
- Iron sheet 3 mm.
- Metal corners 20x20x3 mm.
- Rivets, screws, heat-resistant paint.
- Angle grinder (grinder) with discs for cutting metal.
- Welding machine, electrodes, mask.
- Drill with attachments for concrete.
- Riveter.
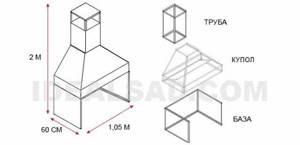
The umbrella consists of a frame made of metal corners, sheathed with metal. The height of the umbrella is 2 m, it will be installed on a grill measuring 105x60 cm.
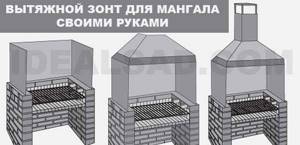
The umbrella consists of three parts: the base, which is attached to the grill; domes with internal bridge to improve traction and pipes.
How to make a barbecue hood with your own hands
Before starting work, measure your grill; if your dimensions differ, then you need to adjust the dimensions of the hood.
Before work, new metal corners must be cleaned from factory grease with a clean rag. We use a grinder to cut metal corners (dimensions for each part of the grill are in the drawings below). To avoid metal shavings when cutting metal, be sure to wear safety glasses.
- We weld 2 sides of the hood base from metal corners:
- Then we weld the corners to them for the back surface of the grill base:
- Assembling the lower part of the dome of the exhaust hood for the barbecue:
- We weld the corners of the back of the barbecue dome onto it:
- Assembling the side parts of the barbecue hood dome:
- Assembling the pipe:
- After welding, we process the seams of the hood with a grinding disc. In order to protect the metal, we treat the frame with heat-resistant paint.
- We mark the metal for covering the exhaust hood:
- We bend the edges and fold lines, securing the sheet to the edge of the workbench:
- We cover the base of the hood with metal using rivets and an installation tool (rivet gun):
- Before covering the hood dome, we add a metal plate diagonally inside, which will help improve draft. This plate is a metal sheet measuring 99x34 cm with 2 cm edges on the edges, to which it is attached to the bottom of the dome.
- We mark and cut out the metal for lining the hood dome:
- We cover the pipe of the exhaust hood for the barbecue:
- We paint the grill hood with thermal paint.
- We install the base on the grill, securing it to the brick with self-tapping screws for concrete (brick).
- We install the dome, securing it with rivets to the edge of the base.
- We install the pipe, putting it on the dome, using rivets for fastening.
Barbecue hood: design options
You can modify the basic version of the hood by making other hood options. Often the base is laid out of brick, and then a dome with a pipe is installed on it.
- The pipe can be either finished metal or brick.
- In addition, instead of a U-shaped base, you can make a corner one:
Exhaust hoods made of brick are made according to the same principle - a metal frame is welded, which is lined with refractory bricks. - In addition to brick, the hood is often decorated with wild stone.
- A barbecue hood can also be decorated with wood - a metal exhaust hood is lined with wood using thermal insulating gaskets.
- A DIY barbecue hood will create more comfort for you, eliminating annoying smoke in your eyes when cooking and leaving the aroma of an open fire for ready-made dishes.
If you are just starting to think about how to make a barbecue yourself, you will be interested in our article Do you want to make a barbecue with your own hands: 25 photos and drawings
Installing a ventilation pipe on the roof
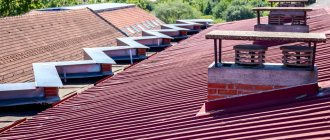
Before we look at the whole process, let's start by preparing the tools and materials for the job. I would like to immediately make a reservation that their choice directly depends on what roofing material is used in the house. The most popular solutions for roofing are metal tiles, slate, soft roofing or corrugated sheeting. We will look at the process of removal through metal tiles. To do this you will need the following tools:
- ventilation pipe (it’s easier to use the ventilation passage assembly, as in the photo below);
- jigsaw and electric drill;
- metal scissors for cutting metal tiles;
- chisel;
- insulation material;
- level, tape measure, marker;
- sealing gaskets;
- screwdrivers, screws and sealant.
The tools and materials are simple, so they do not require special professionalism in the work. Even a beginner can cope with this task. When everything is ready, you can start working.
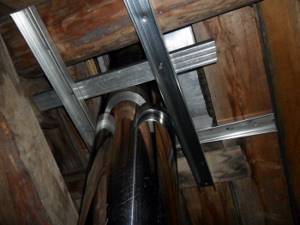
First you need to determine the location where the ventilation pipe will be located. Above we reviewed some tips and requirements, according to the rules specified in SNiP. Having decided on the location, you can begin marking the roof. It is done using a marker, tape measure and level. If you purchased a ready-made ventilation passage unit, then the delivery set includes a special template that simplifies the task. The material is cut along the intended contour. Since we are talking about metal tiles, for cutting you will need a chisel, a jigsaw and metal scissors. The same applies to corrugated sheets
It is important to consider that the metal is coated with a protective layer that prevents corrosion. In order not to violate its integrity, it is better not to use an angle grinder. Ideally use metal scissors
For slate, it is recommended to use a grinder. According to the markings, a corresponding hole is cut. Bituminous shingles are cut with a special roofing knife with a rounded blade.
Ideally, use metal scissors. For slate, it is recommended to use a grinder. According to the markings, a corresponding hole is cut. Bituminous shingles are cut with a special roofing knife with a rounded blade.
The same hole is made in the entire roofing pie: waterproofing, vapor barrier, insulation material. It turns out that we made a through hole through the roof into which the ventilation pipe will be installed. Using the template, markings are made for the location of the passage unit, and holes are drilled for fixing the screws. After which the roof is cleaned of dust, sawdust and debris. Before gluing the gasket, the area is degreased.
Next, a rubber seal is taken and pressed into place in order to obtain the shape of a metal tile sheet. A layer of sealant should be applied to its lower part, where the seal will adhere to the metal tile. Then put the seal in its place. Then the seal is rounded off with screws. If everything is done correctly, excess sealant will come out from under the gasket. They are smoothed out and removed with your finger. The passage element for the pipe is installed on the sealing rubber and fixed with self-tapping screws. The seal straps must be tightened onto the pins of the pass-through element.
All that remains is to install the ventilation pipe in its place, check its vertical position and secure it to the passage element with screws.
This completes the installation. The roof exhaust ventilation pipe is installed and ready to perform its functions. It’s really not recommended to just leave it like that. There are some tricks to protect the ventilation from birds, precipitation and improve draft. For this purpose, umbrellas, droppers and a deflector are equipped. You will see detailed information about installing a ventilation pipe through the roof in this video.
Umbrella for barbecue: design features of the hood
Cooking meat, fish and vegetables on the grill is a traditional, pleasant, festive affair, but it has its drawbacks. The process is sometimes interrupted by bad weather, and the smoke wafting through the yard creates some discomfort for those around. To make grilling barbecue a pleasure, use a barbecue umbrella. The element is installed above the firebox and serves as a smoke exhaust.
Useful functions and operating principle
Making the exhaust part with your own hands is a feasible task. The smoke collector for the barbecue performs two main functions:
- Removal of volatile compounds. In essence, an umbrella is a chimney that raises the gases generated during combustion. Like the barbecue oven system, the action is based on draft force. With sufficient combustion intensity, the smoke heats up to such a temperature that it becomes lighter than the surrounding air and tends upward. If an umbrella is installed, combustion products do not have time to dissipate, but are collected in a pipe and released only at the end of the chimney. Thus, all unpleasant compounds disappear without causing harm to humans.
- Protection of the frying surface from precipitation. This is ensured by the presence of a smoke collector, which, due to expansion, covers the entire grill. Typically, this function is performed by a gazebo or canopy, under which a frying device is installed, but an umbrella allows you to use the grill both under the roof and in an open area.
Umbrella design
Exhaust ventilation is a simple device. Precision is important in manufacturing, so it is recommended to use a drawing. The umbrella consists of 3 parts, each of which serves for gradual smoke removal:
- Smoke collector, or chimney. The task of this element is to collect all volatile compounds from the frying plane into one pass of a narrower cross-section. For rectangular and square barbecues, the classic shape of the smoke collector is a truncated pyramid: 4 sides tapering towards the top. For devices with a round firebox, the collection is a cone.
- A pipe, or, actually, a chimney. The function of this element is to raise the collected smoke to a specified height. As a rule, 3 meters above ground level is sufficient: this is higher than a person’s height and does not allow combustion products to fall in the wind. The shape of the pipe depends on the collector: rectangular cross-section for a pyramidal nozzle, round for a cone. The main thing is to hermetically connect the internal volume.
- An umbrella is a small but important element. It is installed above the pipe at a height of 10-20 cm and protects the chimney from precipitation without interfering with the removal of combustion products.
Materials
The choice of material for the exhaust device depends on the design of the barbecue. If the structure is brick, then both metal and brick are suitable for making an umbrella. How do these materials differ:
- Strength and rigidity. Masonry has greater mechanical resistance than metal. Of course, no one is going to drive a tank into the barbecue, but these qualities are useful during operation: the brick structure will not be damaged by accidental impacts, strong gusts of wind, and with high-quality masonry it will not deform over time.
- Service life. Metal rusts, fades in the sun and at high temperatures, so its service life is significantly lower than that of brick.
- Complexity and production time. To make an umbrella from a sheet of steel, you do not need to have masonry skills, mix a binder mortar or carry bricks. It is easier to make a metal hood.
- Cost of expenses. And on this point, steel wins. Buying a sheet of iron will be much cheaper than buying bricks and mortar.
Both steel and brick umbrellas do their job well. There is no difference in the removal of combustion products.
Metal chimneys for: 1) barbecue, 2) barbecue
Features of brick construction
The basis of the dome is an iron frame welded from a strong corner. Before laying, it is treated with a primer and painted for better protection. Since the temperature directly above the firebox is quite high, the smoke collector is made of refractory bricks. The shape of the structure is stepped, tapering.
The chimney is made of both fireclay and stove bricks. If the barbecue is located in an open area, drainage slopes are made of heat-resistant roofing material on the walls of the smoke collector. Then, during precipitation, moisture will not destroy the building structure. The umbrella over the chimney is metal.
Purpose and types of chimney canopies
As for the protective properties of umbrellas, not everything is as simple as is commonly believed. For example, when talking about the purpose of various nozzles, among other functions, protection of chimney pipes from condensation is mentioned.
Pipe cap
This statement is incorrect, since condensation forms inside the pipe from the temperature difference between the combustion products and the outside air, and the umbrella is located outside and has nothing to do with this process.
Why then are visors needed? We list their main functions:
- give the outer section of the pipe an aesthetic appearance;
- protect the internal cavity from the entry of various debris and foreign objects;
- extend the service life of a brick chimney, protecting it from precipitation;
- increase the draft and do not allow it to be overturned by strong gusts of wind, provided that the design of the hood provides for this.
In fact, decorative caps in no way improve the draft of the chimney; on the contrary, they create additional resistance to the flow of emitted gases. The exception is two types of nozzles:
- similar to industrial exhaust deflectors;
- weather vane - deflectors.
The operating principle of the first type is as follows: the air flow from the wind load washes the cylindrical deflector casing, which causes a slight vacuum to appear inside it.
Air flow from wind load
It turns out that the umbrella-deflector still increases draft, although in the absence of wind it, on the contrary, creates even greater resistance to flue gases. How it works is shown in the pictures:
Chimney cap
The second type is much more effective. The body in the form of a half-cylinder with a weather vane petal can rotate on the pipe due to the bearing. The petal ensures that the body is positioned so that it is always turned “with its back to the wind.” Thus, a vacuum is formed inside the half-cylinder and the smoke draft increases. In addition, such a chimney cap 100% protects it from the effect of overturning the draft when blown by the wind. The operating principle is shown in the diagram:
Body in the form of a half-cylinder with a weather vane petal
