Ten to fifteen years ago, promotion of laminate boards in the consumer market was somewhat difficult. In particular, this was due to the fact that underfloor heating systems installed under the floor covering were popularized, and laminate, due to its composite origin and low thermal conductivity, was not suitable for use in conditions of constant heating. The manufacturers of this material did not want to put up with this state of affairs, and therefore tried to create a laminate for heated floors. Let's figure out how it differs from the usual one, and how to understand when buying that what you have in front of you is exactly what you need.
Laminate for heated floors: selection criteria and installation features
Why was laminate not suitable for heated floors before?
Of course, we are wondering why previously it was impossible to choose laminate as a finishing coating for a warm floor, but now it is possible. What was wrong with it, and what did the producers work on?
1. Laminate board is a multi-layer product, the role of the supporting layer is played by HDF - high-density wood fiber board. The binder in this material is melamine resin, which contains an aqueous solution of formaldehyde.
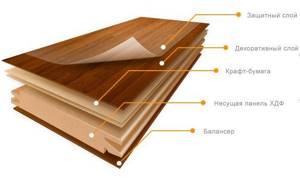
Structuring laminated boards
In certain concentrations, this substance is harmless - it is even used in pharmacology and cosmetology. But when heated - and the temperature of the heated floor is up to about +35 degrees, it begins to emit vapors, worsening the microclimate of the room, which is contrary to SanPiN standards.
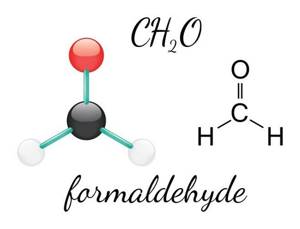
Formaldehyde formula
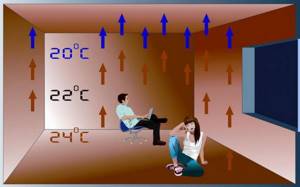
2. Another negative point was the fact that due to the low thermal conductivity of the laminated board, the efficiency of the heating system was greatly reduced. At the same time, the desire to increase the temperature in the room only led to an increase in coolant costs. That is, the tandem of laminate with a warm system became economically infeasible.
The laminated board had low thermal conductivity
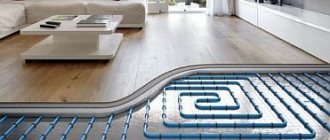
3. And the third point, due to which warm systems, especially water ones, did not work well with laminate flooring, were temperature fluctuations due to cooling of the coolant, which caused any wooden or wood-like flooring to deform. The reason is a large number of cycles of linear expansion and compression.
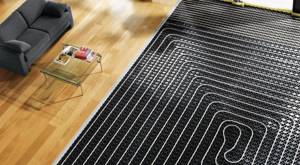
Laminate flooring for water heating
Prices for Kronospan laminate
Laminate Kronospan
Criteria for selecting a suitable substrate
The selection of the substrate is carried out taking into account the floor covering used and its thermal conductivity coefficient.
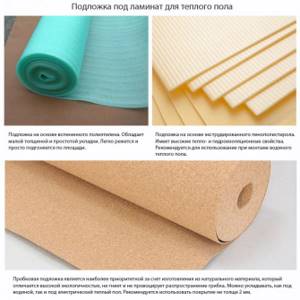
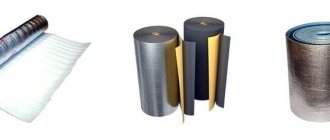
Substrates for flooring based on foamed polyethylene, expanded polystyrene and natural cork
It is important to take this indicator into account, since the use of non-specialized substrates of varying thickness can lead to overheating of the heating system and uncontrolled energy consumption.
The specialized substrate is made of extruded polystyrene or expanded polyethylene foam. Standard thickness is 1.5-3 mm, thermal conductivity coefficient is 0.04-0.08 m²*K/W.
For example, the Arbiton substrate of the IZO-FLOOR THERMO brand is made of extruded polystyrene, has a thickness of 1.6 mm and a resistance of no more than 0.06 m²*K/W. The Quick-Step Uniclic Plus brand underlay is made of polyethylene foam, has a thickness of 2.1 mm and a thermal conductivity coefficient of 0.059 m²*K/W.
In practice, polyethylene backing lends itself well to cutting and is easy to lay and join. The polystyrene coating has high thermal and waterproofing properties, which makes it possible to lay it together with a water-heated floor.
In addition to the above materials, a natural cork backing can be used for installing laminate flooring. This material meets all the requirements - thermal conductivity 0.042 m²*K/W with a thickness of 2 mm.
Cork is an environmentally friendly material, does not rot, and does not contribute to the activity of fungi and parasites. It is a direct alternative to coatings made from synthetic products. The only negative is the price, which, together with laminate, can exceed 1000-1300 rubles/m2.
How the problems of harmful fumes were solved
It is clear that the number one problem is harmful fumes, for which, however, there are standards. In Europe, all products containing formaldehyde are marked E1 (with an emission of less than or equal to 0.124 mg/m³ of air), or E2 (with an emission of more than 0.124 mg/m³). On the Internet you can find statements that there is also class E0, which corresponds to this quality when no emissions occur when heated to 28 degrees. But this is not true.
The well-known furniture manufacturing company IKEA tried to set its own emission value E0.5, equal to half E1, but such a class did not receive official recognition. So the E1 value, which is considered absolutely safe for humans, was and remains minimal, and since 2006 it has become mandatory for manufacturers of all types of board materials.

Class E1 - the safest
Russian manufacturers are also guided by this standard. Americans have their own standards, which, it must be said, are very similar to European ones. But Japanese standards include 4 levels, from F* (the most harmful) to F****, which is the safest.
The product’s compliance with a particular class is indicated by the marking, but what it will be depends on the country of origin.
Thermal insulation properties
Thermal insulation properties
The thermal resistance coefficient indicates how much heat can be transmitted by the coating. The smaller it is, the better thermal conductivity the material has. It should not exceed 0.15 m²*K/W. This factor applies to the entire flooring system, i.e. laminate and underlay.
In other words, the sum of the thermal resistance coefficients of these two elements should not exceed the above figure. Ideally, this figure is 0.1 m²*K/W. Therefore, when purchasing, you first need to select each component of the system, while summing up their coefficients. Only after this should you decide what material you can choose.
If the indicator is too high, the coating will overheat. This will lead to its destruction, as well as the appearance of the problems described in the first paragraph. The heating system will fail faster.
Marking features
The most stringent is the Japanese standard, according to which the lowest formaldehyde emission is 0.005 mg/m³. This is very close to zero - and accordingly, Japanese class F**** laminate for heated floors will be the best choice.
Here is how a laminate suitable for installation on a heated floor is marked:
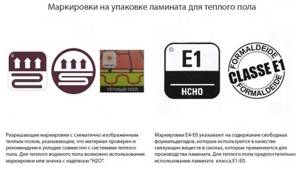
Marking on laminate
Among other symbols on the laminate, you can see the designation B1 - flame retardant. This means that such material will also withstand temporary overheating, which often occurs in water underfloor heating systems.
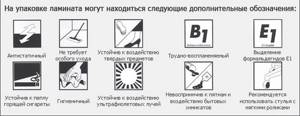
Marking of flame retardant laminate
Laminate from European manufacturers suitable for installation over a water system is usually marked with a zigzag pipe image with the words Warm Wasser above it. For electrical systems - both infrared and cable, there is a laminate labeled Underfloor heating.
Tips for choosing material for different types of systems
The use of wooden cladding over a warm water floor imposes a number of restrictions on the coating used. This is largely due to high humidity and the possibility of direct contact with moisture.
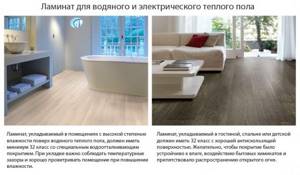
Laminate for heated floors - criteria for choosing material for the water and electrical systems
When choosing a laminate floor with water heating, you should consider the following nuances:
- marking - the presence of a specialized stylized icon or “H20” marking, indicating the possibility of use in conjunction with water heating systems. These coatings have a high density and have water-repellent properties;
- class - it is preferable to use class 32-33 with a locking type of connection. “Click” connection type, since if “Lock” locks are used and the laminate swells, its fixing elements may be damaged;
- safety - it is possible to use only safe coatings marked “E1” or “E0”, indicating the amount of formaldehyde substances included in the composition.
When laying on a water-heated floor, the use of particularly thick types of coating is not recommended. This greatly affects the thermal conductivity of the system and indicates the low density of the material used.
The purchase of laminate floor heating is carried out according to a similar scheme. The first step is to check the presence of special permitting markings, compliance with the class and the presence of a coating that prevents fire.
Otherwise, the choice of material for both water and electric heating systems is carried out taking into account the type of room and the requirements for cladding.
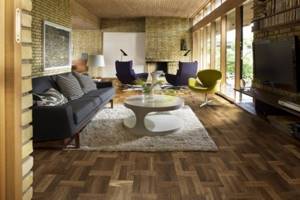
Which warm floor is best suited for laminate?
Laminate today has one of the best combinations of price and quality, and given its beautiful appearance and complete resemblance to natural boards, it can be used in a wide variety of interior design variations. We have provided some excellent examples below.

Hall

Covered terrace
Artistic laminate in the studio
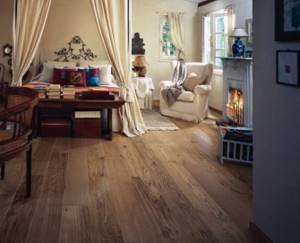
Zoned sleeping area

Kitchen-dining room
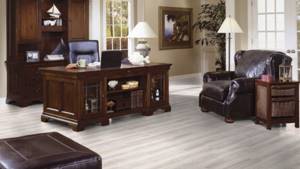
Cabinet
In order for all these rooms, especially those that do not have central heating or a fireplace, to be warm, you need to choose the right heating system that can be installed under the finishing coating. In stores you may be offered several options to choose from, but not all of them are equally suitable for laminate.
Types of heating systems
A general list of heating elements that form the basis of a heated floor is presented below:
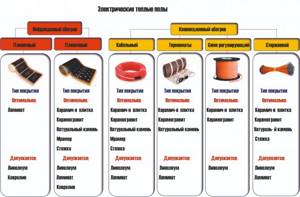
Types of underfloor heating elements
Only the very first of them, carbon infrared film, is the optimal choice for laminate flooring. All other types of heating elements (except for self-regulating cable), although not optimal, are acceptable.
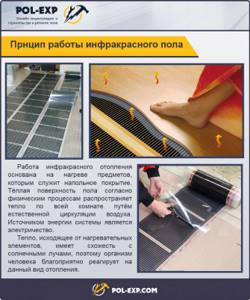
Floor systems can be infrared, which heat the floor due to infrared radiation, and convection, in which the heating of the coating is carried out due to warm air masses rising upward.
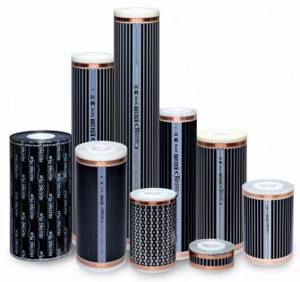
Infrared films
Infrared films include various types of films, differing mainly in the temperature of maximum heating. Based on this property, they are divided into low-temperature, universal and high-temperature, which can heat up to 55 degrees.
Such a high temperature threshold is not suitable for laminate, since +35 degrees is quite high for it. Therefore, for such a floor you need to take either a low-temperature model or a universal one.
Films are available on a bimetallic base, but for installation under wooden coverings it is better to give preference to models with carbon fillers in the form of graphite or carbon paste.
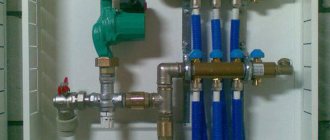
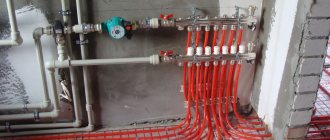
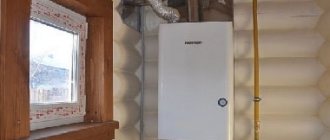
Note! Apartment owners should pay particular attention to the option with film heating, because a water floor, which is rightfully considered the most efficient from an economic point of view, is not allowed to be connected to central heating. Other types of connections require a separate boiler, which is generally unacceptable for most typical apartments.
In private houses, any of the four existing water floor connection schemes can be provided. The main thing is to carry out the installation correctly and select materials for the floor pie, which have already been mentioned above.
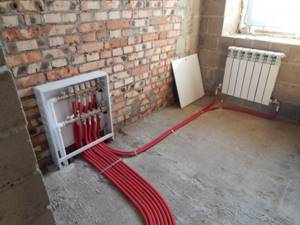
Connecting a water floor through central heating
Electric floors using cables for laminate flooring are also not the best solution, and there are several reasons for this. It will be difficult for the cable to warm up the floor cake, especially if it is not embedded in the screed, but is embedded in a prefabricated system. The temperature of the cable is fixed, so you won’t be able to “turn up the heat”, and the situation is worsened by the substrate.
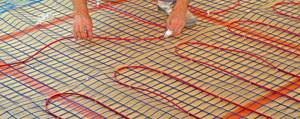
Installation of electric heated floor
In general, whatever one may say, it turns out that infrared film is the most convenient to install and is ideal for laminate flooring. We will talk about the features of installing such a floor in the next chapter.
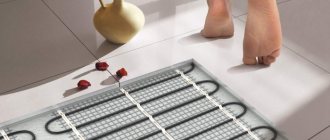
Installation of a film heater under laminate flooring
First of all, you need to calculate the heated floor area, excluding the places where cabinet furniture will be placed, in order to understand how much film you will need. Usually it is sold in sets of 2 linear meters, 50 wide; 80 or 100 cm, which also contains a suitable amount of backing, as well as crimped terminals, electrical insulation, installation wires, plus installation instructions.
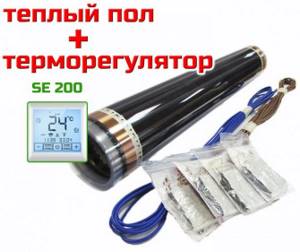
Standard film floor kit
The thermostat, without which it is impossible to control and regulate the temperature of the system, may not be included in the kit. In this case, you select the model yourself. For a small bathroom or balcony, this amount is quite enough. If you need to heat a large room, it is easier to buy a roll of film and consumables separately.
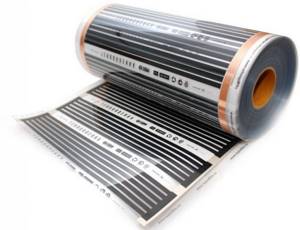
Roll of heating film
Before laying the film, the base must be properly prepared. If this is a rough screed, then it needs to be cleaned, cracks repaired, primed and leveled with a thin layer of self-leveling floor. Alternatively, you can perform dry leveling using any sheet material. They also use it to level the old wooden floor and make a base on the beam floors.
We talked about all the advantages and disadvantages, types, composition and process of pouring self-leveling floors in the article “Technology for pouring self-leveling floors.” Detailed step-by-step process instructions, useful videos and expert advice are included.
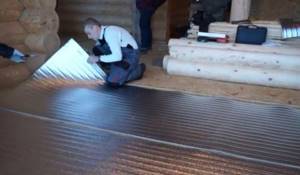
In our example, the film will be mounted in a wooden house on a plywood base.
Table 1. Step-by-step instructions
| Steps, photo | A comment |
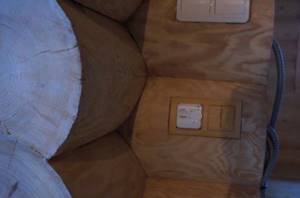
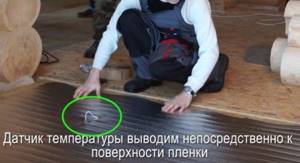
Step 1 - installing a thermostat and floor temperature sensor | When installing the film, the thermostat should already be installed. The place for it is usually chosen on the wall, near the switch. One end of the wire is connected to the thermostat, the second end with the temperature sensor is passed through a corrugated tube and placed on the floor near the wall with the switch. |
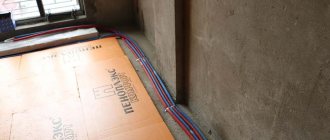
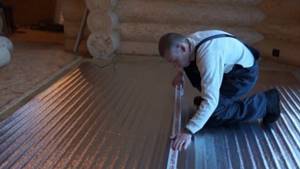
Step 2 - laying foil thermal insulation | Regardless of which areas of the floor the film will be laid on, the entire base is covered with foil insulation. |
Step 3 – bringing the sensor to the surface | Where the floor sensor is located, you need to cut through the substrate and pull it out to the surface - closer to the film. |
Step 4 – attaching the backing sheets | Since our base is made of plywood, it is very convenient to attach the insulation to it using a construction stapler. |
Step 5 – gluing the joints | The joints of the canvases must be secured with tape, preferably metallized. |
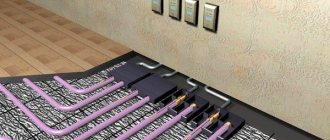
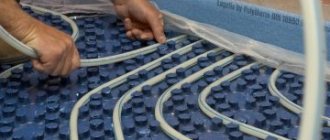
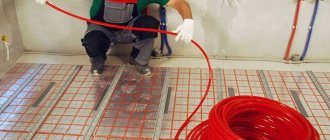
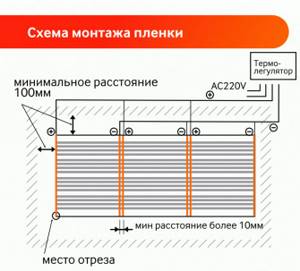
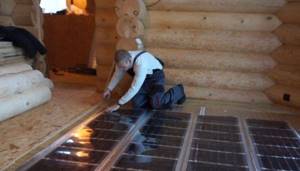
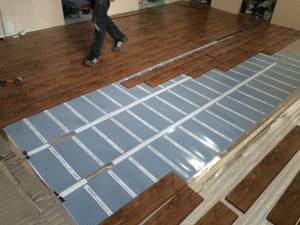
Step 6 – laying the film | Now you can mount the film, following the installation diagram shown in the picture. Please note that the IR film is laid in strips with a pitch of 10 mm, and a distance of at least 10 cm from the walls. |
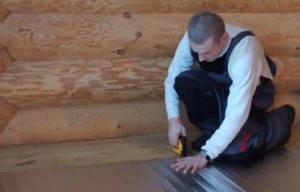
Step 7 – fixing the film | The film, like the substrate, is fixed to the base - for this it has a special edge. |
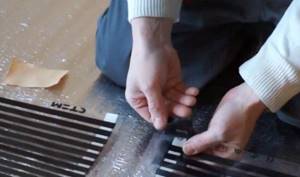
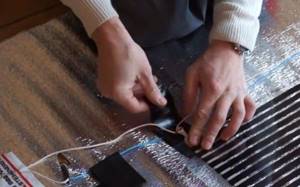
Step 8 - heating the insulating material | Now you need to insulate the edges of the conductive busbar, for which special material is included in the kit. We heat it with a hair dryer... |
Step 9 - Busbar Insulation | ... and seal each end of the tire on the film sections. |
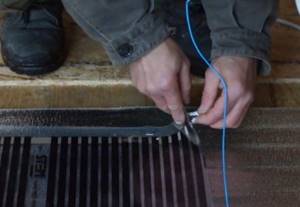
Step 10 - Installing the Clip | Then a clip is put on each tire... |
Step 11 – crimping the clip | ...after which it is pressed with force with pliers. |
Step 12 – cover the clip with insulation | The clips are connected to each other by wires, and after crimping they are hidden under the insulation. |

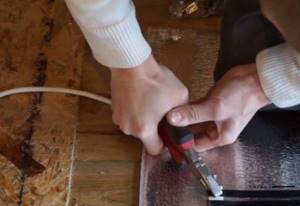
This, in fact, completes the process of editing the film itself. Since we already have a substrate, and it lies under the heating elements, all that remains is to lay polyethylene, which will protect them from damage. The general layout of all layers is presented below.
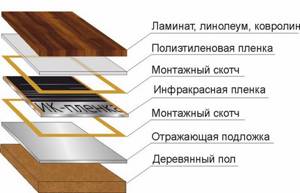
Cake of film heated floor on a wooden base
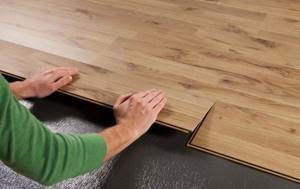
After laying the protective layer, you can take on the laminate, which is mounted on top of the heating film in the most usual way. The only condition is that you first need to check the functionality of the system by letting it work in different temperature conditions. If everything is functioning and there are no sparks anywhere, you can lay the topcoat.
Laying laminate
As for the laminate, before installation it must rest for more than a day in the room where it is to be used, and work on floor covering begins a day after testing the system.
You will find detailed step-by-step instructions for laying laminate flooring in the article “How to lay laminate flooring.” We talk about the nuances, choosing a substrate and its types, the installation process and how to cut holes.

Finished laminate flooring