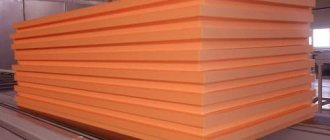
Polystyrene foam is a universal material and is used in many areas of human life. Construction and renovation is no exception. Quite often, in order for foam to look aesthetically pleasing and attractive, it needs to be painted.
Foam plastic is a universal material.
How to paint interior foam surfaces?
It is better to treat elements of interior decoration made of polystyrene with water-based paint. This can be a baguette, tiles, foam baseboard. High quality paint does not create streaks or drops. It lies evenly on the product and closes the pores. Tikkurila Harmony, Sniezka Eco, Caparol Unilatex have received positive reviews here.
1. Before painting, the surface is thoroughly cleaned of dust using a dry cloth. You need to paint in one direction, avoiding streaks. The coating can be multi-layered
It is important to note that the surface must be completely dry before applying each subsequent layer.
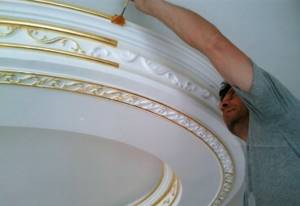
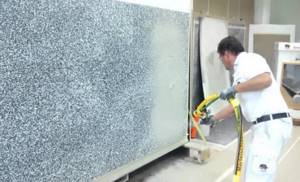
2. If you need to paint foam ceiling panels, you should take into account some technological features. It would be useful to cover the furniture with polyethylene, use special glasses and work clothes. The tiles usually have a relief pattern. It is unlikely that you will be able to create an even coating with a roller and brush. Therefore, it is better to use a spray gun. And before that, all joints are puttied or sealant is applied. The entire required volume of paint of the desired shade is pre-prepared. The desired color is obtained using a tint, which can be selected in hardware stores.
3. When painting a foam ceiling plinth, it is easy to stain the wallpaper (if it is already glued). To avoid this, the obvious solution is to use thin brushes.
4. You can apply decorative elements using gouache. If desired, a product painted with water-based emulsion can be decorated with ornaments. First it is drawn with a pencil. And then gouache and brushes are used. This move will add originality to the interior.
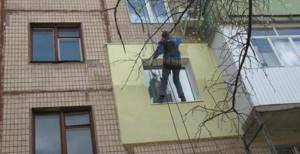
Painting slabs outside the building
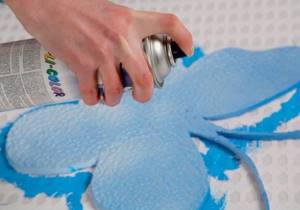
Expanded polystyrene is often used for cladding the external walls of buildings. Therefore, having dealt with the question of what paint can be used to paint polystyrene foam inside a building, you should decide on the materials used to decorate the facade. In this situation, it is preferable to choose an acrylic suspension. Moreover, it is better to purchase aerosols that do not contain freon. They dry instantly and create a waterproof film on the surface of the foam.
Although the choice of exterior paints is wide, most of them include aggressive components that destroy polystyrene foam. Therefore, before painting the foam boards lining the façade of the house, a protective layer must be applied to them. Most often, “liquid glass” is chosen for these purposes. It is pre-diluted with a primer, achieving the most uniform consistency. Another option for protecting foam is to apply liquid putty.
After drying, the facade can be painted with the selected acid-containing composition. The brush should be worked in one direction. It is recommended to apply at least two layers of paint, making sure to take a break before applying each subsequent one. Products that work well here are Novasil Tikkurila, Terraco Maxishield, Düfa Fassedenfarbe 90, acrylic aerosols Bosny and Pozitiv.
Required Tools
To work you need to buy:
When painting a large area, it is appropriate to use a special device - a spray gun.
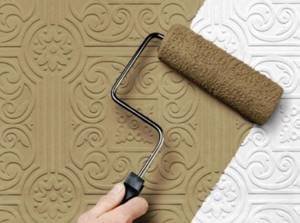
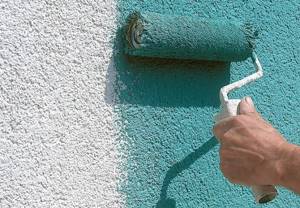
The material must be given the appropriate shade and poured into a pre-prepared bath. Using a roller, the decorative coating is applied to the wall surface. The tool must be operated correctly. The roller should move in one direction, namely, down-up. Such movements help minimize the appearance of streaks on the surface.
After the first layer has dried, you need to paint the walls again in the same color. Compliance with the stages of work involves creating a beautiful and uniform coating with a perfectly even tone.
Our company sells materials for thermal insulation. The catalog contains high-quality and highly technical products. Here you can choose materials for insulating buildings for different purposes.
Decorative products for interior
DIY polystyrene foam crafts can serve as decoration and add zest to the interior.
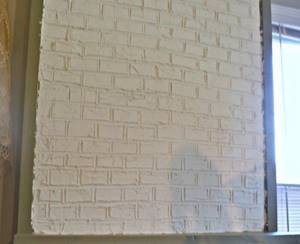
Imitation brick on the wall
A brick wall is a fashionable way to visually change the space in a room and add originality to your home decor. For this purpose, various panels are sold, both made of solid materials and foam plastic, and simple wallpaper with a suitable print. It will be cheaper to make foam bricks yourself.
To do this you need:
- stationery knife;
- foam sheets no more than 1.5 cm thick;
- pencil;
- ceiling tile adhesive;
- laser level.
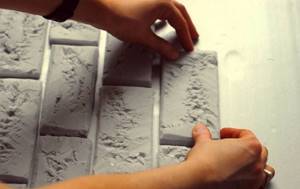
If there are noticeable waves and holes on the surface, you should not glue the brick. It will highlight all the irregularities, they will become even more noticeable. To make it easier to cut out bricks, you can make a template from cardboard, which you then simply trace on foam plastic without making markings each time. Typically the size of decorative brick is 25x6 cm.
The first stage is cutting the bricks. When the required amount is cut out, you can add texture: cut a chamfer on all sides, make the surface rough. A metal brush can be useful here; it is used to press on the brick and make grooves. You can also imitate pits and chips with a soldering iron.
Before gluing the brick, the walls must be treated as before painting. Old wallpaper is removed, the surface is washed and degreased. Using a laser level, markings are made on the wall so that the rows of bricks are even. You should start work from the lower right corner of the wall.
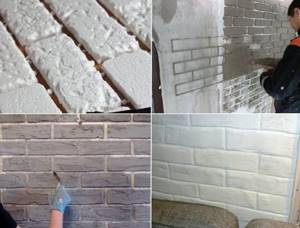
The seam between bricks should not exceed 1 cm in width. When the wall is completely ready, the bricks need 24 hours to stick to the wall more tightly. After this, they are painted with water-based paint.
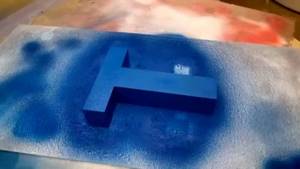
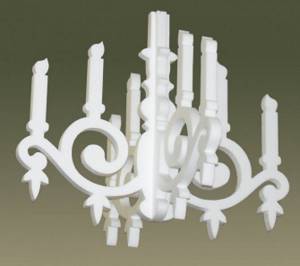
Letters for wall or shelf decoration
Foam plastic with a thickness of 1.5 cm or more is suitable. It is better to use equal sheets purchased specifically for crafts at a hardware store. Using a ruler and a felt-tip pen, draw the outlines of the letters on the foam. Then they are cut out with a stationery knife and all irregularities are removed with sandpaper.
The basis for the letters is ready, its design is limited only by imagination. You can paint it with bright colors or stick rhinestones all over the surface. Such letters are decorated with artificial flowers. Purchased flowers will do, or rather the heads that have been cut off, leaving a piece of the stem. They are stuck into foam.
You can make flowers from corrugated paper yourself. To make the letters glow in the dark, a regular Christmas tree garland or LED strip is glued to them along the edges.
Picture and photo frames
DIY foam plastic crafts are made not only from smooth sheets and material from boxes. To create a frame for photographs or paintings, foam ceiling plinths are suitable. They are already decorated with curly patterns or lines. This means that you don't have to invent anything new.
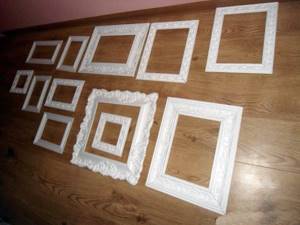
You just need to cut the plinth into 4 parts: 2 in width, 2 in height. Then carefully glue them together and secure them to the picture. You can decorate the walls only with frames, without photos.
Designers use this technique to create a contrast between the color of the wall and the frames. The filling of the frame can be not only a picture. The frame is glued to the wall, and several paper butterflies are placed inside, which are also attached to the wall.
Three-dimensional drawing on the wall
Flat shapes are cut out of foam plastic and painted in different colors. They decorate walls in apartments, for example, for the kitchen you can cut out several shapes in the form of cupcakes, buns, teapots and stick them on the wall above the table.
In a children's room, you can decorate the headboard of the bed from foam letters by writing the baby's name, or by cutting out his favorite cartoon characters.
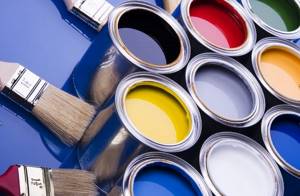
Characteristics of coloring compositions
The range of coloring products is quite large. According to experts, it doesn’t matter what kind of paint you use to paint the foam, as long as it is water-based. This is due to the fact that the type of polymer almost does not reflect its properties. However, in order for the painting to be done efficiently, you should know the advantages and disadvantages of the compositions used.
The best paint option for polystyrene foam is acrylic.
Among the water-dispersed group of paints, acrylic paint has performed very well. This coating has the following positive properties:
- reliable protection against ultraviolet radiation;
- long service life;
- dries quickly and has no odor;
- health safety;
- ease of application;
- easy to clean if necessary;
- resistance to pollution;
- the composition is not affected by high temperature;
- a wide variety of shades.
Painted foam is easy to clean
In addition to the listed advantages, this coloring material has the only drawback - it is high cost. However, it is fully justified by significant advantages. A high-quality composition cannot be too cheap.
In addition to acrylic paints, you should pay attention to water-based coatings. They also have good properties
Among the advantages:
- environmental friendliness;
- lays down smoothly and has no odor;
- good vapor permeability;
- large color palette;
- average cost.
The qualitative characteristics of this coating are inferior to the acrylic composition. It has several significant disadvantages. The paint has low resistance to stains and does not tolerate moisture well. Over time, its surface is washed off with water. If you apply it in large quantities, it may peel off. However, despite all these disadvantages, water-based emulsion is quite in demand among consumers.
We process polystyrene inside the building
In order to paint parts that are located inside the building, for example, baseboards, water-based paints, the so-called water-based paints, are very suitable.
It has a number of advantages:
- Perfectly clogs the pores of foam products;
- It is easy to apply to the surface;
- The cost is quite low;
- Safe for people and animals;
- Does not have a pungent odor.
In addition to the advantages, there are also several disadvantages. Unfortunately, it does not tolerate exposure to water and is quickly washed out.
She also “does not like” exposure to dust, the impact of which deteriorates her appearance.
Acrylic paint has similar properties, however, in addition to the advantages listed above, it is resistant to dust and dirt, but costs a little more.
The best today are silicone mixtures; they do not have serious drawbacks, but are quite expensive.
Recommended viewing:
Also, the inside of the foam can be decorated with gouache and watercolor drawings, if they are not exposed to aggressive environmental influences.
Carrying out preparatory procedures
At the very beginning, you need to get rid of the old layer of paint, wallpaper and putty. If the old layer has excellent adhesion to the surface, then it does not need to be eliminated. Next, level the surface; this can be done using putty. Cover all bumps and depressions. This must be done, because if you install penoplex, they will break over time. The maximum error is one and a half centimeters per linear meter.
It is necessary to prime the unplastered surface. Metal structures that will be covered with a heat insulator need to be painted. You can coat it with an anti-corrosion mixture. Before starting the procedures, you need to hammer in the brackets for mounting drains, air conditioners, distribution boxes, and so on. Plates of insulation material are rolled using a needle roller.
Crafts for the garden
We all know that to decorate your summer cottage, you need to spend a lot of money, but making something nice from polystyrene foam is a cheap pleasure. By winter, you can decorate the area with small and large snowmen. Take a wire and place three foam balls of different sizes on it and make a funny face for him.
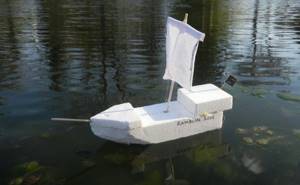
You can come up with a whole compositional picture for landscape design. Think through every detail, draw a sketch, prepare the material and get to work. You can create absolutely any shape: flamingo, swan, penguin and many other ideas. If there is imagination, then there will be beauty.
DIY crafts for boys - cool product ideas, photo examples, tips
DIY crafts for kindergarten - tips on choosing materials, photo ideas for autumn, winter, spring products

Exterior painting
Painting the outside of foam requires weather-resistant paints.
The walls of a building are affected by temperature fluctuations and precipitation, so paint for polystyrene foam must be flexible and not lose its qualities for a long time.
Before you start painting, you need to do some preparation. Acrylic compositions are more suitable for outdoor work, since they are highly resistant to environmental factors.
Before painting, it is necessary to putty the joints. Then experts recommend applying a primer and removing any unevenness after it dries. The paint is thoroughly stirred and brought to a uniform state and color.
The paint can be applied with a brush or roller in one direction. If necessary, use an aerosol.
Painting extruded polystyrene foam on the facade of a building consists of several preparatory stages:
- the surface is leveled (including the locations of the dowels), the joints are made invisible;
- cleaned of dirt and dust (for better adhesion of the primer);
- primed with an acrylic compound, the resulting drips are removed with a spatula.
After giving the paint the required shade, it is poured into the bath. To apply a decorative coating to the walls, use a roller, moving it in one direction (from bottom to top) to prevent the formation of streaks.
After waiting for one layer to dry, apply a second one. Often, when finishing facades, a layer of plaster is applied to the foam plastic. Before starting treatment, façade paints must be mixed well.
If the ambient temperature is below 15°C, it is recommended to use waterproof materials, since as the humidity level increases, the quality of the coating deteriorates. When applying the acrylic composition in a thick layer, bubbles may appear.
Additional painting tips
To avoid leaving streaks on the foam, move the brush in one direction. The purchased material for painting must have a high adhesion coefficient. In this case, it will easily lie on the material.
To paint foam plastic, you need to have two brushes, wide and thin.
If the paint contains solvents that are hazardous to polystyrene foam, then a layer of plaster should be applied to the surface to be treated. It will serve as protection against destruction.
For better quality painting, it is better to have two brushes: a flat one 4-5 cm wide and a thin round one for processing small details.
When working outdoors, paint cannot be used if the temperature drops below +15°C. High humidity will negatively affect the quality of the coating. It is advisable to use only waterproof material.
Acrylic paint cannot be used in low temperatures and high humidity.
Acrylic compounds tend to bubble if they are applied in a thick layer. Over time it will begin to fall off. Experts recommend using paints that are completely ready for painting. They will make the work easier for those who do not have the necessary experience in this matter and will help to obtain a high-quality result.
The process of painting foam plastic has many subtleties and pitfalls. However, following these tips, a home craftsman will be able to carry out painting efficiently and quickly.
Special properties
- If the question arises, which foam plastic is best to choose for crafts, then the answer is simple - any. You can purchase it separately in the store, or use the one that is sold with the product in boxes.
- Fakes are not subject to excessive humidity. They can be used both in winter and summer and not be afraid that they will lose their attractive appearance. Even frosty days are not scary for them at all.
- Even if the material deteriorates a little over time, it can be easily revived and returned to its original condition. It doesn't take much effort or energy.
- If you want to ensure that the fake is firmly in the indicated place, then you will need to make a strong, heavy weight stand.
- To process the material there is no need to use expensive materials.
- This material has one significant drawback: it is afraid of fire. If you use paints that use acetone, the material will simply deteriorate. Therefore, you need to take this fact into account when decorating.
Tips/Tricks
- To prevent streaks and drips from appearing on the foam, you should always move the brush in one direction.
- If you are painting the baseboards that have already been installed on a wall decorated with wallpaper, it is recommended to use masking tape to protect them.
- If it is not possible to use paint that does not contain solvents or gasoline to paint polystyrene foam, you can always use a layer of ordinary plaster to protect it. This way, corrosive chemicals will be isolated from the material.
Foam crafts for kindergarten
Do-it-yourself polystyrene foam crafts are made together with children for creative competitions in kindergarten.
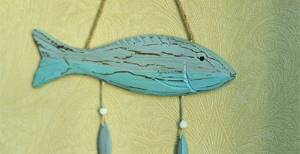
Fish
To make fish you will need:
- cardboard;
- stationery knife;
- glue;
- scissors;
- gouache and brushes;
- eyes for toys.
DIY foam crafts for home or kindergarten.
The outline of the future fish is cut out of cardboard. Small circles are cut from thin foam plastic (ceiling tiles are suitable). They will play the role of scales. The fins and head are cut out separately. The blanks are glued onto cardboard and painted with gouache. Finally, the eyes are glued on.
House
For the house you need:
- smooth foam;
- glue or toothpicks for fastening parts;
- paints;
- knife;
- pencil;
- ruler;
- cardboard.
Using a ruler, draw two side walls of the house on foam plastic. Then the front and back walls. For convenience, you can draw the walls with an angle where the roof will then be attached. For the roof you need 2 rectangles. When all the parts are cut out, the small details are worked out. You can emboss grooves into the roof in the form of tiles.
A knitting needle or the other end of a brush is suitable for this. Windows and doors are cut out on the walls. The walls are glued together; you can use toothpicks if the thickness of the foam allows. They need to be stuck halfway into the ends of the side walls, and then carefully connected to the side walls. The structure is glued to cardboard.
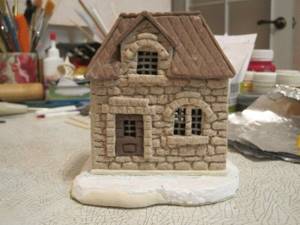
The bottom is decorated with cotton wool or moss. Shutters are cut from scraps and carefully glued to the sides of the windows. When the house is completely assembled, it is painted with bright colors.
Snow Queen's Castle
To assemble the castle, you need to cut identical cubes from polystyrene foam, approximately 2x2 cm. Cardboard is used for the base. You need to draw markings on the cardboard: fence, towers and other details. The towers are assembled in a circle, the foam cubes are glued to the cardboard at the same distance. The gap should be at least 1 cm. The second row is made of “bricks”, placing them not on top of each other, but shifting them.
This is done row by row until the tower reaches 7-10 cm in height. Separately, in the same way, the upper part of the towers is assembled. It should be narrower than the bottom, so the rows are reduced by 1 cube
The upper part is carefully glued to the lower part. For the roof, take blue cardboard and make a cone out of it
Carefully glue it onto the foam building.
By analogy, a fence is assembled. It is not necessary to make it an even square; you can place round “pillars” in the corners. The courtyard inside is decorated with old cut-up DVDs and deer figurines, which are also cut out of foam.
Sequence of actions during operation
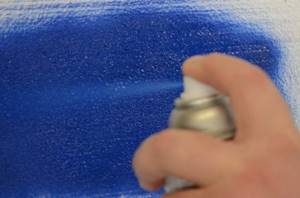
To paint the outside and inside, select the desired type of composition. After choosing, you can start painting the product yourself. The easiest way to do this is to use a product in an aerosol package.
To paint polystyrene foam with your own hands, it is best to choose spray paint
Before starting work, shake the can for 1-2 minutes and then evenly cover the surface from a distance of 30 cm in 2-3 layers. Each time it must dry and only then can the next layer be applied. This method is considered the simplest if you learn how to work with a cylinder.
If the composition in a jar is used, painting is done using a brush or roller. The required amount of water is added to the paint to achieve a suitable consistency. If several tones are used, the composition should be mixed well before coating to obtain an even color. If the elements are painted in different colors, then the brush must be rinsed well with water each time.
To consolidate the result, you can use varnish. A special water-based varnish is often used in combination with acrylic paint to further protect the surface of the foam.
Indoor work
The process of coloring foam products consists of several stages. Before you paint the foam, you need to prepare it. A primer is used for this. An aerosol composition is best suited for this purpose; it is simple and easy to apply to the desired object, the surface dries quickly and can be ready for subsequent work in a short time. This product is ideal for priming the desired element indoors.
Before you start painting parts, you need to prime them with an aerosol composition.
At the very beginning of work, you need to clean the surface with a damp cloth and wait until it is completely dry. When using an aerosol primer, it is recommended to shake the bottle for a few minutes before application and then coat the material with it.
The composition is sprayed quickly, applying a thin layer at a distance of 20 cm from the product. 3-5 layers of primer are enough to get a high-quality coating. After this, the material must dry completely. This takes approximately 30-30 minutes. Various irregularities or drips can be removed with a spatula, lightly touching the surface.
Painting the outside of buildings
Acrylic-based compositions can be used to paint polystyrene foam for interior and exterior decoration. Painting work on external insulation requires more thorough preparation of the foam surface. Before painting penoplex or polystyrene foam with acrylic paint:
- clean the surface from dust, adhesive residues, and dirt;
- stick reinforcing tape to the joints;
- level the surface of the product;
- prime with acrylic compound;
- tint the paint;
- Prepare the necessary tools.
Apply paint to the foam layer from top to bottom in one direction to avoid uneven coloring. Apply the second layer after the first has completely dried.
How can you paint polystyrene foam outdoors? For painting, use rollers, brushes, and a spray gun. When using a spray gun, protect your skin, respiratory system and vision from paint droplets.
Painting penoplex is no different in technology, compositions used, and tools used from painting expanded polystyrene foam.
Applying a covering layer of putty, plaster, or liquid glass to the surface of a thermal insulator significantly expands the scope of application of paints and varnishes. The created intermediate layer neutralizes the destructive effect of active coloring compounds on the foam. The protective layer is applied to a fiberglass mesh. This leads to an increase in the cost and duration of work, but ensures the presence of a protective “shell” of insulation, ready for painting with any composition.
The use of acrylic paints will reduce the time and cost of work to protect foam insulation from premature destruction.
You spent less money, and your home stays warm longer!
- How to paint polystyrene foam
- How to decorate a garden
- How to make three-dimensional letters from foam plastic with your own hands
1. Try to avoid drafts in the room until the paint on the surface has completely dried.
2. Don't forget that gouache is a water-soluble paint. Therefore, when dirty, wipe the painted surface only with a dry cloth.
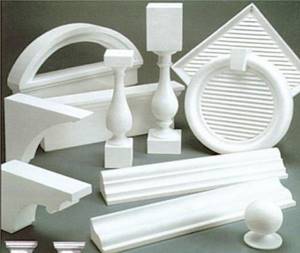
Wall cladding with foam plastic is very popular for both external and internal cladding. If for external work foam plastic slabs are used as insulation, then for the interior of the house there are elements of various forms. These can be baguettes, baseboards, frames and other decorative details. But any finished design with this design requires painting the foam parts. So today I will tell you how to paint polystyrene foam and what is the technology for painting it yourself.
Advantages of painted material
Polystyrene foam is a very popular material in construction; it is used for both external and internal work. However, after some time it may lose its attractive appearance. In addition, the initially white decor may not match the color scheme of the room. These reasons force craftsmen to paint materials in a shade suitable for the interior.
In order not to damage the foam board, you need to know what kind of paint will not harm it
Due to the fact that some compounds can destroy the structure of polystyrene foam, before starting work it is important to figure out what paint to paint it with. Foam plastic will retain its attractive appearance for a long time if this work is done correctly. In this state it will have more advantages:
- it will be protected from moisture, dust, grease stains and other aggressive influences;
- polystyrene foam that turns yellow over time will not become noticeable under a layer of paint;
- painting will make everyday care easier;
- the decor will harmoniously fit into the design of the premises.
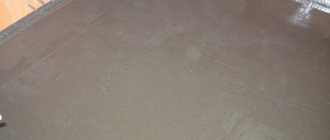
This is interesting: a comparison of extruded polystyrene foam and polystyrene foam. How to paint a concrete floor with polystyrene foam varnish - see in this video:
The material is very light and easy to work with, so it is used by professionals and home craftsmen. It is widely used not only in interior decoration of premises. Elements made of foam plastic often decorate the facades of buildings, gardening areas, and insulate the facades of buildings with slabs. With the use of coloring agents you can realize many original ideas.
A correctly chosen coloring composition can keep structures and decorative items beautiful and attractive for a long time. In this form, they will be less sensitive to sunlight and other destructive factors.
Coloring foam
The fact is that all foam panels and baseboards are produced only in white, which in itself is not bad, but sometimes the white color does not correspond to the overall decor of the room, and then there is a need to paint them. This is where unforeseen difficulties arise - sometimes after applying the paint, the foam begins to dissolve literally before our eyes. Not all craftsmen know how to paint polystyrene foam without damaging its structure.
How to paint polystyrene foam
The chemical formula of the foam is such that it easily dissolves under the influence of white spirit, acetone and some other aggressive chemicals. Therefore, to paint polystyrene foam, you cannot use products containing the above ingredients in their composition. You can paint polystyrene foam only with water-based paints:
- acrylic water-based;
- acrylic water-dispersion;
- latex-based acrylic paints.
Many manufacturers produce acrylic paints in only white color, but they are given the desired tone using specially sold separately available colors. By gradually adding this color to white paint, you can achieve the desired color intensity, and by mixing several colors, you can get the desired shade of paint. In large stores that sell building materials, specialists will help you do this right when you buy paint.
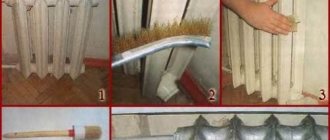
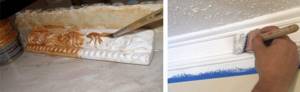
How to paint foam panels
- The panels already glued to the ceiling need to be painted. The seams between the panels should be puttied and sanded with fine emery cloth. Brush dust off the panels with a soft brush and wipe them with a rag. If possible and desired, the panels can be coated with a special primer before painting.
- If necessary, dilute the paint with water to the desired consistency. Check the tone of the paint and its thickness - apply the paint to a piece of foam with a brush and see how it applies.
- Paint the ceiling with a paint roller, moving it in one direction. Paint over unpainted areas that may appear along the walls with a wide, flat natural bristle brush. Acrylic paint dries quite quickly. After the first coat of paint has dried, you can apply another coat.
- If the ceiling tiles have a complex relief pattern, use a paint sprayer rather than a roller to paint them. This way you can evenly paint all the panels, both in the convex and in the recessed areas of their relief.
How to paint a foam baseboard
- To get the best result, you need to paint the baseboard that has already been glued to the ceiling - in this case, the paint will mask all the joints.
- Fill the joints and sand the seams. To protect the walls and ceiling, apply strips of masking tape along the baseboard, close to it.
- Paint the baseboard lengthwise with a narrow, flat brush with natural bristles. When the paint has dried, paint the baseboard again, and after the second layer of paint has completely dried, remove the masking tape from the walls and ceiling.
How and with what compositions you can glue polystyrene foam is described in our article How to glue polystyrene foam.
Paint requirements
Despite the huge variety of types of polystyrene-based foam, there is a problem of its compatibility with paints and varnishes. The fact is that this material is susceptible to the negative effects of organic solvents, precisely those that are part of most paints and varnishes. Thus, in order to coat a foam product with paint and give its surface a beautiful structure, without harm to the material itself, you need to know the features of its compatibility with different coloring compositions.
Expanded polystyrene is resistant to most substances; it can be coated with mixtures of bitumen, lime solutions with water, and also painted with compositions that have a water-dispersion base. But compounds included in the class of organic solvents, for example, ethyl acetate, toluene or the well-known acetone, present in many types of paints, cause a change in the properties of this material, leading to its softening, shrinkage and ultimately dissolution.
Therefore, paints and varnishes for polystyrene-based materials must meet the following general requirements:
- the absence in their composition of substances capable of dissolving foam plastics;
- increased adhesion coefficient to penoplex and PSB;
- stability under the influence of destructive atmospheric factors, insolation;
- providing an aesthetic elastic coating.
What is the difficulty of painting foam?
Before you try to paint a foam product with your own hands, you need to find out what features distinguish the material from which it is made, and how it reacts to certain paints and varnishes. Polystyrene foam has a porous structure and extremely low density. Simply put, it's very fragile.
For this reason, products made from it must be painted carefully so that they do not crumble or break.
As for the choice of paints and varnishes, you need to be careful here. It is necessary that the paint components do not damage (corrode) the surface of the foam object.
We work on 2 fronts
We will consider the remaining two candidates for the title “Best Paint for Expanded Polystyrene” in terms of their scope of application.
Water-based emulsion paints have excellent covering ability, but have low resistance when interacting with water. In this regard, it is recommended to use them for decorating foam products in the interior of a building.

The remaining contender is perfect for painting polystyrene foam used as external insulation, creating a stable and elastic “crust” on the outer covering.
With liquid glass things are a little different
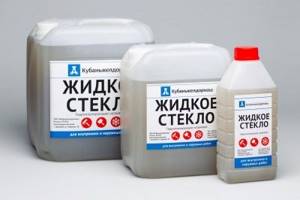
The main solvent in this material is simple water, which, as the liquid glass dries, simply evaporates or enters into a chemical reaction.
In terms of composition and properties, liquid glass is very close to silicate glue, which was very popular at the end of the last century. Liquid glass does not contain as many aggressive components as acetone or kerosene, so it does not destroy the structure of penoplex. And the chemical processes taking place in the layer of hardening liquid glass are also practically harmless to penoplex. And the dried silicate becomes almost chemically inert.
Modern experience in the use of liquid glass shows that it can be successfully used for processing penoplex. This silicate composition can be added either to the composition of cement mortars for plastering, or applied directly to the surface of the penoplex, depending on the goals and objectives. At the same time, the surface acquires good protective properties both from moisture and from many chemicals.
Options for crafts for the site
For the vegetable garden or garden, you can make figures from foam plastic. They will decorate paths between beds, flower beds or a recreation area.
Bird on the tree
To decorate the trees on your site, you can make bird figures with your own hands. To do this, you need to draw a template on paper and then transfer it to a sheet of foam plastic. For birds larger than 30 cm in length, thin material is not suitable. At a minimum, the thickness of the sheet should be 1.5 cm. A shape is cut out with a sharp stationery knife.
This can be a flat design or a three-dimensional figure if you cut out the wings and tail separately. Now all the parts are glued together. To ensure that the figure decorates the tree for as long as possible, the foam is primed in 3 layers. Each layer must dry well. After drying, begin painting. Apply regular facade paint, and then varnish.
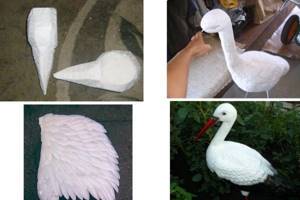
It will not be washed off by rain and will not harm the material, because it is protected from exposure by a thick layer of primer. The dried figurine is attached to the tree using wire or nails.
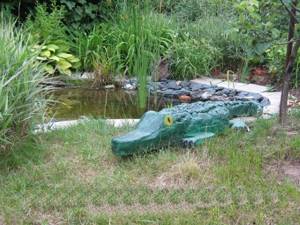
Frog
For a stencil, you can use the image of a cartoon character, for example, the “Frog Traveler”. Fine-grained, dense foam plastic is suitable for work. The design is transferred to the material and carefully cut out with a stationery knife. All irregularities and burrs are removed with sandpaper. Now you need to prime the workpiece and paint it.
After the paint has dried, a layer of clear varnish is applied. It is convenient to use varnish in cans. The main thing is that there are no untreated areas left. To secure the frog to the ground, use thick wire. Carefully place the figurine on one end, and stick the other into the ground. If you want to place the craft on stones, near a pond, cement will do.
Crocodile
Polystyrene foam may not be the only material for creating DIY crafts.
To make a large crocodile, you will need:
| Material | Quantity |
| Styrofoam | About 4 sheets 100x100 cm |
| Plastic bottles | 25-30 pcs. |
| Self-tapping screws | 100 pieces. |
| Cling film | 2 rolls |
| Scotch | 1 reel |
| Whatman | 1 PC. |
| Foam glue | 1 bottle |
| Stationery knife | 1 PC. |
| Scissors Paint in cans White paint Screwdriver | 1 PC. 2 balloons red and green 100 ml 1 PC. |

A silhouette of a crocodile is drawn on whatman paper. The base and frame are made from polystyrene foam. Suitable material is uneven, from household appliances, with any density. The main thing is to cut out the body with the head, tail and paws. All parts are fastened together with glue. Then the foam blank is shaped by turning it with a knife. You need to clearly define the eyes, nostrils and toes.
The workpiece is tightly covered with cling film and tape, if necessary. The film should cover the entire surface. This is done in order to avoid wasting time on putty and to protect the foam from the effects of paint from a can. The base is ready, all that remains is to add small details.
To protect against abrasion, the entire abdomen of the crocodile is covered with plastic from bottles, which is attached to self-tapping screws. The upper part is covered with plastic scales. You need to cut strips from the bottles, about 5 cm wide, and cut them into teeth. The strips are attached with self-tapping screws, starting from the tip of the tail.
The crocodile's teeth are attached in the same way, with self-tapping screws. Below, on the abdomen, there should be a wire with which you can fix the figure on the ground. Plastic is also inserted inside the mouth.
A 5 liter bottle without a bottom or neck, cut lengthwise, is suitable for this. The eyes are decorated with plastic from the rounded parts of the bottles. After the scales have covered the entire body of the crocodile, you can paint it.
It is more convenient to apply paint from a can - there will be no smudges. The body is painted green, the open mouth red. The teeth are painted with white paint separately, with a brush. When the craft dries, you can decorate the garden with it.
Materials that hold together
If a person is faced with the task of making a small, small figurine for a school event, this is one case, but if it is necessary to make heavy and massive figures for wealthy home owners, this is a completely different case.
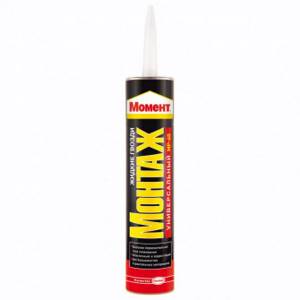
In this case, ordinary PVA glue cannot be used. Therefore, you should stock up on stronger adhesives in advance. This can include:
- sealant (preferably silicone version);
- liquid Nails;
- special glue for gluing foam;
- adhesive for facades (its main advantage is resistance to cold and frosty weather);
- foam for installation.
How to paint penoplex: choosing suitable materials
“Like the painter, so is the painting.”
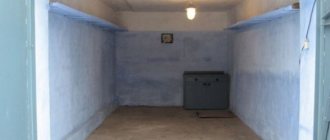
An acquaintance recently insulated a room at his dacha, where he intends to visit in the winter, and a loggia in his apartment, with penoplex. It is also called polystyrene foam. Everything looks neat and beautiful.
However, the question arose: is it necessary to protect the insulation with paint? This is where the topic of this article was born - how to paint penoplex. By the way, the blog already has information on how to secure such insulation.
Let's start with a brief description of the “fashionable” modern heat insulator. It is produced from hydrocarbons (oil, gas, coal). Penoplex is a kind of foam plastic that has undergone deep evolution. And only for the better. Here are some points in which it differs from its “old relative”:
- Flexural resistance is 5-6 times higher:
- Moisture absorption is 6-8 times less. They can be used to insulate attics and other “wet” areas;
- The strength of some types is tens of times higher than foam;
- Fire resistance. It is a self-extinguishing material, unlike smoldering foam;
- Better thermal insulation and sound insulation properties;
- Convenient to use. Easy to cut with a knife. Thanks to the fine-cell structure, it does not crumble;
- Wide and varied range;
- Service life is about 50 years.
Everything is fine. Besides the price. If we are talking about insulating a balcony, then the volume of material is small, however, when insulation of an individual house is required. you'll have to pay more.
Now about whether it is possible to paint penoplex? Can. Many modern manufacturers offer acrylic water-dispersion paints designed to cover thermal insulation and have excellent, stable adhesion.*
Adhesion* (in Latin - “sticking”) - the ability to firmly adhere to a surface.
From this article you will learn: