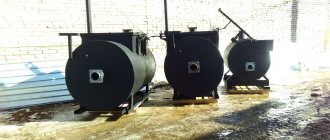
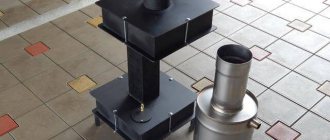
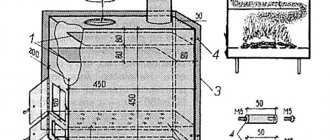
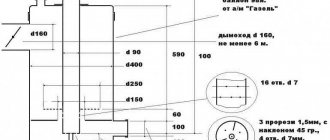
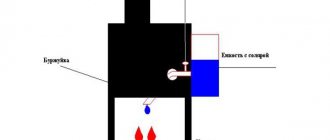
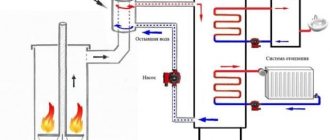
Internal structure of the long-burning stove "Bubafonya"
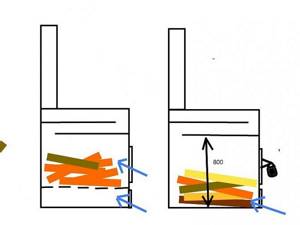
Let's look at the bubafoni device. An old household gas cylinder is the base of the stove. The wood inside the bubafoni burns. Pyrolysis, as the basis of the process, decomposes wood at high temperatures into gases, which, when burned, generate thermal energy. Wood burns in stages:
- Stage No. 1 - the fire heats the wood, burning out light flammable substances. Having crossed the two hundred degree bar, the firewood decomposes into simple substances and the gas begins to burn.
- Stage No2. This stage of combustion is the most efficient, as the gases are heated to a temperature of 700 degrees Celsius.
- Stage No3. We get what this device can provide - the required heat.
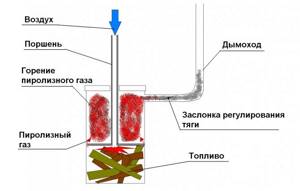
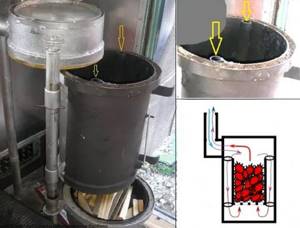
Construction of a pyrolysis boiler. The inner chamber is divided into two parts. This makes it possible to burn solid fuel in one chamber, and burn pyrolysis gas in the second. In the chamber below, which is filled with wood, the initial burning of the wood takes place. In the upper part, it is filled with wood combustion products, which ignite. The heavy press pushes the fuel down, and the wood is burned efficiently. At the top of the firebox there is a hole to which the chimney is connected, and the smoke leaves the stove through this system. Air enters the combustion chamber through an air duct located on one structure of the press. The air supply is regulated by the air duct damper.
Pyrolysis boiler manufacturing technology
To make a powerful boiler, you need to be able to handle an angle grinder and a welding machine, as well as understand the drawings. If you independently manufacture a boiler with a power above 25 kW, you must do everything according to the drawing , otherwise the boiler will not meet safety requirements.
The walls of the boiler should be made of heat-resistant steel, only this will guarantee that it will last for quite a long time. If such steel cannot be found, you can use ordinary steel, only in this case the internal chambers of the boiler are lined with fireclay bricks.
Boiler manufacturing stages.
- The boiler body is made of sheet steel. Using a grinder, boiler parts are cut out of a sheet of metal, holes are made in the walls for the ash pan door and loading door, as well as for pipes and a smoke exhauster. The most important thing is to adhere to the dimensions indicated in the drawing. Using a welding machine, the parts are connected, after which the seams are cleaned of scale and ground.
- Then the pipes are welded so that there are no gaps between the seams. A pipe of the required diameter is taken and a protective heat exchanger is installed on the rear wall of the boiler. After that, they check whether the heat exchanger is leaking due to increased pressure from the compressor, and only then install the rear wall of the chamber, made of heat-resistant steel.
- Then they begin to install a partition that separates the gasification and gas combustion chambers, installing a cast iron grate. An air duct with a damper is made at the top of the gasification chamber. An air duct is also made at the bottom of the chamber and at the same time the bottom and sides are lined with fireclay bricks.
- The boiler doors are made of heat-resistant steel, and for maximum tightness they are reinforced with metal corners.
- The boiler should be installed in a non-residential area, connecting the chimney. Then a water circuit is connected to it and a smoke pump is installed.
Advantages and disadvantages of a pyrolysis oven
Let's start with the good, with the advantages of pyrolysis boilers:
- Fantastic efficiency, often reaching more than 85%.
- The ability to simply maintain the long-burning stove device
- When using high-quality materials in the production of the stove, durability and reliability.
- Meets strict environmental safety requirements.
- Availability of fuel. It is at every step. Wood, chips, other wood waste.
- Due to its small size, it is possible to install the unit in any room.
- There are no difficulties in servicing the oven.
- Baking a bubafonya with your own hands is simple and, most importantly, quick.
Unfortunately, this type of boiler has some disadvantages. One of the main disadvantages is weak traction. Without draft, a pyrolysis stove will be of little use, since there will be no good heat transfer. Let's look at the following disadvantages:
- Complex chimney design.
- There is no model range of pyrolysis systems that can be fired using mixed fuel. For example, fuel oil, diesel.
- It is difficult and unfamiliar for beginners to make the initial setup.
- Not everyone can assemble a pyrolysis boiler with their own hands.
However, the flawless performance of the bubafonya stove and the low price of fuel cover all the existing shortcomings.
Types of pyrolysis furnaces
Units operating according to the described principle can be divided into two categories: with full and partial gas generation.
Furnaces with a full gas generation cycle
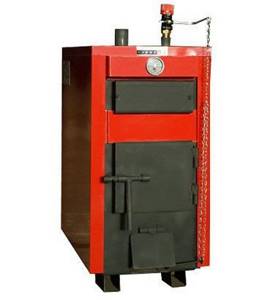
This is exactly the device that was described in the first section. Its manufacture in a home workshop is a rather complex and expensive process. Due to the high temperature in the firebox, it has to be made from heat-resistant alloy steel, which is not cheap.
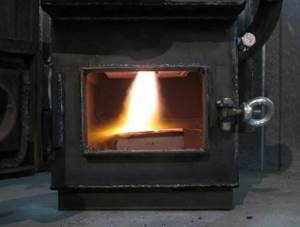
Furnace with a full gas generation cycle
But the main difficulty is different: the rate of wood gas release is constantly changing, and to monitor this process you need cunning and expensive electronics, which, depending on the conditions inside the stove, regulate the supply of primary and secondary air. Thus, the user can independently manufacture only the steel body of the furnace; everything else - the air supply system, controller, catalyst-afterburner - will have to be purchased.
Furnaces with partial gas generation and diagrams
A wide variety of versions of such units are constantly being developed by both reputable companies and craftsmen.
Butakov stove
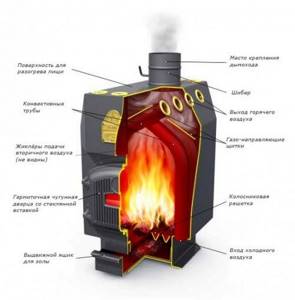
The products of the former are published under brands with euphonious names like “Professor Butakov”, Breneran, Bullerjan, etc., the latter designate their creations more prosaically – “Bubafonya stove”, “Slobozhanka”, “Rocket stove” or simply “oil stove from cylinder for the garage."
Slobozhanka stove
Among them there are designs with both separate and combined afterburning. Such an installation cannot be called a full-fledged pyrolysis unit, but it still contains some structural elements for afterburning wood gas. At the same time, the developers completely abandon forced air supply, so that the stoves become energy independent. We will learn how to make one of them ourselves.
Making a stove yourself
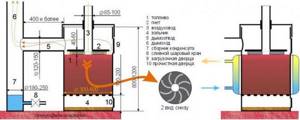
Baking a bubafonya with your own hands begins with drawings. Like any pyrolysis stove for a bath or a pyrolysis boiler with your own hands, you start with a diagram. For drawings of pyrolysis boilers, see the photo below.
Drawing of the Bubafonya pyrolysis furnace. Calculation of basic proportions.
Scheme of a pyrolysis furnace.
Preparing the room, materials and tools for work
Initially, you need to choose a room where you will make a pyrolysis boiler with your own hands, where we will install a babufonya stove. This needs to be done for this reason. When the pyrolysis boiler operates, the lower part of the body heats up to a very high temperature. To avoid a fire hazard, you need to make a small foundation for the stove. Refractory brick is best suited. First you need to dig a “pit” measuring one meter by one meter. The depth of the swarm is 20-30 centimeters. We fill the hole with crushed stone. Pour in the liquid solution. As soon as the area is dry, we cover it with refractory bricks in two rows. It's best to do everything below the level. In some modern buildings, such as auto repair shops, production workshops, warehouses and other premises with concrete floors.
You don't have to make a foundation for the stove. The concrete floor is of sufficient thickness. If there is little space and there are walls nearby, in close proximity to the stove, it is better to install a reflector. Of course, made of heat-resistant steel.
The materials are as follows. A two-hundred-liter barrel (if the pyrolysis stove is made from a barrel) or an old cylinder will serve as the basis for the future stove. Select thick-walled boiler pipes for the production of a chimney. They can be found in any heating network. You will need a channel, a sheet of metal (not thin). The following tools will be needed: Welding, electrodes, hammer, chisel, metal saw, power cutting tool.
Installation and assembly of the structure. Chimney installation
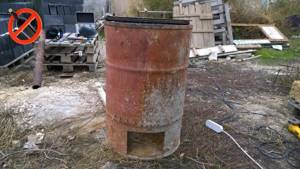
Stage one. First you need to cut off the top of the balloon. Do not throw away the cut top. It will be needed as a future cover. The diagram of the pyrolysis stove is located above. A do-it-yourself pyrolysis oven begins with cutting off the top of the body.
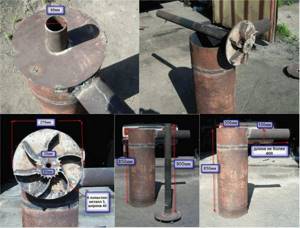
Stage two. We will make a chimney hood. We make a hole of the required diameter along one of the sides of the body. Find a piece of boiler pipe that is bent at a 90 degree angle. The pipe diameter is suitable from 100 to 150 mm. We will make the chimney riser from a boiler pipe of the same diameter. The thicker the pipe, the better the draft in the chimney system. And we know that if the draft is good, then the pyrolysis furnace with your own hands will heat with good efficiency. We will weld the adapter for installing the chimney. We will seal the transition using asbestos cord, clay, or fiberglass.
Third stage. We will weld 2 holders and a top tube to the cover; it will be able to control the lowering of the system. We will attach a metal strip to the stove. It will serve as a side that prevents the stove lid from moving. In the lid of the cylinder, using a gas cutter, we cut out a hole for the pipe (air exhaust) approximately 88 millimeters. This pipe can have any shape. Round or square, it doesn't matter. This is not important for bubafoni to work. And the assembly will be simplified.
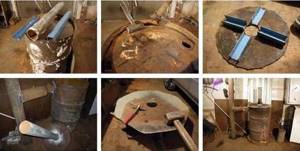
Fourth stage. We take a sheet of metal 4 mm and higher. Cut out a round pancake with a hole in the center of the pancake. The diameter of the pancake will be equal to the diameter of the air exhaust pipe. Between the edge of the air distributor and the wall of the furnace body we leave a gap that is equal to 5% of the length of the circle. We take the thickness of the iron under the plate, based on the size of the stove body. If the stove is made from a cylinder, take the thickness of the iron plate from 8 millimeters. If you make the stove body from a 200-liter barrel, then take the metal plate from 5-6 millimeters. We will weld six blades under the bottom of the air distributor plate. Their necessity is due to the uniform combustion of wood in the chamber from below, and the gases from above will burn completely. A do-it-yourself pyrolysis oven with this mode of operation will last a long time.
In the center of the air distributor we attach a second round pancake, smaller in size - 4 centimeters. The plate is necessary because there is sufficient space between the blade and the firewood for the gases to escape. And the coals did not block the air supply path. Having assembled all the parts together, you need to load the body with wood. The firewood is placed vertically, with paper, wood chips or birch bark placed on top of the firewood for ignition. What kind of wood will we burn with? Dry or raw? If you will often be using raw firewood, you definitely need to add one part to the boiler design. The chimney should be extended downwards, having received an elbow for collecting condensate. Place a drain valve on this elbow.
Alternative options for installing furnaces
There are three such options. Let's consider additional options for assembling bubafoni that can be implemented.
In option 1, we will cut out the top lid of a 200 liter barrel. Let's make a pressure circle for the air distributor from it.
In option 2, cut two circles from a sheet of iron, with the same diameter as the diameter of the pipe. Then we will connect the first circle to the pipe by welding. This will be the bottom. The next circle will become a pressing oppression.
In option 3 we use an iron cylinder (made of large sheet metal) instead of a barrel. Brew a sheet of rolled paper along the seam. The lid with the bottom is also made from a sheet of metal. Everything else is made in the same way, from previous design options.
Stages of installing bubafoni from a gas cylinder.
We will arrange all the work on producing Bubafoni from an old gas cylinder into logical steps: Fill the body with water (the cylinder valve is unscrewed). This will prevent a possible explosion of residual gases. Important, responsible operation!!!
Fill the body with water (the cylinder valve is unscrewed). This will prevent a possible explosion of residual gases. Important, responsible operation!!!
Using a grinder, cut off the top part of the cylinder. Please note that where there is a seam, an additional reinforced layer is glued to the inside of the cylinder. This will complicate the cutting process, but it can be solved. Without this there is no way, the curb will interfere with the movement of the piston. The action is not simple and it is better to cut below the seam. Let's make a hole in the body for the chimney near the top of the boiler. An elbow is made from an iron pipe with a cross-section of approximately 100 millimeters at a right angle. Then two pieces of pipes are cut at 45 degrees and welded together. Next, a 120 mm chimney pipe is connected to the elbow through an adapter. This will definitely make the traction better. The adapter must be sealed using fiberglass or ordinary clay. We will make the lid from a piece cut off from the cylinder, or from sheet metal. Of course, a flat lid would be better. You can place a frying pan or saucepan on it. We cut out the hole for the piston by welding. The section can be anything. Maybe not round. A square or any other pipe will serve its purpose just as well. Installation will be simple.
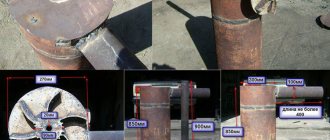
A pancake 27 cm in size is cut out of a 4 mm piece of metal. For the rod we make a hole in the center. The circle is made in such a size that there is a gap of 5 percent of the size of the pancake. Six blades are welded to the bottom of the disk. The blades are bent so that a turbulence of air masses is obtained in the direction of the arrow to the right. The wood will burn better and will burn off all the gas at the top of the chamber. In the center, on top of the blades, a disk with a 40 mm hole is attached. This is necessary so that the charcoal does not clog all the spaces in the air mixture supply rod, and there is sufficient clearance between the firewood and the blades. The stove is installed on the foundation, shielded from nearby walls and objects. This will achieve additional fire safety. The foundation, after heating, will serve as a good heat store for the room and will not cool down so quickly. When loading raw wood into the stove, an additional bend is added to the chimney pipe below, which accumulates condensate. And a tap is installed in the elbow to drain condensate.
Laying the foundation for a pyrolysis furnace
To build a foundation for a pyrolysis stove we need:
- Shovel
- A container for mixing mortar or a concrete mixer (whoever has one).
- Ready-made mortar in bags or individual components (sand, cement)
- Crushed stone
- Fire-resistant red brick
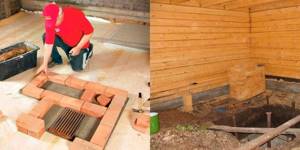
Let's get to work. We will conditionally divide all work into three stages: First stage. First, let's dig a hole the size of each side of the square, equal to one meter, or the side of the square, up to one and a half meters. Accuracy is not important here. The depth of the hole for the foundation of the bubafoni should be thirty centimeters. No need to go deeper. Otherwise, there will be cost overruns and materials.
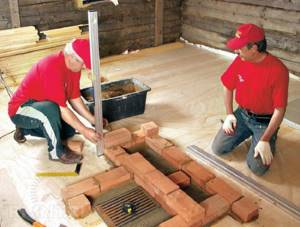
Second phase. We fill the pit with crushed stone. Mix the concrete solution. The brand of solution is optional. We fill the crushed stone in the hole with concrete mortar. Make the surface smooth. A simple trowel will be enough. You need to pull it across the surface of the concrete with a flat, clean board. When the concrete has dried, check the quality of the plane using a building level. If necessary, we additionally adjust the resulting plane according to the level. Depending on the temperature at which the concrete dries, from several days to a week, we wait for the concrete pad to dry completely. After the concrete pad has dried, we move on to the next stage.
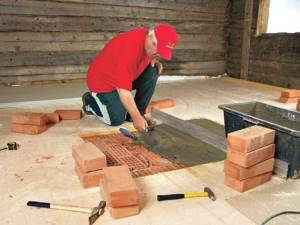
Third stage. We lay fire-resistant bricks on top of the concrete base. How many rows of bricks will be enough? Two or three layers of refractory bricks are enough. If there are walls nearby, then it is necessary to install screens to reflect heat from the walls of the building. Screen materials can be the most common.
Drawings, dimensions and calculations
You can make a small stove with your own hands to heat a garage or other space using scrap materials.
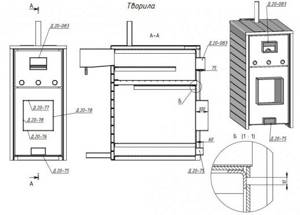
It’s easy to create a sketch plan and drawing of a small metal stove-stove yourself
An obligatory step is the creation of a drawing or diagram of the future structure. To do this, you need to determine the shape and dimensions of the case, the location of the cameras. After this, the power sufficient to heat the room is calculated. The parameters are determined as follows:
- Let's assume that 10 kW of heat is required to heat the room at the lowest outside temperature. We determine the required power of the furnace in normal combustion mode. It is known that in the gas generation mode the furnace power is 10-30% of that which develops in the flame combustion mode. Consequently, to obtain 10 kW with gas generation, the unit, when burning with a flame, must develop a power of W = 10 / 0.3 = 33.3 kW (we assume a 30 percent power ratio);
- We choose the least energy-intensive fuel. For example, dry beech is optimal;
- We calculate the volume of fuel that can provide the required power. A portion of firewood burns in flame mode in approximately 4500 s. Therefore, during this time it should provide the following amount of heat: Q = 33.3*1000*4500 = 149.85 MJ. Let's calculate the required mass of fuel, taking into account that it burns only 80% completely, and the efficiency of a homemade stove is approximately 50%: M = 149.85 / (15.5*0.8*0.5) = 24.17 kg. Knowing that the density of dry beech is 620 kg/m3, let’s convert the resulting mass value into volume: V = 24.17 / 620 = 0.039 m3 = 39 l;
- We calculate the volume of the firebox. The average furnace load factor is 0.63. It should have a volume: Vt = 39/0.63 = 61.9 l.
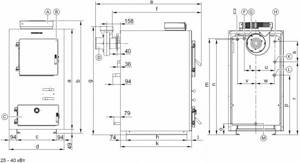
You can make a drawing or technical drawing of the product yourself, taking into account the shape and features of the stove. A ready-made image of a suitable unit is taken as a basis.
Tools and materials
List of required consumables and working tools:
- sheet steel grade St20, thickness 3–4 mm;
- steel equal angle angle 4x50 mm;
- pipe with a diameter of 50–60 mm;
- steel reinforcement with a cross section of 8 mm;
- steel pipes with a diameter of 110 or 120 mm for the chimney;
- bricks in the amount of 15 pieces;
- electric welding machine and several packages of electrodes;
- drill and metal drills, grinder with 230 mm circles;
- building level, tape measure, pencil, hammer.
Choose consumables that are high-quality and reliable. Not only the operation of the pyrolysis furnace, but also the safety of the surrounding area during the heating process depends on this.
Preparation and selection of installation site
The assembly of the structure is carried out directly in the room where the stove will be installed. It is best to order sheet cutting into blanks from specialists in the store. This will ensure a good quality base for the product.
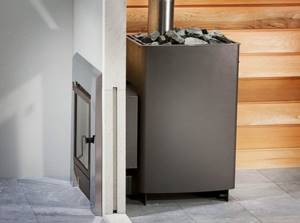
The space around any stove must be safe and heat-resistant, and the floors must be level.
The site for installing the unit must be prepared.
- a base of bricks or other non-combustible material is laid on the floor;
- the base area should be larger than the dimensions of the oven;
- install the unit at a distance of at least 80 cm from the nearest walls;
- the floor within a radius of 1.2 m in front of the heating device must have a fireproof coating (iron sheet 1.5 mm thick).
Ignition of the Bubafonya stove
To begin with, remove the caps from the cylinder and remove the piston-press with the air duct from the stove. Let's put dry wood inside the stove. Any type of firewood. We place the firewood horizontally, as close to each other as possible. If we place the firewood vertically, we will get an unpleasant surprise.
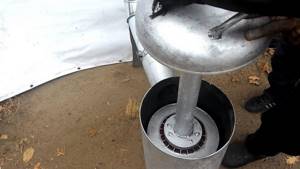
The surprise will be next. An unburned log standing vertically will not allow the piston to move to the bottom. If this happens, there will be a full-fledged fire in the lower chamber. The fuel will burn quickly. The operating mode of the stove will be burning instead of smoldering. I’m generally silent about smoke from the air duct; it will definitely appear. Firewood does not need to be stacked above the level of the chimney opening.
Next, you need to press the firewood with the piston and put the bubafoni cover on the piston.
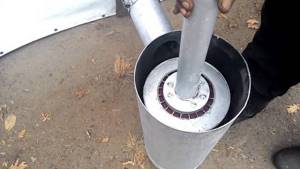
How to properly set fire to wood? Simply throwing a burning match will not work. It will definitely go out before it even reaches the firewood. We'll keep it simple. Take paper, rags or a piece of birch bark. Let's light it and throw it in the oven.
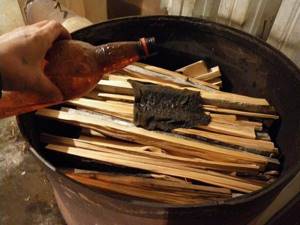
We need to wait 20 minutes for our bookmark to burn well. Then close the valve on the air duct. Air will begin to enter the stove in less quantity. In the primary chamber with firewood, the firewood will stop burning and begin to smolder. Pyrolysis gases will be released. But we need gas. After all, the installation is pyrolysis! This is how our super stove will reach its operating mode.
Video instruction. Ignition of the Bubafonya stove
Existing principles of laying a pyrolysis furnace
The principles in this case will be the same as when laying any stove. The laying should be done evenly, in rows. In the process of laying out each of the rows, it is necessary to check the evenness of the placement of bricks using a building level. The walls and guides should not move apart.
The masonry mixture must be prepared in advance. In this case, you will need to select the required proportions of sand and clay, make the mixture elastic and easy to work with.
Particular attention should be paid to the layout of door openings. You should set up the frame and immediately lay special basalt-based cardboard between it and the masonry
The metal will expand and contract in the event of temperature changes, basalt cardboard is used to level out this moment.
The distance between the bricks and the walls of the boiler should be at least 6-7 cm.
You will need to make several small holes at the bottom of the structure. In the first or second row of masonry, you need to leave small gaps, approximately in the seam, so that the air can be ventilated. Air exchange allows the room to quickly warm up, since in this case the principle of natural convection will work.
https://youtube.com/watch?v=pipgtaF1YGE
At the base of the foundation, you can lay out another row of them, after which you need to raise the base of the boiler. This material has a good level of strength, so it is recommended to use it.
This way you can save a significant amount of money.
At the next stage, the chimney pipe is installed, after which it is lined with bricks. In this case, you will need to constantly rub the inside of the masonry. In this way, problems associated with the appearance of gaps in the seams can be avoided. Every few rows of masonry, you need to wipe the inside of the wall with a dampened rag to smooth out all the seams.
Making a pyrolysis stove with your own hands is quite difficult, so you won’t be able to do it without the help of a professional stove maker.
Recommendations for increasing the efficiency of a homemade stove
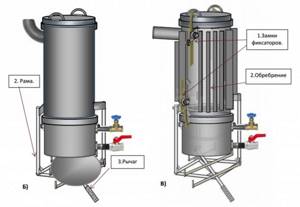
How to increase the efficiency of bubafoni? What problem is preventing this heat generator from working to its full potential? One of the problems is that the stove body heats up unevenly. Because of this, we get poor heat exchange in the room. Is it possible to solve this problem? Of course you can. To solve this problem, let's take a sheet of corrugated metal profile. We wrap it around the stove, obtaining a protective “shirt” and spot-weld the profile sheet to the cylinder.
You can find another solution besides welding. It's up to you to decide. By implementing this solution into a finished design, we will obtain a long-burning furnace device that forms rising air currents. Cold air will rise from the bottom of the ribs. After passing along the body of the cylinder, the air will heat up and become hot at the outlet. In addition to this modification, you can do the following.
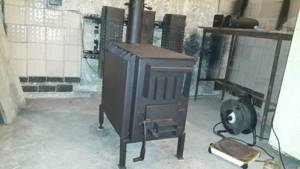
Cover the entire structure with bricks. This will allow heat to accumulate from the generator, releasing it evenly over the entire area of the building for quite a long time. In addition to the profile sheet, you can use pipe scraps. Profile or regular round pipes are suitable. They are welded around the cylinder body, resulting in an effective design for generating heat with uniform heating.
Pros and cons of gas generators
Pyrolysis combustion units are highly efficient and have many competitive advantages:
- high performance – efficiency up to 95%,
- environmental friendliness - minimal smoke level, no soot,
- comfortable maintenance - fuel is loaded 1-2 times a day depending on the model, there is no need to constantly monitor the fuel supply,
- fuel variability - pyrolysis can operate on any solid fuel resource. These can be various materials, including peat, pellets, wood, coal. Sawdust, husks, cardboard and other types of industrial waste are also used.
Another plus is the availability of self-assembly and installation of a factory model of a gas generator and the possibility of making a pyrolysis furnace with your own hands.
The main disadvantage of long-burning units is the high cost of the product. Depending on the power, models are sold in the range from 30 to 100 thousand rubles or more. Therefore, many are attracted to the idea of making their own pyrolysis oven for the home from inexpensive materials.
Among the disadvantages of operating pyrolysis devices, the requirements for fuel quality are also noted. Firewood must be stored in proper conditions to ensure optimal moisture levels. Otherwise, the efficiency of the unit is reduced, since the presence of wet vapors negatively affects the gas processing process.
Advantages of this type of furnace
Advantages of a pyrolysis oven
The pyrolysis furnace has an extremely high efficiency, exceeding 80% - thus, it provides a real opportunity for maximum economical consumption of organic fuel. By changing the automated settings, the efficiency of the pyrolysis furnace can also be adjusted.
Pyrolysis furnaces also provide the opportunity to recycle industrial waste - rubber, polymers and waste from the woodworking industry, however, when using several types of fuel at the same time, it is necessary to strictly observe the 70% barrier for the presence of wood residues.
Due to the almost complete combustion of fuel at high temperatures, emissions of final combustion products into the environment are minimal; There is practically no soot left inside the oven.
The autonomous operating mode allows the pyrolysis furnace to maintain a high temperature inside the firebox for three days without adding new fuel portions.
However, for full operation of the pyrolysis furnace and the elimination of excessive smoke, it is necessary to maintain a strict proportional ratio of air and fuel mixtures.
Features of operation and rules of safety regulations
It is very easy to operate such a sauna stove:
- collected thick and long firewood;
- they filled the entire volume of the firebox;
- They opened the damper and ash pan, made sure there was good draft and lit the wood.
Everything, as the wood burns, the stones heat up, the water heats up. You can call your friends, take brooms and a supply of herbal decoction or just kvass and, after throwing a few shakes on the stones, enjoy the fragrant and hot steam and conversation with loved ones.
When operating, it is important to follow the rules for safe use of the oven. There are few of them and they are very simple:
- Be sure to monitor the condition of the chimney. At the first sign of its malfunction or decrease in traction, all problems will need to be corrected immediately. It is recommended to clean the chimney at least once a month;
- after the wood starts burning, the ash pan door must be closed;
- The firebox door opens only to add firewood and control its combustion. The rest of the time, when the fuel is burning, the door must be securely locked;
- You should not try to heat the oven by touching the sides with your bare hands - this will lead to burns on your hands. The level of heating can be felt by the amount of steam from the stones when water is splashed on them from a ladle.
Manufacturing a metal version
In order to provide a country house or garage with a reliable source of thermal energy, you can make a pyrolysis oven yourself. This will require a sheet of metal of appropriate size and knowledge of manufacturing technology.
A country version of the device can be created in a simplified form. In this case, the combustion space is arranged above the gas generation chamber, which allows for the creation of natural draft and eliminates the need to use a smoke exhauster. A stove device of this design is not connected to the heating system, it does not have a combustion mode control function, however, such a heating device successfully copes with the tasks assigned to it, providing more economical fuel consumption compared to traditional stoves.
In the process of making a pyrolysis unit with your own hands, you must adhere to a certain sequence of operations:
- Heat-resistant steel is used to create the furnace body. The sheet of metal is marked according to previously prepared sketches, cut into individual components, and then welded into a single structure. In the lowest part there is an ash collection, above which there is a combustion chamber, isolated from the ash pan by a cast-iron grate. The supply of the required amount of air to ensure the progress of the pyrolysis process is regulated by the position of the ash pan door.
- A chamber for combustion of pyrolysis gas is installed above the combustion compartment. A heat-resistant steel plate is installed between them.
- The doors of the fuel combustion device and the ash pan, made of metal, are reinforced with a corner.
- The internal surfaces of the combustion space and gas chamber must be lined with fireclay bricks, which helps protect the metal from rapid burning, as well as improve the heat distribution characteristics of the heating device. If the pyrolysis furnace will be used in a residential area, it is necessary to line its outer surface with bricks. This will protect you from burns if you accidentally touch the body of the heater.
- The smoke channel must have a damper that will allow you to regulate the intensity of the draft. To make a chimney, a rolled metal product is used, the outer surface of which should also be lined with fireclay bricks. If the pipe is not insulated in this way, temperature differences on its external and internal surfaces can cause condensation, which will lead to corrosion and subsequent destruction of the metal.
Types of brick heaters
Based on frequency of use, they are divided into two types.
Permanent action
The heating equipment has thin walls and a small layer of stones. The heating of the stones is maintained at 300–350 degrees. Temperature stability is achieved using a connected automatic control system.
The main types of fuel are electricity and gas.
In electric heaters, heating can be reduced (increased) by changing the current, in gas heaters - by adjusting the volume of supplied fuel.
Both types are equipped with automatic protection, which, when the desired temperature limit is reached, turns off the power or, on the contrary, increases it when the fire begins to go out.
Installation and operation of devices occurs only with the permission of the fire inspectorate.
Heat the stove until the stones are sufficiently heated and steam is formed.
It looks like a closed electric oven; on top of it is a metal box with stacked stones. Heating is carried out by heating elements - they enter from below through a layer of stones.
Improved models have a soft heating system. The arrangement of stones does not come into contact with ventilation air; they are heated separately.
It is important to pay attention to the fact that as the layer of stones increases, the production of heat and, accordingly, steam increases. In factory models it is allowed to change the volume of stones from 5 to 60 kg
To obtain dry steam in saunas, minimal stones are needed.
Periodic action
It is customary to lay out such stoves with thickened brickwork. The volume of stones used is large. Durable brickwork protects the outer wall from overheating, allows you to retain heat for a long time, maintaining the temperature inside the room at the proper level.
The reinforced firebox heats the stones below up to 1100 degrees, the top layer - up to 600 degrees (become crimson). Soot and dust are completely burned out.
For solid fuel
In such heaters, the firebox and smoke circuits are separated from the stones by a cast iron plate or wall. The partition prevents combustion products from entering the bathhouse, and soot does not settle on the stones. The average heater can heat a steam room with a volume of up to 10 cubic meters. m, maintaining the room temperature up to 140 degrees. The device has double side walls; air is exchanged and heated through their gaps.
Compact (small-sized)
It’s easy to get a homemade small-sized version from a laundry stove. Only instead of water, stones are placed in the tank. And water, when needed, is heated in a bucket, placing it on top of the stones.
The downside of the small size is the thin walls of the firebox. The solution is to cover it with brickwork, leaving gaps for air exchange.
It is recommended to assemble it yourself from steel sheets 3–5 mm thick.
With built-in water tank
Ovens with double walls are considered the most efficient. The gap between the walls is used to heat water. In addition, you can place an additional water tank next to the stove.
It is located at the top or bottom of the structure.
Above
To increase the rate of heating of the stones, cast iron scrap can be added to the bottom layer. The slab can be installed either as a single piece or as a prefabricated one. The recommended plate thickness is from 10 mm. In order for the stove to warm up faster from below, it is necessary to make smoke circulation along the back of the brickwork. To do this, they take steel plates and divide the internal cavity into two channels: lowering and lifting. Insert them into the gap between the bricks. On the 8th row, the plate needs to be bent so that it can be seamlessly sealed between the bricks.
At the top of the stove, the stones protrude, so the lifting channel is designed in the form of a zigzag. Due to this shape, heat transfer increases. A damper is placed at the top of the channel. A tank of water and stones are covered with a small steel or iron lid.
From below
In such a device, the dimensions of the firebox are increased. The volume of the chamber for stones is larger – 50 liters. For ease of kindling there is a damper at the bottom.
Since the end of the tank faces the firebox, on the sides and below it comes into contact with hot gases, the heating of the water accelerates significantly.
To lay the top bricks, the container is closed from above for most of its length. A steel plate will suffice.
When the lower damper is open, flue gases immediately exit into the chimney without entering the smoke circulation. Therefore, as soon as the stove has reached the desired temperature and a stable combustion process has been established, the damper from below is closed. The stones with the tank are covered with hinged lids.
It is easier to make a partition from a cast iron boiler. Its surface will be washed by flue gases, so the stones located inside will quickly heat up. The firebox is lined with refractory bricks, so coal can be used as fuel.
Design and principle of operation
Construction begins with the development of the project.
The diagram of such a furnace is shown in photo No. 1 (below).
Such a stove can heat up to 1300 m2 of area. Suitable for a large country house. The costs of its construction are not small.
But they fully pay for themselves over time. Its efficiency is more than 90%.
In addition, it effectively accumulates and accumulates heat. One stack of firewood lasts for more than 30 hours. If we add accumulated heat to this, it becomes clear why such a stove can be heated once every two days.
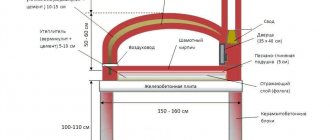
Photo No. 1 Sectional view of a brick pyrolysis oven
Making a brick pyrolysis oven with your own hands is not an easy task. Inside, all partitions are made of fireclay bricks. This is caused by the high combustion temperature - up to +12000 C.
To save money, we will make the oven itself from simple refractory ceramic bricks. From an aesthetic point of view, such a stove is not inferior to its analogues. Such a pyrolysis stove can look like a fireplace and occupy a central place in the interior.
Photo No. 2 Operating principle and diagram of a brick pyrolysis furnace
Due to high temperature and lack of oxygen, the fuel breaks down into solid hydrocarbons and a mixture of gases.
More complete combustion occurs and efficiency increases. One load of fuel is enough for more than a day. Often, pyrolysis stoves for baths are of this design.
Such a stove in a sauna is a real find.
It is not afraid of water, consumes fuel efficiently, retains and releases heat for a long time. In addition, waste is often used as fuel: sawdust, garbage. This further increases the savings.
Flaws
1. Many factors, which are almost impossible to avoid, cause the formation of condensation on heat exchange surfaces. A mixture of condensate and soot forms a viscous, tar-like, acidic coating that is difficult to clean. 2. Vigorous operation of a smoke exhauster or blower can “eat away” a significant portion of the savings brought by the device. In addition, energy dependence can lead to emergency situations during a lack of electricity. Additional measures are required to cool the boiler and its emergency shutdown. 3. Efficiency is directly related to the combustion mode. This forces you to burn extra fuel or have other problems. 4. Constant, frequent monitoring of the chimney system and thorough cleaning of gas outlets, which tend to become overgrown with condensation products, are required. 5. Relatively difficult to manufacture and the need for electronic control components. 6. Special attention should be paid to the chimney; it should be of a larger diameter and better insulated. 7. Wet fuel easily reduces operating efficiency. 8. High cost, sometimes reaching 1.5 and 2 times the value.
What is pyrolysis?
Pyrolysis is sometimes called "dry distillation". The thing is that solid fuel does not burn at low temperatures (plus 200-800 °C) and a small amount of oxygen, although it does release heat. Under such conditions, the fuel smolders, releasing pyrolysis gas. All that remains is a solid residue, which is called wood coke.
So, pyrolysis gas, if mixed with the required amount of oxygen, forms a flammable mixture, the combustion of which releases a huge amount of thermal energy. Pyrolysis boilers and furnaces operate on this principle.
The solid coke remaining after the release of flammable gas is not left idle. It continues to smolder, burning through to the end. So in the end only a small amount of ash remains.
Housing: make or adapt
Firewood in a long-burning potbelly stove does not burn, but smolders very slowly. At the same time, highly heated pyrolysis gas, formed due to the thermal decomposition of the fuel, burns in the chamber adjacent to the firebox. In this “stifled” operating mode, the furnace does not generate very high temperatures, so the metal can be quite thin - about 2.5 mm. Naturally, with a full air supply, the oven will heat up red-hot, so if you want a high-power mode, make the body massive.
Sheet steel is ideal for making the body. It is also possible to use any profile rolled metal, folded in vertical rows into a ring or rectangle. There is a problem in welding all the seams, but in this case the oven receives multiple stiffening ribs and transfers heat as efficiently as possible.
The body of the potbelly stove is made very simply: solid sealed walls and a bottom. Loading can be vertical or horizontal; in the latter case, the top cover plays the role of the combustion door. We will consider both spatial positions of the potbelly stove, but the body will be unified for each. Let's take a 50 liter propane cylinder with a cut off top as an example - a cylindrical body has the advantage of more uniform heating.
Scheme of operation of a long-burning potbelly stove with a horizontal combustion chamber. 1. Chimney damper. 2. Door flap. 3. Combustion chamber. 4. Pyrolysis gas afterburning chamber. 5. Stove door
Scheme of operation of a long-burning potbelly stove with a horizontal combustion chamber. 1. Air supply damper. 2. Chimney damper. 3. Air supply pipe. 4. Combustion chamber. 5. Stove lid. 6. Pyrolysis gas afterburning chamber. 7. Piston
Video
Stove heating in Ukraine, as they say, is experiencing a rebirth. The reasons for this phenomenon are clear without any explanation.
That is why Kharkov innovator Oleg Petrik proposed using pulverized-coal thermal power plant technologies to increase the efficiency of home stoves, and for this it is not at all necessary to have the skills of an experienced mechanic. How can you increase the efficiency of a coal (wood-burning) stove or solid fuel boiler without the use of additional energy resources. The principle of operation of the technology is quite simple : water from the reservoir (steam generator) turns into steam at a high temperature (400 - 500 C) and is supplied directly to the flame, acting as a kind of combustion catalyst that increases the performance of the heating installation. To create an innovation system, you will need: a steam generator, which is made from improvised means ( A canister or pan is suitable, preferably made of stainless steel; even an old moonshine still can be used). A nipple from a car tire is cut into the container. You will also need about half a meter of oxygen hose and about one and a half meters of tube, preferably made of thin-walled stainless steel with an internal diameter of 8 mm, from which the superheater is made.
According to the superheater, steam in a heated state enters through a hole in the stove onto the grate. A steam divider is mounted at the end of the tube to neutralize noise: the tube is cut into slightly less than half with a grinder, in increments of approximately 10 mm, 7 - 10 cuts are made, then the holes are wrapped with a mesh with a 20-30 micron stainless steel window in two or three layers, and it is attached to the tube with a wire with a diameter of 1-1.5 mm.
The rubber tube above the stove must be raised 20-30 centimeters (it is not raised in the photo shown). Although some cooling of the oxygen hose occurs due to water vapor, this must be done for fire safety reasons.
On the subject: Ukrainian craftsman designed an energy-efficient solid fuel boiler and abandoned natural gas
In order, in turn, to speed up the production of steam by the steam generator, when lighting firewood, it is necessary to pour no more than 200 ml of water into the container, it will boil in 5-8 minutes and the device will begin to operate at full power. After this, the steam generator can be completely filled with water for long-term operation of the furnace. The increase in productivity is approximately 50% compared to conventional devices.
Tests of the device showed that the stove's output to operating mode was reduced by half, that is, from 2 to 4 hours. This means that half as much firewood will be needed to heat the stove. The completeness of fuel combustion has improved, the smoke coming out of the chimney is practically invisible, and the amount of ash has decreased significantly. Due to the rise in prices for energy resources, in particular natural gas, such modernization will become relevant for many homeowners. Of course, the proposed solution requires significant improvements: it is necessary to automate the water supply process, optimize the design itself, etc.
However, the option of inexpensive and quick “pumping” of the stove using basic means that can be found in every home will help many people save a lot, and may also be an impetus for the development of new technologies and the birth of new ideas. Read also: Water as a fuel: scientists have found an effective a method of splitting water into hydrogen and oxygen. The craftsman from Kharkov also has a windowed experimental installation for burning coal or wood in a steam atmosphere, or, as he calls it, a “hydrogen potbelly stove.” Help. Superheated steam is widely used to improve the efficiency of turbines in thermal power plants, with the beginning of the last century was used on steam locomotives of all types. Moreover, nuclear reactor designs have been developed in which part of the process channels should be used to superheat steam before feeding it into turbines. It is known that the use of a superheater can significantly increase the efficiency of a steam installation and reduce the wear of its components. Source: ecotown.com.ua Did you like the article?
Share it and you will be happy! A pyrolysis furnace is a virtually waste-free production device that runs both on standard fuel - wood or coal - and uses a by-product of previous processing cycles - gases - to produce thermal energy. Thus, this type of furnace performs the function of a gas generator. Such a stove is almost the only source of heat in cold areas of the planet that are difficult for civilization to reach, where there is no possibility of installing a gas pipeline or a central heating line. On what principle does a pyrolysis stove operate, and the main points in creating it yourself should be considered in the article presented below .This is what a pyrolysis oven looks like
