Every poultry farmer knows that low temperature in a chicken coop leads to a decrease in egg production in birds and the development of colds, which can lead to the death of the entire flock. Several methods are used to heat a chicken coop, but the use of heaters is expensive and does not always pay off. Let's look at several inexpensive ways to heat a chicken coop in winter without electricity.
Types of heating
In order to maintain maximum egg production in chickens in winter, birds need additional lighting and warmth in the room. As for purebred chickens, each variety has its own temperature standards in the chicken coop, but in no case should it fall below +10 degrees Celsius. A comfortable temperature for birds will be from +12 to +18 degrees. To control the temperature in the chicken coop, install a thermometer. There are two types of heating:
The first includes insulating the room itself and laying additional bedding, which releases heat when exposed to natural processes. Artificial heating is the installation of a heating system and electric heating devices.
Floor insulation
It is advisable to make a wooden floor in the chicken coop, which itself will already be warm. In winter, it is covered with sawdust, straw, hay, and seed husks. The bedding is made at least 5 cm thick, and after it gets dirty it is changed.
If the floor is concrete, you can use new technology and lay a fermentation mat. It consists of a 30 cm layer of sawdust or other organic matter and beneficial bacteria introduced as a powder or liquid preparation. Living microorganisms process the droppings into compost, and in the process release heat, further heating the barn.
Important! For the bacterial litter to work, it needs good ventilation and a constant positive temperature. It cannot be installed on a wooden floor; bacteria will destroy the boards.
Insulation of the room
Even high-quality homemade heating will not save you from the cold if frosty air enters through holes in the walls, doors and roof. Drafts significantly increase the cost of heating a room. Therefore, before installing any heating system, it is advisable to spend a little money and start insulating the chicken coop, this will reduce costs in the future and provide a warm shelter for the birds.
Walls
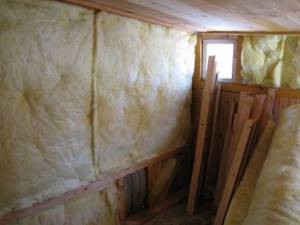
There are many materials for insulation on sale, but most often poultry farmers use mineral wool. It retains heat well, does not allow cold to pass through, is highly resistant to chemical, physical and biological factors, and is also easy to install. Wooden or iron slats are installed on the walls, forming cells into which the cotton wool is placed. Any vapor barrier material is attached to the top; it will protect against condensation accumulation. The finishing material is attached last; you can use chipboard, USB or plasterboard sheets.
Since mineral wool may contain some substances that negatively affect the health of birds, it is better to use it for external wall insulation.
Polyethylene foam is also used as insulation, but its cost is quite high. It is better to choose a material with a foil coating, as it perfectly reflects heat. For installation, slats are nailed to the walls, onto which the material is secured with self-tapping screws. The joints are fastened together with special aluminum-based tape. Afterwards the insulation is covered with finishing.
The most economical way to insulate the walls in a chicken coop is to putty the walls with clay and sawdust. To achieve the desired result, it is necessary to observe the proportions of 3 to 2; add 2 parts of sawdust to 3 parts of clay. The clay is pre-soaked in water, stirring until a homogeneous substance is formed, then sawdust is added to it and mixed thoroughly; it is better to use a concrete mixer for this. The resulting composition is applied to the wall in a three-centimeter layer. When drying, cracks often form; they need to be covered with the same composition. When the walls are dry, they are covered with quicklime.
The floor plays a very important role in maintaining heat; if the chicken coop is built directly on the ground, then it will freeze and, accordingly, the room will be cold. Most often, the same mineral wool and polystyrene foam are used to insulate the floor; expanded clay also retains heat well. A bedding is placed on top of the covering for insulation; sawdust or wood shavings are used for this. Many poultry farmers recommend buying sawdust from spruce; they have disinfecting properties and slow down the proliferation of pathogenic flora. A layer of straw is sprinkled on top of the bedding.
Ceiling
In areas with frosty winters, it is recommended to build chicken coops with a gable roof; this will reduce the load on the roof, and the attic will help retain heat. To insulate the roof, the same materials are used as for insulating the floor.
Windows and doors
No less important is the insulation of window and door openings, because cold air can penetrate through holes. To begin with, inspect the openings, if necessary, foam the cracks, and do the same with window frames. Then you can clean off the excess foam using a utility knife and cover the area with putty. Large holes can be used to place rags. Thermal insulation materials are used for door upholstery.
Artificial heating
In areas with a temperate climate, heating installation is not always required, but in most regions of Russia, winters are cold and it is impossible to do without it. Many poultry keepers are considering installing heating in their coop, but most are on a tight budget and looking for a cheaper option. However, you need to take into account not only the price of heating devices, but also monthly expenses in cold weather.
Stove heating
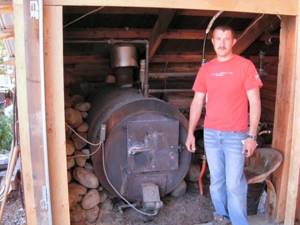
Most often, a potbelly stove is installed to heat a chicken coop, this is due to the fact that the raw materials for the furnace are abundant and cheap. The stove can be heated with either wood or coal. If you have the skills, you can make the design yourself, but if you don’t have them, then it’s better to buy a potbelly stove. The stove is placed away from flammable materials, this will reduce the likelihood of a fire. It is also better to shield it from birds so that they do not accidentally get burned.
Furnace design features
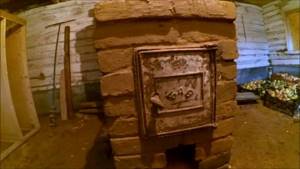
Traditional brick ovens have a fairly simple design. However, the apparent simplicity at first glance allows one to achieve very high levels of productivity and efficiency.
The main elements of the brick stove body are the firebox and chimney. Cooking stoves are additionally equipped with stoves and/or ovens; it is also possible to install a tank for heating water.
Scheme of a Russian stove
The firebox is the main part of the stove unit. It is into the firebox that firewood or other fuel used for heating is loaded. The firebox can have a wide variety of sizes. When determining suitable dimensions, several important factors need to be taken into account, such as:
- type of fuel used. If you will heat the stove with wood, make a firebox 50-100 cm high;
- required performance;
- required volume.
To arrange the firebox, use refractory bricks. The thickness of the walls of the structure in question cannot be less than half a brick.
The chimney is also one of the main elements of any heating stove. The chimney is designed to remove flue gases with various harmful inclusions formed during the operation of the stove.
Rules for constructing a brick chimney
At the chimney design stage, try to think through everything so that its design has a minimum number of bends and turns. Ideally, the chimney should be completely vertical. Any kind of bends will lead to deterioration of traction and a decrease in the efficiency of heating the room.
An important element in the design of a brick kiln is the ash pan chamber. Ash will collect in this compartment. Also, through the ash pan, air is supplied inside the unit to the fuel. The ash chamber is located under the grate and is equipped with its own door. Traditionally, the height of the ash pit is 3 bricks.
Necessity of heating
Creating a favorable temperature regime is directly related to the productivity of chickens and is a necessary key to successful farming. Even a slight decrease in temperature in the chicken coop, lasting for several days, can sharply “reduce” the egg production of the bird and significantly reduce the weight gain of broiler chickens. Warmth acts as a priority maintenance condition, along with feeding and the necessary supplements. In addition, in a cold room, the risk of colds increases sharply and a noticeable decrease in immunity occurs, and when the temperature drops below 5 degrees, the bird may even develop arthritis in the legs. Also, a sharp drop in temperature in the chicken coop can cause the formation of frost and increased humidity, which inevitably leads to the occurrence of infectious diseases in broilers and laying hens.
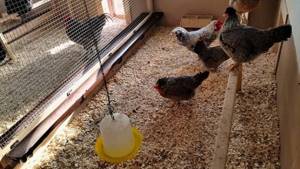
However, keeping poultry in conditions of low temperatures affects not only the health of chickens. In addition to the fact that egg production drops sharply, problems arise with hatching chickens. This is due to the fact that the embryos lack maternal warmth, resulting in a very large percentage of unhatched chicks dying. Due to the fact that the bird is forced to spend most of its calories not on gaining weight, but on heating its body, feed consumption almost doubles, which, along with a decrease in productivity, casts doubt on the feasibility of breeding chickens.
In winter, the optimal temperature in the chicken coop is 10-15 degrees Celsius. An increase or decrease in these values disrupts the biological rhythms of chickens and negatively affects their general condition. To constantly monitor the temperature in the chicken coop, you should hang two thermometers. One of them should be placed near the front door, and the second should be placed closer to the ceiling near the upper perch.
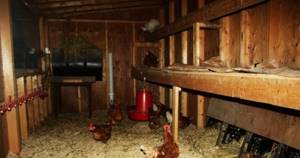
When can you not heat?
To organize heating of a chicken coop, two methods are used - artificial and natural. Each of them has its own strengths and weaknesses, differing from others in energy consumption, efficiency and the amount of money spent. So, for regions located in southern or temperate latitudes, the natural method is quite suitable. The main condition for using this method is the absence of a significant decrease in night temperatures and strong winds. If the temperature in an unheated room can be kept within 7 degrees, then the natural method is more rational and, when carrying out a number of heat-saving measures, can be safely used.
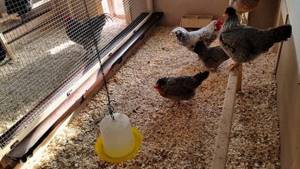
The first object to insulate a chicken coop is the floor. This is due to the fact that, thanks to the plumage, the bird’s body is not particularly sensitive to cold, and the only vulnerable point is the legs. That is why floor insulation must be done first. Before you begin laying the insulation, the floor surface must be sprinkled with powdered slaked lime at the rate of 1 kg/m2. The presence of lime will rid the chicken coop of fleas and ticks. Then the lime layer is covered with any heat-insulating material, which can be sawdust, fallen leaves or straw. The total layer thickness should be 25-30 cm.
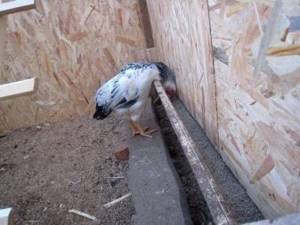
The most effective means of natural heating of a room is manure. During the process of overheating, mullein releases a significant amount of heat, which is quite enough to “heat” the chicken coop during the winter. The only condition for using manure is the prohibition on removing old, already trampled mullein. In such cases, a layer of new fertilizer is placed on top, while preserving the previously laid manure.
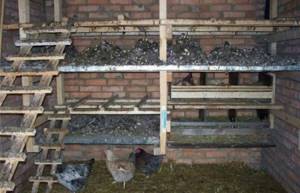
It should be remembered that under no circumstances should extruded polystyrene be used to insulate the floor. This is due to the fact that the material has low throughput and is not able to remove excess moisture. Because of this, the room will become damp and unsuitable for keeping chickens. Concrete floors are covered with thermal insulation material and then covered with boards.
After insulating the floor, it is necessary to begin thermal insulation of the walls and ceiling. To do this, you need to plug all the cracks, not forgetting to form a small ventilation window. When building a chicken coop that is not equipped with artificial heating, double walls and a ceiling should be made. The cavities between the two surfaces are filled with foam plastic or mineral wool, and the thickness of the insulating layer must be at least 15 cm. A room constructed and insulated in this way will “work” on the principle of a thermos: the heat generated by chickens and manure will be retained for a long time, which will allow chickens can tolerate frosts down to 12 degrees. The final stage of insulating the chicken coop will be the insulation of windows and doors, which is carried out using polyethylene or thick fabric.
What should it be
It would seem that there is nothing easier than replacing the suitable surface of a brick oven with a metal insert with your own hands, getting a stove for cooking. In reality, everything is much more complicated. A stove is a complex device, and the thermophysical processes occurring in it depend on the correct arrangement of its elements.
There are special requirements for furnaces of this type. On the one hand, it must effectively accumulate heat in the thickness of the brickwork, on the other hand, it must take a significant part of the heat to heat the hob . In the summer, when heating the house is not required, the hob should warm up quickly with economical fuel consumption.
Requirements
Theoretically, the hob can be made from any material that can heat up to high temperatures when the stove is fired. In practice, they use cast iron plates with holes covered with a removable lid.
This design allows you to create zones with different temperatures on the stove. The thermal conductivity of cast iron, unlike steel, is not very high, so you can heat food on the plane of the stove, as well as cook or stew it over low heat. And by opening the lid, you can achieve direct heating of the cookware with an open flame, which allows you to quickly boil water or fry food in a frying pan.
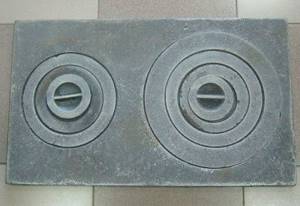
The most practical are the burners shown in the photo, consisting of concentric rings of different diameters - they can be adjusted to the size of the bottom of the cookware. In addition, the gaps between the rings compensate for the thermal expansion of cast iron that occurs when overheated, and the plate can withstand multiple heating and cooling cycles without damage. Solid cast iron stoves are less reliable and require more careful firing.
Materials
Which brick is preferable for laying a stove equipped with a hob? In most cases, on the ordering diagrams of stoves for a home, cottage or bathhouse, you can see two types of bricks: regular solid ceramic and fire-resistant fireclay - it is most often indicated in yellow. From fireclay bricks, they lay out with their own hands those parts that experience the greatest thermal loads during combustion : the firebox and the roof of the furnace, part of the smoke channel directly after the combustion chamber.
The main difference between fireclay bricks is its increased heat capacity . It is able to accumulate and release the resulting heat for a long time more efficiently than ceramic. For laying a heating stove, and especially a sauna stove, this is an undeniable plus.
But if the stove is used primarily as a cooking stove, then the increased heat capacity of fireclay is rather a disadvantage: it will absorb a significant part of the heat, and cooking will take more time. In the summer it will be impossible to cook on such a stove - the room will become hot and stuffy.
If the stove is used primarily for cooking, it is recommended to use a minimum amount of fireclay bricks!
There are many varieties of heating and cooking stoves; every stove maker probably has in stock several tested drawings and diagrams, according to which he carries out the masonry with his own hands. But, one way or another, they are all built on the basis of long-known ones, which are discussed below.
Swedish oven
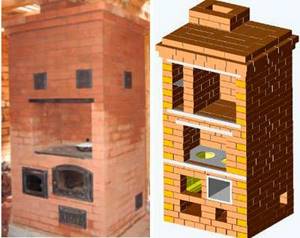
A distinctive feature of the Swedish stove shown in the photo is the oven. And its function is not limited to baking and baking. The oven is located next to the firebox and is separated from it by a thin layer of masonry. The firebox arch is formed by a slab located in a niche. Immediately after starting the fire, the cooking surface and the wall between the firebox and the oven warm up well.
In winter, when the stove is fully loaded, the initial heating of the room occurs by convection currents from the stove and oven, and after the end of the fire, due to the heated walls of the stove. The hob does not overheat , since air constantly circulates above it.
In summer, the stove is used mainly for cooking . In this case, intense convection does not occur, since there is no temperature difference, and a small amount of fuel is sufficient for good heating of the stove. The oven also warms up, creating a high-temperature zone at the exit from the firebox, due to which the flue gases go into the channels completely burnt. The furnace body heats up slightly .
The diagram and drawings of the masonry of a Swedish-type stove with your own hands are shown in the figure.
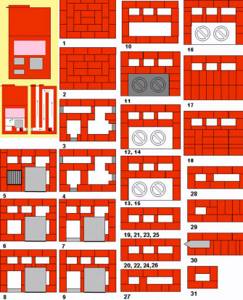
To lay a classic “Swedish” with your own hands you need:
- red solid brick grade M 150 - 580 pieces;
- clay-based dry masonry mixture - 200 kg;
- cast iron grate;
- firebox door;
- ash door;
- cast iron stove with two collapsible burners;
- oven welded from sheet metal;
- chimney damper - 2 pcs;
- cleaning - 3 pieces;
- equal-flange steel angle 40 mm - 170 cm;
- steel strip 5x50 mm - 65 cm;
- flat slate 10 mm thick - 1 sheet;
- roofing iron.
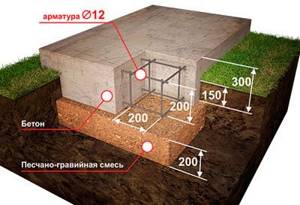
Under the foundation it is necessary to make a sand and gravel cushion 15-20 cm thick. The height of the foundation itself is at least 30 cm, with two-layer reinforcement made of rods. Before laying begins, the foundation is kept for at least 20 days to gain strength. Level the foundation using a screed with the floor level. After it dries, it is necessary to thermally insulate the furnace from the concrete, otherwise it will absorb a significant part of the heat.
Do it like this:
- an asbestos sheet 3-4 mm thick with dimensions 30 cm larger than the dimensions of the stove on the sides and back and 60 cm on the firebox side is placed on the foundation;
- a heat reflector is placed on the asbestos - foil or thin galvanization;
- followed by another similar layer of asbestos with the same dimensions;
- sheet of roofing iron with the same indentations as asbestos;
- on top of the iron is technical felt, impregnated with clay milk according to the size of the furnace.
How to do without electricity?
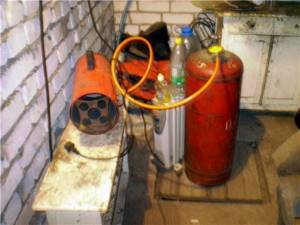
The artificial heating method requires the use of heating equipment, the choice of which depends on the external temperatures, the size of the room and the financial capabilities of the farmer. Electric, gas and solid fuel appliances are used to heat flocks and chicken coops. The simplest is the electric heating method, however, with frequent power outages or constant power surges in the network, it is better to abandon this heating method and use others.
Heat with gas
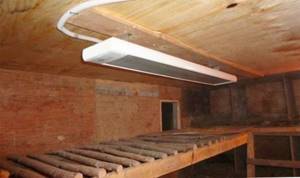
Gas heating comes in two types: convector and water. The water system works on the following principle: the heat generated during the combustion of gas heats the water in the heat exchanger to the desired temperature, after which the coolant, moving through the pipes and entering the radiators, heats the room. The essence of convector heating is that the device is devoid of pipes and has no connection with radiators; it heats up exclusively on its own, and outwardly resembles a large electric heater. Among the advantages of gas heating are the ability to quickly heat the chicken coop and high energy efficiency.
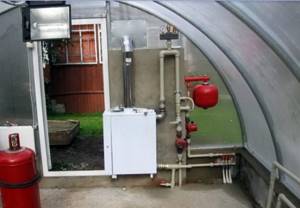
Disadvantages include the high cost of equipment and the need for constant human presence. In addition, when installing a gas boiler, permission from gas services and strict compliance of the building with fire safety standards will be required. It is advisable to use this type of boiler equipment in large poultry farming complexes, where constant monitoring of the device and its maintenance will be carried out.
Potbelly stove
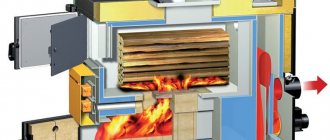
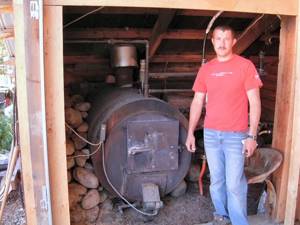
Heating using metal stoves is the simplest and most affordable way to heat chicken coops. The potbelly stove has a simple design and does not require expensive maintenance or regular maintenance. The essence of how a potbelly stove works is quite simple: when solid fuel is burned, the metal walls of the stove become hot and begin to give off their heat to the room. The advantages of this method are low fuel cost, quick installation and ease of use.
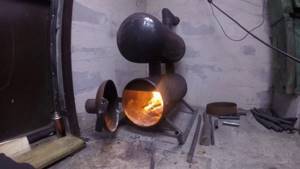
The disadvantages include the need to comply with fire safety rules , which obliges a set of measures aimed at preventing fire. Such measures include the construction of a fireproof pallet and the protection of nearby wooden walls from exposure to high temperatures. In addition, the use of a potbelly stove requires the constant presence of a person, which is due to the need to constantly add fuel. But the most significant disadvantage of heating with a potbelly stove is that it will not be possible to maintain a constant temperature in the room.
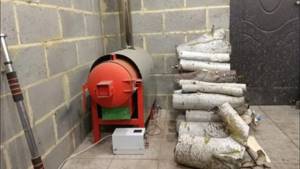
Diesel stove
Heating with diesel appliances is also used to heat chicken coops. Such installations are able to quickly warm up the air in the room and, unlike potbelly stoves, have a temperature regulator. This allows you to change the intensity of the flame and create the required temperature in the room. Diesel units are completely fireproof and environmentally friendly. The disadvantage of such systems is the high cost of diesel fuel, which most likely will not cover the profit received from the sale of chickens.
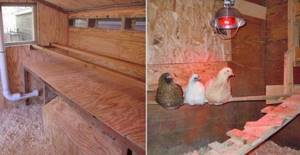
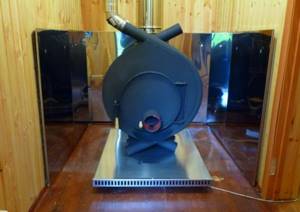
Buleryan
This type of oven is air-convection and is a good solution to the problem of heating chicken coops. The devices are characterized by high energy efficiency and can operate on any fuel. In addition, Buleryans, like all convection models, are quite economical and have high power. This allows them to be used for heating large-area chicken coops on farms and farms.
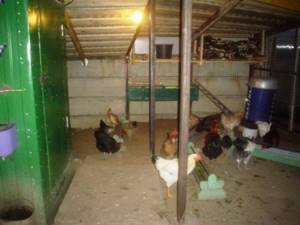
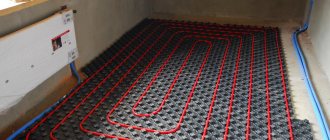
Water heating
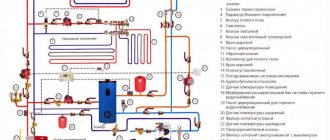
The water heating method is considered the most efficient and fireproof. If the home is heated using a water heating boiler, then the ideal option would be to connect the chicken coop to the heating circuit of the residential building. To avoid heat loss when transporting coolant from the house to the chicken coop, it is better to build a room for keeping chickens close to the house. If buildings are located remotely, pipes running along the street should be insulated.
What is so attractive about a potbelly stove?
Its main feature is its simplicity of design. Even with many additions to it, the principle of operation of a metal stove remains the same: everything that is at hand burns and warms the summer residents.
Although in this case half of the thermal energy evaporates through the direct-flow pipe. But no one writes off even a heating source that has rusted over time as scrap.
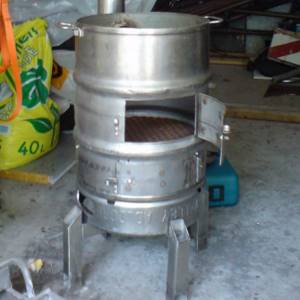
Such a temporary stove can be easily made in a day or two. But first, make your own drawings of the potbelly stove. Much of what is stored in the closets of rural houses and dachas is used. These are milk and water metal (not duralumin) cans, barrels for diesel fuel, vegetable oils, pipes, boxes, corners.
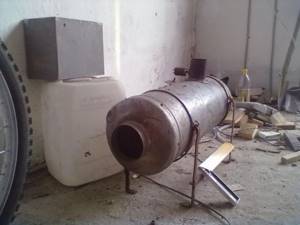
Nothing expensive, including tools - in villages every owner has them at hand. High-quality assembly using gas or electric welding.
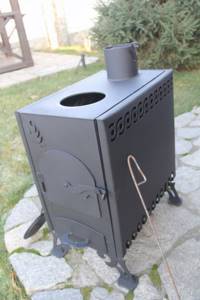
But neighbors who have units will help with this. Welding machines provide greater reliability and rigidity of the assembly. Below are step-by-step instructions on how to make a potbelly stove with your own hands.
Electrical heating
Heating a chicken coop in winter using electrical appliances is the most expensive heating method. each farmer decides which one to choose
- The ventilation type heater ensures constant circulation of warm air and contributes to almost instantaneous heating of the room. In addition, the device has high efficiency, is completely fireproof and ensures uniform heating of the entire chicken coop. The disadvantages of air heaters include high cost, high energy consumption, dry air and high noise pollution.
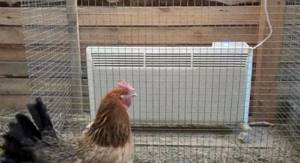
- Oil heaters resemble water heating radiators in appearance and consist of a heating element and sealed containers containing oil. The advantages of heaters include low energy consumption, which is made possible thanks to the presence of a thermostat. The relay prevents the device from overheating and turns it off as soon as the coolant temperature reaches a preset point. In addition, the devices do not produce noise, do not burn oxygen and do not smell. Disadvantages include slow and uneven heating of the room, the risk of oil leakage in case of damage, and heavy weight.
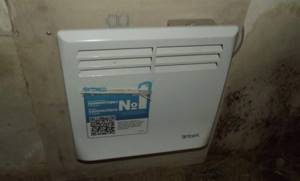
- Electric convectors are energy-saving devices, the essence of which is to suck in cold air from below and release heated masses upward. The advantages of the devices are the absence of noise and odor, low cost and preservation of the natural humidity of the chicken coop. Disadvantages include instant cooling and uneven distribution of warm air.
Why is my chicken coop warm in winter without heating. Simple and affordable
author Vyacheslav Voronov
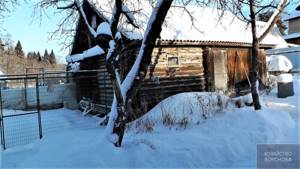
The topic of today’s article is why my chicken coop is warm in winter without heating.
To preserve and increase heat in the chicken coop, you just need to understand from what sources the heat comes and where it goes, only then can you make the right decisions.
WHAT IS MY CHICKEN COOP MADE OF?
in 1995 there was no profiled timber yet, but today I would make it out of it or brick
BOX
The chicken coop box is a frame made of solid logs 3 by 3 meters. Height 2.2 meters. It retains heat an order of magnitude longer than an insulated structure made from sandwich panels and similar frames.
If it were possible to make a chicken coop again, I would make it 3 by 5 meters, so that it would be more convenient for the chickens to jump from the roost
. There is only one minus - in severe frosts, more than 25 degrees, the logs can tear, in such cases you need to inspect the chicken coop for any cracks and caulk it. In 20 years I caulked only once.

In fact, to prevent cracks from appearing, it is enough to have a properly assembled log house and a good stable foundation so that the building does not move or warp and everything will be perfect
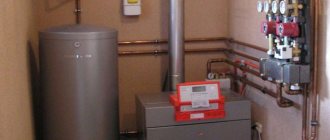
A gas boiler
Gas heating is most optimally used for large areas of utility rooms. You spend a lot of money on the purchase of a boiler, auxiliary equipment, and in addition to everything you need to pay for gas.
Thus, it is not advisable to use this option if you only have 15-40 chickens living in a small barn.
In addition to all this type of equipment, it requires maintenance. Installation of a gas boiler is carried out only by specialists from the relevant services, as they must try and test the entire system.
Natural warmth
A combined poultry house with barns where other animals and cattle are kept does not require heating. Anyone who lives in a village knows that one cow produces so much heat that it is enough to heat an entire barn. It is recommended to combine keeping animals in order to save money as efficiently as possible.
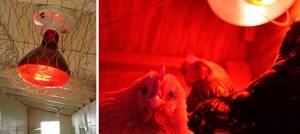
However, when placing the lamp there are some points to consider:
- The IR emitter should be placed in the center of the room so that heating is uniform;
- It is necessary to exclude direct contact between birds and the lamp - for these purposes, the lamp is fenced with a metal mesh;
- It is necessary to prevent water from coming into contact with the lamp.
Potbelly stove - a method without electricity
Many owners of small private households use a potbelly stove for heating. Stove heating has many advantages and is not demanding on the fuel used. The only drawback is that the metal from which the stove is made becomes corroded due to high humidity.
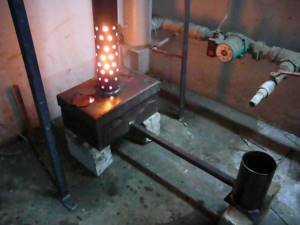
In addition to everything, it is necessary to create optimal conditions:
- a stove requires a chimney to operate;
- the combustion process must be constantly monitored to prevent a fire from occurring;
- it will be necessary to purchase fuel;
- compliance with safety rules;
- The potbelly stove should be located away from flammable surfaces; it is better to insulate it.
The considered theoretical foundations of the installation will make it possible to use the efficiency of the furnace as efficiently as possible. Recently, a lot of new heating elements powered by electricity have begun to appear, but they consume such an amount of energy that the costs will increase several times than using the above methods. You should carefully approach the choice of heating method for the chicken coop in winter, since your subsequent expenses will depend on this.
How to make a simple but effective stove?
This option can serve as an alternative to the simplest metal heating devices - for example, a potbelly stove. With the help of this stove you can heat the room, cook food, and even admire the flames.
The structure occupies just over half a square meter. Unlike full-fledged brick ovens, this one does not require a foundation. The weight of the structure is not so great as to make a strong base - it is enough to lay a strong board.
The oven can be made in just a day. One of the advantages of this option is that starting heating is possible in the evening. Certain skills are necessary, but they do not go beyond the skills of the average male.
On a note! No qualifications are required to build stoves. But it is necessary to maintain order - this will make the design as effective as possible in the context of its potential.
What will you need for the job?
This is not only a simple, but also a budget option. To build the structure you will need:
- brick:
- *fireclay – 37 pcs.;
- *red – 60 pcs.;
- ash door;
- firebox door;
- lattice;
- valve;
- hob made of cast iron.
Clay solution is used as a binder. In total you will need about 20-25 liters of the mixture.
It will also be interesting: barbecue oven - types and characteristics.
Preparation
The first step is to decide on the location of the stove. Since the mass of the structure is small, there are no limitations inherent in traditional brick solutions. By securing strong boards or a suitable alternative material, the “foundation” is thermally and waterproofed.
The role of an insulator can be played by a non-flammable material - for example, basalt wool. Polyethylene or roofing felt is placed on top of the base. The size of the latter corresponds to the dimensions of the base plus a small allowance.
A layer of sand 1-2 cm thick is poured on top. The bedding is leveled. It is important to make the base level - the quality of the design and the convenience of subsequent work depend on this.
Masonry scheme
- The first row is laid on sand without using a solution. A dozen bricks are leveled strictly. The bricks are coated with a thin layer of the mixture, after which the blower door is mounted at the end. The door is pre-wrapped around the perimeter with an asbestos cord, which compensates for the thermal expansion of the metal.
- After fixing the door with wire, lay the second row according to the diagram. Form a ash pit.
- Fireclay is used (in the diagram it has a yellow tint). After laying, a grate is installed above the ash pit.
- Before this, bricks were laid flat. On this row it is placed on its edge. A smoke exhaust channel is formed, inside which a base for the partition is made. One of the bricks (seen in the illustration) is laid “dry” - it will later be removed. After this, the firebox door is installed, which is wrapped several times with asbestos strips before installation. But this must be done so that the door opens well to the top. The element is fixed with wire and a pair of bricks.
- The brick is laid flat again, duplicating the previous row.
- Again the “rib” row is the second and last row in which the brick is laid in this way. The exception is the next row, in which one of the walls is formed by laying on edge. The walls of the chimney channel should be wiped with a damp cloth.
- The brick is laid flat according to the diagram. The back wall is made using the edge-on format again.
- This row closes the firebox. A couple of bricks should hang over the firebox so that the flame moves to the middle of the hob - in case the stove will be used as a fireplace (without closing the firebox door).
- The bricks are moved slightly towards the back wall to support the firebox door. Strips of asbestos soaked in water are laid in front of the brickwork. Thanks to this, they ensure sealing of the gap between ceramics and cast iron. A cast iron panel cannot be placed directly on a clay solution, otherwise the difference in the thermal expansion parameters of the materials will lead to the appearance of cracks.
- At this stage, the formation of the smoke exhaust pipe begins. The latter, according to the plan, should gradually expand towards the back side. But only the chimney base is made of brick. The rest is made of light metal. Otherwise, the excess mass of the element may lead to a shift in the center of gravity of the stove.
- A valve sealed with asbestos strips is installed here. It is recommended to pre-coat the latter with clay mortar. This is the final row, which is used to complete the construction of a brick oven directly with your own hands. The remaining couple of rows are given to the chimney, which will then be connected to a lighter metal channel.
After this, those bricks that were laid “dry” on the 4th row are removed. At the same stage, the smoke exhaust duct and the surface of the stove are cleaned of construction debris.
Final works
The simplest stove does not require serious decorations. The only decoration is whitewashing. It is recommended to add a little blue and milk to the composition - this will protect the coating from the formation of a yellow coating and bleaching.
Important! Brick and metal should be protected before work. If this is not done (for example, using film), you will not be able to get rid of the stains.
It is necessary to coat the seams between the brick and the metal of the chimney very well, as well as the seams between the ceramics and cast iron.
It is imperative to close the joint between the stove brick and the floor. This will prevent oven sand from getting into the room. It is advisable to cover the joint with an L-shaped sheet. Then they make a plinth edging, which serves both as decoration and as an additional element that prevents the “foundation” bedding from spilling out.
Figure 3. Functioning oven
The stove is ready. The entire process took no more than one working day. Now you can try making low-power kindling. You cannot use logs - only wood chips or paper. Wood burning will create too high a temperature and the structure will crack. For the mixture to fully set, you need to give it a week or two. After this, you can already heat it “like an adult.”
Diesel stove
The power of a diesel furnace is very high, but it is completely harmless. For the operation of such equipment, solarium is required, which will have to be constantly purchased. The most important thing: a diesel stove is completely safe. Using such a system, you will not have to think about how to heat the chicken coop in winter without electricity. The efficiency of the installation is high.
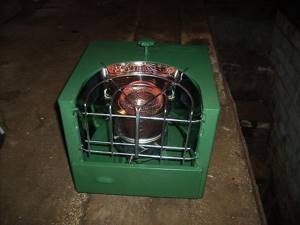
"Bulerian" is one of the unique heating installations that can operate on any type of fuel. This is an air convection oven that has many advantages and is perfect for various operating conditions. Of course, the advantage is that you can use any fuel that burns easily and turns into energy
Heating a chicken coop at any time of the year is a fundamental task for farmers. If you want to constantly receive eggs and be sure that your laying hens will remain healthy, then take care of the room heating system. All issues should be resolved in the summer so that in winter your birds are warm and do not need anything.
What are the specific advantages of such ovens?
During the cold season, it is very important to maintain comfortable conditions in your home or country house, so you need to take care of heating and proper heating in advance. If it is not possible to connect to a centralized heating system, you will have to purchase special stoves or boilers, or it is better to assemble the structure yourself. Basically, such equipment is heated with firewood, but they can be divided into two separate groups:
- Long burning (from 6 to 10 hours) or gas-generating furnaces;
- With periodic operation (2-3 hours) - in this case, the room quickly warms up, but also cools down just as quickly, so you may have to frequently add new firewood. This unit is also capable of taking oxygen from the air, and a significant part of the heat often goes up the chimney.

Features and advantages of long-burning stoves:
- the material for production is cast iron or steel (most often metal sheets with a thickness of 3 to 6 mm are used);
- spacious firebox, consisting of two separate parts;
- you can find models equipped with an air convection system;
- one load of fuel can ensure efficient operation of the stove for 18 or even 20 hours, since over time the combustion process in the stove gives way to smoldering;
- it is possible to use not only solid firewood as fuel, but also pellets - pressed chips, dust, sawdust and other fine waste from the wood processing industry;
- the fuel supply process can be automated (autonomous operation that does not require constant human control), which cannot be said about conventional heating units;
- have high efficiency (efficiency factor);
- most often have low weight and dimensions;
- the issue of having a foundation for the structure is not fundamentally important;
- the fuel burns almost completely, leaving behind a small amount of ash;
- suitable for installation in a room with any interior;
- cast iron models are durable and can last up to 50 years, since the material is resistant to corrosion and mechanical damage;
- the equipment does not emit smoke or foreign odors into the home;
- fuel gas from such a stove will not enter the room thanks to a well-thought-out design, equipped with dampers and sealed doors;
- you can assemble a homemade structure, having at hand all the necessary materials, tools, drawings and diagrams.

District heating
When it comes to heating a chicken coop in winter without electricity, you should consider connecting to your home heating system. This method is suitable if your outbuildings are located close to or adjacent to the house.
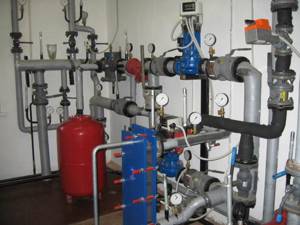
To implement the project, it will be necessary to make a separate outlet from the heating boiler. The circuit must be closed just like at home. The working fluid will circulate continuously; for best results, an auxiliary heat pump can be installed.
Connecting to your home heating supply is not difficult at all if you can install the outlet pipes yourself. In winter, the heating will be constantly running, which has a great impact on poultry.
There are incredibly many methods of heating without electricity, but the choice is up to you. Based on the natural and climatic conditions in your region, the size of outbuildings and the availability of funds, you can choose the best option for heating the chicken coop in the winter.
It is worth noting that in warm conditions, hens continue to lay eggs even in winter; if the temperature in the building drops, they stop laying eggs.
