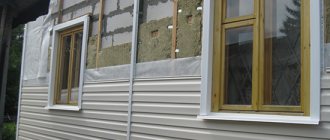
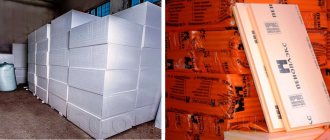
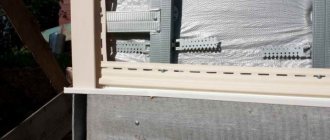
In our country, siding is widely used in individual construction. This material is ideal for cladding the facades of private houses and cottages. Most often, developers choose panels made of metal and PVC, which give the facades an aesthetic appearance. A potential homeowner invariably has the question of what kind of insulation for the exterior walls of a house under siding is worth buying. Finishing with siding has many advantages, but this cladding option requires increased attention to creating thermal insulation. In the conditions of frosty Russian winters, it is impossible to do without good insulation. Insulation of walls under siding is usually done from the outside. In this case, the facing panels cover the insulation and provide its reliable protection from the influence of the external environment.
What requirements must the insulation under siding for outdoor use meet?
The choice of insulation materials is quite diverse, and every year there are more and more of them. Clients are offered both quite expensive and cheaper materials. When choosing insulation for external walls under siding, it is necessary to take into account all the nuances so that the thermal insulation performed is reliable and lasts for many years. A good thermal insulator for walls should have the following properties: The degree of wear resistance of different coatings may differ, so the operating conditions of the material should be taken into account. By choosing durable insulation for the exterior walls of your home, you can subsequently avoid repeated costs for replacing thermal insulation. The selected material must withstand temperature changes well, because in our climate this phenomenon cannot be avoided. Many insulation materials combine heat-protective and sound-proofing properties. An option with good sound insulation is preferable if we are talking about building a house within the city. It should be understood that not all coatings are easy to install. Some types of insulation for external walls under siding are installed using special equipment, which is not always available in the arsenal of a home craftsman. If you plan to carry out renovations yourself, purchase heat insulators that are easy to install yourself. When choosing a heat-insulating coating, you need to take into account the properties of the material used to build the walls and their thickness. Wood, concrete, and brick have different thermal conductivity values, so the thickness of the insulation layer will also vary. It is also worth focusing on the frequency of residence in the house. If it is planned to be used year-round, it is necessary to ensure conditions for maintaining a comfortable temperature regardless of the season.
What kind of insulation is used under siding?
If the structure is planned to be clad with siding, the developer has access to several types of thermal insulation materials that can be used during construction. They are conventionally divided into several groups:
- Extruded polystyrene foam (PENOPLEX);
- Fibrous materials in plates and rolls;
- Styrofoam.
Products differ in the composition of raw materials, appearance, method of application, and cost. We suggest comparing the pros and cons of each insulation in order to decide on the final decision.
Materials with a fibrous structure
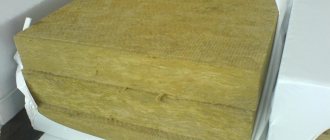
Many developers choose mineral wool as insulation for external walls under siding. Mineral wool is a fibrous thermal insulation material made from minerals. The main types of mineral wool are: glass wool and stone wool (the most popular type is basalt). Such materials have excellent heat-protective characteristics and are resistant to temperature changes and fire. Products are usually produced in the form of mats and slabs of different thicknesses. The cost of panels may also vary depending on the type of raw material. As for the disadvantages, each material has them. For example, in mineral wool it is the presence of formaldehyde additives and high hygroscopicity, which reduces the heat-shielding properties of the coating.
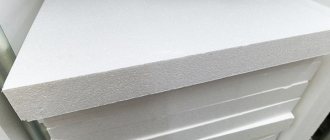
Foam plastic for facade insulation
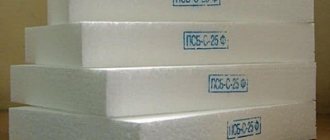
Foam plastic insulation for exterior walls of a house under siding is also very popular. The thermal insulation system can be installed independently, which makes this method attractive to many developers. If you have chosen to cover the facade of your house with siding, foam-based thermal insulation will be cheaper than other options due to its low cost. The panels weigh little, so they are easy to transport. Inexpensive insulation does its job well, but it has many disadvantages. Foam plastic is fragile, so the panel easily breaks and deforms under mechanical stress. If care is not taken during transportation and storage of the material, it becomes unsuitable for use. Sun rays are also dangerous for the polymer and lead to its destruction over time, so increased attention is paid to reliable protection from ultraviolet radiation. Polystyrene foam is easily damaged by rodents, so over time, holes may appear in the insulating layer through which heat can escape. If you choose foam plastic to insulate the facade, you need to take care of ventilation to avoid condensation. You should also pay increased attention to creating a moisture barrier, which is used as special membranes.
Extruded polystyrene foam and its advantages
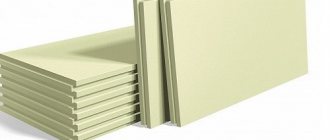
Extruded polystyrene foam is a popular insulation material for exterior house walls under siding. Thermal protection is presented in the form of ready-to-install slabs, and manufacturers offer ready-made solutions for insulating walls, roofs, and foundations. The advantages of the product include low hygroscopicity, strength, and high heat saving rates. Insulation boards have a cellular structure, so the material is light in weight. It can be easily machined, allowing the panels to be adjusted to size. PENOPLEX is often compared to polystyrene foam. Both materials are produced from polymer raw materials, but the production technologies differ, which made it possible to obtain a material with higher technical and operational characteristics. Installation work on installing insulation for the walls of a house outside under siding using extruded polystyrene slabs can be carried out in any weather conditions. This material has almost zero water absorption rates. Thermal insulation made of PENPOLEX can be single-layer or double-layer.
Advantages of expanded polystyrene
In addition to the fact that the house is well insulated from the inside, the outside walls are insulated with an additional layer of heat-insulating material, which can help maintain a comfortable air temperature in the rooms.
To date, manufacturers of building materials have invented a large number of modern heat-insulating materials, but the most effective is still commonplace polystyrene foam, which is also known as polystyrene foam.
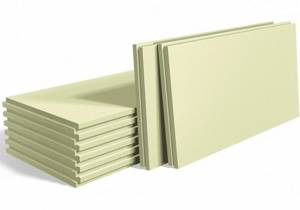
Polystyrene foam sheets have a number of important advantages, which are unique in their own way:
- The low coefficient of thermal conductivity of the material is ensured by the unique structure of the material - 98% of the volume of the material is air, 2% is the material itself.
- The hydrophobic properties of the heat-insulating material allow it not to be afraid of rotting, the appearance of mold formations and damage by various microorganisms and fungi.
- Installation of expanded polystyrene sheets on brick walls can be done without any specialized equipment and tools. In addition, almost anyone can handle its installation, so you will not need the expensive services of highly qualified professionals.
- The relatively low cost of expanded polystyrene makes this material an ideal candidate for use in construction of any scale.
Technology for installing insulation for house walls outside under siding
Before you begin insulating the facade, it is necessary to prepare the surface and choose the most suitable method of installing the insulation. If the house is built from lumber, the outside walls must be cleaned of rotting areas and treated with fire-retardant compounds, as well as a vapor barrier layer must be provided from the inside of the building structure. Contaminants must be removed from the surface of walls made of brick, aerated concrete blocks or concrete, and then primed in two layers. Laying insulation requires the installation of a wooden sheathing, on which the siding will be subsequently mounted. The sheathing elements are attached to the walls in increments of 50-60 cm using dowels or self-tapping screws. After laying PENOPLEX there is no need to use a special membrane, which has hydro- and windproof properties.
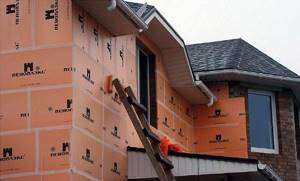
To avoid an unwanted increase in humidity levels, it is necessary to provide a ventilation gap between the façade cladding and the heat-insulating coating. The minimum gap size is two centimeters, but experts recommend starting from a value of 4-5 cm. To create a gap, an additional one is attached on top of the main sheathing, and then the facing panels are mounted. When using PENOPLEX thermal insulation, you can install wall insulation using the frameless method. This option is suitable if the walls are perfectly smooth. In this case, the thermal protection is attached directly to the surface, and then the lathing is installed for subsequent fastening of the facing material. The advantages of the technology include saving time and lower consumption of components.
Preparing the walls
Insulation of external walls begins with surface preparation.
Remove any old pieces of plaster and loose slabs or bricks that are falling off. Otherwise the mount will not hold well. All sharp nicks and protruding fittings must be removed. Then treat the surface with a primer, and then proceed to seal the cracks. It is not at all necessary that the resulting wall be perfectly smooth. But it must be suitable so that the polystyrene foam (or, as it is also called, polystyrene foam) fits tightly to it.
Stages of preparing a brick wall for insulation.
Large cracks must be widened as much as possible and sealed with a large amount of mortar using tow as an auxiliary material. Small ones can be plastered exclusively with mortar. When the solution has dried, apply façade putty on top of it.
If there are significant irregularities on the wall - bumps or holes - then it makes sense to level them with the rest of the wall surface. Just don't overdo it. After all, an excess of solution will not do anything good. After work and drying of the solution and putty, the entire wall must be thoroughly coated with a primer containing an antiseptic.
Now you can move on to the insulation process itself. Please note that if there are structural protrusions on the wall, they must be insulated separately. The main sheets are laid on a flat wall. First it needs to be puttied. There is no point in purchasing special mastic for this. The ideal option would be to work with the same mixture that will be used to glue the foam to the wall. The putty layer should be 2-3 mm. There is no need to make it thicker. Protruding elements also need to be treated with the mixture. It is most convenient to work with a wide spatula - you will spend less time and the result will be of better quality.
Photos of step-by-step installation of insulation
Siding is a good protection for any thermal insulator. Therefore, finishing with foam plastic followed by cladding with vinyl panels is very advisable. Insulating a building from the outside can be considered one of the main stages in the construction of any house, since without additional protection, wood, brick and even reinforced concrete will gradually collapse under the influence of harmful environmental factors. The use of siding can qualitatively extend the life of load-bearing walls of any structure.
Advice from professionals
To insulate a house using penoplexes, there is absolutely no need to select special weather conditions. It is enough that it does not rain or snow. The duration of drying of the adhesive solution will depend on the ambient temperature, but the quality of adhesion does not affect.
Before you buy material and do everything yourself, still consult with professionals. Maybe for a particular building it is better to choose a different insulation or finishing material. In addition, a master who knows his business will help you accurately calculate the amount of materials and the thickness of the insulation.

A little about polystyrene foam
Installing expanded polystyrene boards under siding is a profitable solution for creating an optimal thermal insulation layer. In addition, the material has good sound insulation characteristics, is environmentally friendly and is not subject to combustion.
Despite the fact that polystyrene foam is not flammable, it melts when exposed to high temperatures or open fire. At the same time, combustion products are released into the atmosphere, which, if they enter the human respiratory system, can cause injuries incompatible with life. Currently, two types of polystyrene foam boards are used in individual construction; any of them can be used to insulate your own home from the outside, followed by finishing for siding:
- Regular foam;
- extruded.
| Type of insulation | Thermal conductivity, W/(m*K) | Water absorption,% | Density, kg/m3 |
| Styrofoam | 0,03 | 0,1-0,2 | 25-35 |
| Extruded polystyrene foam (expanded polystyrene) | 0,028 | 0,3-0,5 | 32-38 |
The table shows the average values of material coefficients; depending on the manufacturer, they may differ slightly from those indicated.
About temperature thresholds
Temperature is considered to be +18ᵒС as the lower threshold of human comfort, and for good reason. This is the turning point for the psychophysiological perception of temperature. If it is lower, then the person begins to shiver, he feels drowsiness and fatigue. If the temperature has exceeded 18ᵒC, your health improves significantly - you can walk around the house in light clothes, and taking a shower no longer seems like sheer torture.
We advise you to study - How to choose a washing vacuum cleaner: from theory to practice
+22ᵒС is the threshold regulated by sanitary standards. This is the temperature that should be maintained in all medical institutions – this increases the effectiveness of treatment.
The optimal temperature for the body is +25ᵒC - a person is warm, he can walk around the house undressed, but if you go outside, you can easily catch a cold.
The upper threshold of comfort is +28ᵒС. The house is already relatively hot, and if you go out into the cold, there is a chance of catching pneumonia.
To create an optimally comfortable atmosphere in your home, foam insulation is necessary. Let's look at how to do this.
Installation technology
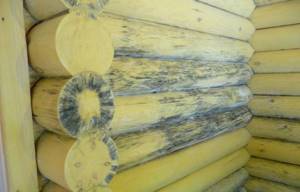
The shape and structure of both types are similar, so the principle will be the same for both external insulation with expanded polystyrene foam and polystyrene foam. Before you start insulating the facade, you need to treat it with an antiseptic. This will avoid the formation of mold and the appearance of insects in the walls that destroy the supporting structure.
Determining the sheathing plane
The next step is to mark the plane of the walls and determine the location of the guides (this can be a wooden beam measuring at least 20x30 mm or a galvanized profile 60x27 mm). Since external cladding is performed using siding (installation of which is usually carried out in a horizontal position), the guides must be mounted vertically.
The exception is metal siding or block house. Its installation can be carried out both horizontally and vertically in relation to the ground.
Vertical plumbs are hung at the corners of one wall, with the help of which the location of the two outer guides is determined. Then two ropes and fishing lines are stretched between them (top and bottom). It is on them that the subsequent installation of the remaining elements of the sheathing is carried out.
Some manufacturers of plastic siding for external walls offer vertical panels to their consumers. Their installation is carried out on a horizontal sub-cladding system.
Fastening the guides
Insulation of the walls of a residential building, followed by finishing for siding, is carried out with a step between the guides of at least 40 cm. Fixation is carried out using galvanized brackets or (if wooden beams are used) self-tapping screws.
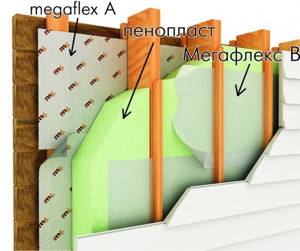
Despite the fact that the design of a metal sub-cladding system on the outside is more expensive than the installation of an analogue made of wood, the service life of the former is much longer. Therefore, the right to choose which material to use for this remains with the owner of the house.
When installing timber sheathing, you need to make sure that the wood is dry. In addition, work in wet, rainy weather can lead to swelling of the structure and subsequent drying out and warping.
Features of use
Despite all its advantages, the material is not universal. When using it, you must fulfill some requirements:
- Insulation of walls with penoplex under siding requires ventilated sheathing. Moreover, in this case it is better to use facade slabs. Under normal conditions, only the ground floor is insulated with sheet material;
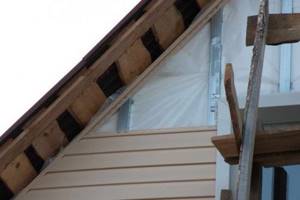
- if vinyl siding is used for finishing, as most often happens in private construction, penoplex can be used. But under the metal siding, façade slabs are laid;
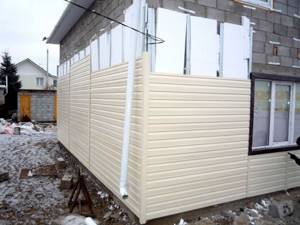
- the undoubted advantage of extruded polystyrene foam is that there is no need for do-it-yourself reinforcement;
- It is possible to thermally insulate the outside of a brick house not only from silicate or clay bricks, but also from aerated concrete or concrete. The technology used is the same.
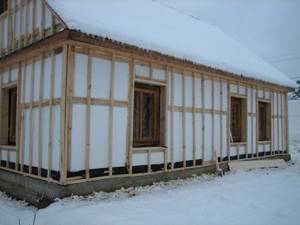
Do-it-yourself insulation of a house with penoplex under siding
The insulation technology is quite simple, but before that it is necessary to determine how thick the thermal insulation layer should be. When sheathing the outside, the thickness of the sheet should be at least 4–5 cm, otherwise it becomes unprofitable.

Then you should determine how the insulation will be secured under the siding. The slabs can be attached directly to the wall surface with glue, or fixed to the lathing.
- Penoplex is laid on a brick wall and fixed with glue. It is advisable to duplicate the fixation with dowels for thermal insulation.
- Install the sheathing - wooden or metal. They fasten it through a layer of thermal insulation using a façade dowel. If necessary, you can do it differently: before laying the insulation on the wall, fix the brackets for the cladding, and then carry out the insulation.
- Do-it-yourself siding is installed on the sheathing. A ventilation gap of at least 2 cm must be maintained between the thermal insulation and the finishing.
- A vapor barrier is not required, since the material itself acts as a vapor barrier.
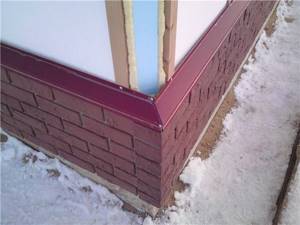
The video discusses in detail the installation of insulation on a brick wall.
Installation of thermal insulation
As mentioned earlier, the characteristics of polystyrene foam and expanded polystyrene are almost identical, so the same method of fixation is described. It is recommended to start insulating walls with slabs from the bottom row and gradually rise. First of all, whole sheets are laid, small openings are closed subsequently.
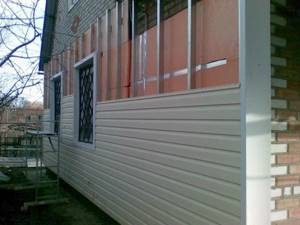
To ensure better fixation, the foam is attached to the wall of the house with the help of fungi - umbrellas. It is advisable to attach the slabs in each corner and at least one anchor should hold the insulation in the center. It is allowed to place anchor elements in the seams of the material, thereby “pressing” two sheets of thermal insulation to the facade at the same time.
If the climatic conditions of the region in which the house is located require that insulation be carried out in two or three layers, placing one seam on top of another is not allowed . This can lead to the formation of cold bridges and gradual wetting, freezing and destruction of the walls.
Typical mistakes when insulating walls with penoplex.
Incorrect insulation performed in violation of technology can lead to a decrease in insulation efficiency by up to 50%. This can be avoided by following a number of rules:
- Don't use cheap glue. In the case of penoplex, it must be heat-resistant, and additional fixation of the plates is provided by dowels.
- When installing the slabs, there should be no gaps left on the façade. If they do not fit tightly to each other and form cracks, this will reduce the “thermos” effect. When in some place it is impossible to fit the slabs tightly, the gap should be sealed with pieces of penoplex foam.
- To effectively insulate a house, at least 60% of the entire façade area must be covered with insulation boards.
- Insulation work should be carried out at temperatures from +5 to +25 °C. Relative air humidity up to 60%. Work must be suspended during precipitation.
- When applying glue to the inside of the slabs, it is important to ensure that it does not get on the joints. After hardening, the glue will lead to the formation of “cold bridges”. Because of them, not only will the effectiveness of insulation decrease, but condensation will also appear on the walls, and then black fungus and mold will grow in the corners.
- Finishing of the facade is carried out only after completion of work on its insulation. It is important that the surface is solid, then it will last much longer.
Recommendations when performing work
Insulating a house with polystyrene foam followed by siding is the most economical and practical option for exterior finishing of buildings made of any building materials. The method is actively used both in the construction of new objects and for finishing and reconstruction of already built ones.
Must be taken into account during installation. That all window and door openings will be slightly pressed inside the walls. Thus, their subsequent finishing will require additional materials, which are best purchased in advance.
- Internal or external corners (slopes, ebbs)
- Sandwich panels or PVC;
- About window trims, which are offered by the panel manufacturer.
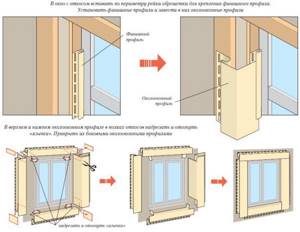
Plastic (vinyl or acrylic) siding is installed only in strict compliance with the technological requirements when working with the material:
- Work on finishing the external walls of a house is permitted only when the ambient temperature is at least 10 degrees above 0. In the cold, the panels lose their flexibility and may crack as a result of installation;
- The fasteners that secure the siding must be made of stainless metal or have a galvanized coating;
- The screws are not turned all the way, this is done so that the panels can move slightly under the influence of temperature changes (in the cold, the siding decreases in size by 1-2 cm, when heated, on the contrary, it increases);
- Screws are screwed in only at a right angle of 90 degrees.
Only by observing all the necessary requirements can you create a high-quality and durable facade that can not only improve the characteristics of the walls, but also modify the entire house.
Thermal calculation
How thick should foam plastic be for wall insulation? Simply sticking it thicker means not only wasting money, but also reducing the strength of the coating.
The initial value is the permissible value of specific heat loss in a given climatic zone, or the thermal resistance of a building R. For walls in the European part of the Russian Federation, the recommended values are:
- South (Krasnodar – Astrakhan – Rostov-on-Don) – 2.8 kW/sq.m.
- Black earth strip (Voronezh – Lipetsk – Volgograd) – 3.5 kW/sq.m.
- Middle band - 4.2 kW/sq.m.
- Boreal zone (Karelia – Arkhangelsk – Naryan-Mar) – 5 kW/sq.m.
Note: beyond the Urals, the northern border of the boreal strip generally follows the southern border of permafrost. The middle strip accordingly narrows and is pushed to the south. For example, Vladivostok lies at the same latitude as Sochi, but you need to insulate there, like in Moscow.
In a specific locality and in regions with difficult weather conditions, R can be found from the appendices to SNiP, from the local department of architecture or the Municipal Internal Affairs Committee. For floor R is taken with a coefficient of 1.3; for the ceiling - 1.7. That is, in Moscow, the floor R should be at least 5.5 kW/sq.m, and the ceiling – from 7 kW/sq.m.
The indicated R values are obtained from typical values of the temperature gradient Γ from inside to outside. For example, in the Moscow region it is considered equal to 40 degrees: +20 inside and –20 outside. If Г changes by no more than 1.7 times, the dependence of R on it can be considered linear and taken with the appropriate correction. For example, you want to have +25 at home in Barvikha with -40 outside. G = 25 – (-40) = 65. 65/40 = 1.625. We multiply by it the recommended 4.2 kW/sq.m for the Moscow region, we get 6.8 kW/sq.m. This is the R value that insulation should be calculated at.
Next, you need to know the values of k for various building and finishing materials. What is this k? This is their specific thermal resistance, R of a square of material in a layer 1 m thick, i.e. Through a meter-thick square, at standard G, exactly that much heat will escape. Some meanings are:
- Reinforced concrete grade 400 – 2.00 kW/m.
- Cement-sand mortar grade 200 – 1.16 kW/m.
- Silicate brick – 0.7 kW/m.
- Fired ceramic brick – 0.56 kW/m.
- The same, hollow – 0.35-0.41 kW/m.
- Gypsum plaster – 0.43-0.47 kW/m.
- Warm plaster (HS) on foam plastic or expanded vermiculite – 0.057 kW/m.
- HS on perlite sand – 0.063 kW/m.
- HS on expanded clay – 0.22-0.25 kW/m.
- Expanded clay granules 20 mm – 0.16 kW/m.
- Oak, laminate – 0.20 kW/m.
- Pine, MDF, construction plywood – 0.16 kW/m.
- Fiberboard, OSB, plasterboard – 0.15 kW/m.
- Polystyrene foam PSB-20 – 0.033-0.035 kW/m.
- The same, PSB-25 - 0.035-0.037 kW/m.
- EPPS – 0.028-0.032 kW/m.
Notes:
- For porous materials, k values are indicated in an air-dry state; for wood - at 12% humidity.
- The numbers in the foam brand indicate its density in kg/cub.m. In general, it varies within the range of 11-35 kg/cub.m (for XPS - 30-45 kg/cub.m); accordingly, k PSS changes from 0.031 to 0.041 kW/m.
Next, we determine R of the available construct. Let's say this is a wall, counting from the inside out, of the following design:
- Laminate 0.012 m (12 mm);
- PSB-20 0.030 mm;
- TS on expanded clay 0.020 mm;
- A wall made of two clay bricks with a layer of 1 cm mortar - 0.50 m of brick and 0.010 m of mortar;
- External cement plaster 0.030 m.
Rn of each layer is calculated using the formula:
Rn = pn/kn, where p – layer thickness in meters; n – serial number of the layer.
We have:
- R1 = 0.012/0.20 = 0.06 kW/sq.m;
- R2 = 0.030/0.035 = 0.85 kW/sq.m;
- R3 = 0.020/0.25 = 0.08 kW/sq.m;
- R4 = 0.50/0.56 = 0.89 kW/sq.m;
- R5 = 0.010/1.16 = 0.008 kW/sq.m;
- R6 = 0.030/1.16 = 0.026 kW/sq.m.
Total R = R1+R2+R3+R4+R5+R6 = 0.06+0.85+0.08+0.89+0.026+0.008 = 1.914 kW/sq.m. This is not enough even for Krasnodar, and already in the middle zone without insulation you will have to freeze, or pay an additional 4.2 - 1.914 = 2.286 kW (approx. 2.3) for heating for each square of the external wall area.
Now let’s calculate the thickness of the external insulation required to bring R to the standard of 4.2 kW/sq.m. We have already found out that we need to retain Rwarm = 2.3 kW/sq.m in the room additionally. We will insulate with EPPS, for which K=0.032 kW/; We take the upper value based on moisture absorption. The thickness P of the insulation is determined by the inverse formula:
P = K*Rwarm
We have: P = 0.032x2.3 = 0.0736 m. Sheathing made of 80 mm EPS or even PSB-25 will allow you to insulate properly, because there will also be plaster on the outside.
A task for those interested: Remove R2 from the list (foam plastic in the sheathing under the cladding), recalculate, and determine how much expensive EXTERNAL insulation is saved due to only 3 cm of cheap (can be waste, from waste) internal insulation. And transfer it to money, at prices in your region.
Notes:
- Insulation of floors and ceilings in private houses is calculated similarly. R for different types of roofs can be found in SNiP or other construction reference books, or consider slate as cement, tiles as brick, and for a metal roof consider R = 0.
- When calculating insulation on the top floor of a high-rise building, the floor is not considered, because there is an apartment downstairs in which they heat. On the ground floor, on the contrary, only the floor is insulated.
Required materials and tools
To make it easy for you to insulate walls using polystyrene foam, you will need the following basic materials and tools:
- foam sheets measuring 1x1 m,
- glue or foam,
- primer,
- construction knife or hacksaw (to cut foam plastic),
- hammer drill,
- mushroom nails,
- hammer,
- aluminum brackets.
It is the presence of special brackets that is the fundamental difference between this insulation method. Once the thermal insulation work is completed, it will be possible to attach an aluminum profile frame to them. And in the future the siding itself will be mounted directly on it.
Return to contents.
Additional insulation fastening and external finishing
To improve the fastening of foam sheets to the wall, they are additionally fixed after pasting. For this purpose, special dowels are designed, the head of which does not go deep into the material. The number of additional fastenings is determined by the quality of the wall surface - the smoother it is, the fewer dowels will be required.
The final stage of work on external insulation of the walls of a house with polystyrene foam is the external finishing. It involves grinding the surface with a special tool designed for foam plastic. Next, additional elements are installed on the slopes and corners of the house. For the latter, a perforated corner element with a reinforcing mesh attached to it is suitable. Glue is also used to attach it.
At the end, all that remains is to perform facade plaster on the insulation, primer and finish the wall by painting it or finishing putty.
Stages of thermal insulation work
Characteristics of foam plastic. Below we describe in detail the process of thermal insulation of walls under siding. So, insulating walls with foam plastic includes the following points:
- Preparation of the working surface. That is, you will need to clean the surface of the walls from various types of dust and debris. Areas where the plaster is crumbling or have small cracks will need to be carefully repaired.
- Apply a coat of primer to the wall. If the wall has not a brick, but a plastered surface, then it would not be superfluous to prime it in two layers.
- We glue the foam sheets to the wall. For these purposes, an adhesive base is applied to the foam sheet, which can be purchased at any hardware store. If you don’t have one at hand, then regular polyurethane foam will also work as an adhesive. Glue is applied in different ways: manufacturers advise applying it using a notched trowel to the entire surface of the slab. Some builders prefer to apply it pointwise directly in the corners and in the center of the slab, while others advise applying the composition in small bumps and in increments of 30-40 cm. It is believed that in this case you can easily hide a small unevenness of the wall and correct this defect in this way.
- You need to start gluing the foam sheets to the wall from the bottom. Once the first row of foam is attached to the wall, you can begin to install the second row. To ensure greater bonding, the second row of slabs is laid with a slight offset relative to the first row.
- The seams between the foam plates must be sealed with polyurethane foam, this will significantly reduce the risk of cold bridges.
- If you think that glue as a fastening element is not enough for your structure, then you can use an additional method of fixing foam sheets using special mushroom nails. They got their name due to their rather wide cap. The mechanical method of fixing foam plastic involves drilling holes in the wall along with the foam plastic and recessing the nail head into the surface of the foam plastic. Next, you need to hammer a nail installed in advance into the technological hole.
- Installation of aluminum brackets for the frame under the siding. They are attached over the entire surface of the wall, and for greater ease of installation it is given a U-shape. The installation consists of making a small recess in the foam, where a U-shaped bracket is attached using a dowel. After installation, all recesses are sealed with polyurethane foam.
As you can see, insulating the outside walls under siding by using polystyrene foam does not present any particular difficulties. Due to its availability and excellent thermal insulation qualities, this material occupies one of the leading positions in the line of modern insulation materials.
Vladimir Moshkin, Surgut. Question: Hello, fellow builders! Can foam plastic be used for siding to insulate a wooden house? And then some say it’s possible, while others say it’s not. Completely confused.
Sergey Zaitsev, Moscow, specialist. Answer: Good afternoon, Vladimir.
The issue of foam insulation is a stumbling block in any construction forum. Indeed, there are both opponents and supporters of this material.
Installation of sheathing and laying foam

To install thermal insulation on the walls of a building under the siding, you will need the following tool:
- an angle grinder (in simple terms “grinder”) with a cutting disc diameter of 150 mm;
- perforator;
- metal scissors (cut galvanized profile);
- electric jigsaw with wood file;
- hammer;
- screwdriver;
- scaffolding;
- electric carrier;
- screwdriver
The walls of the house are covered with lathing made of galvanized metal profiles or wooden blocks. Wood will be cheaper in cost than metal, but its service life is shorter.
This building material should be chosen based on the climatic conditions in which the object is located.

If the climate is dry, then wooden sheathing should be used; if it is humid, metal sheathing should be used.
Installation of the sheathing is carried out as follows. When starting work, you need to decide how the siding will be located - horizontally or vertically. The distance between the profile and its installation depends on this.
When the siding is installed horizontally, the beam or galvanized profile is positioned vertically and vice versa, if a vertical arrangement of the facing material is provided, then the sheathing will be mounted horizontally.
The thickness of the sheathing is selected according to the width of the foam; the thicker the thermal insulation material, the larger the size of the frame. Wooden bars are treated with special fire-resistant and antiseptic compounds for a longer service life.
The surface of the wall is treated with waterproofing mastic. You cannot use a steam or hydrobarrier, since in this case the walls will not allow air to pass through, and this will have a very negative impact on the health of the people living in the house.
Additionally, the frame is installed around door and window openings and at the corners of the building. A metal profile or wooden beam is attached using galvanized screws and special plastic dowels, which are driven into holes previously made with a hammer drill.
https://moisaiding.ru/youtu.be/zG8OwJytJz8
After installing the sheathing, foam plastic is inserted into the openings between the frame and secured using special disc-shaped screws (builders call them “umbrellas”) and glue, which is applied to the surface of the wall and the foam plastic for stronger contact.
The seams between flat foam plastic are sealed with special construction mixtures to prevent air from passing through, this will keep the house as warm as possible in winter and cool in summer.
After laying the thermal insulation, a wind-waterproof membrane is installed on top, which allows moisture and air to pass in one direction - from the building to the outside, and not back. This membrane allows steam to escape from the insulation. Waterproofing protection is installed at a distance of 20-50 mm from the foam using a wooden block or galvanized profile.
It is necessary to take into account the fact that the membrane is a very flammable material, and its combustion occurs at a high rate, so you should think carefully before using it.
Which walls can be insulated with polystyrene foam?
It’s worth mentioning right away that the walls of most houses can only be insulated with polystyrene foam of the PSB / PSBS brand. Extruded polystyrene foam can only be used to insulate the walls of those houses for which vapor permeability is completely unimportant. What kind of houses are these?
Firstly, it is a concrete monolith, which does not allow steam to pass through at all. Or rather, it passes through, but in such tiny quantities that they can be neglected.
And secondly, this is any frame house. You say, how can this be? And like this. The inner layer of vapor barrier is designed to completely cut off moisture from the room from the insulation.
Penoplex is not afraid of external moisture; it almost does not absorb moisture. So any frame, be it wooden or steel, can be insulated with penoplex. The only thing is that the material is expensive.
Now the price for 1 cubic meter of penoplex is approximately 4,500 rubles. While basalt wool can be bought for 1,300 rubles per 1 cubic meter, and polystyrene foam brand PSBS 15 density - for 1,200 rubles per 1 cubic meter.
As you can see, the frame can be insulated with penoplex. Well, let me make a reservation once again: any foam plastic is a flammable material that does not add fire resistance to your home.
We insulate the floor
If the lower surface of the floor is accessible, say, a basement under the entire house, we insulate it from below, calculating the thickness of the foam using the wall method, but using R for the floor. In this case, the work can be completed by attaching the foam with fungi.
If floor insulation with foam plastic has to be done from the inside, then three methods are effective, the first is without replacing the screed:
- We lay 30-40 mm EPPS on the screed.
- Using EPPS, we make lathing on intersecting mortise wooden logs with a cell of 300-400 mm from 40-60 mm beams.
- We put PPS-15 or PPS-20 into the cells of the sheathing.
- Along the sheathing we make a rough flooring from 16-20 mm plywood, and on it - a decorative one from laminate, marmoleum or cork.

Second, if the screed is less than 150 mm:
- We make a vapor barrier on the base floor as usual.
- Instead of expanded clay, we lay 30-40 mm EPPS.
- Next - reinforcing mesh and concrete screed, as usual.
- Flooring - on wooden lathing with EPS in cells, as described.
If there is more than 150 mm in height under the screed, then we make a vapor barrier using a dry screed from aerated concrete (not foam concrete!) blocks or foam concrete with a thickness according to thermal design. Then - reinforcing mesh, screed along the beacons, sheathing with insulation, flooring, see again above. This method is good because in a dry screed you can arrange channels for hidden communications.
Using foam plastic in ventilation facades
You write that you are going to use polystyrene foam as insulation under a siding facade. This means you want to insulate the ventilation façade with foam plastic. I do not recommend doing this due to the fact that any foam is flammable.
If even a spark flies into your ventilated façade, it will blow into a real fire. And it will not be possible to put out the fire, since the foam will be covered on top with siding, which, if necessary, will be very difficult to tear off.
For this reason, only fireproof insulation materials, for example, basalt wool or resole foam, can be used in a ventilated façade.
Where can foam plastic be used?
The best place for foam plastic is on the façade in a wet façade system. There it will be hidden under a layer of plaster and there will be no access to open flames or sparks. And there is no rising air flow, as in a ventilated façade. And the foam in a wet facade will neither ignite nor maintain combustion.
It is best to use polystyrene foam in a wet façade system. Therefore, now, along with facade basalt wool, foam plastic is used in a wet facade.
Sources:
- www.penoplex.ru
- fasadec.ru
- vsebloki.ru
- onfasad.ru
Primer and plaster
A day later, a trowel with a used abrasive mesh is passed over the leveler (see above). Now, within 3 days, the surface needs to be primed with a primer for plaster and plastered, but this is already plastering work. There is only one thing (see above about time pressures) - the soil under the plaster must be leveled with the same used abrasive a day after application, but always within 3-4 days. Plastering can be done later, once the soil relief has been formed.
Note: if plastering will be done later, the soil in front of it must be treated with a liquid primer that penetrates deep into the stone.
