Pros and cons of expanded polystyrene, its types
Expanded polystyrene, a material with a gas-filled structure, is the most common insulator at the moment.
The material appeared on the market recently, but many developers immediately appreciated it. It is used everywhere, for thermal insulation, loggias, balconies, houses, garages and other structures. Let's consider the characteristics that caused such popularity.
Positive qualities of the material:
- is a good heat insulator, which allows the material to be used not only outside;
- moisture resistant - does not get wet, even with prolonged contact with water;
- vapor permeable - despite its origin, the material allows the walls of the building to “breathe”;
- does not rot, fungal diseases do not appear in it;
- well insulates the building from noise from outside;
- does not shrink;
- environmentally friendly;
- is inexpensive;
- simple to use.
Like any material, polystyrene has its disadvantages, but they are not so significant:
- not resistant to chemical compounds;
- rodents can live in it, since the material is porous and soft;
- the material can burn, although manufacturers are trying to solve this problem by treating it with special compounds.
These disadvantages are not so significant if the installation is carried out correctly, taking into account these disadvantages.
Is it possible to plaster polystyrene foam and why is it done?
The positive characteristics of polystyrene foam contribute to the long-term preservation of performance properties. But constant interaction with natural phenomena can destroy the structure of the insulation. Plastering polystyrene foam will protect the material from drying out and the influence of external factors. The plaster layer on polystyrene foam will perform the following functions:
- Protects the insulation from mechanical damage and sunlight;
- Eliminates the appearance of moisture;
- The non-combustibility of the plaster will prevent the spread of fire in the event of a fire.
- Prevents the appearance of insects and rodents;
To achieve the desired result, it is necessary to select a plaster mixture that meets the necessary requirements and select insulation suitable for applying plaster.
Insulation of house walls with expanded polystyrene from the outside
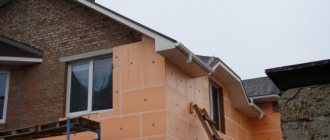
External insulation with polystyrene foam is most preferable for thermal insulation of walls. The usable area of the room does not decrease; the insulation layer can be increased to 20 cm. When finishing a thermally insulated building, you can use ordinary siding or corrugated sheets.
Preliminary wall preparation
The insulation process always begins with surface preparation. It is necessary not only to clean the wall of dust and foreign objects, but also to seal all the irregularities, cracks, and prepare the material.
Attention! The plane for this insulation should be flat and smooth, the difference should not be more than 3-5 mm.
So, the algorithm for performing the work is as follows:
- it is impossible to install expanded polystyrene on an uneven wall with significant differences, since a void will form in the depressions, which will greatly reduce the quality of thermal insulation;
- if the walls are smooth, then you need to evaluate the structure of the facade; for example, if the facade was previously painted, then the surface needs to be thoroughly cleaned. Over time, the paint will begin to fall off, along with the heat insulator;
- As soon as the old coating is removed from the walls, cracks, chips and other defects may appear that need to be eliminated. Before filling the cracks, they should be opened with a hammer drill with a spatula attachment and primed. For masking, you can use cement mortar, gypsum plaster or construction foam. The cracks are foamed, and after drying the foam is cut off. Cover the chips with plaster.
Attention! The wall will be ready for insulation when you run your hand over it and it comes out clean.
We insulate slopes
Windows are the main source of heat loss, and the quality of insulation will depend on how well the slopes are insulated.
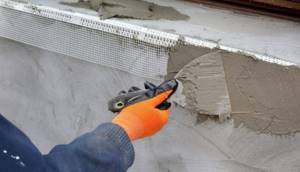
Work on slope insulation is carried out in several stages:
- the surface is well cleaned from dirt and dust. Remove dried foam that may stick out after installing windows;
- prime the slopes in two layers for better adhesion of the surface and the plaster mixture;
- Level the surface after the soil has dried. It is better to plaster the slopes with cement mortar. They need to be made as even as possible so that the polystyrene foam fits tightly to the surface. To do this, use a perforated corner, which is leveled using plaster.
As soon as the preparation is completed and the solution on the slopes has completely dried, you can begin insulation. The algorithm is like this:
- cut the insulation for the walls to the required size;
- apply glue to it and press it tightly to the slope;
- If cracks have formed during installation of the material, they should be foamed or sealed with mortar.
At this point, the preparation of the slopes can be considered completed; it will be possible to return to them when the turn comes for the final finishing of the insulated walls of the house.
Pasting the cornice
Before insulating the walls, you need to first paste over the cornice, for this:
- to paste the cornice, you need to take the thinnest material that will stick to one glue;
- strips are glued strictly from the wall;
- First, you should fix the vertical elements, and only then lay the horizontal ones on them.
The material must be installed in such a way that it does not protrude. If necessary, it should be trimmed with a sharp knife.
Vapor barrier and waterproofing when insulated with polystyrene foam
Despite the fact that polystyrene foam is one of the best materials for wall insulation, and is also a vapor-permeable material, before installing it you need to install a vapor barrier so that condensation does not form between the wall and the insulation. In this case, membrane films are perfect.
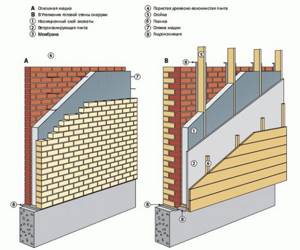
Vapor insulation is installed on fully prepared, dry walls. If the walls are insulated with polystyrene foam made of wood, then the vapor barrier material can be installed on the brackets using a construction stapler.
The material is laid on the walls with an overlap of 10 cm, and the joints must be taped with construction tape. This will prevent the appearance of cold bridges.
The condensation insulator is installed on a concrete or brick wall using glue with additional fastening to dowel nails.
After this, you can safely begin preparing the material.
The process of preparing insulation when using extruded polystyrene foam
Since expanded polystyrene differs from polystyrene foam in its smooth surface, the boards must be carefully prepared before gluing.
Preparing interior walls for laying thermal insulation
Foam plastic for floor insulation
When done, the inconvenience arises in that the thermal insulation layer reduces the usable area. But there is a state of affairs when insulation from the outside is simply impossible.
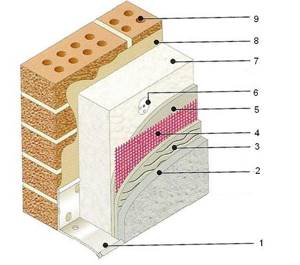
Insulation scheme inside the room: 1. Base profile 2. Decorative coating 3. Primer 4. Reinforcing mesh 5. Adhesive composition for the base layer 6. Dowel 7. Insulation 8. Adhesive composition for gluing insulation 9. Wall
For example, the facade of a house has a large number of decorative elements or the facade has historical significance. Insulation of internal wall surfaces is well provided by extruded polystyrene foam. To install thermal insulation with polystyrene foam on the inner surface of the walls, you will need the following materials and tools:
Scheme of laying polystyrene foam on the wall.
- antifungal primer;
- expanded polystyrene;
- painting mesh;
- adhesive mixture;
- perforator;
- mushroom-shaped dowels with nails;
- hammer;
- sandpaper;
- hacksaw and knife;
- bucket for mixing the solution;
- spatulas, roller, paint brush;
- antifungal additive.
Insulation from the inside begins with preparing the walls. First, the baseboard is dismantled and the walls are cleaned: old wallpaper is removed or paint is removed. Part of the upper flooring structure is removed. This is done in order to insulate the wall as low as possible. After this work, the wall may become covered with dust, which needs to be washed off with a wet cloth. If there are traces of mold or mildew, they are removed with sandpaper. The wall is treated with an antifungal additive using a roller. After the wall has dried, it should be primed. The primer can be applied with a brush. The primer is applied to prevent the appearance of fungal organisms between the wall and the insulation sheets. When applying primer and antifungal additive, the room should be well ventilated.
Advantages of external thermal insulation
Insulation of brick walls is divided into three types: external, internal and intra-wall. The last option involves constructing a building using well masonry and placing a heat insulator during the construction stage.
Internal insulation takes away the usable area of the premises, it provokes dampness in the walls and is not effective enough. Its advantage is the ability to complete the work at any convenient time and the low cost of materials. If you have a choice, you should give preference to external thermal insulation.
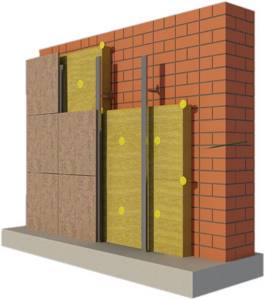
Among its advantages:
- The walls are protected from external influences, so they will last a long time.
- Significant reduction in heating costs.
- The opportunity to create the architectural design of the house to your liking.
- Absence of moisture, mold and mildew on the surface of the walls.
How to insulate with your own hands?
There are two types of thermal insulation: vertical and horizontal (along the perimeter at the level of the sole or above the soil freezing zone). In unheated buildings, only the horizontal layer is used.
From the video you will learn about insulating the foundation from the outside with extruded polystyrene foam:
Preparation
The surfaces are cleaned of dirt, they must be smooth, without chips or potholes. If there are depressions, they are eliminated with plaster mortar, all irregularities are eliminated.
Waterproofing
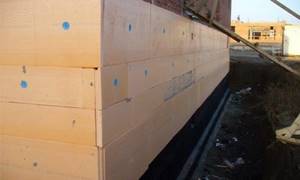
Capillary penetration of liquid leads to oxidation of reinforcement, the formation of cracks, erosions, and internal cavities. All this leads to a decrease in the strength of the structure.
If the site is located in a swampy area with high groundwater levels, not only waterproofing will be required, but also drainage system equipment. Otherwise, water pressure will cause hydrodynamic loads that are dangerous for the building. The role of drainage is played to a small extent by the sand and gravel cushion, but this is not enough.
To protect against water use:
- bitumen-polymer surfacing composition (what is the established consumption of bitumen per 1 m2 of waterproofing?);
- self-adhesive roll material;
- coating waterproofing.
A protective layer is not applied over the thermal insulation.
On a note. TechnoNIKOL produces nanoplates with drainage grooves and protective membranes with geotextiles, which are laid on top of extruded foam to drain atmospheric water.
We talked more about how to properly waterproof a foundation with your own hands in a separate article.
Fastening
For a strip foundation, the slabs are mounted vertically (read more about how to properly make a strip foundation with your own hands here). Installation is carried out starting from the sole, from the outside or inside (when insulating the basement). Fastening from the inside is possible during the reconstruction of already constructed buildings. PPS can be easily cut with a jigsaw or hacksaw, and they are easy to adjust.
Solvent-free compounds are used for installation:
- glue foam;
- mastic;
- polymer-cement mixtures.
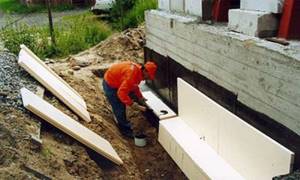
Outdoor option:
- If the waterproofing layer is built-up, it is slightly heated at several points and the foam is pressed against it.
- The foam is applied in strips around the perimeter and in the center (with an indentation of 2 cm from the edge) or dotted.
- The slab is glued using the offset method, initially placing it 2 cm further than required. The gaps are filled with adhesive.
Internal option:
- In the basement, EPS is fastened with dowels (3-4 pcs/m²).
- The edges are coated with sealant based on acrylic, silicone, bitumen.
- Near window openings, cracks are sealed with sealant or polystyrene foam.
A vapor barrier is fixed on top and a decorative finish is applied (plasterboard, gypsum plasterboard, wet plaster, plywood, PVC) and secured to a load-bearing wall or sheathing.
Plastering
Above ground level, in the basement part, the surface is plastered using reinforcing mesh. Then you need to wait until it dries completely and only then proceed to the next stage.
Note. There is no need to plaster the bottom layer located in the ground.
Backfill
When all parts of the insulation are glued, the soil is backfilled, which will serve as an additional fastening for the extruded EPS. The soil is compacted with a tamper. Leave 500-600 mm on top to create a blind area.
Manufacturing and thermal insulation of blind area
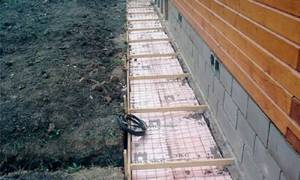
The thickness of the sand cushion should be about 15 cm. Form a slope of 5% to drain water. PPS (40-100 mm) is laid on top of compacted sand.
Then they install roll waterproofing with overlapping and gluing the seams. The canvas should cover the base by 15 cm, on the other side it is folded down. Next, they fill it with crushed stone, gravel, or make formwork, followed by pouring concrete.
Exterior finishing of the base
The stages of work in this case are almost no different, except that in a day mechanical fixation of polystyrene foam with dowels (4 pieces per 1 square meter) will be required. There is no need for such fastening underground, since the extruded PPS is pressed against the back ground.
A finishing decorative coating (tile, stone) is placed on top of the insulation; siding or wet plaster can be used (pre-mill the PPS surface with a hacksaw to improve adhesion). Heavy finishing is not used.
Main characteristics of thermal insulation materials
In order for the protection of brick walls to be reliable and durable, the materials used must have characteristics that can withstand precipitation, wind, frost and heat.
- Water absorption coefficient is a characteristic of a product that shows how much moisture it can absorb. It is better to choose a material with a low index.
- The thermal conductivity coefficient is the main criterion when studying insulation. It shows the amount of heated air lost per 1 hour per square meter. m of material having a thickness of 1 m. This indicator is used as a guide when choosing the thickness of the insulation layer. The best products according to this criterion are polystyrene foam and mineral wool.
- Flammability - determines how dangerous a material is in a fire. The products are divided into four cash registers according to this characteristic; preference is best given to G1, which go out without an open flame. Expanded polystyrene boards are susceptible to fire; when using them for cladding, choose those marked “C”, meaning self-extinguishing.
- Density determines the amount of additional weight on the structure - the lower the indicator, the lighter the material.
- The sound insulation level indicates the possibilities for reducing penetrating noise. All popular heat insulators have this quality to a sufficient extent.
- Environmental friendliness - the criterion determines the safety of insulation for health. For exterior finishing it is not critical, but natural materials are preferable to synthetic ones.
- Difficulty of installation - if you do the work yourself, you need to choose a simple and understandable technology for laying thermal insulation.
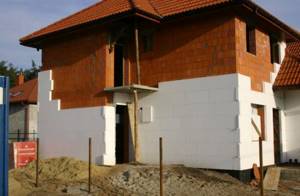
Criteria for choosing expanded polystyrene
The main characteristic when choosing insulating building materials for the facade of a house and roof is the density of polystyrene foam, its numerical expression is indicated in the brand. PSB-15 has the minimum indicator, and PSB-S-15, PSB-S-25, PSB-S-35 are recommended for outdoor work.
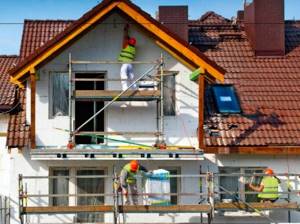
Figure 1. Facade insulation with polystyrene foam
The choice of thickness of expanded polystyrene slabs is focused on the climatic features of the region where the building is located. It should be noted that a 3 cm sheet of PSB-15 in terms of thermal conductivity is similar to 40 cm of brickwork, 25 cm of gas or foam concrete or 10 cm of wood. In addition, the foam plastic is necessarily covered with a layer of plaster, which also acts as insulation for the facade walls.
Recommended insulation for brick walls
The list of popular materials for exterior cladding of a house includes a few products:
- Styrofoam;
- extruded polystyrene foam;
- mineral wool;
- warm plaster.
They have different composition, cost and installation features. Let's look at each material in detail.
Foam plastic is a slab of foamed polystyrene, which is a cell filled with gas. This structure provides low thermal conductivity of 0.032-0.039, good sound insulation and light weight. The density of the foam is 35-50 kg/m3, the recommended layer thickness is 10 cm. The material is capable of absorbing moisture, and therefore requires waterproofing. The disadvantage of insulation is flammability, vapor permeability and sensitivity to light.
Extruded polystyrene foam - the product has the properties of polystyrene foam, but in an improved version. The material does not absorb water, it is more durable and easy to process, its thermal conductivity is 0.028-0.032. The cost of extruded polystyrene foam boards is higher than other materials for thermal insulation.
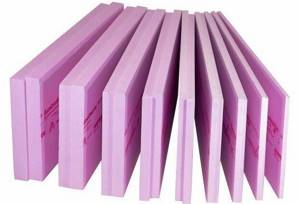
Mineral wool is one of the best insulation materials; it does not burn, is safe, and has a low density of 35-125 kg/m3. The raw materials for the material are glass, stone and slag. Air voids of 10-15 cm remain between the fibers, thanks to which mineral wool has a thermal conductivity of 0.04-0.045, absorbs noise well and allows steam to pass through. For effective protection, a layer of 10-15 cm is needed.
The product is available in the form of rolls, mats and slabs. Basalt wool in the slab version is characterized by resistance to deformation and increased density - 75-150 kg/m3. The material fits easily into the frame and does not cause problems during installation. The only drawback of mineral wool is its high water absorption, which requires mandatory waterproofing. The insulation is affordable, which contributes to its popularity.
Warm plaster is a dry mixture of cement, lime, plasticizers and additives from polystyrene foam granules, expanded clay, perlite. The material is somewhat inferior in terms of thermal insulation - 0.06-0.065, but has many advantages: it does not burn, has vapor permeability, is resistant to moisture and microorganisms, and insulates sound well. Plaster has a significant density of 200-350 kg/m3, so it puts additional load on the foundation. The maximum insulation thickness is 5 cm.
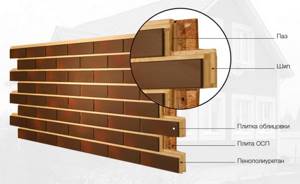
When talking about how to insulate a brick house from the outside, you cannot miss the opportunity of finishing with thermal panels. This material is characterized by a low thermal conductivity coefficient of 0.025 with a small thickness of 60-100 mm. The base of the product is polyurethane foam, the decorative part is made of ceramic tiles. The material is resistant to frost and moisture, can be quickly installed and does not require additional finishing.
Description of material
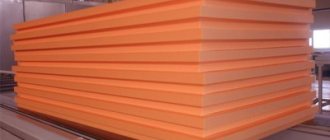
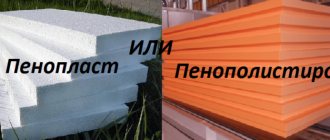
Expanded polystyrene is a modern foam material of synthetic origin. There are two types of it:
- Extruded polystyrene foam;
- Styrofoam.
The latter option is more affordable for arranging thermal insulation. Extruded polystyrene foam does not lag behind in the number of advantages. Among them:
- Frost resistance;
- Moisture resistance;
- Excellent compressive strength;
- Good thermal insulation properties.
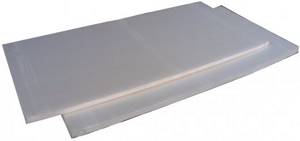
It is widely used and is suitable for any part of the building - from the foundation to the roof. This building material is vapor-tight, resistant to the growth of fungus and mold. By using this material for insulation work, it is possible to avoid additional actions to protect the structure from adverse environmental factors and excess humidity. Extruded polystyrene foam is characterized by a harmonious structure and includes cells measuring 0.2 mm.
Mineral wool thermal insulation technology
Insulation of a brick house is carried out in two ways:
- creation of a ventilated facade;
- “wet facade”, gluing slabs to walls.
Mineral wool is optimally suited for the first method, which involves creating a sheathing and a multi-layer cake with vapor and waterproofing.
- The surface of the walls is covered with a sheathing made of timber treated with an antiseptic compound or a metal profile. The guides are placed in increments less than the width of the insulation by 2 cm. This will allow the material to be laid more tightly.
- Mineral wool is placed between the bars and covered with a waterproofing sheet.
- The film is attached to the sheathing with a stapler.
- Thin slats are placed on top of the moisture protection, which will provide an air gap between the insulation and the cladding.
- The siding is attached to the slats.
Basalt wool slabs are strong enough to be installed without a frame. Correct installation of insulation begins with screwing a horizontal metal profile at the bottom, which will keep the material from sliding. The plates are fixed with special glue and dowels with a wide head. Each row begins with an offset. After finishing all surfaces of the facade, a mesh is laid on the mineral wool and a layer of plaster is applied.
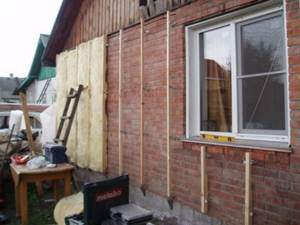
The order of finishing work
Finishing the facade with foam plastic is not a difficult task, but it requires care and experience in similar work. All instructions must be followed to ensure high quality results. Of course, when decorative finishing of a house with polystyrene foam is performed, many points are omitted, since it has a completely different task.
Preparation and marking of the facade
This is done to make it easier to lay insulation sheets. All work should be thought through in advance and the necessary tools and materials should be prepared, which will reduce the likelihood of errors.
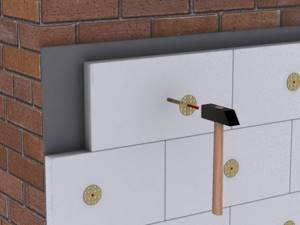
Figure 4. Installation of insulation.
How the marking is done:
- Using a puncher, holes are made in the corners of the walls into which the dowel is inserted. Its outer part should protrude.
- A nylon thread is tied to the upper dowels at a distance of the thickness of the insulation and the layer of glue. A weight is attached to the plumb line to find the vertical, after which the thread is fixed to the lower dowel. A similar procedure is carried out for the second plumb line.
- Both threads are pulled diagonally and their plane is checked (they must touch).
- The horizontal threads are tied to the vertical threads. Its task is to be a beacon when laying insulation.
The next step is to install the bar.
Installing the starting bar
When performing work, you should start from a carefully thought-out project. To secure the profile, you need to determine the lower point of the foam, which is convenient to do using a hydraulic level. After marking, all the points are connected, and the cord is stretched - it will serve as the starting line.
To install the base profile, follow the markings. Its task is to prevent the attached slabs from moving downwards. The width of the starting strip should correspond to the width of the insulation. It is secured with dowels. The distance of fastening points is 250 mm. To compensate for temperature expansion, special connecting elements are installed between the profile elements.
Preparation of the adhesive composition
To do this, the dry solution must be mixed with cold water. The easiest way to do this is with a drill with a mixer attachment. After finishing stirring, you should wait about 5 minutes, which will allow it to brew, and then mix again. In order not to prepare glue, you can use a universal composition that does not have to be diluted in water.
Installation of insulation
The technology is as follows: the material is first glued and then nailed. You should start from the bottom, using 2 spatulas: small (80 mm) and large (200 mm). Using a small tool, apply the adhesive mixture onto a wide spatula.
When gluing sheets, stick to T-joints. It is customary to apply glue not to the material, but to the wall. During the work, the adhesive mass may protrude beyond the insulation - it should be removed. To control the plane and vertical of the installation, control threads and a level are used. At the joints, the difference in insulation thickness should not exceed 3 mm.
The insulation is laid somewhat differently on the outer and inner corners of the facade. Here the material is joined using the gear method. That is, the work is carried out in such a way that a long vertical seam does not form. The glue takes 3 days to dry, after which the installed slabs are nailed to the wall with dowels.
Foam reinforcement on walls
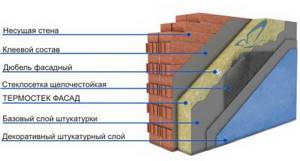
For this purpose, special adhesive mixtures and facade mesh made of plastic are used. Using a spatula, we apply a reinforcing compound on top of the foam, and a mesh is laid on top. An additional layer of adhesive mixture is applied to it.
It is recommended to start from the corners of the building, where pieces of mesh or perforated corners are suitable for reinforcement. Here you should guess the dimensions so that the mesh is installed overlapping. The glue mixture is applied in such a way that approximately 8 - 10 cm of the mesh remains dry, since it dries quite quickly. Next, gluing the next piece, apply a solution to this area, and cover it with another mesh on top.
The reinforcing layer dries within 3 days after applying the mesh. After this, its remains in the form of bulges are rubbed down using sandpaper. The next stage is finishing.
Insulating a house with polystyrene foam according to the “wet facade” principle
Panels of polystyrene foam or extruded polystyrene foam are attached to the wall using a simple technology called “wet facade” due to the presence of processes that require drying.
- The brick wall is being prepared: cleaning from dirt, eliminating defects, priming.
- A metal profile is attached at the base level, which will become a beacon when laying the first row and a drip for moisture. Glue is applied pointwise to the insulation boards and they are pressed against the wall.
- Additional fastening is carried out with dowels - in the corners and in the center.
- Work begins from the bottom of the corner, the rows are laid offset for the stability of the structure.
- A plastic mesh for reinforcement is laid on top of the finished insulation and a thin base layer of plaster is applied.
- After the solution has dried, priming and final finishing with decorative plaster are performed.
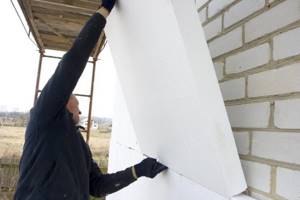
Wall insulation technology
Before you start working with polystyrene foam inside with your own hands, you will need to carry out a set of preparatory measures. In order for the heat insulator to lie flat against the wall, you will need to prepare the vertical surface. It is carried out in the following order:
- removing the finishing layer, if any;
- cleaning from dirt, dust, grease and other contaminants;
- leveling the base using putty;
- checking levelness with a building level;
- treating the wall with a primer that has an antiseptic effect (this way you can protect materials from the destructive effects of fungus and mold).
The thickness of the foam sheets is taken depending on the climatic region. In order to find the exact value, you will need to perform a thermal calculation. You can use the special program “Teremok”, which performs all the actions independently. To start work, you only need to know the thickness of the wall and its composition. Thermal conductivity of various materials can be easily found on the Internet.
If it is necessary to increase protection from the cold, a polystyrene foam thickness of 20-50 mm is often taken without calculation. Before fixing the sheets, special glue or mastic for foam plastic is applied to the base.
It is important that the adhesive solution does not contain substances that can destroy the material used. Such substances include, for example, acetone and other solvents
When purchasing glue, you need to check with the seller whether it can be used to secure polystyrene foam.
Sheets of heat insulation are attached to the wall with bandaging. You can shift each subsequent row relative to the previous one by half the width of the sheet. The joints are arranged in a checkerboard pattern.
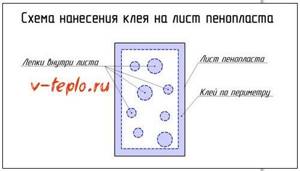
The glue is allowed to dry for about 3 days, after which additional fastening is performed with mushroom dowels.
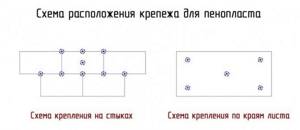
After fastening, it is necessary to seal the joints between the sheets. To do this, you can use polyurethane foam. After hardening, excess material is cut off with a knife, and the joints are rubbed with a special grater.
Before finishing work begins, after completing actions with foam plastic, a number of measures must be performed. They are carried out in the following order:
- applying glue or reinforcing mesh to strengthen the base for finishing;
- leveling the surface with sandpaper;
- padding;
- installation of a vapor barrier layer;
- ensuring an air gap between the vapor barrier and the finish (for this you can use a frame made of wooden slats).
When doing DIY work, it is recommended to choose films as a vapor barrier material. They are cheaper, and their main disadvantage (creating a greenhouse effect) is not so important when using thermal insulation with low vapor permeability. There is still a need to take additional measures to ventilate the premises.
Is it possible to insulate the floor with polystyrene foam?
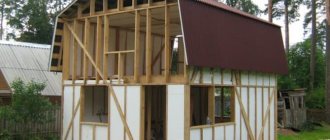
Insulating the walls of a frame house with foam plastic
How to apply warm plaster to walls?
Working with insulating plaster will take time, especially if you lack painting skills. To properly prepare the solution, the mixture is diluted according to the instructions.
- Brick walls are cleaned and protruding parts are removed. The surface is primed with a penetrating compound.
- A plaster mesh and beacons are attached to create a common plane.
- The prepared solution is applied to the walls. The thickness of the layer depends on climatic conditions, but it should not exceed 5 cm.
- You can create various decorative textures on the finished surface.
Insulation of slopes and window perimeter
To insulate slopes, it is necessary to cut strips of foam plastic according to the dimensions of the slopes so that they fit tightly on the slope, resting on the ends of the slabs laid on the walls.
As an option, you can first paste over (or otherwise strengthen) the window opening with PPS strips so that the cut of the insulation strip lies flush with the plane of the wall.
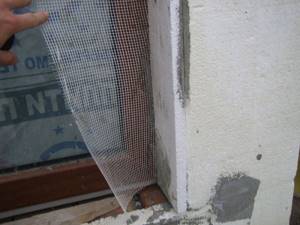
Insulation of slopes
Then polystyrene slabs, cut to length, are laid on the plane.
All joints and junctions must be tightly covered with insulation ; possible cracks are filled with polyurethane foam or coated with glue.
What are the advantages of insulation?
Brick houses have a huge number of advantages compared to other materials. Such a building is reliable, stable and moisture resistant. A brick house will last for many years, and you will be confident in its integrity. But, like any stone, a brick building needs insulation, as heat consumption increases.
Insulating a brick house from the outside with polystyrene foam has the most positive effect on the thermal insulation characteristics of the building.
This is especially true during the cold season, when the masonry cools down under the influence of low temperatures, and it is more difficult to heat the room.
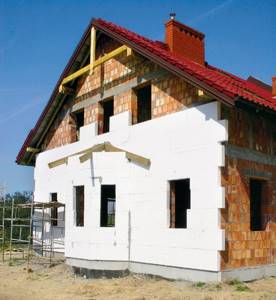
Therefore, it is necessary to use foam insulation on the outside of a brick house in order to:
- Save heat from heating the building. You can save quite a lot on electricity, which consequently leads to financial savings.
- Accumulate heat until the outside temperature reaches zero. So that when the cold weather begins, the heat in the rooms is not spent on warming the entire stone building.
- Internal insulation is done during the period when the walls are just being built. However, you should take care of your comfort by insulating the building from the outside as well.
- By insulating a brick house externally with polystyrene foam, rather than from the inside, you can avoid moisture condensation, and your room will not be filled with droplets of condensed air.
3Required equipment and materials
To insulate the facade of a wooden or brick house with your own hands using Izover Optimal insulation or any other, you need to have the following tools:
- Broom, metal brush - to clean the facade from dust and dirt; Painting brushes - to cover the facade with a primer; Hacksaw and stationery knife - to adjust the polystyrene foam to size; Spatula - to smooth the glue onto the surface of the insulation and to perform putty work; Hardware gun - for installation of a vapor barrier film on the facade of a wooden house; Bucket, trowel - to stir the putty composition, glue for polystyrene foam; Drill - for drilling holes in the wall for facade dowels.
The estimate for consumables is as follows:
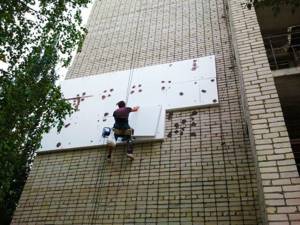
- Deep penetration primer; Adhesive for polystyrene foam; Liquid penoizol; Facade putty mixtures; Vapor barrier film (if you will insulate the facade of a wooden house); Facade dowels with umbrella-shaped caps; Fiberglass putty mesh; Decorative material with which the insulated facade will be finished.
House insulated with polystyrene foam PSB 25F
Now there are a few recommendations that need to be taken into account when preparing an estimate for building materials. It is best to take deep penetration primers from the company Ceresit; for example, the CT-17 primer has proven itself well, which is perfect for the walls of both wooden and brick houses.
The facade putty composition must be completely waterproof. Acrylic facade putties perform best. If finances allow, then polymer façade putty compounds are an ideal option; reviews indicate that after drying they form a completely hydrophobic surface.
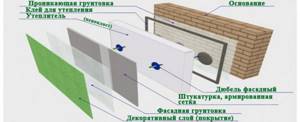
To attach polystyrene foam panels, you need glue that does not contain organic solvents. The following options work well:
- Adhesive Ceresit CT-85 from for insulation of facade glazing; Adhesive Izolemfi from; Adhesive Stopter K20 from Adhesive Glims-KF from; Adhesive Styrofix from .
Conditions for insulating external walls with foam plastic
Like any other construction process, insulating a brick house from the outside with polystyrene foam requires a special approach, in particular, this concerns the preliminary preparation of the work front. So, in order for polystyrene foam to hold tightly and perform its functions, it is necessary that the weather for the last three days be dry and without rain.
You can measure the air humidity yourself, or refer to weather forecasters - it should not be higher than eighty percent. Therefore, it is better to start insulating a brick house with polystyrene foam in the summer, when hot, dry weather makes it convenient to apply the insulating material.
As for the temperature that will be outside during the period of insulation, it should be no lower than 0-3 degrees C. Otherwise, the foam will not be securely fastened, and the heat in the house will still be consumed. This is another point in favor of the fact that this method of insulation should be carried out in the spring and summer.
Make sure that the craftsmen take seriously the base on which the heat-insulating material will be applied. There should be nothing foreign there so as not to interfere with the easy, quick and high-quality laying of the material.
After all, if anything interferes with the normal adhesion of the polystyrene foam together with the binding substances, insulating a brick house with polystyrene foam will not give the necessary dividends. Therefore, it is necessary to carefully treat the wall, ridding it of everything that may be unnecessary.
Pay attention to cracks and surface irregularities. If this is necessary, you need to re-prime the wall. Only after this process should we begin to insulate the house.
Stages of insulation
Insulating walls inside a house
Insulating a brick wall from the inside with polystyrene foam consists of several stages. First you need to prepare the walls: wallpaper or paint must be removed. Some of the old wallpaper can be removed quite easily by hand, using a knife or spatula. For the most persistent ones, use plain water: thoroughly moisten the wallpaper with a sponge, rag, or spray bottle. You can also purchase wallpaper remover at hardware stores.
Old paint can be easily scraped off with a spatula. If absolutely necessary, you can use special solvents or heat the wallpaper with a hair dryer. In this case, the room should be well ventilated. It is advisable to wear a mask for your own safety, so as not to be poisoned by toxic fumes.
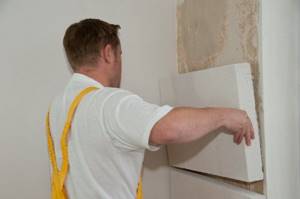
Then the walls must be leveled: they need to be puttied and plastered. The primer coating procedure will not be superfluous at all. When the wall is cleaned, plastered and well dried, foam insulation of a brick wall requires the application of waterproofing.
Waterproofing material is laid to prevent the penetration of moisture that forms between the heat insulator and the wall. Moisture itself greatly reduces the thermal insulation properties of polystyrene foam and its service life (over time, rot and mold can form). Only after these procedures can you move on to the next stage.
The insulation of a brick house from the inside continues directly with the installation of the blocks themselves. We take a sheet of foam plastic and apply a layer of glue along the perimeter away from the edges, then apply it to the wall and hold it for at least 30 seconds. Carefully move on to the next sheet and place them as tightly as possible.
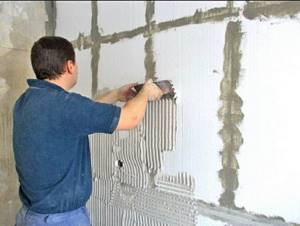
Insulating a brick wall with polystyrene foam from the inside does not require the use of dowels as for external work. The main thing is that the foam joints do not form a straight line, but are laid out like bricks. This arrangement gives reliability to the connection at the joints of the plates.
The insulation of a brick wall from the inside with polystyrene foam continues with the construction of a frame made of metal, wood, or PVC, which is covered with plasterboard. There should be a gap of 2-3 cm between the foam and the second wall. Now you can carry out the exterior finishing. After thoroughly preparing the plasterboard wall, you can proceed to painting it.
What foam sizes should you choose?
It all depends on your needs.
For example, if you decide to insulate the walls of your house with polystyrene foam, then sheets measuring 1000×1000 mm and 1000×500 mm are suitable for solving this problem. The optimal thickness is mm.
Usually they buy sheets of 1000x1000 mm. And to fill the remaining areas, the existing sheets are cut into two parts:
You can also buy the required number of sheets measuring 1000x500 mm for these purposes. But this is in cases where the walls are smooth, without numerous elements that will prevent the laying of entire sheets. Otherwise, you will still have to frequently adjust the width of the sheets.
That is why many people buy polystyrene foam with dimensions of 1000×1000 mm to insulate the walls of their houses. And during the installation process, they are adjusted to the required dimensions (the sheets are cut into pieces). This material is easy to cut, so everything is simple here.
Also, when choosing, consider the cost of the sheets. For example, it may turn out that buying 1 sheet of 1000x1000 mm in size will be more profitable than two sheets of 1000x500 mm.
If you decide to buy expanded polystyrene 2000×1000 mm, then keep in mind that such sheets may be more difficult to install. It is often easier to install two 1000x1000mm sheets than one 2000x1000mm sheet. Of course, a lot depends on what purposes you need this material for.
In general, now you know what sizes of foam there are. We hope that you have already made your choice.
Application area
Extruded gray polystyrene foam has a wide range of applications. Mainly used for insulation work. The scope of use is limited only by temperature indicators (not higher than 75°C). The material can be laid in damp places, in the ground.
Typically, the scope of use is limited only by financial capabilities. The high cost makes it impractical for use in many places. In places where there is no need for high technical characteristics, ordinary polystyrene foam is used instead of PPS, reviews of which are also positive, in order to save money.
Used for insulation:
- concrete or wooden floors;
- walls indoors or outside the building. Compatible with any material;
- wells. Often concrete rings are coated with material for additional protection;
- blind areas;
- surface of the earth. To prevent destruction of the structure, paint is applied. Even a thin layer will not allow the composition to deteriorate.
In addition to the listed areas, the material is used in road construction. Included in many refrigeration units as extruded insulation. Used in agriculture. Roofs and underground floors are insulated with expanded polystyrene. One of the promising areas is the production of sandwich panels.
Technical characteristics of extruded polystyrene foam
The material has some of the highest technical characteristics on the market of insulation products. Any gas has a much lower thermal conductivity than solids. For air, the figure is 0.026 W/m*oC. Extruded polystyrene foam is an air mixture of approximately 90%. It has a thermal conductivity of 0.03 W/m*oC. Almost like air, which means heat is retained perfectly.
The material is produced with different densities. Manufacturers offer from 25 to 47 kg/m3. The higher the number, the greater the strength. As the density increases, the strength increases from 20,000 to 50,000 kg/m2.

Water is poorly absorbed by polystyrene foam. In about a month, one tile can absorb about 0.4% of its own volume if it is completely immersed in water. Further, the percentage of absorbed liquid does not increase, but stops. Vapor permeability is minimal. It is 0.0128 Mg/(m*h*Pa). Often companies specializing in repair work suggest not using vapor barriers, limiting themselves to using only polystyrene.
The insulation is able to withstand temperatures ranging from -50 to +75°C. Its use is possible in almost any climate. The flammability is high, the class varies depending on the addition of additional substances, from G1 to G4.
Some models have a special recess along the edges. Made to increase the tightness of the slabs by insulating the seams. This innovation prevents cold layers from forming between the elements, ensuring complete heat retention.
Tests were carried out with polystyrene foam. Their meaning is repeated freezing and thawing of wet tiles. It was determined experimentally that the material can withstand 80 cycles without changing the technical characteristics. This information is useful for users: the composition can withstand approximately this number of years during operation.
Characteristics, properties and scope of application
To determine the harm of polystyrene foam as insulation, it is necessary to consider its properties, composition and manufacturing method
Special attention should be paid to the area of application, since it is the decisive factor in identifying the impact on humans.
Structure of the material on a cut
Insulation
Foam plastic is almost irreplaceable as a material for protection against cold.
- Its porous structure can significantly reduce thermal conductivity.
- The polystyrene foam holds its shape perfectly, something that not one of the insulation materials in this price category can boast of.
- It is more than 90% air, so it does not burn and does not support this process.
- In its production, a minimum amount of styrene-containing substances is used, which is considered a decisive factor in determining environmental cleanliness.
- The maximum service life of foam plastic exceeds 50 years. This is evidenced by the installation instructions and the quality certificate included with most products made from this material.
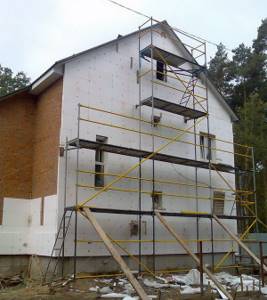
Use as external insulation of houses, amateur photo
Release of toxic substances
It is believed that polystyrene foam, when burned or subjected to strong heating, releases styrene, which is very harmful to the body and in its pure form can become a real poison. However, the harmfulness of basalt insulation is sometimes much higher, especially if violations were made during its manufacturing process, which leads to the decision to use a less dangerous material, although it emits unnecessary substances.

The use of this material was approved back in the Soviet Union, taking into account the relevant GOST
Thus, it becomes clear that it is quite safe to insulate a loggia or other premises using polystyrene foam. In the same cases where it will emit harmful substances, there are many other materials, in the form of vinyl wallpaper and plastic interior items, that can cause more harm.
Rodents really like this material. What may indicate lack of toxicity
Application area
When determining the degree of harmfulness of a given material, it is necessary to consider the places where it is used.
First of all, it is worth understanding that polystyrene foam is used indoors only when insulating plastic windows or entrance doors. In all other cases, cheaper materials are used. Therefore, its impact on humans is minimal. Separately, it is worth noting the insulation of walls in contact with the street. The fact is that it must be done only from the outside (see also the article Insulating facades with foam plastic: we do external thermal insulation with minimal time and money)
Otherwise, condensation will appear between the insulation and the wall, mold and mildew will form. When plasterboard partitions are erected, it does not matter at all whether the basalt insulation is harmful or whether styrene foam releases. In this case, both of these materials are placed in such conditions that their use is not only the most optimal solution, but also environmentally friendly. The only unsafe place to use this insulation is considered to be a metal roof
However, taking into account the fact that foam plastic is separated from the immediate area of incandescence by a layer of waterproofing, and from the living space by a vapor barrier film, then using it for these purposes is quite acceptable.
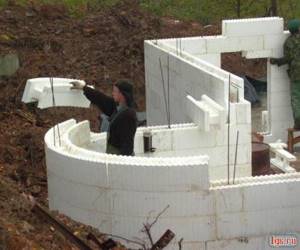
Houses in Japan made entirely of foam plastic
Research and practice
Many novice craftsmen, doing installation work with their own hands, turn to specialists or the Internet for advice. However, there is no clear opinion from experts or reliable research from specialists on the issue of the dangers of this material.
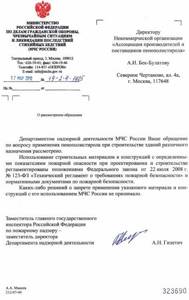
Response from the Ministry of Emergency Situations to a request about the dangers of this material and its fire safety during the construction of residential buildings
At the same time, practice has shown that the location of the insulation and external influences on it cannot completely eliminate the release of harmful substances. True, the probability of such cases is so small and requires certain conditions that it is not worth taking it seriously.
It is also necessary to remember that the price of other environmentally friendly insulation materials is very high, and their natural components also emit harmful substances when burned or overheated.
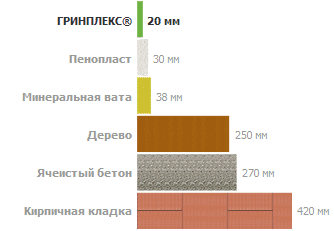
Thickness of different types of material to achieve the same thermal insulation effect
Properties and technical characteristics of EPP
Water absorption tending to zero. If the stove is completely immersed in water, its sealed surface will not be able to absorb moisture.
The end parts are open, and therefore water can penetrate into the intercellular space, but its amount will be negligible.
Low thermal conductivity (much lower than other materials), therefore extruded polystyrene foam has long been noticed by representatives of construction specialties, manufacturers of refrigeration equipment and even road workers. Inability to rot, which is easily explained, because EPP does not come into contact with moisture. Poor UV tolerance. Extruded polystyrene foam has outstanding characteristics due to its ordered cell structure, because it perfectly withstands bending and contact loads. High resistance to chemical reagents, including saline solutions, alkalis, alcohols, acetylene, fluorinated hydrocarbons, etc. The material does not come into contact with oils, lime, cement, natural gases and their mixtures, but is afraid of dichloroethane and acetone. Insignificant light transmittance (for unpainted EPP). The slabs have a small thickness (15–20 mm), which in some cases is highly valued by people who are forced to use it to solve a wide range of problems. The melting point is 2500 C, and some brands of extruded polystyrene foam can melt at a temperature of 3000 C. Temperature range at which the material can be used: from +750 C to -500 C
Sudden changes are undesirable, as it has been noted that this can cause the EPP to become covered with cracks.
Factors affecting thermal conductivity
Foam boards are made in various thicknesses. Therefore, there are numerous factors that affect the thermal conductivity of a material.
- Layer thickness. To achieve high-quality energy saving, it is necessary to make the layer thicker. For example, a 5 cm layer will transmit less heat than a 1 cm layer.
- Structure of the material. Its porosity enhances its insulating properties. This is because the cells contain air. And it retains the thermal conductivity of the foam well.
- Humidity. During storage, the foam must be protected from moisture. It adversely affects the characteristics of the material, even vice versa.
- Average layer temperature. If the temperature increases, there will be consequences. The efficiency of using the insulator will become worse.
6Priming walls and installing hangers
Using a roller or brush, cover the facade surfaces with 1-2 layers of deep penetration primer. For suspensions we use regular fishing line or nylon thread. Suspensions are installed in increments of 60-70 centimeters over the entire height of the wall.
Thanks to the hangers that show where it is necessary to trim the polystyrene foam, and where, on the contrary, to add adhesive, you will be able to secure the insulation panels with a perfectly flat surface, plastering and finishing which with your own hands will not cause any difficulties.
Common mistakes
When installing extruded polystyrene foam with your own hands, frequent mistakes are made. Knowing about them, you can avoid repetition of ridiculous situations. Below are the most common:
- The surface of the walls is not completely leveled. Therefore, the slab lies unevenly;
- The glue is applied to the center of the slab, the corners will bend outward over time;
- Plaster without a reinforcing mesh will lead to cracking of the surface;
- Poor insulation of the seams between the plates will lead to the formation of cold bridges;
- There is an opinion that the thermal insulation of a house made of aerated concrete will lead to the disruption of the vapor barrier of the premises and the possible formation of mold.
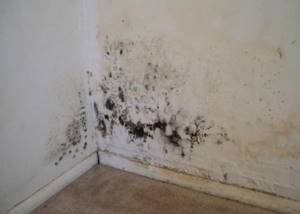
Only correct and competent installation of insulation in compliance with many conventions can benefit both the person and the entire building. This should be remembered!
