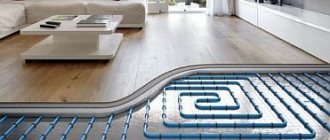
Tile flooring is one of the coolest. It does not warm up well even in a warm room; walking on it is cold and quite unpleasant. The solution to this problem will be to install a water heated floor under the tiles, which you can do yourself.
This heating system consists of a multi-layer structure placed under the floor covering, a hot water source and distribution equipment responsible for temperature regulation. Such a system not only heats the room evenly throughout the entire volume, but also maintains a comfortable temperature of the material itself. At the same time, you can get rid of extra pipes and radiators, which usually spoil the entire interior.
Types of floors and their features
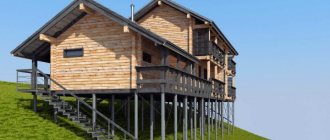
Choosing a ceiling and making floors in a wooden house
Houses can have different designs. It must be taken into account when arranging floors. Laying the first floor floor depends on whether there is a basement or whether it will be laid directly on the foundation. Reliable thermal and steam protection is needed here.
For interfloor ceilings, sound insulation is more important, since the main load of heat conservation and protection from moisture is borne by the lower and upper floors.
The photo shows an example of a ceiling
The attic space must also be separated from the living space by an insulated floor to avoid heat loss through the ceilings of the upper floor.
Floor options
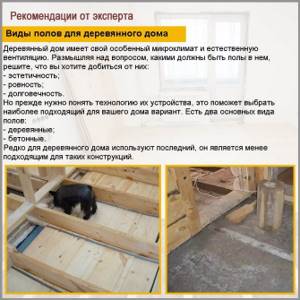
Types of floors for a wooden house
The floor can be wooden or concrete. The choice depends on the desire of the owner and technical capabilities.
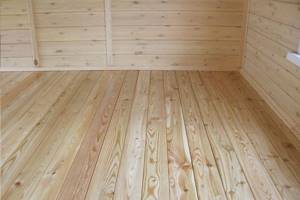
Wooden flooring - advantages and disadvantages
Wooden floors in a private house
It would seem that the answer is simple - a wooden house should have a wooden floor. It is easier, cheaper and faster to do without resorting to the services of professional builders. The structure will be light enough and any foundation will support it. Again, this is an environmentally friendly option and fits well into the interior.
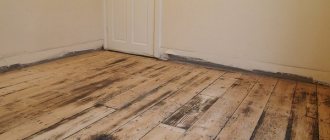
Wood floors are prone to rot, especially if a protective coating has not been applied.
However, there are a few "buts". A wooden floor will last a maximum of 10 years. Wood tends to rot, no matter how much you protect it from external influences. In addition, wood-boring beetles will also do their job. For a wooden floor, constant humidity in the house is important - no more than 60%. Otherwise, the floor will begin to deform and rot. Laying a wooden floor must be done with special care so that it does not warp or creak later.
Concrete floor
Its main advantage is durability. You can put any finishing coating on it - laminate, linoleum, ceramic tile. However, this is a rather heavy structure that not every foundation will support. Concrete is used only for laying the floor of the lower floor.
Modern wooden cottages, as a rule, have a ground floor where a boiler room, workshop or other utility rooms are located. It is better to use concrete slabs for the overlap between the ground floor and the first floor. This is a more expensive option than wooden logs, but more reliable.
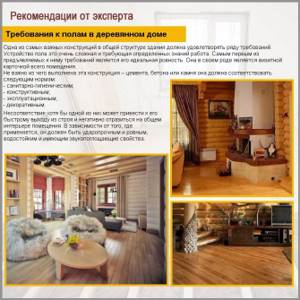
Requirements for floors in a wooden house
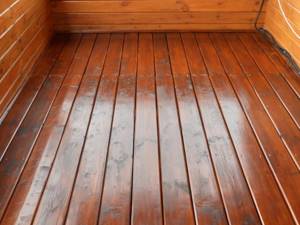
Finish floor
Wooden flooring can be constructed as a rough flooring, intended as a base for subsequent coating, or as a finishing flooring, that is, for finishing. In addition to wooden flooring, the finished floor of a frame house is made of piece or glued parquet, parquet boards, laminate, linoleum, and PVC tiles. Finished wooden floors (made from planks) are relatively inexpensive, environmentally friendly and aesthetically pleasing, but their service life is highly dependent on the quality and durability of the coating. Parquet floors are more durable, but also more expensive. The best price/quality ratio is for laminate or linoleum floors. PVC tiles are made from the same material as linoleum, but have one significant advantage: if the coating is damaged, the tiles can be replaced independently of each other.
Advantages and disadvantages of underfloor heating
Advantages
:
Flaws
:
- heated floors, depending on the design features, can significantly reduce the height of the room
; - in the event of a malfunction of this system, it will be very difficult and expensive to dismantle the floor layers;
- sometimes this is a rather lengthy and complex procedure
, which it is advisable to perform during the construction of a house; - the need to take into account the position of groundwater.
Wood floor pie
The basic principles of creating a wooden floor pie are accurate calculation and verification of all parameters. The choice of wood is no less important. Typically the following types are used in construction:
- pine can only be used if the board is not very resinous. This floor will bring a very pleasant pine smell into the room;
- oak is the most reliable and durable material;
- maple is easy to process and moisture resistant;
- Larch is comparable in strength to oak and has natural protection against insects. The most expensive option.
The tree must be treated with an antiseptic against rotting and a fire retardant, which reduces its flammability.
Neomid Base Eco Proff - deep-penetrating universal antiseptic
Lags
Cross beams that are attached to a wooden frame are called joists. Floorboards or sheet covering are mounted on them. Using logs, it is easy to level the horizontal floor if the foundation was poured with level differences.
Logs are made from wood; metal or concrete are used much less often. The width of the board varies between 25-30 mm, and the height depends on the thickness of the insulation. As a rule, it is 150-200 mm. If the logs are laid on a concrete base, then a waterproofing layer must be made from roofing felt.
The beams are made from wood species:
- oak;
- beech;
- ash;
- fir;
- pine.
The table will help you calculate the step between lags:
| Spacing between walls (m) | ||||
| Beam size (mm) | 2 | 3 | 4 | 5 |
| 150*50 | 80 | 40 | ||
| 200*150 | 60 | 40 | ||
| 200*80 | 60 | 35 |
The laying direction has its own characteristics:
- the boards must be perpendicular to the finishing coating;
- in rooms with windows, the beams are laid in the direction of the flow of light;
- in the corridor, the logs go in the direction of movement from door to door.
Preparing beams for installation is no less important than choosing wood. After all, wood is a favorite place for insects, fungi and bacteria. Ready-made antiseptic solutions for treating wooden structures are available for sale. It is recommended to apply a double layer of antiseptic with a break of 1-2 hours.
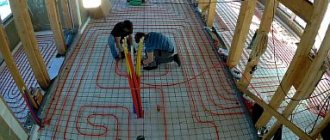
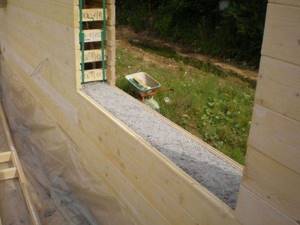
Floor pie in a bathroom/bathroom with water-heated floor
Section of a finishing screed in a bathroom with thermal insulation, underfloor heating (water heated floor), waterproofing and tiles. Floating floor.
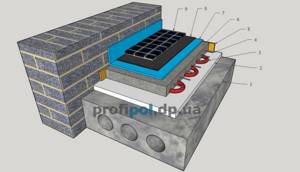
- floor slab
- thermal insulation (30-100mm)
- water heated floor pipe (16mm)
- reinforced mesh (2.5-4mm)
- damper tape (5-10mm)
- finishing floor screed (60-80mm)
- elastic waterproofing with overlap on walls (1-2mm)
- elastic glue (2-5mm)
- finished flooring (ceramic tiles / porcelain stoneware) (8-12mm)
Finishing the base as a factor in floor insulation
Finishing the base is the most difficult task, since any flaws in this work will be noticeable.
When finishing the basement of a house on screw piles, bricks or blocks are often used, arguing that the subfloor is insulated. This is definitely a false statement. The frame pie completely insulates the heat of the house. The underground itself is not heated in any way and will still freeze. But by laying a dense brick wall around the base, the access of air to this space is completely blocked. This leads to waterlogging, condensation, the development of fungus and swelling of the floor.
But it is better to install a false base. Nowadays, many beautiful, durable and environmentally friendly materials are produced for this - siding or special panels with imitation stone, brick, wood and other textures. Installing a false base is not only easier to install, but can also be dismantled if necessary.
There are different situations - high water in the spring and the underground needs to be dried, an animal has climbed through the ventilation holes and cannot get out, there is a need to install additional communications, etc.
Although the base does not add thermal insulation, it performs another practical function - protecting the subfloor from the penetration of water from the outside (rain, melt water). To do this, seal the joint between the false plinth and the blind area using rolled waterproofing.
The blind area of the building can be poured from concrete, paving slabs and any other materials can be laid. But, firstly, the blind area must have a mandatory slope from the building, and, secondly, it must be sealed from the underground and false base.
Base finishing
Insulating the floor of a frame house on stilts is a simple technological process, but the comfort of living in it will depend on the quality of the work. Even before starting work, you need to carefully study the nuances, do not skimp on the choice of materials, install them carefully and correctly - and the warm floor will delight the inhabitants of the house for many years.
Composition of the “pie” of a heated floor with a concrete screed
Layers of underfloor heating with concrete screed were discussed in the previous article, here I will list them again (from bottom to top):
- insulation;
- polyethylene film;
- reinforcement mesh (you can do without it, but with it it is more convenient to install the pipe and the floor will be stronger);
- heated floor pipes;
- concrete screed.
Everything else that is above and below what is listed does not apply to the warm floor itself, but it will still be mentioned here, because it plays its role.
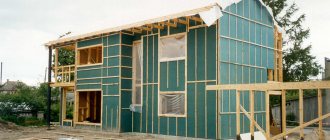
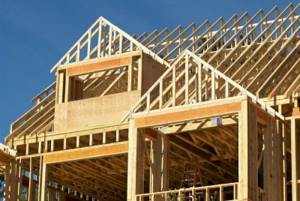
Construction of frame houses
The construction of a frame house from the foundation to the roof involves the creation at the first stage of a cheap foundation (possibly a strip foundation). The building can be secured to the foundation with bolts, dovetails, tie-down anchors, or a wedge. The construction of load-bearing walls was described above, but after completing this stage, you can start working on the roof. For this purpose, ceiling beams with a square cross-section are used, the side of which is 150 mm. Permanent wind braces are installed in the corners flush with the posts. A board with a cross section of 150×50 mm is laid on them. The roof frame is reinforced with ties; the pitch between the rafters should be equal to twice the distance between the frame posts.
Our ancestors slept differently than we do. What are we doing wrong? It’s hard to believe, but scientists and many historians are inclined to believe that modern man sleeps completely differently than his ancient ancestors. Initially.
20 photos of cats taken at the right moment Cats are amazing creatures, and perhaps everyone knows this. They are also incredibly photogenic and always know how to be in the right place at the right time.
Contrary to all stereotypes: a girl with a rare genetic disorder conquers the fashion world. This girl's name is Melanie Gaydos, and she burst into the fashion world quickly, shocking, inspiring and destroying stupid stereotypes.
What is it like to be a virgin at 30? I wonder what it’s like for women who didn’t have sex until almost middle age.
11 Weird Signs That You're Good in Bed Do you also want to believe that you please your romantic partner in bed? At least you don't want to blush and apologize.
How to look younger: the best haircuts for those over 30, 40, 50, 60 Girls in their 20s don’t worry about the shape and length of their hair. It seems that youth is created for experiments with appearance and daring curls. However, already last.
Strapping and logs
The strapping board is installed around the perimeter of the building and aligned with the outer plane of the foundation. Place the board on its end so that there is space left on the planks inside the perimeter to support the joists. The strapping, like the logs, is made from a 50 mm board, the width of the board depends on the design load and the thickness of the insulation layer; usually a board 20-25 cm wide is used.
- Laying of the trim is carried out on the sides of the house, located parallel to the floor beams. The strapping boards are placed on their ends, aligned along the outer edge of the beds and fastened to them with nails at intervals of no more than 20 cm.
- Mark the location of the logs. To do this, measure the lag laying step from the corner along the laid strapping board, 40 cm. The boards intended for lags are laid out on the beams in the required quantity, placed on the side plane and aligned according to the markings. In this case, it is necessary that the marking line is on the same side of the board, otherwise the step may change.
- If the length of the board from which the logs are made covers the entire length of the building, then on the opposite side the markings are done in a similar way, starting from the same corner. The logs are cut to size and secured with nails to the strapping and beams, and after checking their level position, to the beams at the intersection.
- If the building is longer, then the logs must be joined. They do this overlapping to increase the strength of the floor. In this case, the boards are laid first on one side, then on the other so that the joint is made on the floor beam. Cut intermediate logs 30 cm long and nail the joints together, installing the scraps as spacers. After this, the logs are secured to the floor beams.
Installation of strapping and layout of logs
Thermal insulation of the first floor floor
If you decide to build a house on screw piles with your own hands, then special attention should be paid to insulating the floor of the first floor. The structural design of a wooden floor on the second floor does not require such careful thermal insulation
As a rule, the construction of houses on stilts is carried out using beams. To do this, we lay OSB boards or plywood along the slats attached to the bottom of the joists. The design in cross section will resemble the letter W.
Layout of a wooden floor on joists with insulation
Now you can begin installing hydro- and vapor barriers. To do this we do the following:
- We spread the waterproofing film over the joists so that it sag into the gaps between the joists. You can use membrane waterproofing or regular film.
- We place thermal insulation material in the spaces between the joists (on top of the film). Mineral wool is suitable for these purposes. If you want to properly insulate your house on stilts, then it is better to use basalt wool.
- The waterproofing film on the joists must be secured with a stapler.
- The structural design of the first floor floor in a house on stilts must include a vapor barrier. If you are building with your own hands, then do not forget that the vapor barrier material is laid with an overlap of 150 mm. The joints must be taped.
Using the method described above, the construction of the ground floor floor is carried out in any room, be it a bathroom, kitchen or living room. As for the structural pie of the second floor floor, it can be done without heat and waterproofing material. But in the bathroom and other places with wet processes, it is worth laying a waterproofing layer into the floor structure. In the video below you can learn in more detail about the construction of the floor of a house on stilts with your own hands.
Flooring installation

An example of laying tongue-and-groove boards of the finishing coating.
The next layer of the structural cake is made with a board 3 cm thick. When laying the boards with your own hands, keep a step of 40-50 cm. This sheathing along the joists will allow you to get a ventilation gap. You can attach the boards to the joists with self-tapping screws.
We then proceed with the construction of the floor in the house in this order:
- We lay the subfloor on the sheathing of boards. It can be a tongue-and-groove board or a regular board. We fasten it to the sheathing with self-tapping screws.
- You can lay purchased flooring on the boards with your own hands.
Since the front layer of the floor in the bathroom and toilet will be tiles, it is better to lay plywood or OSB on the rough boards to level the surface. At the same time, the structural pie in such rooms must include additional waterproofing, which is laid over plywood.
Warm floor of a frame house
You can make a warm floor in a house on stilts with your own hands. This is not shown in the video below, but the process is simple and takes place in the following sequence:
- A structural heated floor pie includes the same load-bearing wooden frame as for a non-heated floor, with the only difference being that the plywood sheets are not laid on backing boards, but on cranial blocks attached to the joists with self-tapping screws on the sides. You can use a cranial block with a cross-section of 30x30 mm and fasten it in increments of 15-20 cm.
- After laying the plywood on the beams and performing waterproofing, we lay expanded polystyrene in the gap between the joists. The top surface of the polystyrene foam boards should be flush with the top of the joists.
- Next, you need to lay a layer of vapor barrier film, placing it on the walls above the expected level of the finished floor.
- We lay a reinforcing mesh over the film and fill it with a thin layer of cement mortar.
- Then we lay the heating mats of the underfloor heating system on the reflective layer of foil insulation. We perform concrete screed.
- We install flooring. If the floor is in the bathroom or kitchen, then you can use tiles.
For more information on how to make a floor in a frame house, watch the video below:
https://youtube.com/watch?v=SYV5vkZOWZk
What type of floor should I choose?
The system of electric heated breakwaters has the following modifications:
- Heating cable;
- Mats;
- Film floor;
- Rod floor.
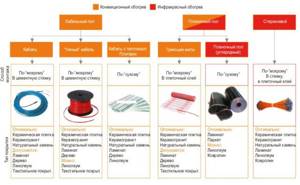
Types of electric underfloor heating systems
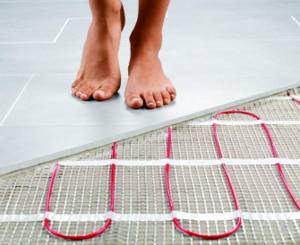
Among the advantages of the cable are low cost and the ability to retain heat even after the system is turned off, which allows you to save electricity. However, an electric heated floor under tiles has a reduced degree of electrical safety; its installation technology is more complex and requires accurate calculation of the cable length. This type of electric floor heating is most often used in the bathroom.
Thermal mats are essentially an improved cable. Mats are infrared and convection. The convenience of the latter lies in the fact that the heating element is fixed to a fiberglass mesh. Installing mats is much more convenient than cables; all you need is to buy a roll of the required size. In addition, a screed is not necessary and installation takes place in a layer of tile adhesive. Laying such warm floors is recommended under tiles or porcelain stoneware.
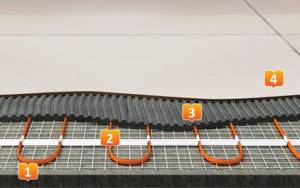
Warm floor tiles based on heating mats: 1 - Leveling screed, 2 - Heating mats, 3 - Tile adhesive, 4 - Tile or porcelain stoneware
Infrared heating is most suitable for wooden surfaces (laminate, parquet). It uses special heating rods that are connected in parallel to power wires.
What are the walls of frame houses made of?
The materials for the walls are chosen differently; now we will tell you in more detail about the materials used for this type of house.
Pie with ecowool
Ecowool is based on cellulose and is an environmentally friendly and safe material. It has good heat-protective and sound-proofing properties, does not rot, is fireproof, retains moisture in the upper layers, easily allowing it to pass out, and does not harbor rodents.
Ecowool is based on cellulose and is an environmentally friendly and safe material.
Mineral wool pie
Mineral wool is most often used in frame houses and consists of basalt and crushed glass, which are mixed with an adhesive. It has good vapor permeability, sound insulation, does not emit harmful substances when in contact with fire, makes the house warm in winter, and keeps cool in summer.
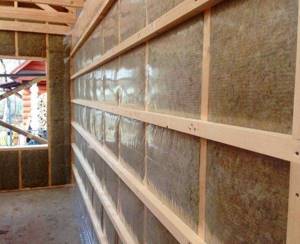
It has good vapor permeability and sound insulation.
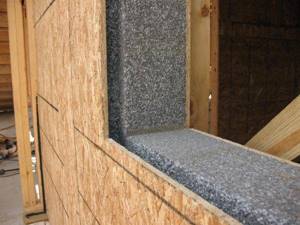
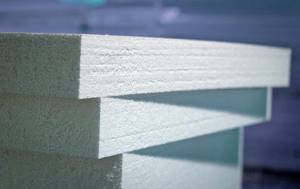
Pie with polystyrene foam
Expanded polystyrene is a safe material, fungus and mold form on it, it is lightweight, so there is no need to strengthen the foundation, it is flammable, you cannot leave it in direct sunlight, insects can get into it, you cannot heat it too much, you need to create protection from mechanical stress, affordable price.

Expanded polystyrene is a safe material.
Pie with OSB
It has good moisture-resistant properties, if the construction is carried out, it is correct, then it is suitable for any insulation, well suited for the outside, environmentally friendly, reasonable cost.
It has good moisture-resistant properties.
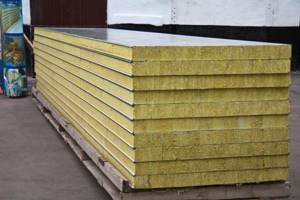
Pie with basalt insulation
Basalt wool is safe, has good sound and heat insulation properties, is non-flammable, reliable, resistant to chemical attack, mold, does not shrink, and does not lose its properties under the influence of high temperatures.
Basalt wool is safe, has good sound and thermal insulation properties.
Selection of thermal and waterproofing
You can choose several materials for thermal insulation. The most environmentally friendly is expanded clay. It is inexpensive, non-flammable, does not rot, and mold does not form on it. But its thermal insulation qualities leave much to be desired.
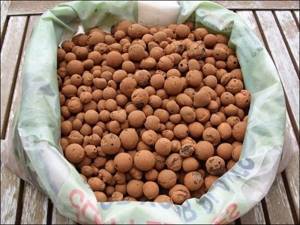
The photo shows expanded clay insulation
Another environmentally friendly material is sawdust. You can get them at sawmills almost free of charge. They have low thermal conductivity and are suitable for insulating attic floors. Disadvantages include their ability to decrease in volume over time, susceptibility to moisture and, as a result, the formation of fungus. These risks can be reduced by using additives - clay, cement, lime or boric acid, as an antiseptic.
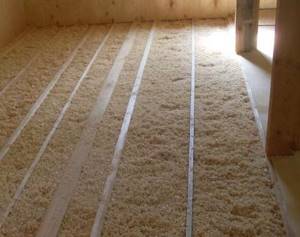
Sawdust as insulation
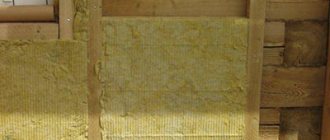
Mineral wool (or glass wool) is also a budget option. It does not burn, retains heat well and has high sound insulation properties. But its installation requires adherence to a certain technology, in addition, it can cause allergies and skin irritation.
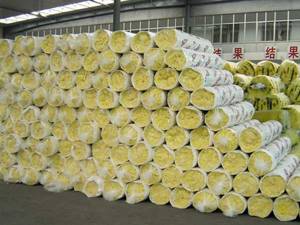
Appearance of mineral wool
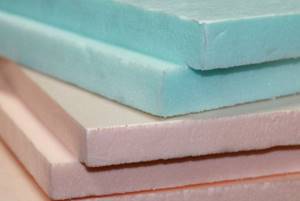
Polystyrene foam is one of the most convenient options in all respects. It is cheap, has good thermal insulation qualities, and is easy to install. You can use it to make a dense reinforced screed. From the same series - extruded polystyrene foam, it is more resistant to moisture.
Foam plastic for insulation
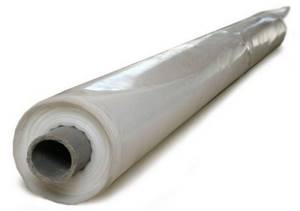
Waterproofing
This is an equally important component of the floor pie. The simplest option is plastic film.
The second option is pasting roll materials, consisting of waterproof material with a bitumen-polymer composition applied to it. Its use is justified where groundwater comes close to the surface. Most often, roofing felt is used for this purpose.
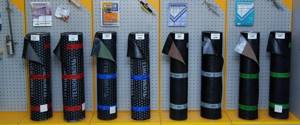
The most technologically advanced and most expensive option is a membrane coating. It is a self-adhesive film consisting of three layers - a rigid plastic film, a bitumen-polymer layer and an anti-adhesive layer. It is convenient to use for creating waterproofing in rooms with complex configurations.
Profiled membrane waterproofing
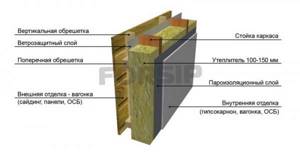
Wall construction
As already noted, the wall in a frame-type house has a rather complex structure. A proper wall pie should consist of the following elements:
- The very first layer, when viewed from the side of the room inside the house, is the OSB board or drywall, which levels the wall.
- This should be followed by a vapor barrier, which will protect all other layers of the cake from the penetration of steam, which can significantly damage the insulation. For such purposes, you can use various materials, but it is best if it is a multifunctional membrane.
- The third layer is a frame made of wooden beams. Its dimensions may vary, but the classic construction option involves the use of material with dimensions of 15x15 cm.
- Between the frame racks there is a layer of high-quality insulation. Most often, mineral wool is used for thermal insulation, which is sold in the form of tiles or rolls.
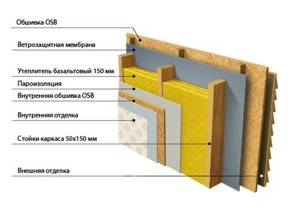
The fifth layer is fibreboard. The most commonly used material is OSB boards.
When choosing, it is very important to purchase slabs with the correct thickness. The higher this figure, the better. The classic option is 1.5 cm thick slabs.
Very cheap house options may have slabs with a smaller thickness in their construction, but in this case it is worth understanding that such a house is not intended for living throughout the year. It is possible to live here at most in summer and late autumn. The sixth layer will be a wooden horizontal sheathing. For its implementation, wooden materials or aluminum profiles can be used. The difference is fundamental here. The choice of material will not subsequently affect the performance of the house. The seventh is insulation again. You can use mineral wool as it, or you can buy polystyrene foam. Experts recommend using the latter option, since both are almost identical in efficiency, but the cost of mineral wool is much higher. The eighth layer is a multifunctional membrane film, which is assigned the functions of protection from steam and wind. It is best to use high-quality film that will reliably protect against strong gusts of wind. The ninth layer is again a sheathing, but this time vertical. When choosing a material, the builder is given freedom of decision. It can be either a metal profile or wood. The final layer is a decorative finishing layer. Here you can also use materials at your discretion. Probably, you just shouldn’t use natural stone because of its heavy weight. It will significantly increase the weight of the structure, which is not designed for such extra pounds.
The classic option is considered to be slabs 1.5 cm thick. Very cheap house options may have slabs with a smaller thickness in their construction, but in this case it is worth understanding that such a house is not intended for living throughout the year. It is possible to live here at most in summer and late autumn. The sixth layer will be a wooden horizontal sheathing. For its implementation, wooden materials or aluminum profiles can be used. The difference is fundamental here. The choice of material will not subsequently affect the performance of the house. The seventh is insulation again. You can use mineral wool as it, or you can buy polystyrene foam. Experts recommend using the latter option, since both are almost identical in efficiency, but the cost of mineral wool is much higher. The eighth layer is a multifunctional membrane film, which is assigned the functions of protection from steam and wind. It is best to use high-quality film that will reliably protect against strong gusts of wind. The ninth layer is again a sheathing, but this time vertical. When choosing a material, the builder is given freedom of decision. It can be either a metal profile or wood. The final layer is a decorative finishing layer. Here you can also use materials at your discretion. Probably, you just shouldn’t use natural stone because of its heavy weight. It will significantly increase the weight of the structure, which is not designed for such extra pounds.
Requirements for wood and materials
The technological process of arranging each element of the building offers a different sequence and combination of components of a multilayer structure.
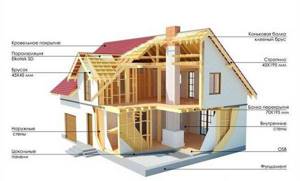
So the roof has its own set of layers, and the floor and walls have their own set. In this article we will look at the features of the “pie” of the floor of a frame house and installation methods.
Before choosing a floor material, you should decide on the type of foundation.
In most cases, frame houses are built on pile foundations or on a strip foundation. This is primarily due to the fact that the house is not heavy, up to 16 tons. And a pile foundation is the cheapest, as it does not require the use of special construction equipment. Therefore, we will accept that the foundation of our house has a pile appearance.
During construction, softwood pine and spruce are usually used as flooring materials. The boards and beams are quite strong, light, reliable, and also least susceptible to rotting. And the price of such building material is insignificant. But if you want your house to stand for a long time, you should use hardwood, such as oak.
The beams and boards are more durable, much stronger, and therefore heavier. Oak is always used in the construction of large and heavy frame houses. Pleasure is not cheap.
The entire structure is based on logs, so for their arrangement a beam with a section of 10x15 cm or a section of 15x20 cm is used. The beam is installed on the edge of the pile site. The more supports there are under the joists, the smaller the beam cross-section can be used, but experts do not recommend beams smaller than 10x10 cm.
Do not forget that a layer of waterproofing should be laid between the timber and the metal pile.
In the age of high technology, you should not use roofing felt or parchment, but it is best to trust the proven means of waterproofing, linocrom or roofing felt.
To ensure reliable insulation, a double layer is laid. Also, instead of timber, you can use boards with a width of 15-25 cm and a thickness of 5-6 cm. The laying technology is the same on the edge.
To file the bottom layer (rough), which will hold the insulation, you can use unedged boards, plywood, OSB boards, flat slate. There are no restrictions, the most important thing is that the material is moisture resistant and resistant to temperature changes.
To file the top layer under laminate, parquet, or linoleum, it is best to use an edged board, which allows you to directly install the finishing coating on it. In this case, the thickness of the boards can be in the range from 25 to 35 mm.
If you plan to level the floor surface with plywood slabs, OSB or other material, then you can use an unedged board as the material for the finished floor. And if you don’t want to complicate everything, then you can use a tongue and groove board, which will be the final floor covering, but as you understand, this is an expensive pleasure.
To cover the floors of the second or more floors, you can use any material, since it has more decorative functions than functional ones. But the finished floors of the second and subsequent floors are installed in the same way as for the first floor.
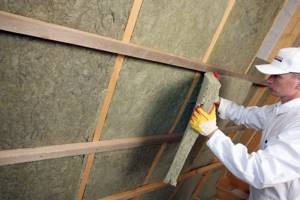
For attic spaces, the subfloor must be strong to withstand the weight of the insulation and an adult. Typically, glass wool (insulation) in the attic is left exposed, so all the load falls on the attic subfloor.
To protect all wooden structures, they are treated with special antiseptics and penetrating compounds. But there are small nuances; it is better to process everything before installation, each element separately.
Antiseptics are used against rotting and tend to erode within 6-7 years; additional treatment will be required. Penetrating compounds are used against wood fires, they are treated once and for all, but the price is much higher than that of antiseptics.
Nails or screws are used as fasteners. It is preferable to use nails because they hold lateral loads much better.
When fastening dimensional boards and beams, you can use both bolted connections and metal corners. We take metal corners from stainless steel and fasten them with nails or self-tapping screws.
The connection of all elements should be taken responsibly, because creaking when walking will depend on this.
Arrangement of concrete screed
Certain types of floor pies on the ground can be made using clay, cement and polymer levelers as the top layer. But it is concrete that has gained the greatest popularity as a material for the construction of screeds.
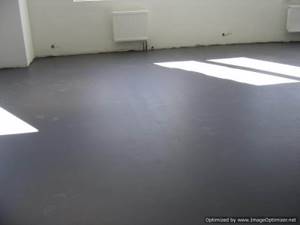
The photo shows the finished screed
This demand is explained by such material features as:
- accessibility and prevalence in the domestic market;
- relatively low price;
- ease of concrete preparation in individual construction conditions;
- ease of installation of the screed yourself;
- strength and durability of the finished coating, subject to compliance with production technologies.
Determining the feasibility of constructing a concrete floor on the ground
In order for the ground flooring to meet the requirements of operational strength and durability, it is necessary to ensure that the soil meets a number of parameters. For example, the soil must be stationary and compacted. In addition, the depth of groundwater must be at least 6 meters.
Pie scheme
Important: It is advisable to install floor pies of this type in residential buildings that are heated during the cold period. If the room is not heated, then in the cold season the soil may freeze and thereby increase the load on the foundation. As a result, the structure of the building may become deformed.
Layered cake"
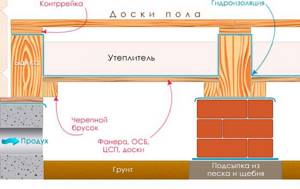
By putting together all the elements of the floor, we get a kind of pie consisting of several layers. The lowest part, the filing, is designed to hold the “filling” of the pie. It is made of sheet material or assembled from thin wooden slats. A wind barrier is laid on top of the filing - a layer of thin polymer material that prevents the movement of air between the room and the outside environment. This significantly reduces heat transfer through the floor. It is advisable to use reinforced polyethylene or polyvinyl chloride film as wind protection.
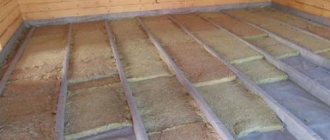
A layer of insulation is placed on top of the windbreak. Without it, the cake will cool down very quickly, so you need to take both the selection of material and its installation very seriously. The thicker the layer and the more evenly it is laid in the space between the joists, the more comfortable the microclimate in the house will be
It is fundamentally important to eliminate all cracks: when insulating with mineral wool, they are carefully plugged with pieces of the same material, and when insulating with polystyrene foam, they are filled with polyurethane foam
The cake ends with the installation of wooden flooring. It can itself be finished as a finished floor, or carry another coating that best satisfies the desires and capabilities of the home owners.
Step-by-step installation of a floor on a pile foundation
Let us describe the sequence of actions for arranging and insulating the floor of a frame on screw piles. Work begins after careful preparation of the wooden elements: treatment with an antiseptic and fire retardant compound.
Strapping device and lathing fastening
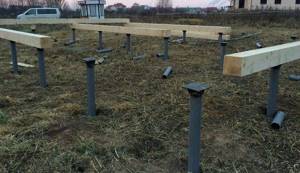
Let's assume that the piles are installed and the metal heads for fixing the beams are secured. Further progress of work:
- Drill four holes on each “bottom” of the screw supports.
- Lay waterproofing, for example, roofing felt, on the heads.
- Lay out the beams along the perimeter of the structure and connect the elements together “in half a tree.”
- Attach the beams to the heads with self-tapping screws.
- Insert the remaining beams inside the perimeter.
- Use steel staples to additionally connect the strapping parts.
- Check the horizontal placement of the beams.
- Fill the bottom of the beams with sheathing - a base for attaching the substructure.
Useful: How to calculate dew point
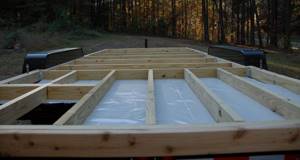
Rough base and thermal insulation
Lay sheets of OSB, chipboard or moisture-resistant plywood on top of the guide rails. If edged boards are used, they must be nailed perpendicular to the joists.
After preparing the subfloor, they begin to insulate it:
- Cover the base with waterproofing film.
- Place insulation in the cells between the joists. When cutting mineral wool, it is necessary to provide a margin of 0.5 cm on each side for the tightest possible fit and to prevent the appearance of cold bridges.
- Spread a vapor barrier membrane over the insulation with an overlap between the sheets. Tape the joints with construction tape.
The next steps depend on the type of floor covering.
Creating a thermal contour for the plinth
The installation of a floor in a house on stilts necessarily involves driving in the base. The following methods of insulating finishing are possible:
- Brickwork. The base is a cushion of crushed stone and sand. The fence is laid out in half a brick; reinforcement is not necessary. Ceramic or clinker bricks are used for work.
- Siding. Thermal plates are mounted on a lathing made of galvanized profiles or bars, assembled on piles.
- Profiled sheeting. Purlins are welded to the bored posts, which serve as the basis for attaching the profiled sheet.
- DSP. Sheet material is mounted by analogy with corrugated sheets. The outer part can be decorated with flexible tiles and porcelain stoneware.
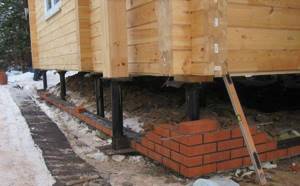
Regardless of the chosen method of finishing the underground part, it is necessary to provide “vents” - openings for natural ventilation.
The blind area of the house is laid out from concrete screed, paving slabs or paving stones. When arranging, it is necessary to maintain a slope angle of 4° outward. It is imperative to seal the junction of the false plinth cladding with the blind area. This will prevent melt water and precipitation from entering the underground.
American and Canadian do-it-yourself technology
A house using American technology is a prefabricated structure based on a wooden frame. All main elements are manufactured at the factory.
Distinctive features:
- using only well-dried wood;
- the structure is assembled not from timber, but from edged boards (in the frame there is a board 5 cm thick);
- reinforcement of openings is provided by double and triple racks made of boards;
- above the opening the board is mounted on an edge;
- the top trim is made of double boards;
- the corners of the frame are made using a special technology (“California” or closed corner);
- large glazing area;
- two-story design.
The frame is sheathed on the outer and inner walls with OSB boards, between which thermal insulation is laid (most often, mineral wool). A vapor barrier is placed between the insulation and the slabs. Exterior finishing is provided by siding, decorative panels, artificial stone and other materials.
The basis of Canadian technology is a frame assembled from vertical and horizontal profiles. Insulation is placed between the frame elements. The cladding is made with OSB boards with a thickness of at least 12 mm. The rafter system is covered with plywood.
A vapor barrier made of thick polyethylene film is applied over the insulation. Mineral wool is used as insulation. Sometimes a combined option is used - a layer of mineral wool covered on both sides with polystyrene foam. For the frame, a board (timber) measuring 5x15 cm is usually used.
If the construction technology is followed, frame houses using American and Canadian technology have a service life of at least 60-70 years. Durability often exceeds 100 years.
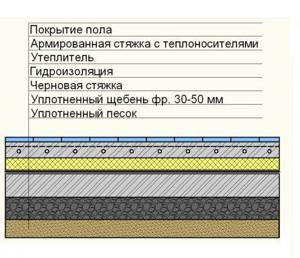
Floor pie of a frame house on a strip foundation
With a strip foundation, you can make the floor in a frame house using joists, but it is more advisable to make a floor on the ground or a screed. Since the construction of the floor using joists is described in detail above, we will focus on the second option.
The foundation is backfilled with compaction in layers. You can use sand first, then crushed stone. Insulation is laid on the compacted layer. In such structures, backfill material, for example, expanded clay, is often used. Expanded clay is leveled and filled with a cement screed, on which the floor covering is subsequently laid. A device of this design requires certain skills.
If it is planned to install a warm electric or water floor, then heating systems are installed in the screed.
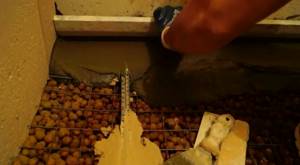
Installation of cement screed on expanded clay.