This technological operation is performed on new heating systems before they are put into operation.
It is also carried out after the completion of preventive or repair work on the specified systems after their complete completion, but before the restart of the specified systems into operation.
The implementation of these works is also associated with such a factor as seasonal operation of the heating system. Therefore, such work takes place every autumn on all sections of heating mains and centralized heating systems of apartment buildings.
The main task that pressure testing of a heating system with air is aimed at achieving is to identify possible places of coolant leakage from the heating system lines.
The procedure and technological features of performing pressure testing of the heating system
Hydraulic tests of heat supply systems are usually carried out with different pressure tests depending on the purpose of the system and the type of equipment used. For example, a heat input unit into a building is pressurized with a pressure of 16 atmospheres, heat supply systems for ventilation and ITP, as well as heating systems for multi-storey buildings - with a pressure of 10 atmospheres, and heating systems for individual houses - with a pressure from 2 to 6 atm.
Heating systems of newly constructed buildings are pressed with 1.5-2 times greater pressure from the worker, and heating systems of old and dilapidated houses are pressed with lower values in the range of 1.15-1.5. In addition, when crimping systems with cast iron radiators, the pressure range should not exceed 6 atm, but with installed convectors - about 10.
Thus, when choosing pressure testing, you should carefully read the equipment data sheets. It should not be higher than the maximum pressure of the “weakest” link in the system.
First, the heating or heat supply system is filled with water. If the heating system is filled with a low-freezing coolant, then pressure testing is carried out first with water, then with a solution with additives. You should know that due to lower surface tension, coolants based on ethylene glycol or propylene glycol are more fluid than water, so in case of minor leaks on the threaded connections, sometimes they should only be tightened slightly.
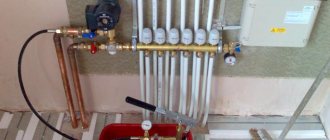
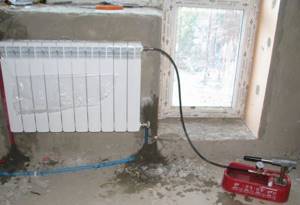
When preparing a functioning heating system for the heating season, the working coolant must be drained and refilled with clean water for pressure testing. The heating system is usually filled at the lowest point of the boiler room or heating unit through a drain ball valve. In parallel with filling the heating system, air must be bleed through air vents on risers, the top points of branches or through Mayevsky taps on radiators. To prevent airing of the heating system, the system is filled only from the bottom up.
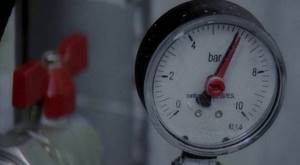
Then the system pressure is increased to the calculated one, with the pressure drop monitored by measuring pressure gauges. In parallel with pressure monitoring, a visual inspection of the entire system, pipeline assemblies, threaded connections and equipment is carried out for the formation of leaks and the appearance of drops on the seams. If condensation forms on the system after filling with water, the pipelines must be dried and then inspected further.
Heating devices and pipeline sections hidden in building structures are subject to mandatory inspection.
The heating system is kept under pressure for at least 30 minutes, and if no leaks are detected and no pressure drop is recorded, then it is considered that the system has passed pressure testing.
In some cases, the pressure drop is permissible, but within limits not exceeding 0.1 atmospheres, and provided that a visual inspection does not confirm the formation of water leaks and violations of the tightness of welded and threaded connections.
If the result of hydraulic tests is negative, repair work is carried out with further repeated pressure testing.
Upon completion of the testing work, a test certificate is drawn up in the form specified in the main regulatory documents.
Permissible test pressure when testing water heating
Many developers are interested in what pressure should be used to check the heating system. In accordance with the SNiP requirements presented above, during pressure testing, pressure is allowed to be 1.5 times higher than the working pressure , but it should not be less than 0.6 MPa.
There is another figure indicated in the “Rules for the technical operation of thermal power plants.” Of course, this method is “softer”; its pressure exceeds the working pressure by 1.25 times.
In private houses equipped with autonomous heating, it does not rise above 2 atmospheres, and it is adjusted artificially: if excess pressure appears , the relief valve immediately turns on. Whereas in public and multi-apartment buildings the working pressure is much higher than these values: five-story buildings - about 3-6 atmospheres, and tall buildings - about 7-10.
Heating system testing equipment
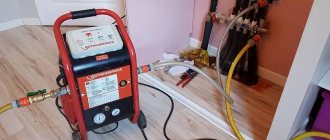
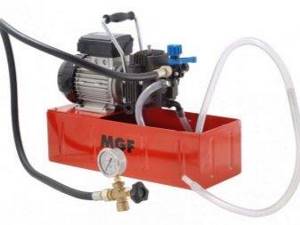
Most often, a pressure tester is used to perform a hydraulic test. It is connected to the circuit to regulate the pressure in the pipes.
A huge number of local heating networks in private buildings do not require high pressure, so a manual pressure tester will be sufficient. In other cases, it is better to use an electric pump.
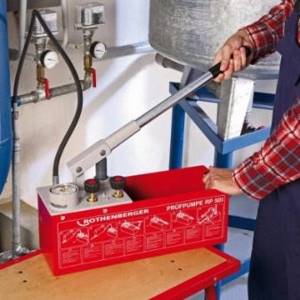
Hand-held devices for testing heating systems develop a force of up to 60 bar or more. Moreover, this is enough to check the integrity of the system even in a five-story building.
The main advantages of hand pumps:
- Reasonable cost, which makes them accessible to many consumers;
- Light weight and dimensions of hand presses. Such devices are convenient to use not only for personal purposes, but also for professional use;
- Long service life without failures or breakdowns. The device is so simply designed that there is nothing to break in it;
- Suitable for medium and small heating equipment.
Branched and large circuits on large areas, multi-story buildings and production facilities are checked only with electrical devices. They are capable of pumping water under very high pressure, which is unattainable for manual devices. They are equipped with a self-priming pump.
Electric pumps develop a force of up to 500 bar. These units are usually built into the main line or connected to any opening. Basically, the hose is connected to a tap through which the pipe is filled with coolant.
Performing heating pressure testing is a very complex technological procedure. That’s why you shouldn’t do it yourself; it’s better to use the services of professional teams.
(2 votes, average: 5 out of 5)
Home » Interesting articles » About heating pressure testing » Norms and rules for pressure testing, explanations and links to SNiP. » Requirements and documents for crimp testing personnel. Requirements and documents for crimp testing personnel.
What are the requirements for personnel and what documents are needed to perform pressure testing?
Heating pressure testing is an annual event that is carried out in a building in order to identify system leaks and eliminate them before the start of the heating season.
In Moscow and the Moscow region, the heating season begins when the outside temperature drops to +80C and stays there for at least a week.
After lengthy experiments and calculations over many years, the date of the onset of the heating period is considered to be October 1. The heating season ends on May 1 - with the onset of warmer weather. The heating system starts up within 10 days from the start of the heating season.
Therefore, to carry out work on the operation and maintenance of heating equipment and to carry out preparatory work for the heating period, as well as pressure testing of the heating system, it must be carried out by trained and trained personnel. All specialists must have appropriate education, training and undergo mandatory training and certification in thermal power plants.
Certification of repair personnel is necessary in order to prevent accidents and injuries during maintenance and carrying out hydraulic tests and operational activities.
Let's look at what documents trained personnel should have and what they should know: - rules of operation and maintenance of thermal installations; — safety rules and instructions on occupational health and safety; — instructions for eliminating emergency situations at the facility during operation and conducting hydraulic tests; — operating principle of the thermal and elevator unit, equipment, instrumentation and controls; - have practical skills and certain qualifications for repair, maintenance of thermal and elevator units.
Maintenance personnel must be recertified once a year. After completing repeated annual training, the staff passes an exam, after which they receive a certificate, and the organization receives a journal with an assessment and the signature of an engineer from Rostekhadzor about completion of the training.
That is, repair personnel performing operation, maintenance and pressure testing of the heating system must be trained, trained, trained and have certain skills and requirements.
Watch the video:
What documents do personnel need to perform pressure testing of the heating system?
Social reviews Cackl e
Tools used for crimping
The strength and density of water heating are tested using a pumping device. This device is made in the form of a pump, which is connected to the system pipe using a high-pressure hose and a check valve. When choosing a device, consider the following parameters:
- Performance.
- Pressure.
- Voltage to which electric type models can be connected.
To perform small-scale work, you can use a manual heating system pressure tester, which is equipped with a hydraulic cylinder.
Electric devices with a piston pump are considered more convenient as they pump up pressure more efficiently. In this case, the pressure is pumped up faster with the least amount of labor. Special pressure gauges and control units can be added to the basic configuration of electric crimping machines.
Private cottages are equipped with systems with a working pressure of 2 atmospheres, so the pressure of the water supply network is sufficient for pressure testing. The circuit is filled with water from the tap of the water supply system and the readings of the installed pressure gauges are monitored.
Heating system pressure test certificate
This document displays the following information:
- What type of crimping method was used?
- The project in accordance with which the circuit was installed;
- The date of the inspection, the address where it was carried out, as well as the names of the citizens who sign the act. This is mainly the owner of the house, representatives of the repair and maintenance organization and heating networks;
- How the identified faults were eliminated;
- Test results;
- Are there any signs of leakage or reliability of threaded and welded connections? In addition, it is indicated whether there are drops on the surface of the fittings and pipes.
Who can carry out pressure testing?
In new buildings, responsibility is assigned to contractors, and in the case of preparing an already working system, the inspection is carried out by the organization responsible for maintaining all engineering systems of the facility.
The rules for conducting pressure testing and other testing processes are determined by housing legislation. Regulations apply to all management companies, regardless of the type of building in which they are required to carry out work.
In facilities of administrative and state significance, inspections and tests are carried out by the operating organization or by a contractor who has approvals and work permits.
Crimping process
Pressure testing of heating systems in a private home begins with disconnecting the heating boiler, automatic air vents and expansion tank from the system. If there are shut-off valves leading to this equipment, you can close them, but if the valves turn out to be faulty, the expansion tank will definitely fail, and the boiler will fail, depending on the pressure that you apply to it. Therefore, it is better to remove the expansion tank, especially since this is not difficult to do, but in the case of a boiler, you will have to rely on the serviceability of the taps. If there are thermostats on the radiators, it is also advisable to remove them - they are not designed for high pressure.
Sometimes not all heating is tested, but only some part. If possible, it is cut off using shut-off valves or temporary jumpers are installed - surges.
The following is the process:
If the system has been in operation, the coolant is drained. A crimping machine is connected to the system. A hose extends from it, ending with a union nut.
This hose is connected to the system in any suitable place, even in the place of the removed expansion tank or instead of the drain valve. Water is poured into the container of the pressure testing pump and pumped into the system using the pump.
The device is connected to any available input - on the supply or return pipeline - it doesn’t matter
Before increasing the pressure, all air must be removed from the system. To do this, you can bleed the system a little with the drain valve open or drain it through air vents on the radiators (Mayevsky valves). The system is brought to operating pressure and held for at least 10 minutes.
During this time, all remaining air is released. The pressure is raised to the test pressure and maintained for a certain period of time (regulated by the Ministry of Energy standards). During the test, all devices and connections are checked. They are inspected for leaks. Moreover, even a slightly damp connection is considered a leak (fogging also needs to be eliminated). During crimping, the pressure level is monitored. If during the test its fall does not exceed the norm (as specified in SNiP), the system is considered to be in good working order. If the pressure drops even slightly below normal, you need to look for a leak, fix it, then start pressure testing again.
As already mentioned, the testing pressure depends on the type of equipment and system being tested (heating or hot water supply). The recommendations of the Ministry of Energy set out in the “Rules for the technical operation of thermal power plants” (clause 9.2.13) are summarized in a table for ease of use.
| Type of equipment tested | Test pressure | Test duration | Allowed pressure drop |
| Elevator units, water heaters | 1 MPa(10 kgf/cm2) | 5 minutes | 0.02 MPa (0.2 kgf/cm2) |
| Systems with cast iron radiators | 0.6 MPa (6 kgf/cm2) | 5 minutes | 0.02 MPa (0.2 kgf/cm2) |
| Systems with panel and convector radiators | 1 MPa (10 kgf/cm2) | 15 minutes | 0.01 MPa (0.1 kgf/cm2) |
| Hot water supply systems made of metal pipes | operating pressure+ 0.5 MPa (5 kgf/cm2), but not more than 1 MPa (10 kgf/cm2) | 10 minutes | 0.05 MPa (0.5 kgf/cm2) |
| Hot water supply systems made of plastic pipes | operating pressure+ 0.5 MPa (5 kgf/cm2), but not more than 1 MPa (10 kgf/cm2) | 30 minutes | 0.06 MPa (0.6 kgf/cm2), with further testing for 2 hours and a maximum drop of 0.02 MPa (0.2 kgf/cm2) |
Please note that for testing heating and plumbing made of plastic pipes, the test pressure holding time is 30 minutes. If no deviations are detected during this time, the system is considered to have successfully passed the pressure test.
But the test continues for another 2 hours. And during this time, the pressure drop in the system should not exceed the norm - 0.02 MPa (0.2 kgf/cm2).
Correspondence table for different units of pressure measurement
On the other hand, SNIP 3.05.01-85 (clause 4.6) has other recommendations:
- Heating and water supply systems are tested at a pressure of 1.5 times the working pressure, but not lower than 0.2 MPa (2 kgf/cm2).
- The system is considered operational if after 5 minutes the pressure drop does not exceed 0.02 MPa (0.2 kgf/cm).
What standards to use is an interesting question. For now, both documents are valid and there is no certainty, so both are valid. It is necessary to approach each case individually, taking into account the maximum pressure for which its elements are designed. So the working pressure of cast iron radiators is no more than 6 Atm, respectively, the test pressure will be 9-10 Atm. It’s also worth deciding on all the other components in approximately the same way.
https://youtube.com/watch?v=ruN3puj3EyU
Air crimping
Not everywhere and not always is it possible to rent a crimping machine, just as it is not possible to buy one. For example, you need to test the heating in your dacha. The equipment is specific and the chances that someone you know has it is very low. In this case, pressure testing of the heating system is carried out with air. To pump it, you can use any compressor, even a car one. The pressure is monitored using a connected pressure gauge.
This type of crimping is less convenient and not entirely correct. Heating and plumbing are designed to transport liquids, which are much denser than air. Where water will not even ooze out, air will escape. Therefore, we can say with a high degree of confidence that you will have an air leak - somewhere there will be a loose connection. Moreover, it is difficult to determine the location of the leak during such testing. For this purpose, use a soap solution, which coats all joints and connections, all places where air can escape. Bubbles appear at the leak site. Sometimes you have to search for a long time. This is precisely why such pressure testing of the heating system is not very popular.
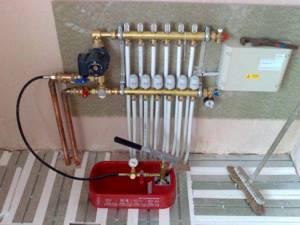
Pressure testing of a heated floor has its own characteristics - you must first check the comb and all the devices attached to it. To do this, close all the supply and return valves of the loops, filling only the heated floor manifold, and check it by raising the pressure. Having reset it to normal, the heated floor loops are filled one by one, and only then is excess pressure created. The process is described in more detail in the video.
Tasks of pressure testing of heating in the house
Regardless of the heating system organization scheme (centralized or decentralized), the requirements of SNiP provide for the technical preparation of such systems for commissioning.
This includes a whole list of work performed at the stage before putting the heating equipment into operation, as well as work that must be performed already at the maintenance stage.
One of the main requirements for commissioning and servicing a water heating circuit used in a private or municipal home is pressure testing. According to the rules and requirements for units of sanitary systems, all elements of heating system circuits are subject to strength testing.
In addition to pre-launch tests, hydraulic or pneumatic testing is traditionally performed by:
- before each new heating season in order to identify places of depressurization and weakened areas;
- after repair operations and replacement of equipment, fittings, gaskets and other elements.
In addition to the main task of identifying areas and points capable of passing coolant, pressure testing helps to free the circuit from insoluble particles that clog the pipeline.
Upon completion of installation, the heating system is double checked by performing pressure testing. The first time is performed to identify depressurization of connections and other defects. They test it a second time to ensure that the circuit is fully operational.
The homeowner can do the pressure testing with his own hands. The water or air pressure testing process does not involve any complex actions, just as there is no need to purchase expensive technological tools and equipment.
To check the tightness of the system using the hydrostatic method you will need:
- fill the circuit with coolant (water) at a temperature of 5-50°C;
- connect a water pump to the system - electric or manual;
- install measuring instruments in the heating circuit - pressure gauges with a limiting upper pressure twice the operating pressure.
Pressure testing of the heating circuit without water is also used - pneumatic testing of the system with air pressure (manometric method).
This option has its own characteristics and is often used to test individual components of a heating circuit, such as radiators, heating panels, heat exchangers, etc.
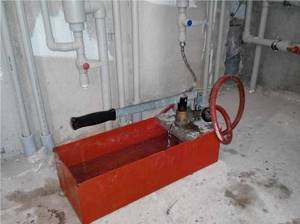
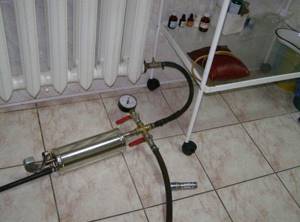
The pump for performing hydraulic tests is a manual design. Such a tool can be considered the most optimal for use in the household when it comes time to pressurize the heating system
SNiP crimping rules
The norms for pressure testing of the heating system are described in documents such as SNiP 41–01-2003, and also 3.05.01–85.
Air conditioning, ventilation and heating - SNiP 41-01-2003
Hydraulic checks of water heating systems can only be carried out at above-zero temperatures in the premises of the house. In addition, they must withstand water pressure of at least 0.6 MPa without damage to the seal and destruction.
During the test, the pressure value should not exceed the limit for the heating devices, pipelines and fittings installed in the system.
Internal sanitary systems - 3.05.01–85
According to this SNiP rule, it is necessary to check water heat supply and heating systems with the expansion vessels and boilers turned off using hydrostatic pressure equal to 1.5 working pressure, but not less than 0.2 MPa in the lower part of the system.
The heating network is considered to have passed the test if it holds the test pressure for 5 minutes and does not drop by more than 0.02 MPa. In addition, there should be no leaks in heating equipment, welds, fittings, threaded connections and pipes.
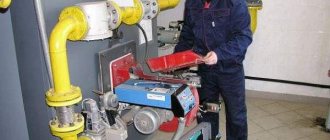
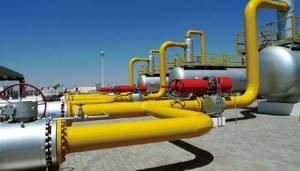
Basic safety provisions when introducing gas into the system
Gas start-up process
The gas start-up process must be performed at low flow rates. The feed speed should be in the range of 15–25 m/s. This is necessary to prevent an explosion of the gas-air mixture from the possible formation of sparks when metal objects rub against the inner surface of gas pipelines. The pressure during the filling process should not exceed 0.1 MPa.
All workers involved in gas-hazardous work are required to wear protective tarpaulin suits, helmets and rubber dielectric shoes, and also carry insulating gas masks, safety glasses and special gloves. In addition, the work team must have a first aid kit equipped with all the necessary medications to provide first aid.
The place where pressure testing of the gas pipeline and other work along the pipeline is carried out must be fenced and equipped, if necessary, with special posts in order to prevent unauthorized people from being in the high-risk zone. During the release of gas into the system, it is prohibited to smoke, conduct hot work and use open flames.
Advantages and disadvantages

To prevent scale from forming, propylene glycol is mixed with distilled water.
In water at temperatures above +75°C, carbonates decompose and scale is deposited. Propylene glycol inhibits the corrosion process, ideally if the substance is added to a distilled liquid.
Advantages of using energy carrier with additives:
- protects the heating circuit and devices from rupture in frost, freezing occurs slowly with gradual crystal formation;
- the frozen substance in the pipes acquires a working consistency when the heating unit is started;
- the second most environmentally safe coolant after water, long-term inhalation of vapors, ingestion, contact with skin is not dangerous;
- does not damage materials upon contact with floor and wall finishes;
- promotes rapid heating and slow cooling of the system;
- reduces hydraulic resistance and improves the functioning of the pump in the return branch;
- reduces electricity consumption when pumping energy carriers, due to its low density.
Pressure testing - what is it?
Pressure testing of a finished water heating system is a test of tightness and assembly quality. Whether the system can be put into operation or not depends entirely on the results of such a check. This is the first procedure that needs to be carried out after installation and before turning on the heating.
At its core, it is control without destruction. Air or water is pumped into the system, thereby creating increased pressure. If there are no leaks, you can safely put the system into operation.
Pressure testing is also carried out when checking an already operating system. After all, leaks often appear at the places where parts are connected using fittings, soldering or welding. The pipes themselves may also suffer, for example, from mechanical stress or corrosion. High temperature and pressure also cause gradual wear of pipes and parts of the water heating system. To detect and eliminate the location of the flaw, crimping is required.
This is a set of measures through which not only the heating system, but also the hot water supply, sewage system, and pipes in the water well can be checked in a private home.
Pressure testing of a heated floor system
The crimping procedure includes:
- pipeline testing and flushing;
- checking and, if necessary, replacing parts;
- restoration of damaged insulation.
The following are tested under high pressure:
- strength of housings, as well as walls of pipes, radiators, heat exchangers and fittings;
- fastening when connecting the elements that make up the system;
- maintenance of taps, pressure gauges, as well as gate valves.
Types of crimping
Pressure testing of the heating system in multi-storey buildings is divided into several types, it depends on what the heating system is pressurized for.
The newly assembled system undergoes primary pressure testing before immediate commissioning. The diagnostics are designed to check the quality of the assembly, so they are performed after the radiators, heat generator and expansion tank are connected. However, it is best to mask the heating system behind decorative cladding or fill it with screed after performing pressure testing.
Secondary pressure testing is carried out for preventive purposes. The most suitable time for this is when the heating season has ended and scheduled maintenance has been carried out. The main purpose of planned pressure testing is to prepare for the next heating season and reduce the risk of emergency situations.
Unscheduled pressure testing is carried out after repair work is carried out in one of the areas, for example, after disconnecting the boiler or dismantling radiators. A similar process is necessary after flushing the system, as well as in case of startup after a long period of inactivity. With the help of pressure testing, damage and leaks of the system are detected during various problems.
Equipment
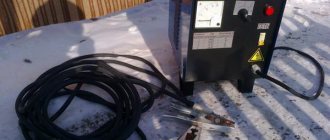
If pressure testing is carried out in centralized heaters, then the staff uses standard devices. Private heating or water supply involves the use of slightly different devices. The electrical device used in the work is a special pump.
There are two pump options.
- The handheld device is a self-contained device. The system is controlled by pressure applied using the device lever. Pumps of this type are considered suitable for a small private house. Using a manual pump for volumetric systems is quite difficult, since at the same time you need to pump up pressure and monitor the indicators using the built-in pressure gauge in the unit.
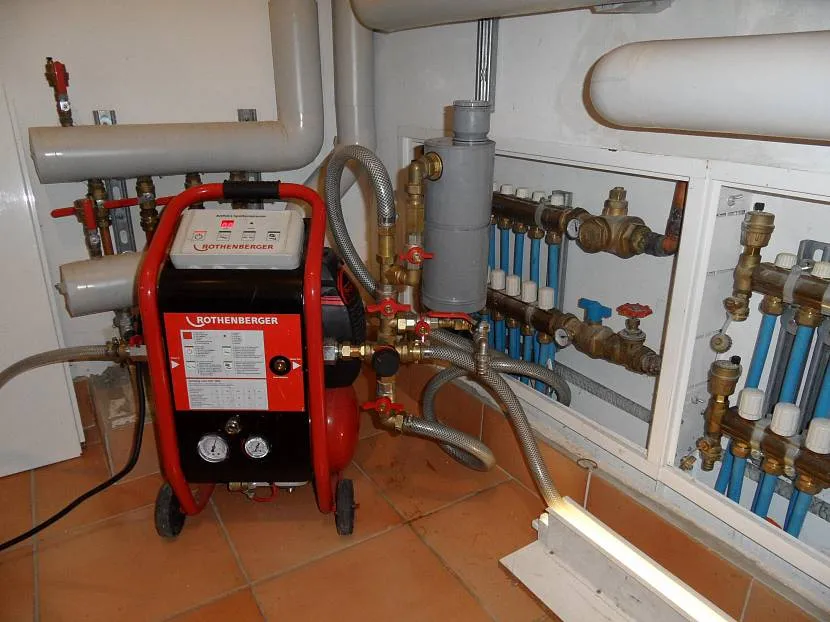
- Electric pumps are more complex and expensive. They are convenient for crimping, since they initially have the ability to create a certain pressure. The necessary indicators are entered by the operator, and it will be entered into the system automatically. It is not necessary to buy such a crimping machine if we are talking about private one-time use.
These devices are usually available from companies that provide professional crimping services. Home heating is rarely tested annually. If we compare the cost of devices, the difference will be about 25%. Companies that provide crimping services sometimes rent out their equipment. You can specify the price of services, but usually they are identical to the cost of the equipment itself.
Not in all cases the work can be carried out independently. If this work is needed as evidence of checking the integrity of the heating system, then a confirmation certificate is often needed. Such paper will be issued only if the work is carried out taking into account all regulatory requirements and by specialists who have special permission to do so. The cost of this activity is not specified in legislation; it is usually calculated individually. Company prices are related to the volume of systems, as well as the architectural features of buildings. Much also depends on the condition of the shut-off valves installed on the system.
Tariffs are taken into account based on the cost of work per hour, they vary from 1000 to 2500 rubles. However, if papers confirming the work are not required, but there is a desire to start pressure testing the system, then you can do it yourself. Moreover, hydraulic tests are possible even with clogged radiators and pipes. Hydraulic presses come in different capacities. Pumping units used to test systems are also called pressure testers.
Often, crimping equipment is confused with other types of devices, for example, a hydraulic electric press is used for pressing bearings, gears, shafts and other things. This tool is also used for stamping plastic and rubber products. The machine, which is a hydraulic press, is not used for crimping the heating system. This equipment is usually used in auto repair shops.
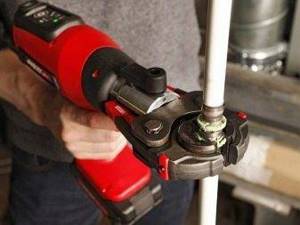
There is also a crimping press - this is a device that is used to tighten press fittings. This tool is also called press pliers, and its purpose, of course, is related to the arrangement of the heating system, however, this tool is not suitable for crimping.
Equipment and test frequency
Pressure testing of centralized systems is carried out by personnel using standard equipment, so it is hardly worth talking about. But not everyone probably knows about the costs of private heating and water supply. These are special pumps. There are two types - manual and electric (automatic). Manual pressure testing pumps are autonomous, the pressure is pumped up using a lever, and the created pressure is controlled using a pressure gauge built into the device. Such pumps can be used for small systems - pumping is quite difficult.
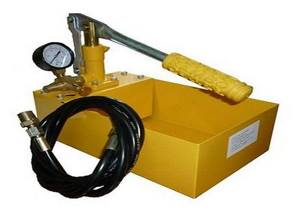
Manual crimping machine
Electric pumps for pressure testing are more complex and expensive equipment. They usually have the ability to create a certain pressure. It is set by the operator, and it is “caught up” automatically. Such equipment is purchased by companies engaged in professional crimping.
According to SNiP, hydraulic testing of heating systems must be carried out annually, before the start of the heating season. This applies to private houses too, but few people comply with this standard. At best, they check it once every 5-7 years. If you are not going to test your heating annually, then there is no point in buying a pressure tester. The cheapest manual one costs about $150, and a good one costs from $250. In principle, you can rent it (usually from companies that sell components for heating systems or from offices that rent equipment). The amount will be small - you need the device for several hours. So this is a good solution.
Wall mounting
Installation of gas boilers begins with determining the location where it will be located, taking into account the need for free space for maintenance and compliance with all rules. Then you should turn to the already mentioned template, which marks the places of attachment to the wall and the places where the wires are connected.
You need to transfer this drawing to the wall using a pencil or drill. Using a drill of the required diameter, a hole is drilled for the dowels, and the corner is secured. Dowels must match the material and thickness of the wall.
The next stage involves partial disassembly of the unit: you need to remove the front panel of the boiler. To do this, you will need to fold back the cover and release the crossbars on the right and left - this will release the trim panel. The final procedure is to hang the gas apparatus on the hanging angle, which was previously secured to the wall using fasteners.
Pipe crimping
There are 2 different methods of heating heating: water and air. Using the first option, all thermal systems are most often tested. To do this, liquid under pressure is pumped into a special tap, with which you can quickly detect breakouts and leaks.
The air method is a less effective method for checking pipes, but its main advantage is that during frosts water cannot be used, as it may freeze. To find leaks, soapy water is used to lubricate suspicious areas. The main search method is to determine a breakthrough by ear. The pressure in the system is built up using a compressor through a valve into which water must be supplied.
For multi-story buildings, there are certain testing rules that indicate the minimum pressure for the test. In water heating, panel and convector systems it should be 10 atmospheres, and in a circuit with steel or cast iron pipes - 6 bar.
Pressure testing with water and/or air: what is it?
There are several tests designed to detect leaks in a water or gas pipeline system, and their use depends on what is being carried through the pipeline and how safe the tests are. Practically used:
- Hydraulic testing with high pressure water flow.
- Pneumatic tests with compressed air.
- Ultrasonic integrity control.
- Pumping bubble solution.
For most domestic gas pipelines, the pipes are tested under air pressure. Non-destructive testing measuring systems are more accurate because they allow you to accurately diagnose areas of loss of tightness. But they require specialized equipment, which is not always available to organizations in the housing and communal services sector, and even more so to individuals.
Gas pressure in a gas pipeline: classification, types and categories of pipes Natural gas is used in everyday life and in industrial enterprises. Pipelines are used to deliver it to its destination. The most important indicator for them is the gas pressure in the gas pipeline. This…
For air conditioners of high power or quantity, cooling systems are also tested.
Regarding industrial production related to the processing of flammable and flammable materials, pressure testing will be needed to assess the stability of the fire extinguishing systems.
All of the above types of pipe crimping are performed with water or air.
Pressure testing (pressure testing) of heating and water supply system pipes.
Reproduction of articles, as well as their individual parts, is prohibited. We want to reserve the right to exclusive placement of this material on our website home-engineering.net. Here we share the knowledge and experience gained by our team over the years of work in the field of design and installation of engineering systems.
→Home →To the list of articles
Introduction What is crimp testing (pressure testing) of pipelines and connections Description of the general procedure for crimping pipes Uponor Methodology for PEx cross-linked polyethylene pipes. Water test Uponor method for PEx-Al-PEx metal-plastic pipes. Water test Uponor procedure for PEx and PEx-Al-PEx pipes. Air test Uponor notes for testing underfloor heating pipes (underfloor heating) Rehau method for testing heating pipes, underfloor heating and water supply HERZ recommendations (DIN 4725) for hydraulic testing of underfloor heating systems KAN method for testing heating pipes (including water underfloor heating) ) and water supply system for tightness STB 2038-2010. Methodology for testing a heating system for tightness using the hydrostatic method (pressure testing with water) STB 2038-2010. Methodology for testing a heating system for tightness using the manometric method (air pressure testing) STB 2001-2010. Methodology for testing water supply systems for tightness using the hydrostatic method (pressure testing with water) STB 2001-2010. Methodology for testing a water supply system for tightness using the manometric method (air pressure testing) Conclusion
Introduction. up
The purpose of this article is to describe the procedures for pressure testing (pressure testing) of installed pipes and connections of the heating and water supply system to check the quality of the work performed. The general principles of the hydrostatic (water pressure testing) and manometric (air pressure testing) methods are described. Specific recommendations from leading manufacturers of polymer pipelines, which are often used in the installation of heating and water supply in private homes, are considered: Uponor, Rehau, Herz, Kan. Sets out local codes and regulations regarding pressure testing.
What is pressure testing of pipelines and connections. up
After installing pipelines and connections of elements of heating and water supply systems, it is necessary to check the quality of installation work and make sure there is no damage or poorly installed elements. Such tests must be carried out before and immediately during the embedding of elements of engineering systems into the building structures (pouring floor screeds, plastering grooves, sewing niches, etc.). This procedure allows you to promptly notice and eliminate accidental damage, reducing the likelihood of the so-called manifestation. "human factor".
When carrying out the pressure testing procedure, the pressure in the elements of the house’s engineering systems (heating, water supply) is monitored, and a decrease in the test pressure indicates possible damage. After this, as a rule, it is possible to localize and eliminate the problem with minimal consequences. A self-tapping screw accidentally screwed into a pipe laid in the wall or a sharp nail on a shoe when pouring heated floor pipes, or a pipe damaged during transportation or installation can (and often does) go unnoticed if pressure testing has not been carried out. During commissioning, these damages still make themselves felt and require expensive repairs, incl. and to restore the fine finishing of the premises (replacing tiles, plastering, puttying, painting, wallpapering, etc.).
Pressure testing of pipes can be carried out either with water (the working medium - which is preferable) or, in some cases, with air. Checking pipelines with air is most often carried out when the ambient temperature drops below +5°C and there is a risk of water pipes freezing. The methods for testing heating and water supply systems with water (hydrostatic tests) and air (manometric tests) are somewhat different (see below). The test pressure should be selected based on the test medium (water or air), the operating pressure of the piping system, the pipe manufacturer's recommendations, and local codes.
Description of the general procedure for performing pressure testing of pipes. up
Pressure test methods vary slightly among different pipe and equipment manufacturers, as well as in building standards, but generally have much in common. Below we have tried to outline the most important points that you should pay attention to when performing pressure testing of heating and water supply system pipes. The following sections provide specific recommendations from various manufacturers.
General procedure for crimping:
- Pressure tests are carried out with either water (preferred) or air. After completing the last connection of pipes (pressing, soldering, etc.), it is necessary to wait a certain time before starting crimping. Pressure testing is carried out immediately before embedding pipes and permanent connections into building structural elements and throughout the entire duration of embedding work.
- The test pressure must be monitored using a test pressure gauge of suitable range. Throughout the test, visual control of the absence of leaks is also carried out, therefore all elements and sections of the systems must be accessible for visual inspection. When pressure testing with air (or inert gas), foaming compounds compatible with the material of pipes and fittings, or in the simplest case, a water-soap emulsion, are used to control air leaks.
- System elements not designed for the test pressure should be disconnected: safety valves and other fittings, boiler, boiler, expansion tanks, etc., which otherwise could be damaged by high pressure.
- It is necessary to fill the pipes with water up to the operating pressure in the system (or with air - up to pressure testing), remove air from all elements (only when pressure testing with water) and visually inspect the system elements for possible leaks. Thus, unpressed and loose connections are quickly identified.
- If there are no leaks at the previous stage, you need to increase the pressure to the test pressure (the value is determined in advance). Allow some time for the expansion of polymer pipelines, periodically increase the pressure to the test pressure, visually monitoring the system elements for leaks.
- After this, during the control period of time, measure the pressure drop using the control pressure gauge.
- The pressure test is considered successful if the pressure drop (item 6) does not exceed a certain value (usually a fraction of a bar, see below). And a visual inspection of pipes, connections and other elements will not reveal leaks.
Uponor methodology for PEx cross-linked polyethylene pipes. Water test. up
Hydraulic testing (water testing) of the Uponor PE-Xa polymer piping system can be carried out in accordance with local metal piping codes. But there is a more suitable method for crimping such systems, taking into account the fact that under pressure the plastic pipes of the Uponor PE-Xa system expand and elongate.
Hydraulic tests must be carried out before putting the system into operation and before pouring concrete into the pipes. Before testing, you should make sure that there is free access to all parts of the system and the possibility of visual inspection in order to easily identify possible leaks in the future. According to the Uponor procedure, pressing should only begin some time after the last connection has been made using Q&E (Quick-and-Easy) axial pressing, see table below.
| Ambient temperature, °C | Waiting period before hydrotesting begins |
| >+10 | 15 minutes |
| +10..+5 | 30 min |
| +5..0 | 1,5 hour |
| 0..-5 | 3 hours |
| -5..-10 | 4 hours |
| -10..-15 | 8 ocloc'k |
Time from installation of last Q&E connection to testing as a function of ambient temperature.
Test procedure:
- Fill the system with clean water, remove all air from the system through air vents.
- Set a pressure 1.5 times higher than the working pressure, but not less than 0.6 MPa (6.0 bar).
- Maintain this pressure for 30 minutes by pumping. Inspect all pipe sections and connections during this period of time.
- Then you need to quickly lower the pressure to 0.5 of the working pressure. If the pressure then rises above 0.5 of the operating pressure, the system is sealed.
- Leave the system at this pressure for another 90 minutes and check the connections. If the pressure does drop during this period of time, there is a leak in the system.
Methodology for hydraulic testing of PEx polymer pipelines (Uponor).
Uponor methodology for PEx-Al-PEx metal-plastic pipes. Water test. up
Preparation for tests. The system must be protected from freezing. Before testing, it is necessary to carry out a visual inspection of all joints and connections of the system. Pressure gauges with a graduation value of no more than 0.1 bar must be connected at the lowest point of the system. The system is filled with clean drinking water, the air should be released. All tanks, valves, fittings and equipment not intended for hydraulic testing must first be disconnected or removed. All ends of the system must be hermetically sealed with plugs, shut-off valves and other equipment. In case of a large temperature difference (more than 10 degrees) between the water and the environment, the system should be kept for 30 minutes, pumping up the pressure to the test pressure every 10 minutes, for temperature compensation (temperature equalization). Visible leaks and significant pressure drops are not allowed.
Preliminary check of press connections. To detect unpressed fittings (which may have been forgotten to press), the system is subjected to a preliminary test with a pressure of 3 bar before hydraulic testing. The duration of the test is 15 minutes. If no leaks are found, proceed to hydraulic tests.
Stage 1. Hydraulic tests should be carried out in accordance with current regulations. The system is loaded with a test pressure of 1.1 from the working pressure (relative to the lowest point of the system). For example, the maximum operating pressure is 10 bar, respectively, the test pressure is 11 bar. Next, a thorough inspection of the entire system is carried out; leaks are not allowed.
Stage 2. After 30 minutes, the pressure is reduced to 50% of the original (in our example - 5.5 bar). After which the system is left for 120 minutes, no leaks are allowed during the entire period. In this case, it must be constant on the pressure measuring device. If there is a drop in pressure, there is a leak in the system that needs to be repaired. After which the tests are repeated.
Methodology for conducting hydraulic tests of metal-polymer pipelines PEx-Al-PEx (Uponor) for an operating pressure in the system of 10 bar.
Uponor procedure for PEx and PEx-Al-PEx pipes. Air test. up
If the pipe system is to be left without water after testing (the system is not expected to be started for the next 7 days and there is no constant circulation of water) or there is a risk of freezing, it is recommended to test with compressed air or inert gas. Gauge tests are carried out in 2 stages: leak test and strength test. In both cases, the additional time required for temperature compensation (balancing the temperature of the compressed air and the environment) must be taken into account. All tanks, valves, fittings and equipment not intended for hydraulic testing must first be disconnected or removed. All ends of the system must be hermetically sealed with plugs, shut-off valves and other equipment.
- Stage. Leak test. Before starting testing, inspect all areas of the system and connections. To control, use a pressure gauge with a division value of no more than 1 mbar.
- Set the pressure to 0.15 bar using an air compressor.
- Wait 15 minutes for temperature expansion of the pipes.
- Next, you need to perform an inspection - 120 minutes for a system with a volume of up to 100 liters, for every additional 100 liters of volume add 20 minutes of inspection.
- The leak test is passed if no pressure loss is detected.
- The test pressure increases to a maximum of 3 bar (for systems with a pipe diameter of 63 mm or less) or a maximum of 1 bar (for systems with a pipe diameter of over 63 mm).
Uponor notes for testing underfloor heating pipes (underfloor heating). up
Hydraulic tests must be carried out before pouring mortar or concrete into the pipes. Before carrying out hydraulic tests, the pipe loops must be completely filled with water and the air must be displaced. Tests must be carried out both before the start of laying the screed and during its implementation. When filling with mortar, the pipes must be under a pressure of at least 0.3 MPa (3.0 bar). Pressure tests should be carried out in accordance with the procedures for Uponor PE-X flexible pipes and Uponor MLC PEx-Al-PEx multilayer pipes (see above).
- It is necessary to carry out a visual inspection of the connections and ensure that the shut-off devices in front of and behind the manifolds are closed in order to limit the test area.
- Consideration should be given to equalizing the ambient temperature and the filling water temperature during an appropriate waiting period after reaching the test pressure.
- When testing with air, sufficient time is required for the temperature of the compressed air to return to ambient temperature.
- All pressure gauges used must give reliable readings accurate to 0.1 bar (10 kPa). If there is any danger of pipes freezing, proper measures must be taken to heat the building, etc.
Rehau method for testing heating pipes, underfloor heating and water supply. up
Pipelines that are mounted but not embedded in a screed or under plaster are subject to pressure testing. A change (drop) in pressure is only an indirect confirmation of a violation of the system’s tightness.
- The tightness of the system can only be checked by visual inspection of open sections of the pipeline.
- Minor leaks can be determined solely by visual inspection (protrusion of water or use of a leak detection aerosol) during a pneumatic test.
- In this case, the maximum permissible pressure of the safety valves should not be exceeded.
- Dividing the system into smaller inspection areas improves the accuracy of inspection results.
Important information on crimping with compressed air or inert gas. Small leaks can only be detected by using leak detection aerosols (foaming agents pressurized with compressed air, followed by pressure testing with water and a visual inspection). Temperature fluctuations can adversely affect the result of the hydraulic test (pressure drop or increase). Pressurized air or inert gas are compressed gases. Therefore, the volume of the pipeline determines the readings of the pressure gauges; a large volume of pipes reduces the likelihood of detecting small leaks due to a decrease in pressure.
Carrying out pressure testing: To check the tightness of a heating system based on Rehau Rautitan equipment, it is necessary to carry out a hydraulic test in the following order.
- Dismantle (if any) safety devices, meters, etc., replace them with pipes or shut-off elements.
- Fill the heating system with filtered water and remove air.
- Connect the pressure testing unit and create test pressure in the system. The test pressure must correspond to the response pressure of the safety valve. The minimum test pressure is 1 bar.
- After 2 hours, increase the pressure to the test pressure, since a drop in pressure is possible due to stretching of the pipeline.
- Maintain test pressure in the system for at least 3 hours and observe.
- Additionally, perform a full visual inspection of the heating system and look for leaks. There should be no protrusion of water along the entire length of the system.
- If possible, immediately after pressure testing, heat the system to maximum operating temperature and perform a visual leak check again.
- When laying a screed floor, the system must be under maximum operating pressure, this will allow leaks to be detected immediately.
HERZ recommendations (DIN 4725) for hydraulic testing of underfloor heating systems. up
- Pressurized water is supplied to the pipeline and air is removed. Immediately before and after laying the screed, check the water pressure.
- The test pressure must correspond to 1.3 times the operating pressure of the equipment and may not drop by more than 0.2 bar during testing.
- The equipment must remain watertight (no water escaping).
- When laying the floor screed (seamless floor), it is necessary to reduce the pressure in the pipes to the maximum permissible operating pressure.
- A pressure supply of 6 bar for 24 hours is recommended.
KAN method for testing heating pipes (including water-heated floors) and water pipes for leaks. up
- During testing, the pipes must be open (not concreted). The pipe system is tested for leaks under pressure 1.5 times higher than the operating pressure, but not more than the permissible pressure for the weakest point of the system.
- Create test pressure in three steps with an interval of 10 minutes.
- After the last increase in pressure to the test value, within the next 30 minutes the pressure must not decrease by more than 0.6 bar.
- Over the next two hours, the pressure drop compared to the previous one should not exceed 0.2 bar.
- During testing, it is necessary to visually check the tightness of the connections.
- The concrete screed can be started after leak testing. During the grouting phase of the floor on which the pipes are laid, a pressure of at least 3 bar should be maintained in the pipes (6 bar is recommended).
In the DOWNLOADS section you can download STB 2001-2010 and STB 2038-2010. The most important points regarding pressure testing of heating and water supply systems are outlined below.
STB 2038-2010. Methodology for testing a heating system for tightness using the hydrostatic method (pressure testing with water). up
When installing pipelines that are to be hidden in building structures, a leak test should be carried out before they are embedded in the structures. Tests shall be carried out under the following conditions:
- ambient air and water temperature not lower than 5°C;
- water pressure is 1.5 times greater than the working one at the lowest point of the system, which does not exceed the test pressure specified in the passports of heating devices, fittings, metering devices and pipelines;
- testing of the heating system must be carried out when it is disconnected from boilers and expansion vessels, using steel plugs;
- testing of polymer pipelines should be carried out no earlier than 24 hours after the last adhesive joint and no earlier than 2 hours after the last welded joint.
Procedure for preparing for testing:
- the heating system is filled with water from the water supply system;
- When the system is filled with water, air is removed through the air outlets;
- By external inspection, the filled system is checked for leaks from detachable connections and for fogging of pipeline welds;
- At the lowest point of the heating system, a pressure generating device is connected, which should include a pressure gauge for measuring pressure.
Test procedure:
- An excess pressure of at least 1.0 MPa is created in the heating system for a panel heating system and floor heating at the lowest point of the system, and at least 0.20 MPa for a water heating system at its highest point.
- Testing of polymer pipelines must be carried out both preliminary and final. During preliminary testing, it is necessary to provide for an increase in water pressure to the required value for at least 30 minutes. The pipeline is considered to have passed the test if the pressure drop in it is no more than 0.06 MPa. During the final test, the pipelines are kept for 2 hours.
- Record the readings of the pressure gauge installed at the lowest point of the system and begin to measure time, monitoring the readings of the pressure gauge.
- After completing the tests, it is necessary to drain the water from the heating system.
Rules for processing test results: The heating system under test is considered to have passed the test if the resulting pressure drop value is less than the permissible value or equal to:
- 0.01MPa (0.1 bar) for panel system and floor heating for 15 minutes;
- 0.02 MPa (0.2 bar) for water and steam systems (low and high pressure) for 5 minutes;
- 0.02 MPa (0.2 bar) for polymer pipelines for 2 hours.
STB 2038-2010. Methodology for testing a heating system for tightness using the manometric method (air pressure testing). up
When installing pipelines that are to be hidden in building structures, a leak test should be carried out before they are embedded in the structures. Tests shall be carried out under the following conditions:
- ambient temperature below 5°C;
- air pressure 0.1MPa;
- testing of the heating system must be carried out when it is disconnected from boilers and expansion vessels, using steel plugs;
- testing of polymer pipelines should be carried out no earlier than 24 hours after the last adhesive joint and no earlier than 2 hours after the last welded joint.
Procedure for preparing for testing:
- At the lowest point of the heating system, a pressure generating device is connected, which should include a pressure gauge for measuring pressure.
Test procedure:
- An excess pressure of 0.1 MPa is created in the heating system.
- Record the readings of the pressure gauge installed at the lowest point of the system.
- Threaded and welded connections of pipelines are covered with soap foam. If there are gas bubbles in the soap suds, the heating system is considered leaky.
- If the pressure drops by more than 0.01 MPa, it is reduced to atmospheric pressure and the defects are eliminated.
- An excess pressure of 0.1 MPa is created again, the pressure gauge readings are recorded and the time begins to be measured.
- Monitor the readings of the pressure gauge.
Rules for processing test results: The heating system under test is considered to have passed the test if the resulting pressure drop value is less than the permissible value or equal to:
- 0.01 MPa (0.1 bar) for water and panel heating systems, floor heating, polymer pipelines, etc. for 5 minutes.
STB 2001-2010. Methodology for testing water supply systems for tightness using the hydrostatic method (pressure testing with water). up
Test conditions and preparation for them are similar to STB 2038-2001, hydrostatic method (see above).
Test procedure:
- A test excess water pressure of at least 1.5 times the excess operating pressure is created in the water supply system.
- The system is considered to have passed the test if, for at least 10 minutes under test pressure, no pressure drop of more than 0.05 MPa is detected, and no traces of water leakage are found in welds, pipes, threaded connections, or shut-off valves.
- After completing the tests, it is necessary to drain the water from the water supply system.
STB 2001-2010. Methodology for testing a water supply system for tightness using the manometric method (air pressure testing). up
Test conditions and preparation for them are similar to STB 2038-2001, manometric method (see above), except for the point:
- tests of a water supply system using polymer pipes must be carried out at an air temperature in the rooms in which the water supply system pipelines are located of at least 5°C.
Test procedure:
- It is necessary to create a test excess air pressure of 0.15 MPa in the water supply system.
- Threaded and welded connections of pipelines are covered with a foaming mass. A violation of the tightness of the water supply system is judged by the air bubbles formed in the foaming mass. If a leak in the water supply system is detected, the pressure should be reduced to atmospheric pressure and the defects eliminated.
- A test excess air pressure of 0.1 MPa is created again.
- Systems are considered to have passed the tests if, during at least 5 minutes of being under test pressure using the manometric test method, no pressure drop of more than 0.01 MPa is detected.
- After completing the tests, it is necessary to reduce the air pressure in the water supply system to atmospheric pressure.
Conclusion. up
The article collected various methods of hydraulic and pneumatic testing, according to the recommendations of pipe manufacturers and the requirements of local standards. Despite the presence of some differences in the considered methods, they all share common key points. Therefore, we have summarized the goals and principles of testing installed heating and water supply system pipes for leaks.
If you need to design and install engineering systems for your home in Minsk and the Minsk region; you want to get advice and install a heating system, water supply, sewerage, ventilation, built-in vacuum cleaner, and perform electrical work; make the necessary calculations and select equipment; or you encounter difficulties in implementing your ideas - we will be happy to help you.
Limitation of responsibility
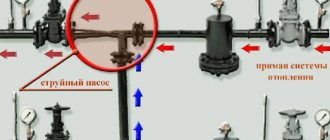
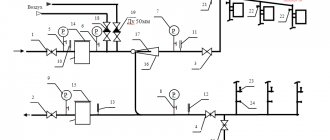
First, let's figure out what we will be crimping. There are several options for connecting a building to the heating network. The first, most common option is when inlet valves are installed next to the wall at the entrance from the city. With this option, the boundary of division of responsibility is considered to be the flange of the inlet valve, and the owner of the building is responsible for everything beyond (including the inlet valve). Accordingly, the heating unit and heating system of the building are pressurized.
The second option is when the heating unit is located inside the building, and an internal heating main runs through the building from the input valves to it.
With this connection option, you need to clarify where the demarcation line lies. The “Heat Supply Agreement”, which is concluded between the owner and the heat supply company, will help us with this. This agreement has an annex, which indicates where the demarcation line lies. Date: September 25, 2021
Cost of hydraulic tests
It is not recommended to carry out tests of the heating system yourself, since such measures are considered quite important. It is best to entrust the work to a licensed contractor whose specialists know how to perform pressure testing of a heating system and can guarantee the high quality of the work performed.
Most often, the cost of crimping consists of the following:
- Scope of work performed.
- Technical condition of the system.
- The need to perform additional operations, including flushing, eliminating leaks, replacing control and measurement devices.
The contractor provides the customer with a contract for performing pressure testing and an estimate. In this case, a high result of the work performed in accordance with the technical specifications is guaranteed. In addition, all the results obtained will be included in an act drawn up according to certain rules.
From all that has been said above, it can be understood that pressure testing of the heating system is a fairly important and responsible event that allows you to determine the performance of the heating network.
Video description
This video shows a test of a separate system unit using air
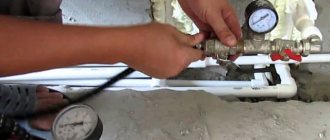
On a private plot
For private areas, most often the working pressure does not exceed 2 atmospheres. Therefore, when checking, a pressure of 4 bar is used. Car pumps or small compressors can be used during testing.
Before checking the pipes for leaks and pressure resistance, it is necessary to drain all liquid from the system into a large container for reuse. This is necessary to ensure that coolant with impurities does not enter the system. After this, a special liquid with special additives is poured into the circuit, which helps flush the pipes from excess dirt, scale or rust.
Before flushing the system, it is necessary to clean all water filters and put them back. Cleaning the pipes can be done several times, if necessary, and the water temperature should be from 55 to 60°C. After each run of the purifier, the water filters should be checked. The rinsing can be completed if they remain clean after the test.
Pressure testing with water Source konyademirdokum.com
If the water remains clean after washing, it can be reused to build up pressure during pressure testing. But for this you should let it cool to 40-45 °C. If a manual blower is used, then water must be poured into its tank and the pressure in the system increased using a lever. After it has reached the desired mark, the circuit must be checked within 30 minutes.
Similarly, with multi-storey buildings for private plots, it is also necessary to re-test the system if the pressure drops below normal. To do this, you must first find and repair the leak.
If the pipes are under a concrete covering, and there are no leaks in open areas, then you need to look for wet spots on the surface of the walls or floor, since if depressurization occurs there, the water will wet them. You can also use a thermal imager to detect leaks. If the spots are not visible and the pressure drops, then at high temperatures you can find the problem area using this device.
Pipe flushing
After familiarizing yourself with the fact that this is pressure testing of the heating system, you should consider one of the important components of this process, namely flushing the pipes. When pouring water into the system, the liquid may contain impurities that, during heating, can leave scale or salts on the walls of heating systems. This reduces the working cross-section of the pipes and can cause blockages, just like rust.
These 2 harmful impurities reduce the rate of heating and cooling of pipes and increase the pressure inside the heating circuits. This can lead to overheating of individual sections of the heat pipe and the formation of fistulas (cracks or holes). If scale or rust has formed a 1 mm layer on the wall, this will degrade the performance of the system by 15-20%, which will lead to a severe loss of thermal efficiency.
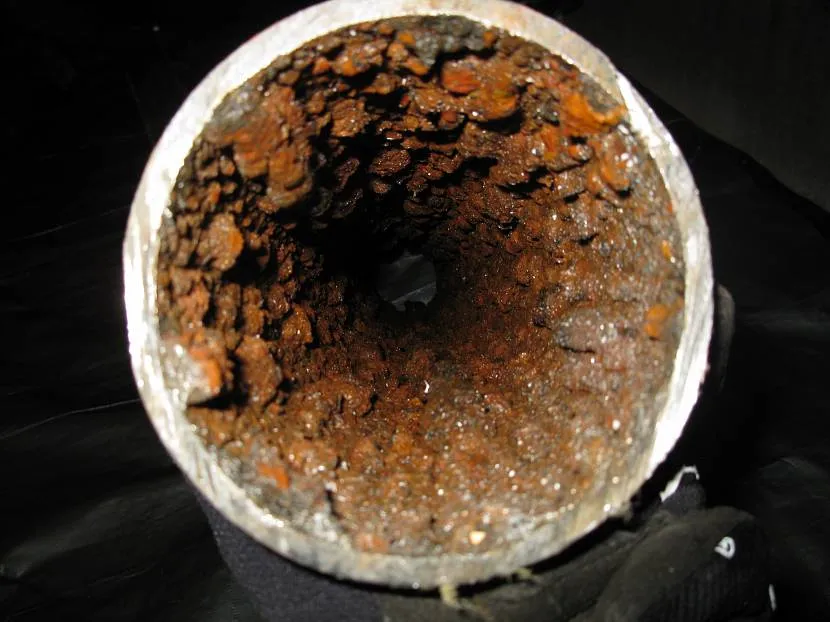
Example of a dirty pipe Source restreamsolutions.com
The main indicator of clogged pipes is the speed at which they heat up, the uniformity of this process, as well as increased fluid flow inside the circuits. To clean the system from harmful deposits, the system is pumped with water with special impurities, after which an air compressor is connected. It is needed so that, due to high pressure, turbulence is created in the water flow, which creates additional vibrations in places of deposits.
During such washing, scale and rust are torn off the walls and driven towards the filters. When carrying out this activity, you should close all air valves that should relieve excess pressure. It is also recommended to install a check valve at the junction of the compressor mount in order to avoid water backflow.
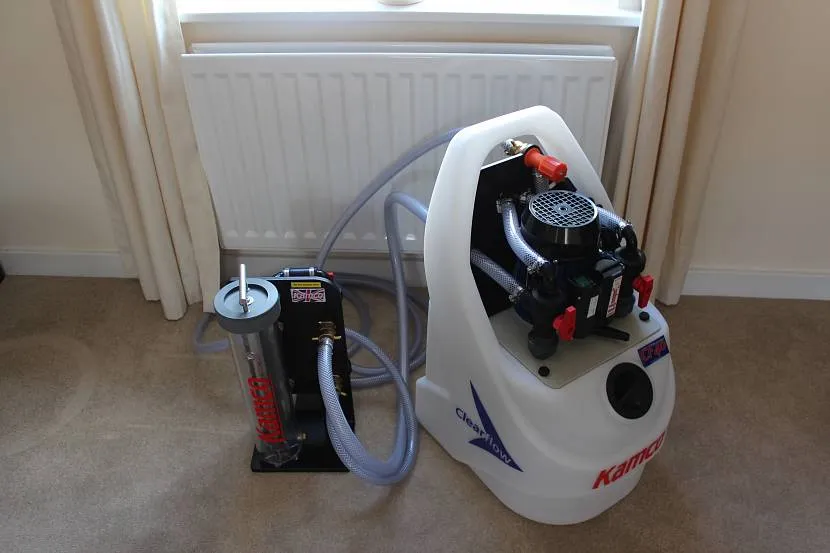
Flushing device Source www.lhps.co.uk
Certificate of pressure testing
At the beginning of this document, information containing the name of the system being tested, which is taken from the technical documentation of the equipment, is indicated. Next, indicate the name of the object in which the system is installed. To do this, use data from the project or information from the construction permit.
Then you should indicate the location of the boiler room in which the testing was carried out, this could be a city or town, as well as the current date.
The next step is to write down the part characterizing the test parameters. It is filled in in a certain sequence.
- Indicate the pressure that was used during testing. This value should be determined in two units of measurement at once - kg/cm2, as well as mPa.
- Indicate the amount of pressure drop that occurred during the test (also in 2 units).
- Indicate all detected defects.
Having received such a document, the acceptance committee can draw conclusions about the compliance of the installed system with accepted standards. Next, having examined the report on the work performed, the commission makes a decision on putting the tested object into operation.
you can follow this link.