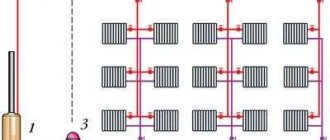
Furnace finishing options
Do not underestimate the decor - it determines how well the stove will look in the interior and the indicator of its thermal efficiency.
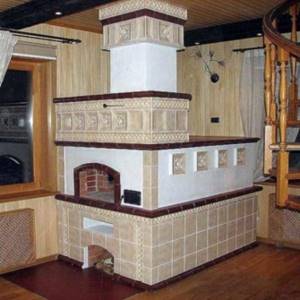
Large tiled stove in a wooden residence
Kitchen design in a private house, modern or classic decoration and layout of the dining room, beautiful arrangement and decoration
Kitchen in a private house, design features. The size and shape of the kitchen in a private house and its design. Square, narrow and combined kitchen. Which style is best for the kitchen in your home.
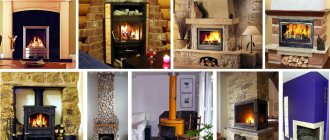
The following options are used for finishing:
- Traditional solutions include cladding with clay mortar. Such a mud stove will fit perfectly into the decor of a rustic kitchen or into a Provence-style interior.
- The tile finish consists of elements that are similar to ceramic tiles, and inside they have a fastening in the form of a protrusion, which is called a rumpa. This option is an excellent solution for a luxurious interior.
- Tiles are considered an economical option. In this case, products created by pressing with double firing are used. This type of product is called majolica.
- Terracotta tiles imitate stone designs. Similar products come in square and rectangular shapes.
- The design of the stove is done using clinker tiles. This cladding is durable and reliable.
- The most budget-friendly options include decorating with plaster and paint.
- The most labor-intensive option is the use of natural stone.
The combined finish looks good. On the kitchen side, the surface can be tiled, and on the living room side, with stone.
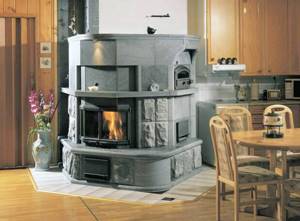
Stove-fireplace, lined with gray tiles, in the kitchen of a country house
Cladding is a troublesome and costly task. In some cases, it is easier to hide flaws or add an accent with simple decor. You can arrange cast iron pots or ceramic dishes, hang embroidered towels or hang bunches of herbs.
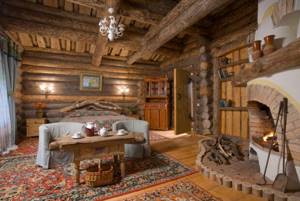
Painted fireplace stove in the bedroom of a wooden country house
Next to the stove you can place a stand for firewood, a woodpile, a grip and other accessories.
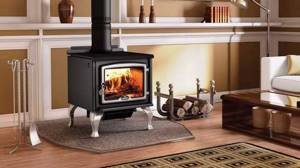
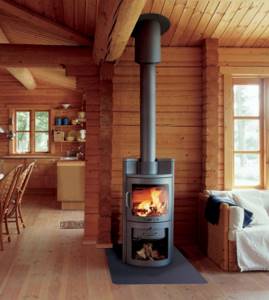
Finnish wood stove in the living room
Installation
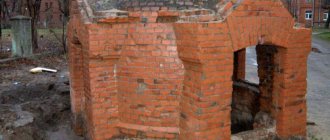
Construction of a brick kiln
Installing a brick heating structure is not an easy task. First of all, you should decide on the location of the stove. The most suitable room for a brick stove is the kitchen: you will have the opportunity to cook food without running to another room.
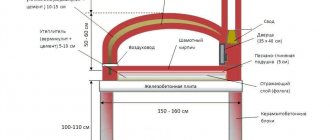
It is recommended to lay a foundation for a brick stove when designing a structure or during the process of pouring the foundation. An average brick oven weighs about 300 kg, so be sure to design a monolithic concrete support so that the structure does not push through the wooden floor .
If the house has already been built, dismantle the floors in the place where the stove will be installed, dig a recess of about 25 cm, arrange a cushion of sand and gravel and fill the reinforced base.
The video below shows the features of preparing the base for installing a stove in a wooden house:
A reliable foundation is a guarantee of confidence in the safe operation of heating equipment and its durability.
Important! The foundation area should be 10-15 cm wider than the lower part of the structure.
Insulate the wall. The foundation for the stove is laid in accordance with the dimensions of the structure.
How to properly install a chimney in a wooden house? Design it as far as possible from the matrices located between the floors. In most cases, the smoke exhaust system is designed next to the outer wall. A chimney located next to the outer wall will protect the home from drafts.
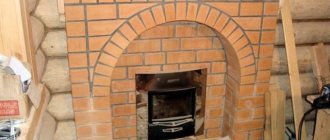
After finishing the masonry, plaster the stove or tile it.
Which material is better? Choose one that is resistant to fire and do not forget that it will become very hot when heated. Advice. It is worth finishing the stove with fire-resistant plaster or fire-resistant tiles: these materials do not interfere with the transfer of heat.
Installing a brick structure to heat a wooden house is a labor-intensive task. Installing a metal stove will take less time.
The video below discusses in detail the process of laying a budget version of a brick kiln:
Installation of a metal heating structure
Beginners in installation are recommended to give preference to metal heating structures . It is possible to assemble a metal stove in a few hours. Fully equipped models with smoke removal systems are available for sale. You can also make a metal structure for heating a country house with your own hands: it’s not that difficult.
Which stove is easier to install? Metal is easier to do than brick, but it also has its own subtleties: take them into account before you begin installation work.
How to install a stove in a wooden house? The first rule of installation is: the stove should not stand close to the wall .
The optimal distance from the heating structure to the wooden wall is 25 cm. It is recommended that the wall be tiled, especially for surfaces located in the immediate vicinity of the stove. Advice. Place the stove near the wall on the opposite side of the door - this will ensure sufficient air flow from the street to maintain the fire.
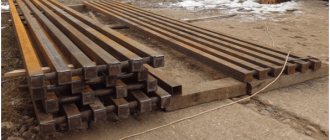
Metal structures are placed on a base made of a sheet of steel or a small elevation is used. Having completed the design of the podium on the floor, the racks are fastened under the floor as additional protection from the load. This is an important point when installing cast iron structures.
Manufacturers offer hanging models of metal stoves that do not require supports and will protect your floors.
The stove needs a chimney. It is possible to route the pipe to the street in any way - either through the ceiling or through the wall.
The diameter of the smoke exhaust pipe must correspond to the size of the pipe: this will provide powerful draft. Insulate the chimney to avoid heat loss .
Recommendation: Before installing a new metal stove, perform the first firing in the open air, this will allow the paint covering the internal and external parts to set, and the characteristic odor will also go away.
For large country houses, it is recommended to install several metal stoves to ensure a comfortable temperature in the home.
Types of cladding for furnace devices
Before carrying out work on lining the furnace, you should very carefully select the material to change the appearance of the furnace device. Properties to consider when choosing materials:
- high temperature resistance;
- good heat dissipation;
- mechanical reliability, practicality;
- strength of adhesion to the solution;
- aesthetic appeal.
Most often, materials with a thickness of at least 6 mm with a low-porosity structure are used for lining the furnace.
Since ancient times, brick, natural stone, tiled material, and ceramic tiles have been used to change the appearance of the stove. Modern industry offers artificial stone, as well as soapstone, for such work.
Plastering and painting the stove
Materials and tools:
- plaster based on fireclay mixture
- heat resistant paint
- stencil with a pattern
- brush, plaster trowel
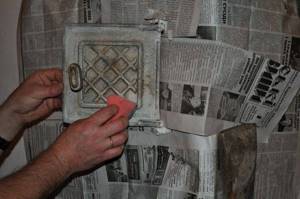
Before painting on the stove, its surface must be prepared.
First you need to prepare the structure for decoration. First of all, you need to plaster the surface of the structure. To do this, you need to make a fireclay mixture, which is designed for conditions of temperature changes - from strong heating to cooling.
First you need to align the corners of the product using an aluminum profile. Then start plastering. After plastering, the surface of the device will become smooth and acquire a light gray tint. After you plaster the stove, the product should dry for two days. Then you need to light the oven, increasing the heating temperature. After this, they begin to decorate the stove.
First, the stove is painted white.
You can purchase such paint in stores or make it yourself. This kind of paint is very expensive in stores. Therefore, you can paint the stove with building facade paint that has a latex composition.
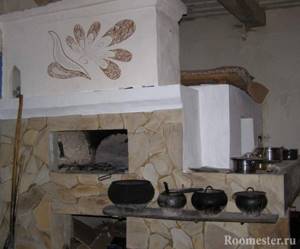
A stove painted with a single color paint can be decorated with various patterns. For this purpose, paint that is resistant to high heat is used. If you are good at drawing, you can decorate the stove with excellent drawings, colors, patterns, using all your creative imagination. If you don't draw well enough, you can buy a stencil with patterns. If you liked any ornament in the magazine, you can transfer it to tracing paper, enlarge it using a photocopier and transfer it to the surface of the stove. The design of such a furnace is shown in Fig. 1, which shows a photograph of a stove decorated with stenciled patterns.
You can make a pattern that matches the pattern on the tiles in the kitchen. This combination of kitchen decoration ornaments and stove will create a special style in the interior of the room.
Historical reference
The presence of a Russian stove has become a real legend - previously such heating structures were installed in every private house. They have become an integral part of Russian folklore. Even today it is difficult to find a replacement for a Russian stove, taking into account its reliability!
It is not known exactly when they began installing similar structures for heating homes in Russia. According to approximate data, their prototypes appeared 4 thousand years ago, when people decided to equip their house with the ability to make a fire hidden under clay materials.
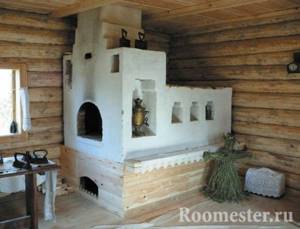
Stove in a rural wooden house
In Rus', stoves were distinguished by the peculiarity of their masonry. Until the 13th century, the most common variants were chimneys, in which there were no chimney pipes facing the street. In such options, smoke escaped from the premises due to drafts through the door, but at the same time, soot constantly settled on any surfaces, which caused a lot of inconvenience.
However, the usual version appeared only in the 18th century. Then they were made of bricks with fire-resistant properties, they had chimneys. At that time, such structures were placed exclusively in the corners of huts, not far from the front door. It was permissible to leave a small space between the wall and the stove, where various kitchen utensils were stored.
Kitchen design with a stove in a rustic style =»ltr»>
Historically, the stove is used in several styles: country, Provence, rustic, chalet. For example, for Americans, a rustic interior means country details, for the French it’s romantic Provence, and for Swedes it’s a rural chalet. All of them are rustic, so the layout and decoration of the building is similar. The main features of a rustic kitchen with an oven are natural shades, natural materials and homemade decor.
In rural interiors, the colors of wood and stone predominate - brown, beige, gray, white. Natural timber and stone are used as the basis for finishing and furniture. Materials for creating decor or small-sized furniture - rattan, straw, metal (implies the use of forged elements). To create a warm, cozy environment, an abundance of textiles is a must: curtains with floral patterns, embroidered tablecloths and napkins made of cotton or linen, decorative pillows and bedspreads with decor will become the highlight of the room.
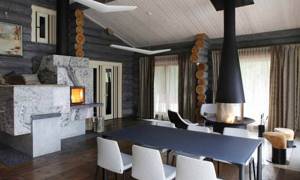
Usually the oven is placed in the kitchen
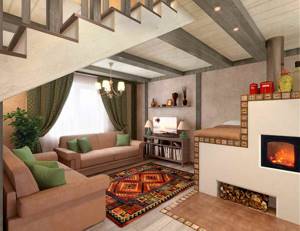
Rural interiors are dominated by the colors of wood and stone.
See alsoRustic style in the interior
Design of a small kitchen with an oven =»ltr»>
Antique stoves can be used very advantageously in a modern interior. To do this, you need to pay attention to details: colors, lighting and proper use of space. Light shades – white, ivory, beige – will help to make the area visually wider. To prevent the space from seeming boring and monotonous, you can dilute it with bright details. For example, decorate a Russian stove with multi-colored mosaics, hang curtains with spectacular patterns. Excessive drawings can reduce the size of a kitchen with a stove.
Lighting in a small kitchen should be central (chandelier) and local (above the work area). It is better to use cold incandescent lamps, as their white color advantageously expands the space. And the last point is the rational use of space: the location of furniture, stove. In a small room, the use of bulky furniture sets is unacceptable.
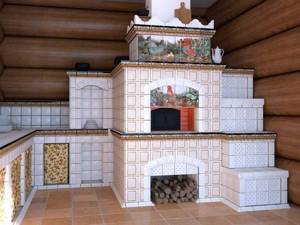
To prevent the stove from being monotonous, you can cover it with tiles
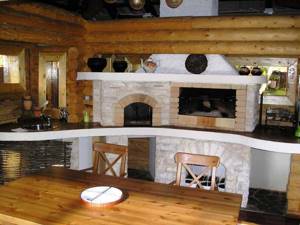
Antique stoves can be used very profitably in a modern interior
See alsoKitchen in a country house
Decorating the stove with tiles
At high temperatures, the tiles may burst. When choosing, you need to pay attention to heat resistance and damage resistance. The best cladding option would be natural stone and marble, but due to their high price, the materials are rarely used. Decorating with tiles is not only beautiful, but also practical. The tiles are easy to wash and clean. The choice of tile depends on the style of the kitchen and personal preferences. They will help determine the quality of materials.
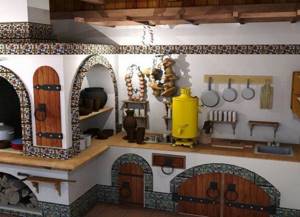
A stove with a combined cladding looks original: tiles and plaster with paint Source modernplace.ru
Classification of tiles for Russian stoves:
- Majolica is bright, covered with painted glaze, made from baked clay. The tile is distinguished by a figured, sculptural relief. Often painting elements are done by hand, this factor increases the price of the material. Traditional tile colors: yellow-brown, blue-green. When tiling the stove, you can combine majolica with other, more affordable tiles. Pros: high aesthetics. Cons: fragility.
- Tiles - have a box-shaped shape (a rack for fastening), covered with transparent glaze or opaque enamel, and are made of clay. There are smooth and embossed tiles. The paintings can be anything: flowers, mythological drawings, ornate patterns, figures of animals. Advantages: aesthetics, environmental friendliness, safety, high heat transfer. Cons: high price and weight.
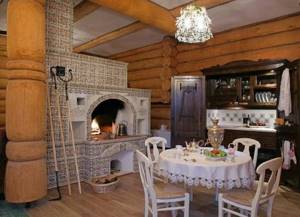
Tiles make the Russian stove the queen of the kitchen Source modernplace.ru
- Porcelain tiles - composition: quartz, granite dust, pieces of marble, several types of clay, mineral dyes (all this is pressed and then fired). The tiles can be of any color, with any pattern. Advantages: non-porous structure, pressure and heat resistance. Cons: price.
- Terracotta is made from pressed and then fired clay. The appearance resembles brick and natural stone. It has a rough surface, without glaze. Advantages: fire resistance, good heat transfer and adhesion, durability, low weight and cost. Cons: low resistance to damage.
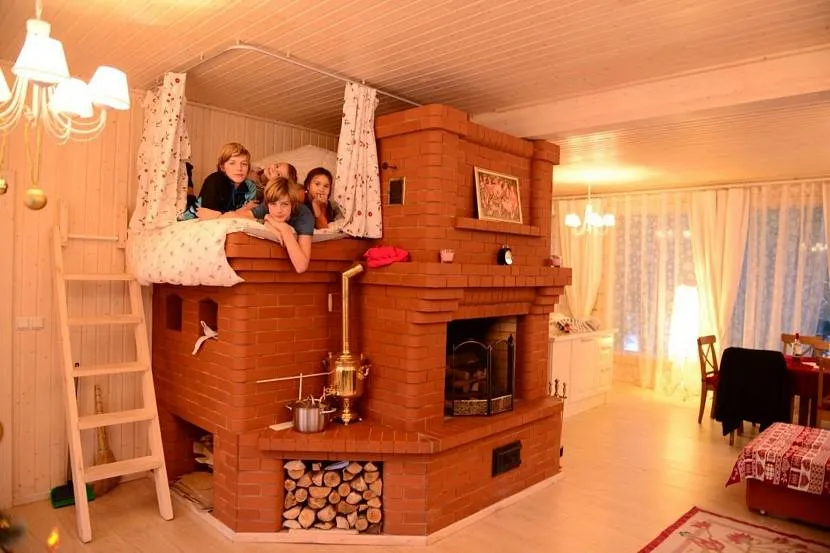
Terracotta imitates brick, the stove approaches its original appearance Source pechnoy.guru
- Clinker tiles are made from several materials, mainly shale clay and fireclay powder. It has a matte surface and is not glazed. Pros: high strength, frost resistance, water resistance. Cons: not used for devices lined with oven bricks due to different coefficients of thermal expansion. Consists of a gradient of colors: yellow-brown, orange-red, white-beige.
- Fireclay tiles are made from stone flour and refractory clays. The material is made by hand. It is fired at temperatures above 1300⁰. Advantages: resistance to temperature changes, high strength, minimal slip coefficient. The tiles do not crack or wear off. Cons: expensive material.
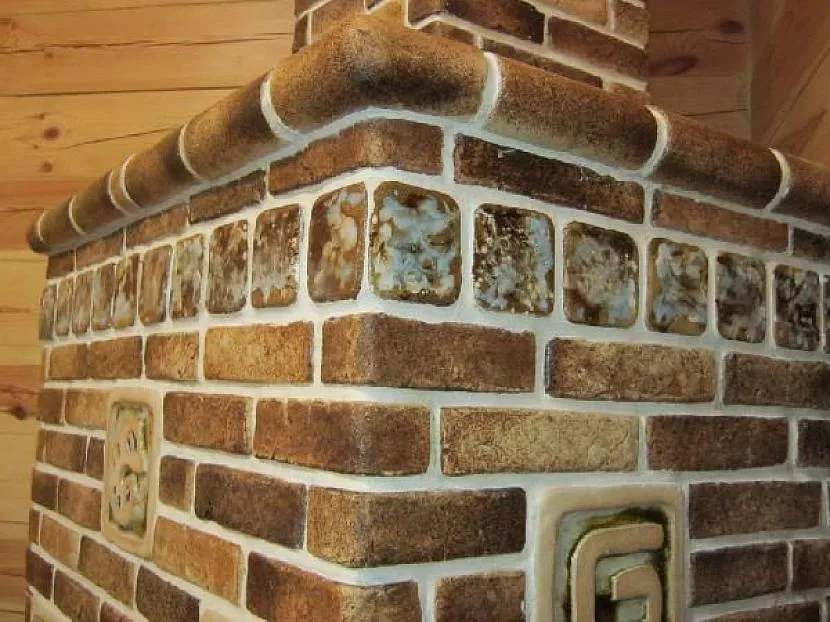
If you make the lining from tiles, you will soon have to replace it. Ordinary ceramic tiles are not suitable for the design of a Russian stove. Even fire-resistant ones will crack due to temperature changes.
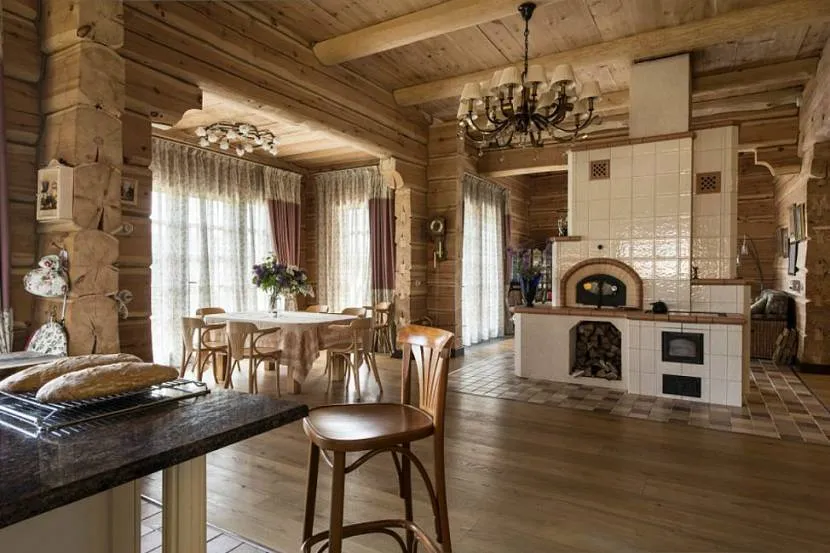
Plain snow-white tiles look good in the classic interior of a wooden house Source www.tproekt.com
Additional materials
Auxiliary parts and additional materials for a traditional Russian stove are not only functional elements, but also serve as effective decor. When working on the creation and design of a stove with a stove bench, you may need the following:
- brick;
- sand;
- accessories for stoves;
- grate;
- valves;
- corners;
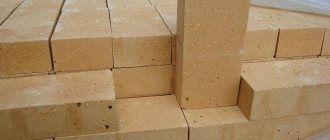
- fireclay slabs;
- fireclay brick;
- tile;
- ceramics;
- stone cladding;
- basalt insulation.
The old Russian stove is very economical in everyday life. She will decorate a modern country cottage, and housewives will appreciate her ability to prepare original dishes.
What does a traditional Russian stove with a deck consist of?
Traditionally, the Russian stove with a deck is large, but a modern interpretation allows you to make a structure of any size. Dimensions of the classic version:
- width - 1.5 meters;
- length - more than 2.5 meters;
- height - up to the ceiling.
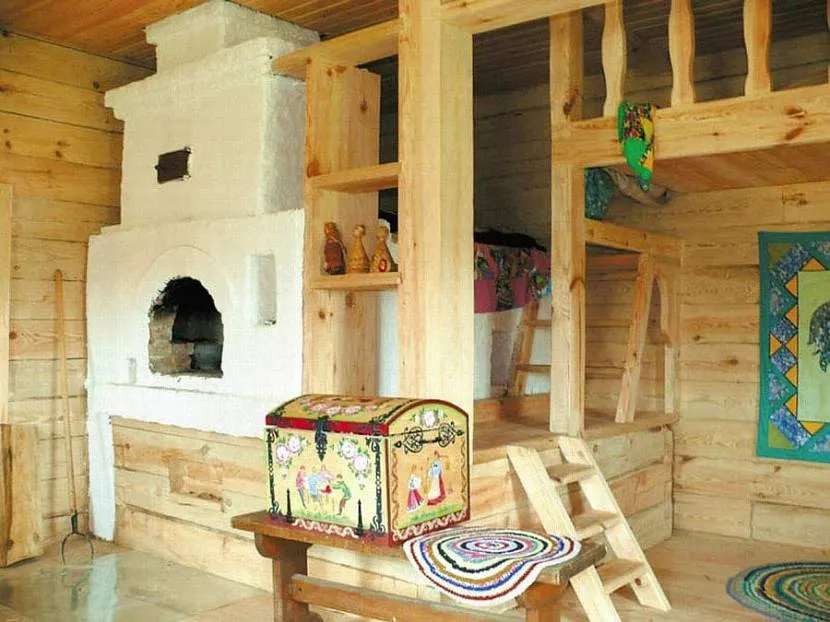
The stove requires proper care. Inspection by a professional technician is needed every 1-2 years to prevent smoke leakage. After firing the stove, you should clean it and remove the ash. Currently, the structure is equipped with cast iron plates (frying surfaces) for more convenient operation.
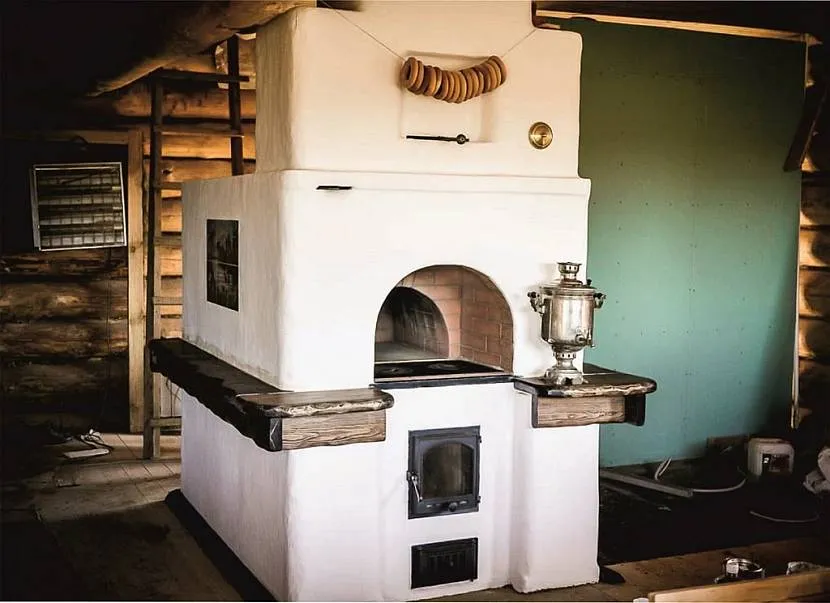
A cast iron hob makes life easier for the housewife Source modernplace.ru
A la russe
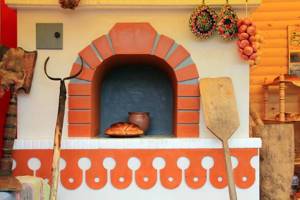
The “a la russe” style involves the use of traditional authentic elements of Russian life. Once upon a time, classics were written about stoves with such decor. Shelves were placed near the whitewashed hearth.
Wood is an absolute favorite. The main decorative elements are samovars, brooms and spinning wheels, animal skins (not exotic) and towels with embroidered ornaments. It is not at all necessary to decorate the stove with drawings. A perfect white background is enough.
Cladding the stove with tiles
Tiles are a unique and antique type of decoration. The material is presented in the form of ceramic tiles on one side, and on the other - a pump, with the help of which the installation process is carried out.
The color range of tiles is varied; in addition, they can have different reliefs and patterns. A stove lined in this way will have a unique look. However, the cost of the material can significantly exceed other types of cladding. This is due to the fact that the finished tile is painted by hand.
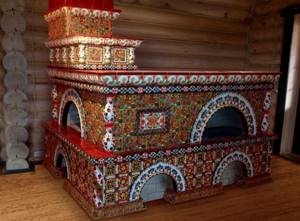
Russian stove decorated with tiles
To cover a stove with tiles, you must adhere to certain technical recommendations and perform it in the following order:
- The tiles must first be soaked in water. Then you should cover the oven with them without using a solution - to evenly distribute the parts. Next, remove all rows except the bottom one.
- Laying rows, starting from the bottom, on a clay mortar. In this case, the steel pins inserted into the holes of the tiller must be connected to each other with wire, pressing the tiles against each other.
- Adjacent tiles are additionally fastened together with elastic steel brackets.
- The final stage is grouting the joints with clay mortar.
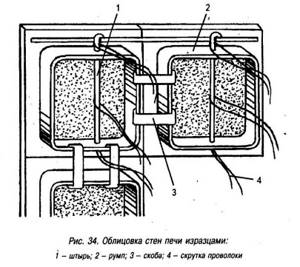
Scheme for attaching tiles to the stove surface
Important advice: Horizontal seams are rubbed with a gap of several millimeters, taking into account the shrinkage of the tiles.
A stove lined with tiles in a private house is a reinforced, monolithic structure with an almost unlimited service life.
Furnace finishing
The firebox is finished with the same materials as the stove itself. The main condition when choosing materials is safety, fire resistance, reliability, and strength. When designing the firebox, special attention should be paid to fire safety rules, because this part is most directly related to fire.
It is very important to leave a gap between the firebox and the stove lining. This is necessary for free air circulation, which affects the efficiency of its operation as a whole. It is not advisable to fill this gap with sand or thermal insulation material. It will become a reliable obstacle to deformation of the facing material. If there is a gap, then the finishing material will not crack, voids or other negative aspects will not appear in it.
When using plasterboard structures, leaving a gap will be an additional means against fire. 10 centimeters is the minimum gap that must be left between the firebox and the stove for safety reasons.
Chimney
The first most important part of the heating structure is the firebox, and the second is the chimney. How to properly install a chimney in a wooden house? The system responsible for removing smoke must be designed very carefully. The operation of the stove is affected by the correct insulation of the chimney.
A mandatory requirement for chimneys in wooden houses is lining. Due to this, the level of surface cracking is reduced and the likelihood of a fire is reduced.
In most cases, chimneys are designed from galvanized steel pipes. Chimneys made from this material should be insulated with fire-resistant materials. Special attention should be paid to those areas where the pipe comes into contact with the roof and other wooden surfaces.
The optimal solution for wooden houses is sandwich chimneys. The surfaces of sandwich chimneys are well insulated, which prevents them from overheating. There is only one drawback - a relatively short service life, ranging from 10 to 15 years. After this time, the insulation may peel off, and the chimney will have to be repaired.
Chimneys made of ceramic materials are leaders in quality. There is almost no condensation on them, the integrity of the structure creates a powerful draft, and a constant one. The service life of ceramic chimneys is several decades. There is only one drawback - significant weight.
Russian hut and tower
The stylistic concept of “Russian hut” involves the use of wood. It can only be an imitation, but it must be skillful and thoughtful. In some ways, this direction is reminiscent of a loft, but it is much more dynamic and elegant than the “concrete jungle” style. The main difference from the previous style is that each decorative element has its own functional purpose.
A house in the “Russian tower” style is radically different from other styles. Planning plays an important role here. In villages, many people still decorate their yard in this style. Key features: the presence of garden decor, bright colors, ornate carvings, an abundance of tiles, colorful patterns, bright decor.
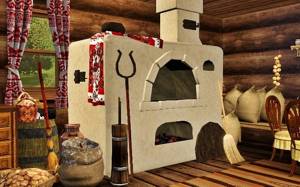
Furnace design
Before choosing the material from which the finishing will subsequently be made, it is worth paying special attention to the design of the room. Most often, the presence of a Russian stove suggests a rustic style of kitchen, embodied in rough decoration of walls and floors, whitewashed ceiling, chintz curtains and wooden floorboards
However, imagination and a little effort will allow you to create other unique design options that fit perfectly into the environment.
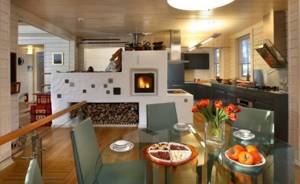
Russian stove in the interior of a modern kitchen
Most often, refractory bricks are used to lay a stove with your own hands. As a rule, it does not require additional cladding and can be used as an independent decorative element. But, in case of obvious dissonance with the kitchen design or violation of the integrity of the surface during operation, the material needs additional finishing.
There are plenty of options: the stove can be covered with tiles or stone, used tiles for decoration, or simply plastered and painted in any of the colors presented in the palette. The choice will depend only on the complexity and cost of the work.
Other directions
Traditional Russian stoves with couches in modern apartments are often decorated in ethnic styles, very far from Slavic symbols. The most fashionable formats are oriental and Mexican.
The Russian stove in the interior of houses is a wonderful element that decorates the location and gives the room a unique atmosphere of comfort and homely warmth. With the help of the right design and well-chosen decor, you can turn your home into a real work of art.
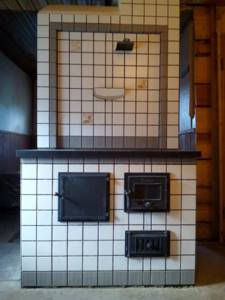
Specifications
Modern modernized Russian stoves with a built-in surface for cooking allow you to slightly modify the usual design options and customize them “to suit you.” Using a stove, you can use an additional source of heating, since in this case it becomes possible to heat the side panel or lower stove part without the main firebox running.
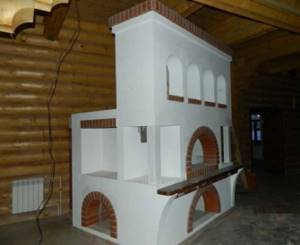
In the case of side heating, the adjacent room will be supplied with heat. As for the lower heating, all the walls of the heating chamber are heated here. Thanks to this feature, one large room can be heated while cooking.
Preparing the furnace for work
Before finishing, preparatory work cannot be avoided. They are needed for smooth application of plaster and high-quality wall cladding. The first step is to remove the old plaster if the stove has been used before.
This process is carried out with a spatula and water. If the old plaster contains cement, then you will have to use a chisel or hammer. If the old material is successfully removed, the wall should be cleaned down to the brickwork.
The next step is to run a wire brush or sander over the surface of the oven.
Important! To properly attach the plaster, you will need to spray the walls with water and clean the seams between the bricks.
New masonry must be dried and cleaned of dust and other defects.
After cleaning, the walls need measurements. Using a building level, the correctness of the corners is assessed and, if necessary, they need to be plastered to level them.
Choosing a wood stove for home heating
There are a huge number of options and modifications of modern heating stoves. As the number of options increases, the problem of choice always arises. Usually guided by the following principles:
- The size of the stove should be selected based on the dimensions of the room and the number of heated rooms;
- functional purpose: cooking, heating, combined;
- correct selection of furnace power.
Everyone's taste preferences are different. It is difficult to give advice on this matter. You must always proceed from the functional purpose of the stove. If the stove just needs to heat, then you can take it to a separate room. If you like an open fire, next to which you can sit on a cold winter evening, then you should choose a design that allows installation inside the house. Such a stove will perfectly complement the interior of the room.
How to choose a stove for a Russian-style home
“Russian House” is a very multifaceted concept, one might say vague. This style of interior design is suitable for a house “a la russe”, a Russian hut, a Russian tower, as well as noble nests, Russian estates and other variations on this theme. The most striking style of home decoration using a stove is manifested in the first three directions. Let's stop at them.
Russian stove in a house “a la Russe”
“A la Russe” does not recreate the exact furnishings of a Russian home. It is based on decorating the home with traditional Russian elements: samovars, brooms, spinning wheels, skins, towels. Someone will call this style primitive, popular print, since it “collects” things that are associated with Russia all over the world.
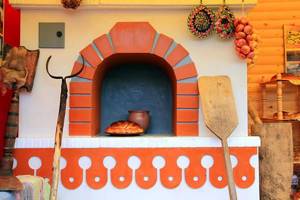
Stove in the style “a la russe”
It is worth noting that the “rich” stove refers more to the “Russian tower” style, which will be discussed a little later. “A la Russe” should not be overloaded with bright tiles. Regular white is sufficient. But you definitely need to decorate the stove: hang bunches of dried herbs and berries, embroidered towels, amulets, wicker figurines of a brownie, etc. If you still have an old balalaika or bast shoes, do not rush to throw them away. They will find a second life as decorations for a Russian stove. Believe me, no one will pass by!
Stove in a Russian Izba style house
A Russian hut begins with a tree. Everything is made from it, from floors to windows. No plastic. This style differs from the previous one in that each item in it has its own practical value and is actively used in the household. The same cannot be said, for example, about the towel on the stove in the “a la russe” design. It has only a decorative function.
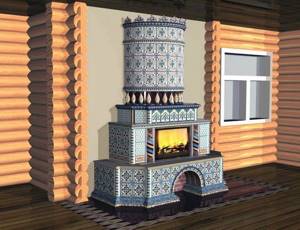
Russian stove. Photo from the site radikal.ru
However, even in the “Russian hut” the queen of the interior is the stove. It can be plain or lined with brick. Tiles are also acceptable, but not variegated or too bright. It is best to use white or blue, diluted with gold.
Important: In a modern interior, the stove can be left as a symbol or decoration. That is, make the structure in the form of a furnace
Place a fireplace and a niche for firewood in it. Throw a blanket and a couple of pillows over the place where the bed is traditionally located. Place kitchen utensils on top. And on the other side of the “stove” a modern hob is installed and a workplace for cooking is set up.
Stove in a Russian Terem style house
To understand what a house in the “Russian tower” style is, remember the illustrations for children’s collections of fairy tales. The tower pleases with bright colors and original carvings. The stove should be the same: with motley, even tacky tiles. The brighter the tiles, the “richer” the stove looks.
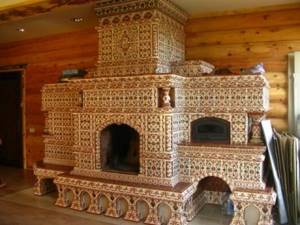
Stove with colored tiles. Photo from firepic.org
Interesting: In the village of Gorskoye near St. Petersburg there is a house that is a clear example of how the love for everything Russian is reflected in the interior. This is not a museum at all, but a private residential building. The owner is an antiques collector, originally from France. In this house, every little thing, every little thing is imbued with the owners’ love for our culture. Their special pride is their luxurious Russian stove. It was made by a ceramist and teacher at the St. Petersburg State Academy of Arts and Industry named after. A.L. Stieglitz Larisa Vyacheslavovna Zakharova. Decorated with magnificent tiles, this stove seems to have been transported from a fabulous Russian tower.
Important: In order for the stove to fit organically into any interior and the whole composition to look elegant, do not allow excesses. Even a small kink can result in your home becoming a tacky mess. . If the stove is large, then the doors in the room should also be bulky, the windows should be wooden with heavy swing shutters, and the curtains should be “lighter”: made of chintz or thin linen
If the stove is large, then the doors in the room should also be bulky, the windows should be wooden with heavy swing shutters, and the curtains should be “lighter”: made of chintz or thin linen.


