- 36571
- polystyrene foam basement insulation
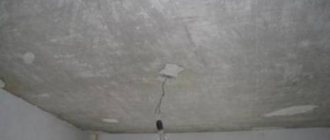
There are two ways to solve the problem of floor insulation in a house: laying thermal insulation material on top of the ceiling in a living room or insulating the basement ceiling.
If the house is in use, the first option is problematic: you will have to move the furniture and remove the covering. The second option remains - insulating the floor from below from the basement.
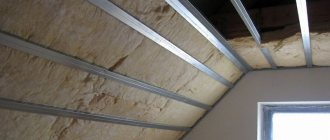
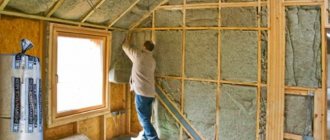
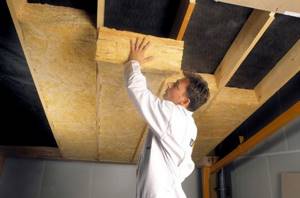
Using mineral wool
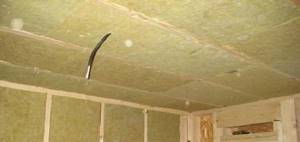
It is necessary to work with this heat-insulating composition very carefully. You need to wear a protective suit, respirator and goggles. So that mineral wool particles do not get on the skin, because it is very irritating to the skin. Disadvantages of mineral wool:
- You cannot lay the material and then remove it, as it may lose its thermal insulation qualities.
- Afraid of moisture.
- It is necessary to lay it without gaps, the quality of thermal insulation will depend on this.
- It is necessary to use additional thermal insulation agents.
- The material is not durable and requires replacement after 10 years.
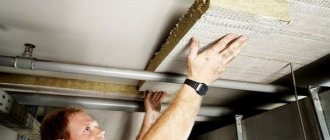
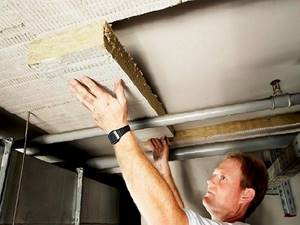
Installation stages
- The upper part of the building is cleared of debris and dust.
- The frame is made of metal or wooden guides.
- Measurements are being taken.
- Logs are installed.
- A vapor barrier must be secured to the surface.
- There must be a gap between the vapor barrier and the mineral wool for air circulation.
- Wear protective clothing.
- Mineral wool blocks are placed into the resulting cells.
- Another layer of vapor barrier is attached on top of the insulation.
- The upper part of the house is covered with purchased material: plasterboard or clapboard.
How to insulate a ceiling with penoplex
Penoplex is equally effective for both external and internal thermal insulation, and it is suitable for any surface - ceiling, walls, floor. Ceiling insulation can be done in two ways, and both of them are quite simple.
Installation of thermal insulation with hangers
How to insulate a ceiling with penoplex
To work you will need:
- foam sheets 20 mm thick;
- sharp knife;
- roulette;
- metal hangers;
- plastic dowels and screws;
- polyurethane foam;
- primer.
This method is suitable for ceilings with a flat surface. If the ceiling is made of concrete slabs and there are gaps or chips at the joints, they should be sealed with putty before insulation. The working area is then checked using a level to ensure there are no differences in height. After this, you can begin to insulate the surface.
Installation of thermal insulation with hangers
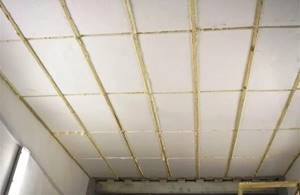
The ceiling is primed and dried, and the hangers are prepared. In one of the corners, about 15 cm away from the walls, a direct suspension is applied to the ceiling and secured with dowels and screws. Next, they retreat another 15-20 cm from the first suspension parallel to the wall, and attach the next one. After completing this stage, the suspensions should be placed on the ceiling in even parallel rows with a gap of 2-3 cm.
Now the ends of the first row of hangers are bent downwards and the attachment points are marked on the foam sheet with a pencil. Using a sharp knife, cut holes along the width of the suspension and apply the material to the ceiling, carefully threading the ends of the fasteners through the insulation. After laying the first sheet, proceed to the second, tightly joining the slabs together. All fastening holes, seams between slabs and joints with walls are sealed with polyurethane foam.
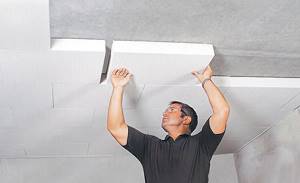
Instead of hangers, many use special disc-shaped dowels or self-tapping screws. The principle of fastening and installing insulation remains the same. It is not recommended to use ordinary self-tapping screws for these purposes. The thermal insulation layer is covered with plasterboard, wood, and plastic panels.
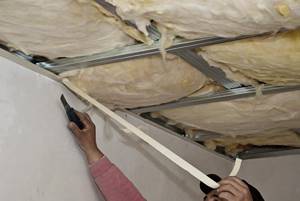
Fastening to the sheathing
Fastening to the sheathing
The second method is used in cases where the ceiling has large differences in height or separate beams. For the sheathing, choose a beam or aluminum profile that matches the thickness of the insulation. To make it easier to adjust the foam sheets to the sheathing cells, you should immediately attach the beams at a distance 1-2 cm less than the width of the sheet. When the frame of the beams is ready, you can attach the thermal insulation.
The slabs are cut to length, glue is applied to the back side and tightly inserted into the cells of the sheathing. All gaps and cracks between the insulation and the timber are filled with foam and the excess is cut off. A fiberglass reinforcing mesh is glued on top of the penoplex, and then the ceiling is finished.
All gaps and cracks between the insulation and the timber are blown in with foam and the excess is cut off
Insulated ceiling covering
Thermal protection of the floor from the basement
Thermal insulation of the floor is best done during the construction phase. But, if this moment is missed, then it is better to insulate the floor of the first floor from the basement.
This method of thermal insulation of the floor of the first floor in a private house is an effective protection of the floor from heat loss and allows you to maintain the height of the ceiling in the living room.
How to properly insulate the floor on the basement side and what materials to use? As insulation, you can use building materials made from synthetic microelements or based on natural raw materials, namely:
- Mineral wool;
- Basalt wool;
- Styrofoam;
- Extruded polystyrene foam (penoplex).
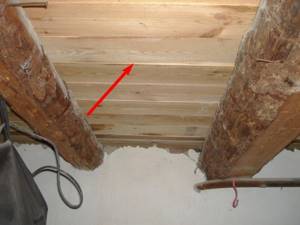
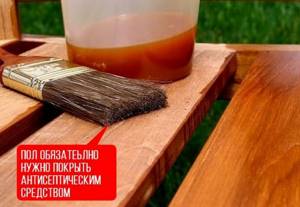
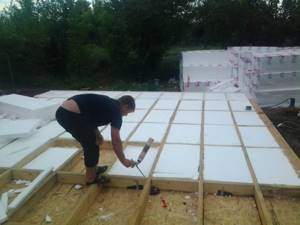
If you are insulating a wooden floor from below, you must first perform preparatory work. Wood is highly flammable and susceptible to harmful insects, and therefore preparation consists of repairing or replacing rotten areas, as well as impregnating the beams with antiseptic and fire retardant compounds.
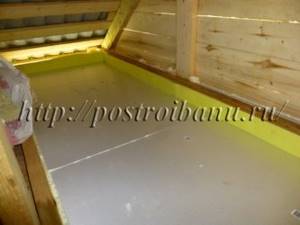
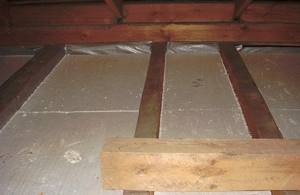
Then a layer of waterproofing material - polyethylene or foil film - is attached between the beams. The waterproofing sheets are laid with an overlap, and the edges should overlap the ends of the beams by about 15 - 20 cm. From below, from the basement, slabs of mineral or basalt wool are inserted between the beams.
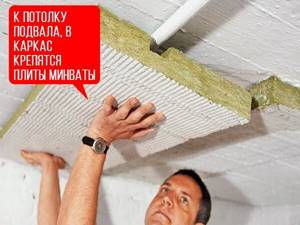
Cover the entire area of the insulated surface with an overlap of vapor barrier materials and secure it with wide-headed nails. The joints are sealed with special adhesive tape. Counter battens and flooring elements are stuffed on top.
Features of installing foam plastic on wooden ceilings
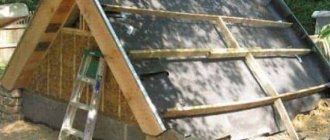
To ensure high-quality insulation of the ceiling in a wooden house with polystyrene foam, the nuances of laying the material must be observed. There are two methods: external and internal. When using the option of insulation from the inside, remember that the ceiling height will be slightly reduced.
Insulation from outside
Work mode +5..+30С. The technology for insulating the ceiling with foam plastic in a wooden house from the outside depends on whether the attic is heated or not.
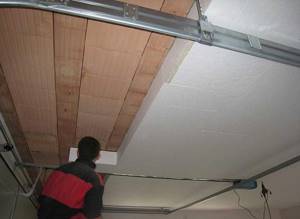
Inexpensive do-it-yourself insulation of the garage ceiling from the inside
The work algorithm in the presence of an attic with heating is as follows:
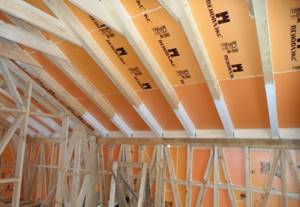
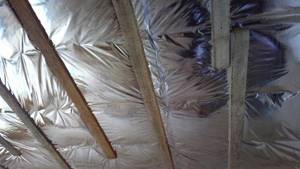
- Attach cranial bars to the bottom of the beam structures. Cover the beams and the area between them with foil-insulated material with the sheets overlapping each other, and seal the joints with construction tape.
- Place foam sheets in the space between the beams. Place the vapor barrier membrane above, overlapping it by 10-15 cm, and secure the joints with tape. All that remains is to lay the subfloor. The work has been completed.
If the attic is not heated, then first a sheathing is constructed from a wide board, the sheathing is placed in the space between the beams. Then like this:
- lay a vapor barrier material;
- pour a layer of expanded clay 10-15 cm thick;
- lay out the vapor barrier again, placing the sheets on top of each other and seal the joints with tape;
- lay foam plastic boards, fill the joints between them with polyurethane foam;
- after the foam has dried, lay waterproofing material on top;
- install a screed with reinforcing mesh or cover the insulation with a sub-plank floor.
Insulation from the inside
Let's look at how to insulate the ceiling in a wooden house with polystyrene foam from the inside:
- Clean the ceiling surface from old decor, dirt and dust. Then smooth out surface defects with a putty compound, treat the wood with an antiseptic, impregnated against fire, prime with a deep penetration compound in 2-3 layers, and let dry.
- Stretch the wiring, lay the necessary communications. It is better to insulate the wires in corrugated pipes and secure them to the ceiling.
- Construct a sheathing from wooden planks or metal profiles. The pitch of the sheathing guide elements is at least 50 cm. Installation with dowels and self-tapping screws.
- Cut the foam to the size of the sheathing cells. Fix the sheets with screws and glue. Installation is carried out with a tight fit of the foam elements to the sheathing. If glue is used, then the mixture should be applied along the end in a continuous line, and dotted on the plane of the element.
- Fill the gaps between the insulation with foam or seal with adhesive-based sealant.

After the sealant has dried, plastering work is carried out. The plaster is applied to a reinforcing mesh, which is attached to the elements with self-tapping screws. The final stage is decorating the ceiling.
Basement ceiling insulation options
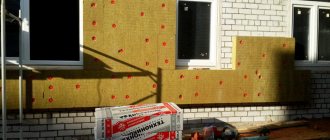
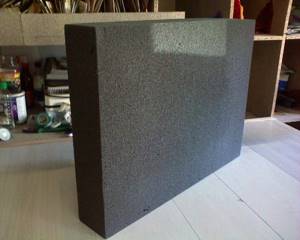
The most common thermal insulation material is expanded polystyrene (EPS). Insulating the basement ceiling with polystyrene foam from the inside is an economical and easy to implement option.
The material has the following properties:
- non-hygroscopic;
- minimal thermal conductivity;
- there is no vapor permeability.
There are many modifications, including EPPS - extruded polystyrene foam, consisting of closed cells filled with an inert gas.
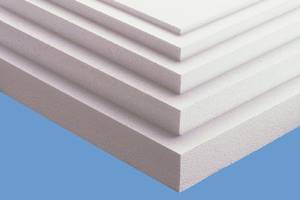
expanded polystyrene
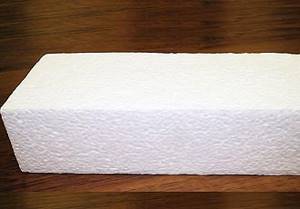
Styrofoam
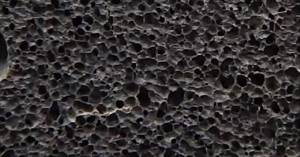
The higher the density of the material, the greater its strength, the thinner the layer required for insulation and the lower the risk of mechanical damage.
For insulation, slabs with a density of 35 kilograms per cubic meter are used, the layer thickness is up to 10 cm. Leaky grades of material are fragile, mice gnaw them to make nests.
All types belong to different flammability groups, from G1 to G4. When burning, foam releases toxic substances. Flammability is reduced due to the addition of a fire retardant: such EPS becomes self-extinguishing. For any construction work, it is recommended to purchase modifications with impregnation.
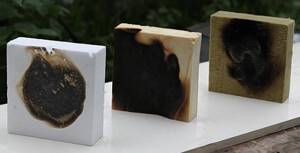
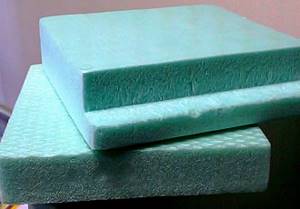
The sample on the left is polystyrene foam, in the middle is extruded polystyrene foam, on the right is mineral wool
Basement ceiling insulation technology:
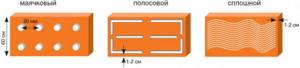
1. Attach the slabs to the concrete floor using tile adhesive with additional fixation with umbrella dowel nails.
2. Foam the seams.
3. Cover with plaster using reinforcing alkali-resistant fiberglass mesh.
Before installation, it is advisable to treat the surface of the reinforced concrete floor with a hydrophobic penetrating compound.
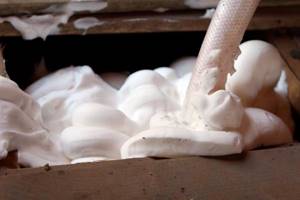
Another option for insulating a basement floor is spraying liquid polyurethane foam (PPU).
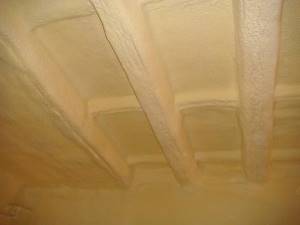
PPU is more expensive than PPP. Pros:
- fast processing;
- thin layer compared to sheet insulation;
- no hydro/vapor barrier, adhesives or mechanical fasteners are required;
- the material lays down in an even sealed layer, without gaps or cold bridges.
Minuses:
- a spray gun is required for application;
- flammability G1-G2.
Which is better: insulation inside or outside?
Two insulation technologies are used for balconies: inside and outside.
Internal insulation is less effective, since the outer walls of the balcony freeze in severe frosts, and condensation forms between the insulation and the wall surface. The only advantage of this method is that you can do it yourself and save on paying hired workers.
When insulating from the outside, the wall is protected from freezing by insulating material, which promotes better heat retention. Although external insulation technology is more effective, it cannot always be applied. You can carry out work on the 1st and 2nd floors from the ground or using a stepladder, but if the balcony is located above the second floor, it is very difficult to do the work yourself. Also, after gluing the penoplex, it is necessary to finish the surface, so another issue is being resolved - the decorative design of the balcony from the street.
How to insulate walls?
Before you begin laying insulation, you need to check all wall surfaces for cracks and crevices. If there are any, they need to be puttied.
We prepare the walls and begin the insulation process
Then all surfaces are covered with a layer of waterproofing mastic. You can attach penoplex, as in the case of the ceiling, with glue or dowels. All subsequent work is performed in a similar way.
You can replace the glue with a mixture for laying ceramic tiles. Here it is necessary to observe one very important point - there should be no gap between the wall and the floor.
Penoplex can be installed on walls in another way. First, a sheathing of metal or wooden profiles is installed. The pitch of the sheathing should be equal to the width of the sheet.
Adhesive is applied to a sheet of penopelks, and then the insulation is laid between the sheathing profiles. All cracks are filled with polyurethane foam.
We reveal the secret of strong steam - insulating baths and saunas with Penoplex!
Why insulate the bathhouse? It's so warm there! If you tirelessly add firewood, it is quite possible. But no matter how much you drown, drafts blowing from all the cracks and an icy floor can ruin your mood for a long time. Is it worth mentioning how much money you will have to spend on heating a bathhouse and sauna? Do you want to avoid the mistakes of your predecessors and perform high-quality insulation of your bathhouse and sauna? Then read important information from our specialists right now!
Two super materials that we recommend for bath insulation:
| PENOPLEX Comfort | PENOPLEX Facade |
| Eco-friendly insulation, which does not contain harmful substances, is easy to install, providing the desired microclimate. | Insulation with maximum thermal insulation properties, environmentally friendly and practical. |
A good sauna is not only a hot steam room. To make you and your guests truly comfortable, it is necessary to insulate not only the steam room of the bathhouse, but also all rooms without exception: the changing room, dressing room and vestibule. If a sauna or bathhouse has a swimming pool and a gym, they must also be properly insulated.
Important rules for insulating a bath that everyone should know
Competent calculation
This is the first and most important rule for ensuring the most effective insulation results. Only an experienced specialist will be able to correctly calculate thermal insulation depending on the total area of the bathhouse or sauna, the number of rooms, building material, heating system, number of people who can simultaneously visit the steam room, etc.
Complex insulation
According to professional builders and bathhouse experts, insulation should be both external and internal. Thermal insulation work begins with insulation of the foundation, walls and roof, and only then can you safely proceed to the internal insulation of the ceiling, walls and floor.
Effective insulation. The requirements for insulation for baths and saunas are: high thermal insulation properties, durability, resistance to temperature fluctuations and direct exposure to moisture.
Why PENOPLEX is ideal for insulating a bathhouse with your own hands
Short-lived and ineffective materials have been replaced by modern, new-generation insulation Penoplex. This is extruded polystyrene foam, which has a dense cellular structure that does not allow moisture to pass through. As a result, the material does not lose its thermal insulation properties in extreme conditions with high humidity and temperature, which are typical for baths, saunas or hammams for 50 years or more.
Penoplex is ideal for insulating the walls of a bathhouse from the inside, as it does not contain harmful toxic substances. Unlike natural materials, insulating a bathhouse made of timber and a log bathhouse using Penoplex is easy and simple.
Interesting fact: the only bathhouse built in 2006 in Antarctica and included in the Guinness Book of Records is insulated with Penoplex slabs. On a continent where the thermometer drops below –50 °C at night, a bathhouse can warm up to 120 °C. To insulate the walls, floor and ceiling of the bathhouse, only 25 m3 of Penoplex slabs were needed.
Bathroom insulation with PENOPLEX slabs: quickly, reliably, economically
For external insulation, Penoplex Facade insulation is used, which is ideal for installing a wet plaster facade or well masonry when it comes to building a new bathhouse.
It is recommended to insulate the roof of a bathhouse using Penoplex Pitched Roof insulation by installing it between the rafters. Do-it-yourself insulation of the bathhouse ceiling with clay is done from the attic side. A modern solution is to lay Penoplex thermal insulation boards on the floor.
To insulate the walls in the bathhouse, it will be necessary to install a wooden or metal frame, place Penoplex Comfort thermal insulation boards in the cavities and line them with wooden clapboard.
Insulation of the floor in the steam room of a bathhouse is carried out in the following order:
- Penoplex slabs are laid on the foundation slab;
- Next, a concrete screed reinforced with a building mesh is made;
- any decorative covering is installed - most often solid wood.
If you are far from the science of construction and do not want to spoil good insulation, entrust the insulation of your bathhouse to our professionals. The quality of work is 100% guaranteed.
(2 5.00 out of 5) In order to rate a post, you must be a registered user of the site.
What materials are used to insulate a basement?
Many experts claim that insulating the basement will help avoid many problems that almost always occur during the operation of wooden houses. It is also noted that the floor temperature in the house is directly related to the level of heat in all rooms of the structure.
To keep the basement warm, you can use both traditional and modern thermal insulation materials:
- Mineral wool.
- Penoizol.
- Styrofoam.
- Expanded polystyrene.
- Polyurethane foam.
- Penoplex.
- Penofthol.
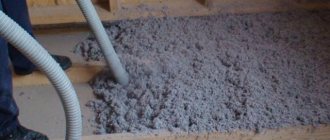
Mineral wool is a traditional, familiar natural insulation material that can also be used to insulate floors on the basement side. It is produced using high-temperature melt technology. Despite the spread and popularity of the material, it is significantly inferior to modern insulation in all respects.
Mineral wool is sold in rolls and slabs.
Expanded polystyrene is a modern insulation material. A high-tech thermal insulation material that can insulate not only the floors and walls of the basement, but also any other room in any type of structure.
Expanded polystyrene is similar to polystyrene foam, but has slightly different properties.
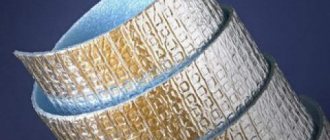
Penofthol is a heat-insulating material that does not react with building materials and is resistant to biological influences. It has good waterproofing characteristics and minimal thermal conductivity.
Penofthol comes in foil.
Penoizol is the so-called “liquid foam”. The material is non-flammable, stable from a biological point of view, and boasts excellent thermal insulation and vapor permeability properties. Durable.
Penoizol - insulation and sealant.
Penoplex is a modern thermal insulation board made from foamed polystyrene. They have increased thermal insulation characteristics, relative strength, resistance to biological influences, and minimal water absorption.

Penoplex is a modern material.
Polyurethane foam is a unique thermal insulation material that must be applied to the surface to be insulated using special equipment (spraying method). After application, a monolithic, even layer of thermal insulation is obtained, in which the appearance of cold bridges and joints is excluded.
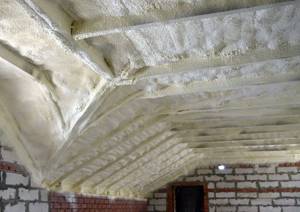
Polyurethane foam is sprayed onto the structure using special equipment.
How to mount
Installing such slabs on the ceiling will not cause any difficulties for anyone. Even if you have never done this kind of work, you can still do it. The operating procedure will be as follows:
- First, the surface of the ceiling is cleaned from dirt, dust and other similar things. Old peeling coatings also need to be removed.
- All necessary work is carried out on laying the wiring and sealing the grooves in which it is laid.
- Next, the surface is primed. It is needed to improve the adhesion properties of the surface and to prevent the formation of mold or mildew under the insulation layer. Most primers contain special components for this.
- The next stage is gluing the plates. They are cut to the required dimensions as necessary and glued, if possible, in a checkerboard pattern so that the joints of the plates do not form one line.
The final work is to “foam” the joints between the parts with polyurethane foam, the excess of which is cut off after drying.
Is it possible to insulate a balcony with penoplex?
As for the general issue of insulation, this can be done under one condition. The loggia must first be glazed, otherwise the entire process of laying thermal insulation does not make sense. If we talk specifically about penoplex, then this is a modern type of insulation. It has replaced the popular foam plastic and is gradually displacing it from the construction market. The popularity of penoplex is explained by its improved characteristics. First of all, the material is more resistant to mechanical stress.
We can say with confidence that thermal insulation boards are ideal for balconies. Typically, the loggia is insulated with penoplex under lining, drywall, plaster or other finishing material. The slabs can be laid on the floor or sheathed on the ceiling. Penoplex is attached to the walls both inside and outside the balcony. Here you can choose according to your wishes. However, slabs of a certain density are used for each element of the building. The material is resistant to large temperature fluctuations and is equally suitable for use in southern and northern regions.
Important! Penoplex is a trademark, not the name of the material. In fact, the thermal insulation is made from extruded polystyrene foam boards
Methods of insulation and fastening
From a scientific point of view, insulating the ceiling with foam plastic from the outside is the most correct and effective way of thermal insulation. If there is such a possibility, the external type of installation is used. But in apartment buildings, where internal insulation is the only possible option, this method is used. Its advantage is that it simultaneously provides good sound insulation.
Sheets of material can be secured in two ways:
- special adhesives;
- special umbrella nails.
There is no need for glue on the attic side
The quality of fastening is especially important for internal insulation. The glue is not applied to the entire surface of the foam, you can only cover the perimeter and a cent of this will be enough
When using adhesive mixtures on water, the thickness of the adhesive layer is added to the thickness of the foam.
External insulation - work order
Foam boards do not have sufficient moisture resistance, so when laying external insulation, additional layers are required:
- on the outside it is a layer of waterproofing;
- on the inside (from the room side) there is a layer of vapor barrier.
How to insulate a ceiling with foam plastic from the outside:
- Surface preparation: removal of dust, debris, leveling.
- Laying a vapor barrier - it is secured using a stapler.
- For installation using lags, logs are installed; for installation without lags, pouring is done using wire reinforcement.
- Laying foam.
- Installation of the waterproofing layer - it must be laid over the walls.
- Laying the floor and trimming the waterproofing film around the edges. The finished floor is laid on top of the screed only in the case of a residential attic, otherwise a screed is sufficient.
The foam is cut so that it fits tightly between the beams, and the gaps between the beams and the insulation must be filled with polyurethane foam. The insulation with the beams must form a common plane. If the thickness of the beams is not enough, it is sharpened with wooden planks. A small gap is left between the insulation and the joists to ensure ventilation.
Technology of internal ceiling insulation with foam plastic
A significant disadvantage of internal thermal insulation for a city apartment is that foam boards and fine finishing take away precious centimeters. Calculating the final ceiling height requires the correct choice of foam thickness and fastening method.
When using material 5 cm thick and lathing for finishing with clapboard, for example, a total of about 8-10 cm of room height is required. If suspended models of plasterboard ceilings are used, even more height is hidden.
How to insulate a ceiling with foam plastic from the inside:
- Surface preparation: cleaning from finishing and dust. Check the surface using a level. If there are noticeable differences, the surface is puttied. For very large irregularities, plastering and grouting are required. If there are irregularities less than 0.5 cm, it is enough to just seal them and then sand them with sandpaper.
- Treating the surface with an antiseptic primer.
- Dry the surface.
- Foam boards are specially roughened using scrapers, sandpaper, and a special knife. A layer of adhesive solution is applied evenly over the entire surface of the sheet. Start installing the sheets from the corner, pressing them to the surface and supporting them for 1-2 minutes. Laying is done specifically with each subsequent row offset by half a slab.
- After gluing and drying, holes are drilled in the center and corners of the sheets, umbrella dowels are inserted into them and hammered with metal pins.
- If it is decided to lay polystyrene foam on the frame, after leveling the surface, a sheathing made of wood or an aluminum profile is installed, then laying foam plastic and laying a vapor barrier.
- Installation of a finished ceiling.
When insulating from the inside, waterproofing is not required. If the finished ceiling is mounted on a lathing - these are plastic panels, plasterboard ceilings, lining, no additional foam fastening is required.
In rooms with high air temperatures, additionally foil and foam foil insulation in rolls can be laid on the foam plastic, while the finishing ceiling is made only on the frame.
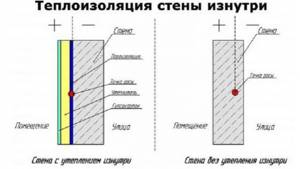
Insulation of basement walls
No matter how strange it may sound, insulation from the basement side of a wooden house has both advantages and disadvantages.
Not only the ceiling, but also the walls of the underground storage facility need thermal insulation.
Advantages:
- The ability to maintain a stable temperature not only in the basement, but throughout the house.
- Insulating the basement significantly reduces heat loss from the interior of the house.
Flaws:
- When insulating a basement from the inside, it is necessary to make high-quality waterproofing.
- In addition, it is necessary to organize effective ventilation.
If none of this is done, then the insulation will soon begin to deteriorate, because under the influence of moisture any material will lose its performance characteristics.
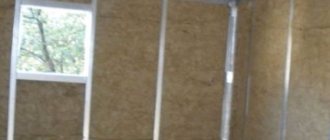
We use foam plastic
To insulate basement walls from the inside, ordinary polystyrene foam is usually used. This thermal insulation material is lightweight and has a lot of positive properties:
- Excellent characteristics.
- Completely safe from an environmental point of view.
- Relatively low price.
The service life of foam plastic will depend, first of all, on the quality of the work on insulating the room, as well as on the effectiveness of the created waterproofing.
Of course, you can use more expensive materials: polyurethane foam, polystyrene foam, etc., but if there is no urgent need to make the basement as warm as possible, then they can not be used. In principle, it is possible to insulate a basement from the inside on all sides using mineral wool.
The working process
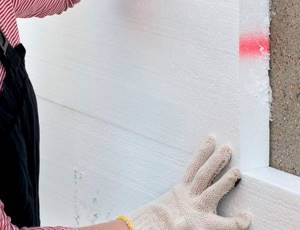
Any thermal insulation material will not adhere well to the wall if it is glued to a poorly prepared surface. That is why, before starting work, you should completely clean the surface, eliminating all minor defects.
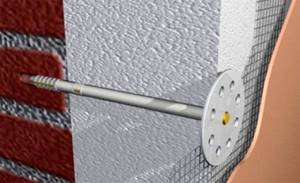
This type of foam fastening is more reliable than glue.
In most cases, foam is fastened using adhesive compounds, but for greater reliability, many homeowners also fasten the material with dowels, which guarantees the most reliable fixation of the insulation.
Laying polystyrene foam must begin from the bottom of the basement. The basic rule in this case is that the insulation must be laid with a minimum gap between the plates. That is why special attention should be paid to the initial surface preparation. If the base has serious differences, then significant gaps will form between the plates, which will minimize all the performance characteristics of the material. Insulating a basement in a wooden house will then be extremely difficult.
Foam boards must be thoroughly impregnated with adhesive, glued to the wall and secured with dowels for reliability. Experts also strongly recommend using reinforcing mesh at this stage (possibly with a minimum diameter of rods). It is embedded in insulation and covered with a generous layer of adhesive. This approach allows the insulation to last reliably for more than one year. As soon as the resulting surface has dried, it must be rubbed and leveled using special mixtures (primer, plaster). If desired, you can carry out additional decorative finishing of the wall, ceiling and floor.
Do-it-yourself penoplex installation
To carry out proper installation of polystyrene foam boards on the ceiling surface, you will need to prepare a certain list of consumables and tools. In addition, the insulated surface must also be prepared. This will allow you to install the thermal insulation layer quickly, without downtime.

You will need:
- building level;
- construction or stationery knife;
- hammer;
- perforator;
- ladder or stepladder.
List of materials required for DIY installation:
- deep penetration primer with an antifungal component;
- dry adhesive composition compatible with polystyrene foam;
- foam for installation;
- fastening tools (so-called mushrooms).
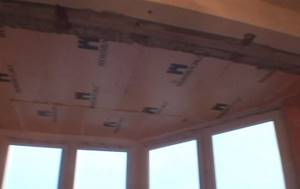
Insulation of the ceiling base from the attic side
This method consists of the following sequence of actions:
- Cleaning the surface to be insulated from residues of various types of contaminants.
- Applying an adhesive mixture to the surface and laying insulation elements on the attic flooring.
- During the procedure, care must be taken to ensure that no serious gaps are formed;
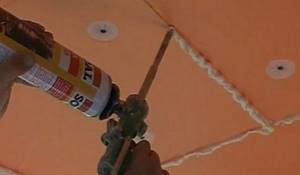
- When the glue has completely set, it is necessary to seal the existing gaps between the insulator plates. This is done using polyurethane foam.
- After 24 hours, you need to trim off all excess foam for installation. If the attic space will be used for residential purposes, planks or other floor coverings are laid.
Insulation of the ceiling on the residential side
There are often objective circumstances according to which it is not possible to install insulation from the attic area. This happens in apartment buildings where upstairs neighbors live, or in buildings where there is no attic at all. In this case, all insulation work will be carried out from the side of the home, and the procedure will become somewhat more complicated.
The work algorithm looks like this:
- All debris must be removed from the surface to be insulated and visible gaps and cracks must be filled with putty;
- then apply a primer and a mixture that prevents the development of fungus;
- insulation boards are treated with an adhesive solution and then fixed to the surface;
- using a hammer drill, holes for the “fungi” are drilled on the surface of the glued slabs;
- the dowels must be driven into the holes made for them, so the plates will be securely fastened;
- places where joints do not fit tightly and all gaps are carefully foamed;
- after the polyurethane foam has hardened, remove its excess with a knife and begin to secure the reinforced mesh, which will be held in place by the adhesive solution;
- the surface treated with glue and reinforced with mesh must be cleaned and primed, after which a fine finish can be applied;
- The final stage of work consists of decorating the insulated area (you can use paint or any decorative coating).
It is not difficult to conclude that carrying out work inside to insulate a room is a much more labor-intensive and costly process. Because of this, the popularity of this procedure is low, and it is used only in situations where it is impossible to insulate the home from the outside.
Insulation of the attic ceiling
If the attic space is used as a residential attic, the question of insulating it using penoplex will be relevant. Its high qualities of thermal insulation and absorption of extraneous sounds will make staying in the attic more comfortable and suitable for living. But it is worth considering that the material will have to be secured differently in this area.
Independent work will consist of the following stages:
- Prepare the surface for attaching fragments of insulating material to it. The procedure is standard and described above.
- Assembling the sheathing frame and securing the polystyrene foam boards to it.
- Treat all joints with installation foam that has a minimum expansion rate.
- OSB, chipboard or plank flooring is fixed on top of the thermal insulator.
Features of insulating the basement ceiling of an apartment building
All of the above is true for a private cottage. How realistic is it to insulate the floor from the basement side of an apartment, so as not to spoil the newly renovated floor and not limit yourself in the thickness of the insulation layer (especially important for apartments with low ceilings)?
A basement in an apartment building is not your personal property. In some cases, even entering there is problematic: it is locked with a key, and the technician-caretaker has the key. To carry out work there, you will need permission from the housing administration. Responsible housing and communal services officials will tell you which documents to collect.
The list will likely include a permit from the fire inspector.
note
Therefore, do not rush to purchase PPS or PPU - they are flammable, the likelihood of getting the go-ahead from firefighters is minimal.
Pay attention to basalt wool and foam glass in slabs: both materials belong to the NG group.
Serious disadvantages of mineral wool:
- hygroscopicity;
- when wet, cotton wool loses more than half of its heat-shielding properties;
- vapor permeability.
This is not critical if the basement is dry and well ventilated.
Mineral wool insulation of a basement ceiling from the inside can be done in two ways, frameless and framed. In the first case, installation is carried out similarly to the PPS:
- secure the slabs to the ceiling with glue;
- secure with “umbrellas”;
- plaster with façade plaster reinforced with fiberglass mesh.
This option is feasible only with rigid facade slabs and only in a dry basement. In other cases, a frame one is used:
1. The ceiling is sheathed with plasterboard profiles.

2. Cotton wool is placed between the profiles.
3. Cover with a vapor barrier membrane.
4. Sew up with waterproof plasterboard, fiberboard sheets or other similar material.

Sometimes mineral wool blanks are hermetically packaged in plastic or vapor-proof film before being placed in the frame and the seams are sealed with mounting tape.
The option is energy-intensive, but provides 100% protection of the insulation from getting wet.
Another option is to insulate the ceiling in the basement of the house with foam glass slabs.
This material does not absorb moisture and is alkali-resistant - an important property when used in combination with plaster.
Its disadvantages:
- the weight is on average three times greater than that of mineral wool;
- much higher price.
The maximum permissible thickness of thermal insulation is 10 cm. Within these limits, you can fasten the slabs with glue and dowels with nails in increments of 20 cm. If it is more, you will need a frame, but it should be taken into account that foam glass will create a large load on the floor.
When installing with glue, the slabs are treated from the outside with plaster and fiberglass mesh; when using the frame method, they are sewn up with waterproof sheets.
Installation from the room side
It often happens that work from the attic side is impossible. The reason may be the presence of neighbors above, or simply the absence of such a part of the building. In this case, it is necessary to carry out insulation from the side of the room, which complicates the procedure a little.
Penoplex insulation
So, the instructions for carrying out the work are as follows:
- First, the surface is cleared of debris and all cracks, holes and gaps are sealed;
- then the surface is treated with a primer and antifungal mixture;
- An adhesive mixture is applied to the insulation boards and they are attached to the surface;
- Using a hammer drill, holes are drilled for the fungi. It is worth considering that this procedure is carried out with a ceiling that is already partially covered;
- after making holes, fungi clog in them, which makes it possible to hold the slabs more securely;
- then all joints and gaps are treated with polyurethane foam;
- after the foam has hardened, its remains are cut off and the reinforcing mesh begins to be attached using a rough adhesive mixture;
- after this, the surface is cleaned, primed and another layer of finishing is applied to it;
- Thermal insulation work is completed with final surface finishing (painting or applying a decorative coating).
As you can see, carrying out this type of work on the residential side requires significantly more effort and costs. For this reason, this procedure is preferred in case of a desperate situation.
In most private homes, the attic space can be used as semi-living space. So-called attics are created. Naturally, insulation is also required here, since wind can blow through the roof, and the main material has low thermal insulation and sound protection.
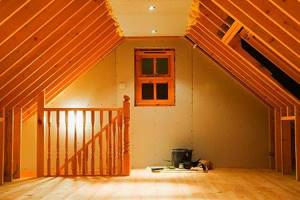
Preparing to insulate the attic
Related Posts
- How to insulate the ceiling in a bathhouse with your own hands
- Insulation of a veranda in a wooden house
- Do-it-yourself insulation of a balcony from the inside in a panel house
- Why line the roof and ceiling with clapboard and how to do it correctly? nuances of the procedure
- Construction of a frame bath with your own hands
- Bathhouse made of foam blocks
- Choosing insulation for a bath: features of organic and inorganic types
- Do-it-yourself insulation of walls with polystyrene foam - detailed instructions
- Using slag for floor insulation
- Aluminum foil for bath insulation
- How to properly insulate a garage outside and inside with your own hands step by step
- Isover thermal insulation overview
- Insulating the attic with foam plastic
- We insulate the wall of the apartment from the inside with our own hands
- "penoplex" under a warm water floor, the advantages of the material, methods and technology for its installation
- Do-it-yourself insulation of the loggia. if necessary? sequencing
- Subtleties of attic floor insulation
- Cost of painting walls and ceilings
- Insulating the attic from the inside if the roof is already covered: step-by-step instructions
- What and how to build a simple bathhouse in the country?
- When health is in your hands: a bathhouse that will be the envy of your neighbors
- Finishing the facade of the house with foam plastic
- Step-by-step instructions for thermal insulation of floors with penoplex
- Do-it-yourself insulation of a well for the winter
- How to make a ceiling in a private wooden house and do-it-yourself finishing
Read with this
- How to insulate the ceiling in a bathhouse with your own hands
- Insulation of a veranda in a wooden house
- Do-it-yourself insulation of a balcony from the inside in a panel house
- Why line the roof and ceiling with clapboard and how to do it correctly? nuances of the procedure
- Construction of a frame bath with your own hands
- Bathhouse made of foam blocks
- Choosing insulation for a bath: features of organic and inorganic types
- Do-it-yourself insulation of walls with polystyrene foam - detailed instructions
- Using slag for floor insulation
- Aluminum foil for bath insulation
Features of insulation of a wooden house
Wood remains the most susceptible material to moisture, and therefore the construction of wooden houses requires mandatory floor insulation, since the temperature difference at the junction of warm and cold air fronts causes the release of condensation. In addition, about 25% of the heat accumulated in a room can be lost through an uninsulated floor. There are a thousand and one more reasons to insulate the floor in a wooden house with high quality, but today we will look at the relevance of using a relatively new material for insulation - penoplex.
Each of the insulating materials can be suitable to varying degrees for a certain floor structure and a certain climate. Therefore, when deciding to purchase this or that material, you need to study its properties so as not to waste time and money, but to have clear characteristics and a guaranteed shelf life of the insulation. Insulating floors in a wooden house with penoplex has its own characteristics, which you also need to know about.