Time does not stand still, everything changes - and now the designers have already reached the potbelly stove. Its updated look can harmoniously fit into and even embellish a room in an elite mansion.
We are more concerned about the question not of aesthetics, but of practicality: how to make a potbelly stove yourself, what is required for this? This article will help anyone who is planning to make this type of useful heating device on their own.
Obvious advantages of a potbelly stove
In its design, a potbelly stove is an ordinary stove; it is a very simple design, the operational efficiency of which has been proven by a huge number of its uses. That is why furnaces operating on mining have still not lost their demand. Do-it-yourself potbelly stove drawings and their subsequent implementation is an activity that everyone can do.
Modern manufacturers, in some cases, still produce factory models that can please the demanding owner. Potbelly stoves made by the owners themselves are often used. It should be noted that ratings from users of such models are much higher than ratings of factory models that owners purchase.
The following is a list of the most significant characteristics of a homemade heating device; this information will help to form a list of those points that you must pay attention to in the process of creating a potbelly stove.
The main positive characteristics are the following:
- Simplicity. The design of a potbelly stove is extremely clear; a craftsman of any level of training can build it using available materials and tools.
- Mobility. The final product is very compact, given that it contains a fairly large thick sheet of metal or lining.
- Heating efficiency. This is facilitated by metal walls. For this reason, a potbelly stove is suitable for a summer house or garage.
- Budgeting. Both furnace parts and fuel are low in cost. Plus, potbelly stoves often work during mining.
When asking the question “How to make a potbelly stove with your own hands,” you need to be aware of a number of disadvantages of such a device. Due to the limited degree of heat capacity, it warms the room only at the moment of combustion itself. In addition, you need to behave extremely carefully near the stove, because its walls get very hot during operation.

Methods to increase efficiency
There are several ways to increase the efficiency of a potbelly stove in the garage and stop freezing. They are complex in varying degrees: from a sandbox to an updated design. All of them are produced without serious financial costs, and improvised means are used for their implementation. Let's consider each method for increasing the efficiency of a potbelly stove separately.
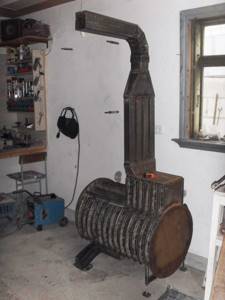
Changing the chimney
The efficiency of a potbelly stove is directly affected by the shape of the chimney. To ensure that heat transfer does not suffer, the pipe design must meet certain parameters.
- The pipe must be vertical. Angles with an inclination of no more than 45 degrees are allowed. If conditions force you to insert 90-degree angles, then you should try to use them as little as possible.
Angle 90, replace with 45
Make the chimney higher
Brick screen around the stove
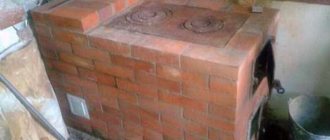
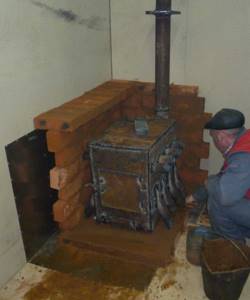
The brickwork around the device allows you to retain heat and protect yourself and others from contact with hot metal. Properly placed masonry increases heat transfer by about a quarter. When the potbelly stove is heated, the brickwork heats up. After the fuel burns, it will continue to share the collected heat. Experts advise laying bricks not close to each other, but 30 centimeters from the walls of the firebox.
To lay out the screen, you will need a couple of dozen heat-resistant bricks:
- the screen is laid out on clay mortar;
- the first row is laid out according to the intended markings;
- in the second row, ventilation gaps are made the size of half a brick;
- the brick is laid out in accordance with a pre-designed shape and size for the opening;
- A steel strip is attached to the last row for additional fixation.
Improving heat transfer using fuel
A metal stove is heated in different ways: from wood to sawdust with small debris. To improve heat transfer in a potbelly stove, compressed sawdust, briquetted industrial waste and coal are used.
- Compressed sawdust burns out much more slowly - one load is enough for many hours of smoldering.
- Briquettes are made from wood shavings and waste. The pressed composition allows them to smolder for a long time, because they cannot flare up. Briquettes smolder evenly and for a long time, increasing the heat transfer of the potbelly stove.
Sawdust briquettes
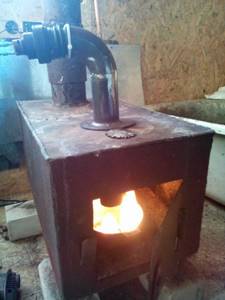
It is also worth assessing the traction force. This can be done by looking at the color of the flame. If there is not enough air, the flame turns red and dark stripes appear; if there is too much oxygen, the flames become bright white. The draft, and with it the efficiency of the stove, is normal when the flame is golden-orange. For better traction, you can blow the potbelly stove using a conventional fan.
Sandbox
If you have no desire at all to re-equip your stove, add anything to it, or experiment with different types of fuel, there is the simplest and most economical method. A box is placed on the potbelly stove, in which two buckets of sand are placed.
Place 2 of these buckets in a box on top of the stove.
Redesign of the structure
Steel corners welded on the sides strengthen the device itself and increase the temperature of the furnace. Metal side screens are also screwed on for these purposes.
Craftsmen attach sheets of iron 6 centimeters from the walls of the firebox. This is done so that the heat energy is transferred using convection, due to which air moves between the installed plates and the body of the potbelly stove.
Install protective metal screens
To prevent the heat energy from disappearing so quickly, you can use a metal cassette. It is a cylindrical object welded from a sheet of steel. It is called a cassette because it is inserted into the combustion chamber. A little firewood is loaded into the cassette, turned over and placed in the potbelly stove so that the firewood itself gradually falls onto the heated coals and ignites. While the wood already in the firebox is burning, the remaining wood in the cassette is dried and lights up after the first layers.
Using additional coolant
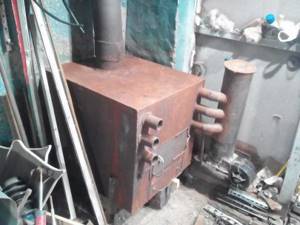
The stoves are complemented with water tanks and so-called water jackets in order to use them as an additional coolant and save energy.
The water jacket is designed as follows. A U-shaped tank in which water is heated is mounted in the housing. Two pipes branch off from the tank: for supply and processing. The tank itself is fed by tapping into the pipeline.
The efficiency of a potbelly stove increases without the help of specialists and serious financial investments. To make the stove heat up better, we can resort to changing the design, additionally covering it with masonry, or simply change the type of fuel. All these methods differ in complexity, but have one thing in common - they work.
Material used to create the furnace
In the manufacturing process, high-quality steel is often used, less often and in special cases - cast iron. Depending on the type of metal, elements from natural stones are added or not.
Cast iron provides fairly low heat capacity, the material is difficult to find in the public domain, and it is also difficult to use for cooking. This is the main reason why the choice falls on steel; it lends itself to deformation during operation much more readily.

In this case, the further service life of a self-made gas stove depends on the thickness of the material.
When assembling a device for use in rare special cases, such as in the event of a failure with the heating system, it is better to shave iron with a thickness of 1 mm.
To create a stove, you will need factory-made fittings; standard doors, valves, burners and grates will do. If desired, these parts can be made by hand from steel.
Ensuring heat removal
It is possible to increase heat removal by creating devices that promote natural and forced convection. To ensure natural air circulation, screens are made with a guide device that allows you to create a powerful convection flow and distribute it throughout the room. The guide apparatus is made in the form of curved strips of metal, welded to the screen and directing warm air not only upwards, but also to the sides. The prepared device is attached to the oven.
The heat removal device can also be made from scraps of water supply and profile pipes. The distance from the floor to the bottom edge of the elements must be at least 15-20 cm. The pipes are welded to the stove body and covered with a screen on the sides to protect against accidental contact. A traditional potbelly stove heats the air around it by 0.5-1.0 m, and the use of such a design allows you to increase not only the radius, but also the rate of temperature rise in the room. When the body of the heating device is heated above 60 °C, a stable convection draft appears in the device, the power of which increases as the temperature of the furnace increases.
Heat removal can be increased by using fans to blow over the heat transfer surface. Both household and old car fans are used. Devices with variable rotation speeds have proven themselves especially well. They allow you to regulate the temperature and heating time of the room in various oven operating modes.
For more efficient blowing of the furnace elements, special casings are installed that allow cold air to be directed to the hottest areas of the heating device, while it can be taken from various places in the room. A potbelly stove with pipes welded into the firebox for heating air has proven itself well. A multi-speed car fan installed on a common discharge manifold allows you to effectively heat the room.
The combined use of devices for artificial airflow and natural convection can significantly increase the efficiency of a potbelly stove, which means heating the room more efficiently.
Case: material and shape
If you decide to carry out the work process according to a drawing or photo, then you need to use a metal sheet, which is then cut out. In addition to this you will need:
- square pipe;
- rods;
- fittings;
- necessary corners;
- molded profiles.
The above will be needed to create a furnace body. Thanks to the rectangular shape and the presence of planes, the stove will have all the ergonomic properties, that is, the stove will be extremely stable, the process of processing and covering it will be extremely simple. The stove will be extremely easy to attach to any other structure or part.
For the base, you can use existing metal products, such as a box or any other cabinet product. Often objects have the shape of a cylinder: a can, a cylinder, a large pipe.
The work process will also include welding. Drills, bolts and screws are useful only if the thickness of the metal is not particularly large.

It doesn’t matter at all which model the master chooses. Although the work seems simple, you need to have a drawing in any case.
Work on the combustion chamber
A larger oven size will provide more heat. This means that the bottom of the chamber will require a lot of space. But in the future it will be possible to conveniently place firewood there. This determines the required shape of the stove: cylindrical, laid on its side.
Even a rectangular oven must still be horizontal. Verticality is only possible with a particularly large size.
Ceiling passage
To allow the sandwich to pass through the ceiling, a rectangular hole was cut to the size of the stainless ceiling cutout. An SML slab 8 mm thick and 60x60 cm in size was laid for cutting. This entire structure was screwed with self-tapping screws to the bars in the ceiling between the floors. In the ceiling around the pipe, insulation with foil two layers thick was laid, the foil was laid towards the sandwich. I taped all the seams with aluminum self-adhesive tape and covered the top with the same LSU sheet measuring 60x60 cm. The roof passage has not yet been laid in any way, because it is planned to redo the roof next year. Masterflash was placed on top and sealed with sealant.
source
The process of working on the ash pit
This element is present from time to time, since ash can be removed directly from the space of the fuel chamber. You will need holes in the door to supply air.
If you plan to have a stove with a garage for an ash pit, then the stove is given the shape of a box. This will avoid using the combustion chamber area. The metal will be thin. Welding is also not needed, screws will suffice.

Design Features
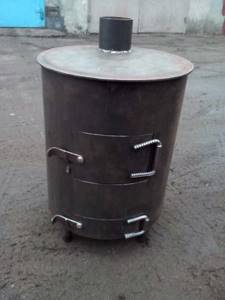
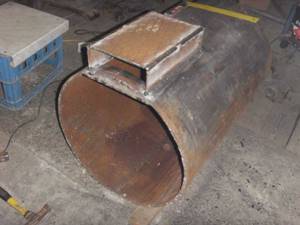
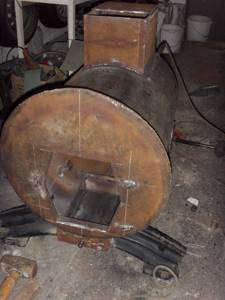
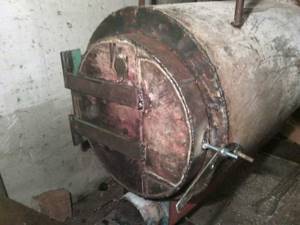
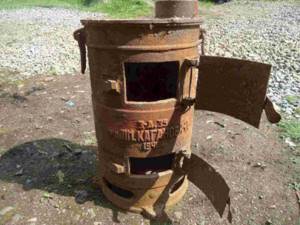
Any person who has basic skills in working with metal tools and a welding machine can make a potbelly stove for a garage. To make the furnace body, sheet metal or a barrel, a gas cylinder, or a thick-walled pipe are used. The thicker the body walls, the longer the unit will last - the shortest-lived stoves are those made from old metal barrels.
Stoves made of sheet material can be rectangular, elongated in length or height, or compact square. Cylindrical housings are also placed vertically or horizontally. A vertical potbelly stove takes up minimal space, but greatly limits the size of wood that can be burned in it. A horizontal stove allows you to use long firewood, but takes up much more space.
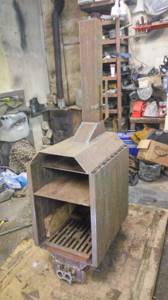
The scheme of the potbelly stove is extremely simple. The internal volume is divided horizontally into two parts - the combustion chamber and the ash pan. In some cases, the ash pan can be welded externally to the bottom of the body in order to increase the volume of the firebox.
The firebox and ash pan are separated by a grate. It is welded from thick steel rod. It is recommended to use reinforcing bars, as the metal mesh will quickly burn out. The grate is welded to the inner walls of the housing, but it is more convenient to weld only the stops for it and make the grate removable - this will make it easy to replace it if necessary.
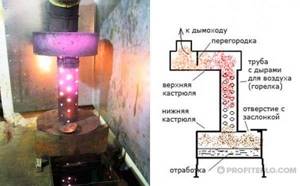
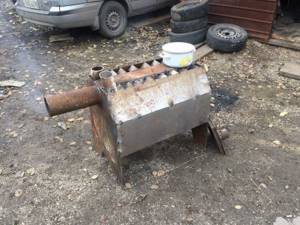
Design of a potbelly stove running on waste oil
If the ash pan in the form of a metal box is welded from the bottom from the outside, the function of the grate can be performed by the lower part of the body - three rows of holes are drilled in it in a checkerboard pattern. This design quickly burns out, so it is more practical to cut a rectangular hole along the length of the body and lay a grate welded to size.
The ash pan performs two important functions: it is a container into which unburnt fuel remains are poured, as well as a channel for supplying air to the firebox and ensuring an optimal level of draft.
It is recommended to provide separate doors for the ash pan and the firebox - in this case, you can adjust the draft by slightly opening and closing the ash pan door. The outer ash pan of a potbelly stove of the simplest design may not have a door. If the firebox and vent have one common door, holes are drilled in its lower part to allow air to enter the combustion chamber.
The pipe for connecting the chimney is welded vertically into the housing on the opposite side of the fire door to ensure maximum heat transfer from the stove and leave more space under the hob.
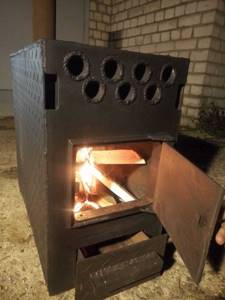
If you plan to use the heating stove as a stove, a steel sheet (or a stand for it) is welded onto the top of the cylindrical horizontal stove or a cast iron burner is welded. For a vertical stove made from a gas cylinder, you need to cut off the top part and weld a metal sheet.
The stove body is equipped with legs made of a metal angle or pipes. The structure must be stable. The height of the legs is selected individually.
Door and openings
These parts are most often metal, made from residual material after the main work. Welding will be needed to attach the parts to the body. It is extremely important to install a locking device. This could be a deadbolt or a latch.
For openings you need to know the dimensions according to the standard: firebox - 250x50 mm; blower - 100x250 (width by height). Canopies at a distance of 10 cm.
Smoke outlet
For this you need a pipe with a diameter of 150 mm. It will be constantly involved in thermal conductivity, so it requires steel and no insulation. The pipe is mounted on the side or on the stove. Pipes inside the house go along long lines and to the farthest point. This will increase the amount of heat received.
Following the information on the drawings, chimney pipes must always be equipped with valves (rotary or along a guide). With them you can influence the process of warming up and smoke removal by closing the chimney at the time of combustion.
What do experts recommend?
Perhaps at your dacha there is a traditional Russian, Dutch or Swedish stove, the material for which is brick? Then you are probably experiencing problems with warming up. And it’s not surprising, since such stoves need to be heated constantly. According to experts, they are not suitable for irregular use and rapid heating of the house. It may be that it will be possible to increase the temperature inside the room after a day. If you do not use the device for several weeks, then it would be more advisable to acquire modern metal stoves rather than traditional ones. They warm up in a couple of hours and will be the best option for you.
Scientists have invented a robotic glove with artificial intelligence
After the party, the girl decided to apologize to her neighbor: the answer melted her heart
Ilona Bronevitskaya celebrates her anniversary. Stas Piekha showed touching photos of his mother

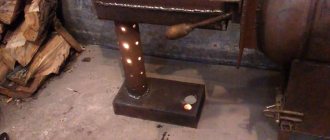
Combustion enhancement parts
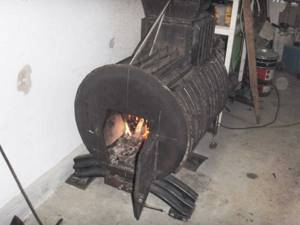
The photo of a self-made potbelly stove shows all the elements. In order for the combustion process to be long, in addition to the pipes, a suspended load is useful. A metal pancake is suitable for these purposes.
The video of making a potbelly stove with your own hands also discusses all the points that need to be taken into account. By sticking to the plan, the desired result will be quickly achieved.
Required Tools
To make a potbelly stove you need to arm yourself
:
- grinder with cutting and grinding wheels;
- a welding machine with a current of 200 amperes (plus electrodes, a protective suit with a mask, a hammer for beating slag);
- chisel, hammer, pliers;
- steel brush;
- electric drill with a set of metal drills;
- tape measure and marker/chalk/pencil for marking.
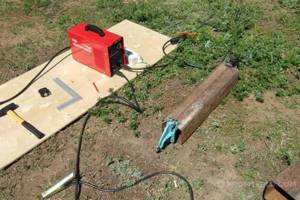
Preparing the necessary tools for making a stove
Note! Welding work must be performed outdoors or in a well-ventilated area away from flammable objects and liquids.
DIY potbelly stove photo
+3